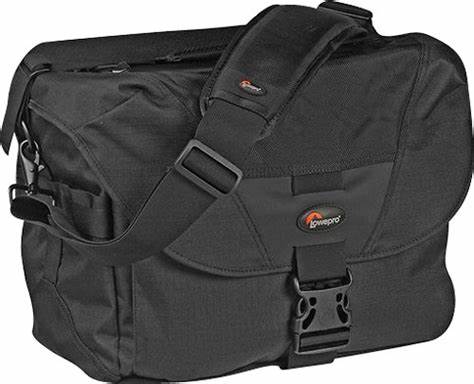
The Lowepro Stealth Reporter 200 AW is a shoulder‑style camera bag originally designed for photojournalists and news photographers, with an emphasis on speed, durability, and weather protection. It remains a strong option for DSLR shooters who need fast access and rugged reliability.
🧱 Build Quality & Design
According to Lowepro’s own description, the Stealth Reporter series was “created for photojournalists and news photographers” and built to withstand harsh field conditions while remaining lightweight and durable.
Key design elements include:
- Magnesium‑reinforced structure (internal frame)
- Heavy‑duty materials and reinforced stitching
- All Weather (AW) cover for rain, dust, and sand protection
- Highly water‑resistant top zipper for fast access without opening the flap
This makes it particularly suitable for urban, documentary, and editorial DSLR work, where speed and protection matter more than hiking comfort.
📸 Capacity & DSLR Compatibility
The bag is sized for one DSLR body plus 3–4 lenses, a flash, and accessories. This aligns well with typical DSLR kits such as:
- A DSLR body (D700, D300S, D810, etc.)
- A trio of primes (e.g., 35/50/85)
- Or a zoom kit (24–70 + 70–200)
- Flashgun + batteries
- Memory cards (dedicated wallet holds up to 12 cards)
User feedback confirms it “easily takes a DSLR camera + a couple of lenses” and is “well padded” and “sturdy”.
⚙️ Organization & Workflow
The Stealth Reporter 200 AW includes:
- Removable cable management pouch
- Memory card wallet (attaches to strap)
- Multiple pockets for batteries, notebooks, filters, and personal items
- Adjustable padded dividers for customizing DSLR layouts
This makes it ideal for fast-paced DSLR workflows, especially in news, street, and event environments.
🚀 Strengths for DSLR Use
1. Fast Access
The top zipper allows you to grab your DSLR without opening the flap, a major advantage for street and press shooters.
2. Weather Protection
The AW cover provides full rain and dust protection, essential for field work in unpredictable conditions.
3. Professional Layout
Designed for working photographers, the internal layout supports efficient DSLR operation and quick lens changes.
4. Discreet Appearance
The bag looks like a messenger bag rather than a camera bag, reducing unwanted attention — useful in sensitive environments.
5. Durability
User reviews highlight that it is “better made than newer models” and extremely sturdy.
⚠️ Limitations for DSLR Use
1. Shoulder Fatigue
As a shoulder bag, it places all weight on one side. With a DSLR + lenses, this can become tiring during long assignments.
2. Limited Dual‑Body Support
While it can fit one DSLR comfortably, dual‑body shooters may find it cramped.
3. Bulk When Loaded
The bag becomes heavy and boxy when filled with DSLR gear.
4. No Dedicated Laptop Sleeve
Some versions lack a padded laptop compartment, limiting its use for hybrid photo‑editing workflows.
⚖️ Summary Table
| Category | Strengths | Weaknesses |
|---|---|---|
| Access | Fast top‑zip access | Full flap still slows deep access |
| Weather | AW cover, rugged build | Adds bulk when deployed |
| Capacity | DSLR + 3–4 lenses | Not ideal for dual‑body setups |
| Comfort | Padded strap | Shoulder fatigue over time |
| Durability | Very sturdy, pro‑grade | Heavier than modern bags |
| Discretion | Looks like a messenger bag | Still bulky when full |
✨ Verdict
The Lowepro Stealth Reporter 200 AW is an excellent DSLR bag for photojournalists, street photographers, and documentary shooters who prioritize:
- Fast access
- Weather protection
- Professional organization
- Durability
It is less ideal for long hikes, dual‑body setups, or photographers who need backpack‑level comfort.
Final assessment: One of the best classic shoulder bags for DSLR field work — rugged, fast, and intelligently designed, though heavy and less comfortable for all‑day carry.
📖 Lowepro Stealth Reporter 200 AW — Evaluation for Fujifilm XE2 & X‑Pro3 Kits
🎒 Why This Bag Works Even Better for Mirrorless
The Stealth Reporter 200 AW was originally designed for bulky DSLR bodies, so when you load it with smaller, lighter Fujifilm cameras, you get:
- More space than you need (excellent for flexibility)
- Better weight distribution
- Faster access because the bodies don’t snag on dividers
- Room for accessories like chargers, batteries, filters, and notebooks
In other words, the bag becomes over‑engineered for the Fuji kit — which is a good thing.
🧱 How Your Fuji Kit Fits Inside
📸 Your loadout:
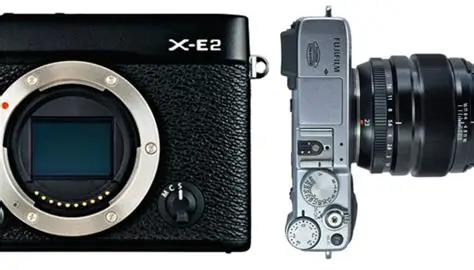
- Fujifilm XE2
- Fujifilm X‑Pro3
- Three lenses (likely primes or compact zooms)
Typical layout inside the 200 AW:
- Centre compartment: X‑Pro3 with lens mounted
- Side compartment 1: XE2 body
- Side compartment 2: Two primes stacked or one zoom
- Front pocket: Batteries, cards, cleaning cloth
- Side pocket: Filters, small notebook
- Rear pocket: Passport, phone, flat items
- Top zip access: Grab the X‑Pro3 instantly without opening the flap
This is exactly the kind of workflow the bag was designed for — fast, quiet, efficient.
✅ Strengths for Fuji XE2 + X‑Pro3 Users
1. Perfect size for a two‑body mirrorless kit
You’re not fighting the bag’s dimensions. Everything fits with breathing room.
2. Fast access for street and documentary work
The top zipper is ideal for the X‑Pro3 — a camera built for decisive‑moment shooting.
3. Discreet appearance
The bag looks like a messenger bag, not a camera bag. This pairs beautifully with Fuji’s rangefinder‑style bodies, keeping you low‑profile.
4. Weather protection
The AW cover is a huge advantage in Phnom Penh’s sudden rainstorms or dusty dry season.
5. Quiet operation
The flap and zippers are relatively quiet — important for street and candid work.
6. Room for extras
Because Fuji gear is compact, you can carry:
- A small LED light
- A power bank
- A mini tripod
- A notebook
- Snacks or water
Without overloading the bag.
❌ Weaknesses (Specific to Fuji Use)
1. Overkill for minimalists
If you ever go out with just one Fuji body and one lens, the bag feels too big.
2. Shoulder fatigue
Even with lighter mirrorless gear, a shoulder bag can strain over long days.
3. Not ideal for long hikes
Urban, editorial, and street? Perfect. Travel trekking? Less so.
4. Dividers designed for DSLR depth
Fuji bodies are slimmer, so you may need to reposition or double‑fold dividers to avoid empty space.
⚖️ Summary Table for Fuji Use
| Category | Strengths | Limitations |
|---|---|---|
| Fit | Perfect for 2 bodies + 3 lenses | Slightly oversized for minimal kits |
| Access | Top‑zip is ideal for X‑Pro3 | Full flap slows deep access |
| Comfort | Lighter load than DSLR | Shoulder fatigue on long days |
| Discretion | Looks like a messenger bag | Still bulky when full |
| Weather | AW cover excellent for SE Asia | Adds bulk when deployed |
✨ Verdict
For a two‑body Fujifilm kit, the Lowepro Stealth Reporter 200 AW is almost the perfect shoulder bag:
Fast access, discreet design, weather protection, and enough space for a full working kit without feeling cramped.
It’s especially strong for:
- Street photography
- Documentary work
- Editorial assignments
- Urban travel
- Fast‑moving environments
Its only real drawback is the inherent limitation of shoulder bags: long‑term comfort.