For me, printing has never been an optional extra. It has always been part of the act of making a photograph.
The camera is only the beginning. The file sitting on a hard drive is not the finished work any more than a manuscript saved on a computer is a finished book. A photograph does not fully exist until it leaves the screen and becomes a physical object.
Printing forces a different kind of honesty. On a monitor, images can look impressive simply because they are backlit. Bright colours glow. Shadows appear rich. Sharpness can seem exaggerated. A print strips away some of those illusions. Suddenly you are confronted with the photograph itself. Does the composition work? Is the moment strong enough? Does the image still hold your attention when it is nothing more than ink on paper?
A print also slows the viewing process. We live in a world where photographs are flicked past in fractions of a second. Social media encourages endless scrolling, endless consumption, endless forgetting. A print asks something different of the viewer. It occupies physical space. It can be held, framed, pinned to a wall, placed in a portfolio, revisited years later. It has a permanence that digital images often lack.
As a photographer, I have learned more from looking at my own prints than I ever have from looking at thumbnails on a screen. Weak photographs reveal themselves quickly. Images I once thought were successful suddenly appear shallow or cluttered. Conversely, some photographs that seemed ordinary on a monitor come alive in print, revealing subtleties of tone, texture and emotion that I had overlooked.
Printing also creates a tangible connection to photography’s history. Every great photographer from Henri Cartier-Bresson to Dorothea Lange ultimately worked toward the print. Their photographs existed as objects that could be held, exhibited, archived and passed between generations. There is something deeply satisfying about participating in that tradition.
Perhaps most importantly, prints survive. Hard drives fail. Websites disappear. Social media platforms rise and fall. Algorithms bury yesterday’s work beneath today’s noise. Yet a well-made print sitting in a box, portfolio or frame can still be discovered decades from now. It can outlast the technology used to create it.
That is why printing has always been part of the process for me. The photograph is not complete when I press the shutter. It is not complete when I edit the file. It becomes complete when it exists in the real world as something I can hold in my hands and live with over time. The print is not a by-product of photography. It is, and always has been, one of its final destinations. 📷🖨️
The Nikon D300S is one of those cameras that refuses to die. Released in 2009 as Nikon’s flagship DX-format DSLR, it was aimed at serious enthusiasts and professionals who wanted speed, durability, and reliability without moving to full-frame. Even in 2026, it remains surprisingly capable in the right hands.
The Good
Built Like a Tank
The D300S comes from an era when Nikon built cameras to survive hard professional use. The magnesium-alloy body feels incredibly solid, with weather sealing that still puts many modern consumer cameras to shame. If you’ve handled a D700, the D300S feels very familiar.
For street photography, travel, documentary work, and rough conditions, that toughness is worth a lot.
Fantastic Ergonomics
This is one area where the D300S still embarrasses many modern cameras.
Dedicated buttons everywhere
No menu diving for common functions
Large grip
Excellent control layout
Top LCD panel
Fast operation
You can change settings while keeping the camera to your eye. Once you learn it, it becomes almost instinctive.
Superb Autofocus
The 51-point Multi-CAM 3500DX autofocus system was legendary in its day and remains highly effective today. It tracks moving subjects well and is significantly better than many entry-level DSLRs that came years later.
For:
Street photography
Sports
Wildlife
Events
it still performs remarkably well.
Fast Shooting
7 fps standard
8 fps with the MB-D10 grip and larger battery
Even today that’s respectable performance.
The Viewfinder
The optical viewfinder offers:
100% coverage
Large bright image
Professional feel
Many photographers miss viewfinders like this. Looking through a D300S feels connected and immediate.
Beautiful Nikon Colors
The 12.3MP CMOS sensor produces files with a very pleasing character.
Modern cameras often win on technical perfection, but many photographers still love the way older Nikons render:
Skin tones
Greens
Reds
Black-and-white conversions
The files have a slightly organic look that some newer sensors lack.
The Bad
Only 12 Megapixels
This is the biggest limitation.
In 2009, 12MP was excellent.
In 2026:
Heavy cropping is limited
Large commercial prints are harder
Landscape photographers may want more resolution
If you are used to a D810’s 36MP files, the D300S feels restrictive.
High ISO Performance is Showing Its Age
The D300S performs best at:
ISO 200
ISO 400
ISO 800
ISO 1600 is usable.
ISO 3200 becomes noticeably noisy.
Compared to modern cameras, low-light performance is well behind current standards.
Video is Primitive
The D300S introduced HD video, but by modern standards it is almost unusable:
720p only
Limited autofocus
Motion JPEG format
Short recording times
Most owners ignore the video mode completely.
Heavy
At roughly 840g before a lens is attached, it’s not a lightweight travel camera.
Old LCD and Live View
The rear screen was excellent in 2009.
Today:
No touch screen
Slow Live View
Primitive compared with mirrorless systems
Why It Is Still Usable Today
This is where things get interesting.
The D300S remains useful because photography is not a megapixel competition.
For street photography especially, it still offers:
Speed
The camera reacts instantly.
Minimal shutter lag
Fast startup
Responsive controls
It feels like a photographic tool rather than a computer.
Access to Nikon’s Lens Legacy
The D300S includes:
Screw-drive autofocus motor
AI and AI-S lens compatibility
Full Nikon F-mount support
You can mount decades of Nikon glass and get excellent results.
Affordable
In 2026, good examples often sell for a fraction of their original price.
You get:
Pro body
Pro autofocus
Pro controls
Weather sealing
for less than many entry-level mirrorless cameras.
It Forces Better Technique
Many photographers discover something interesting when they return to a D300S:
They stop obsessing over equipment.
You can’t rely on:
Massive cropping
Extreme ISO
AI noise reduction
You have to:
Get closer
Expose properly
Compose carefully
In some ways it makes you a better photographer.
Final Verdict
The D300S is not a camera for pixel peepers.
It is a camera for photographers.
Its weaknesses are obvious:
Low resolution by modern standards
Aging high ISO performance
Outdated video
But its strengths remain compelling:
Tank-like construction
Excellent controls
Superb autofocus
Great optical viewfinder
Beautiful Nikon color
Incredible value for money
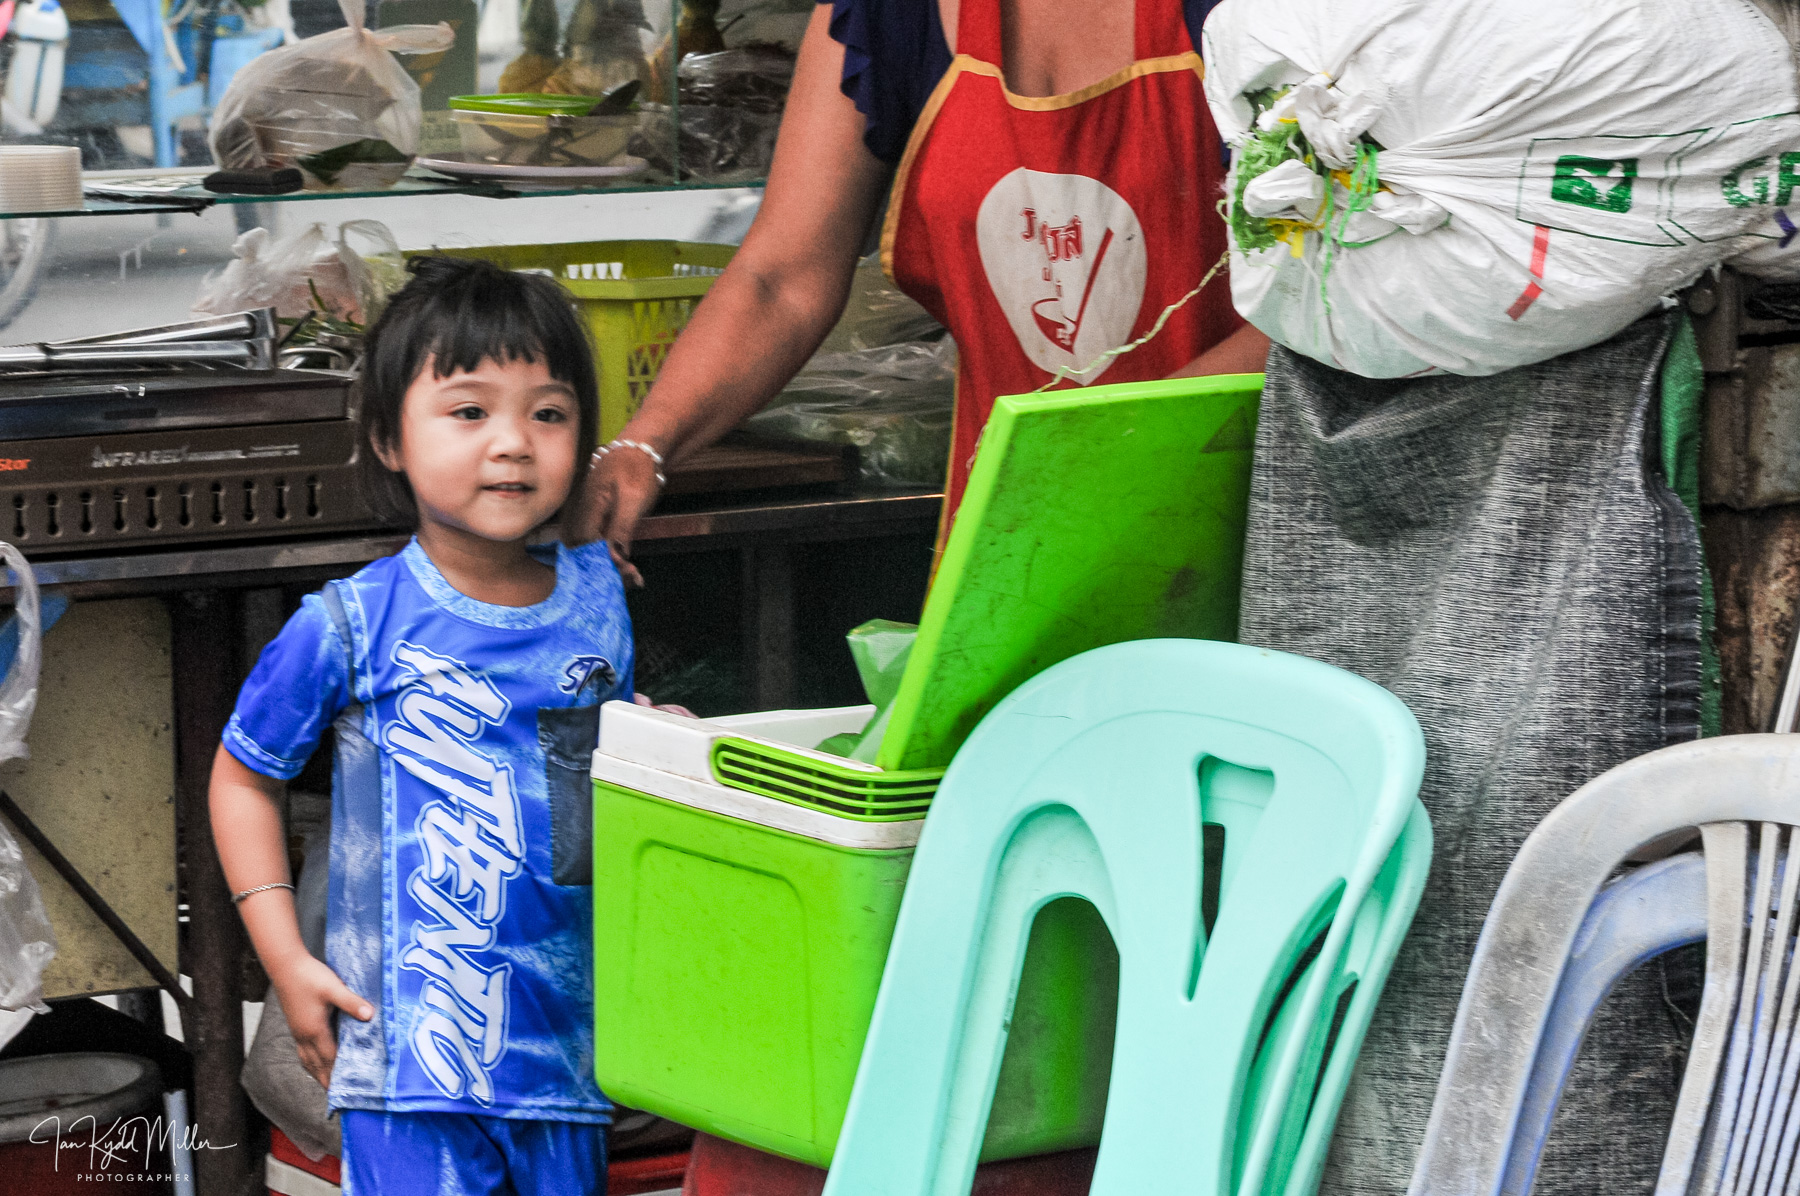
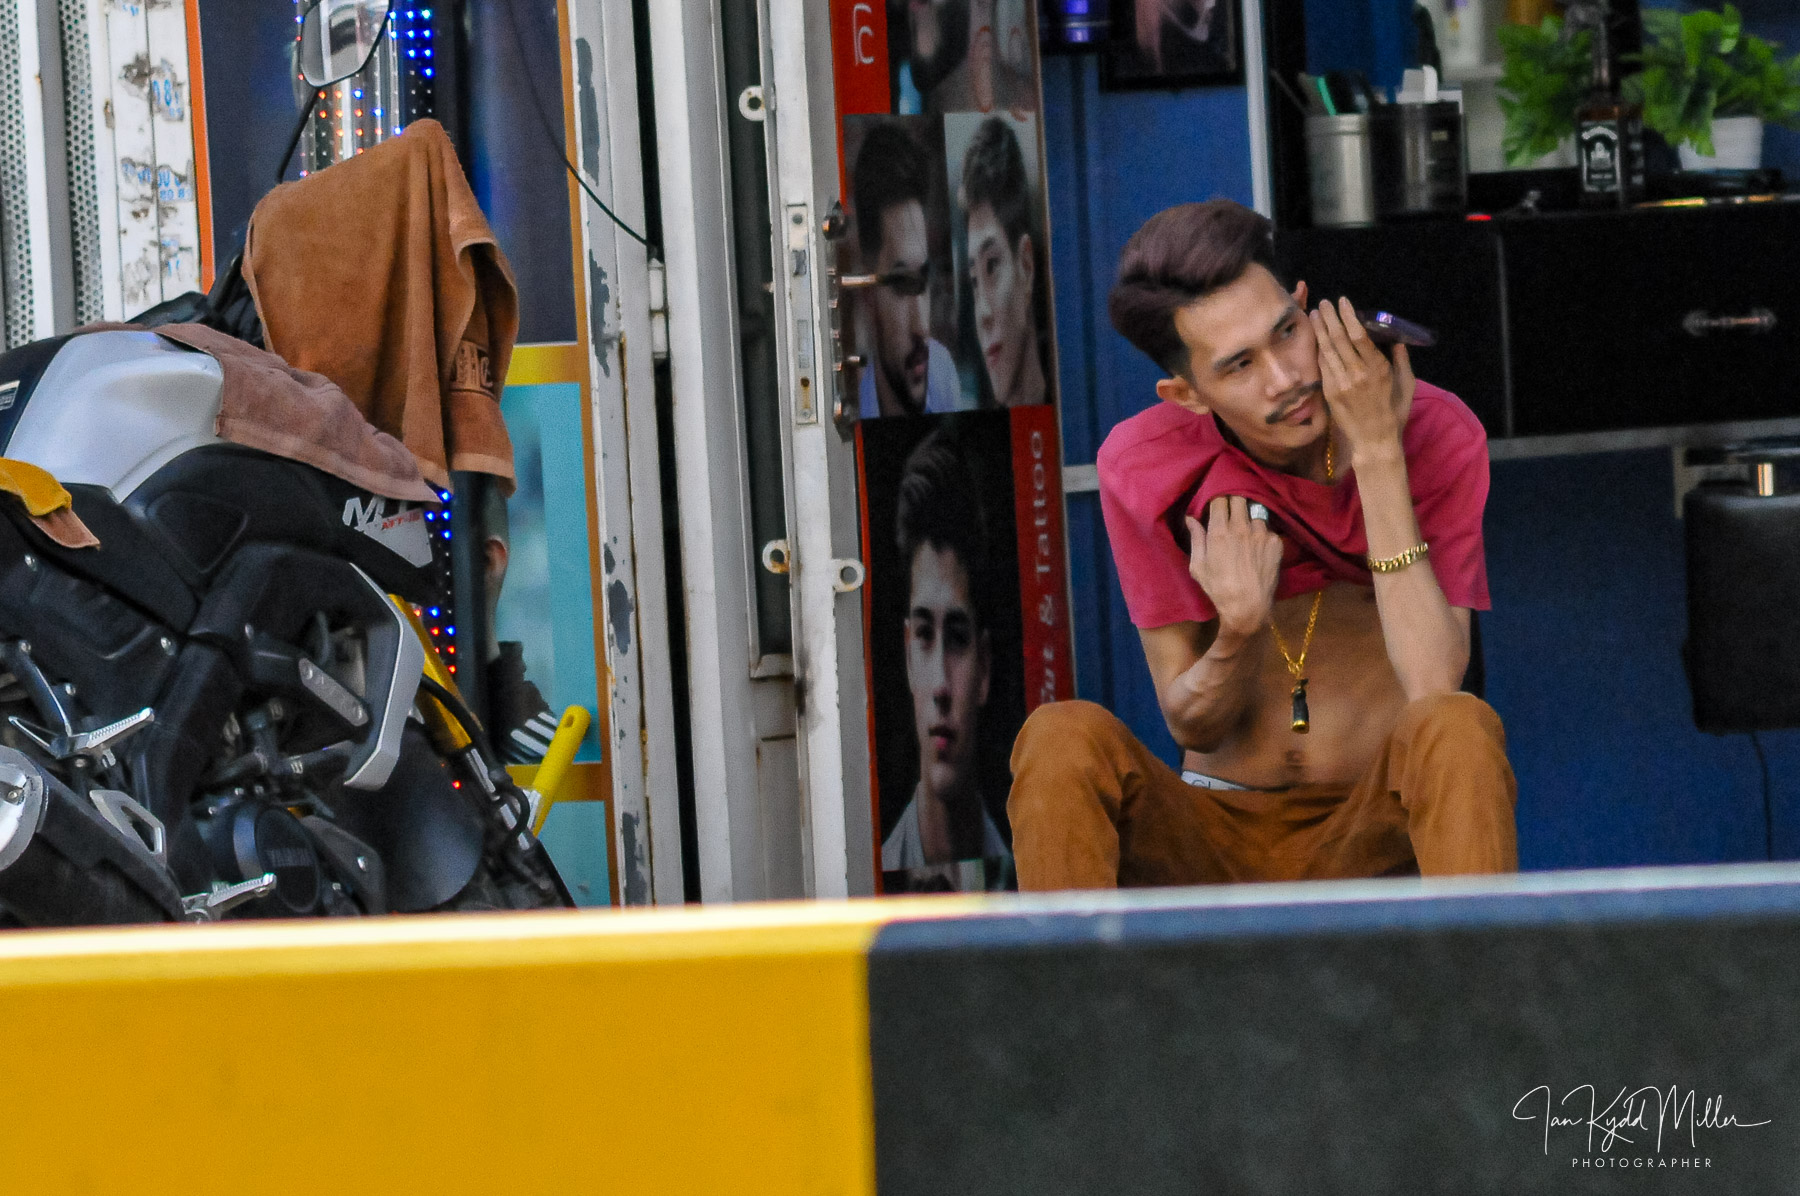
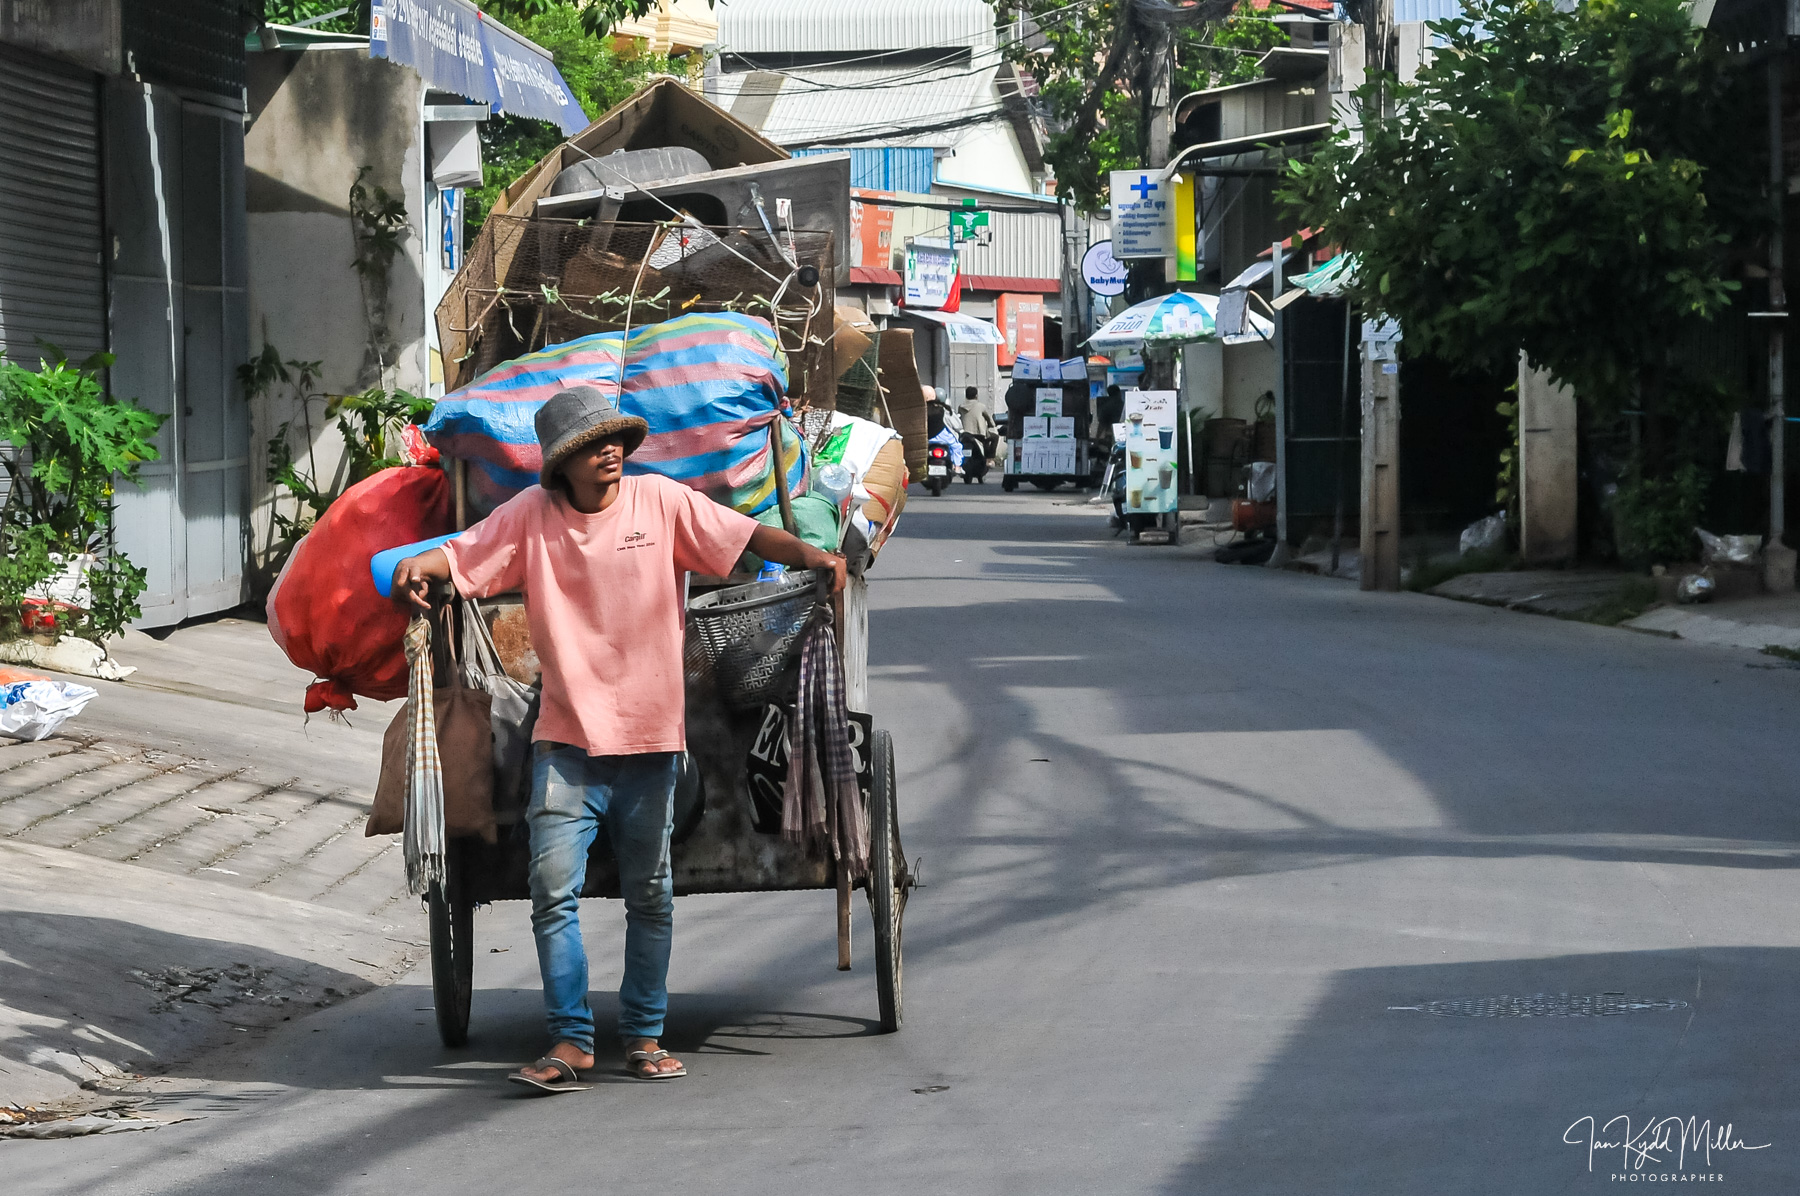
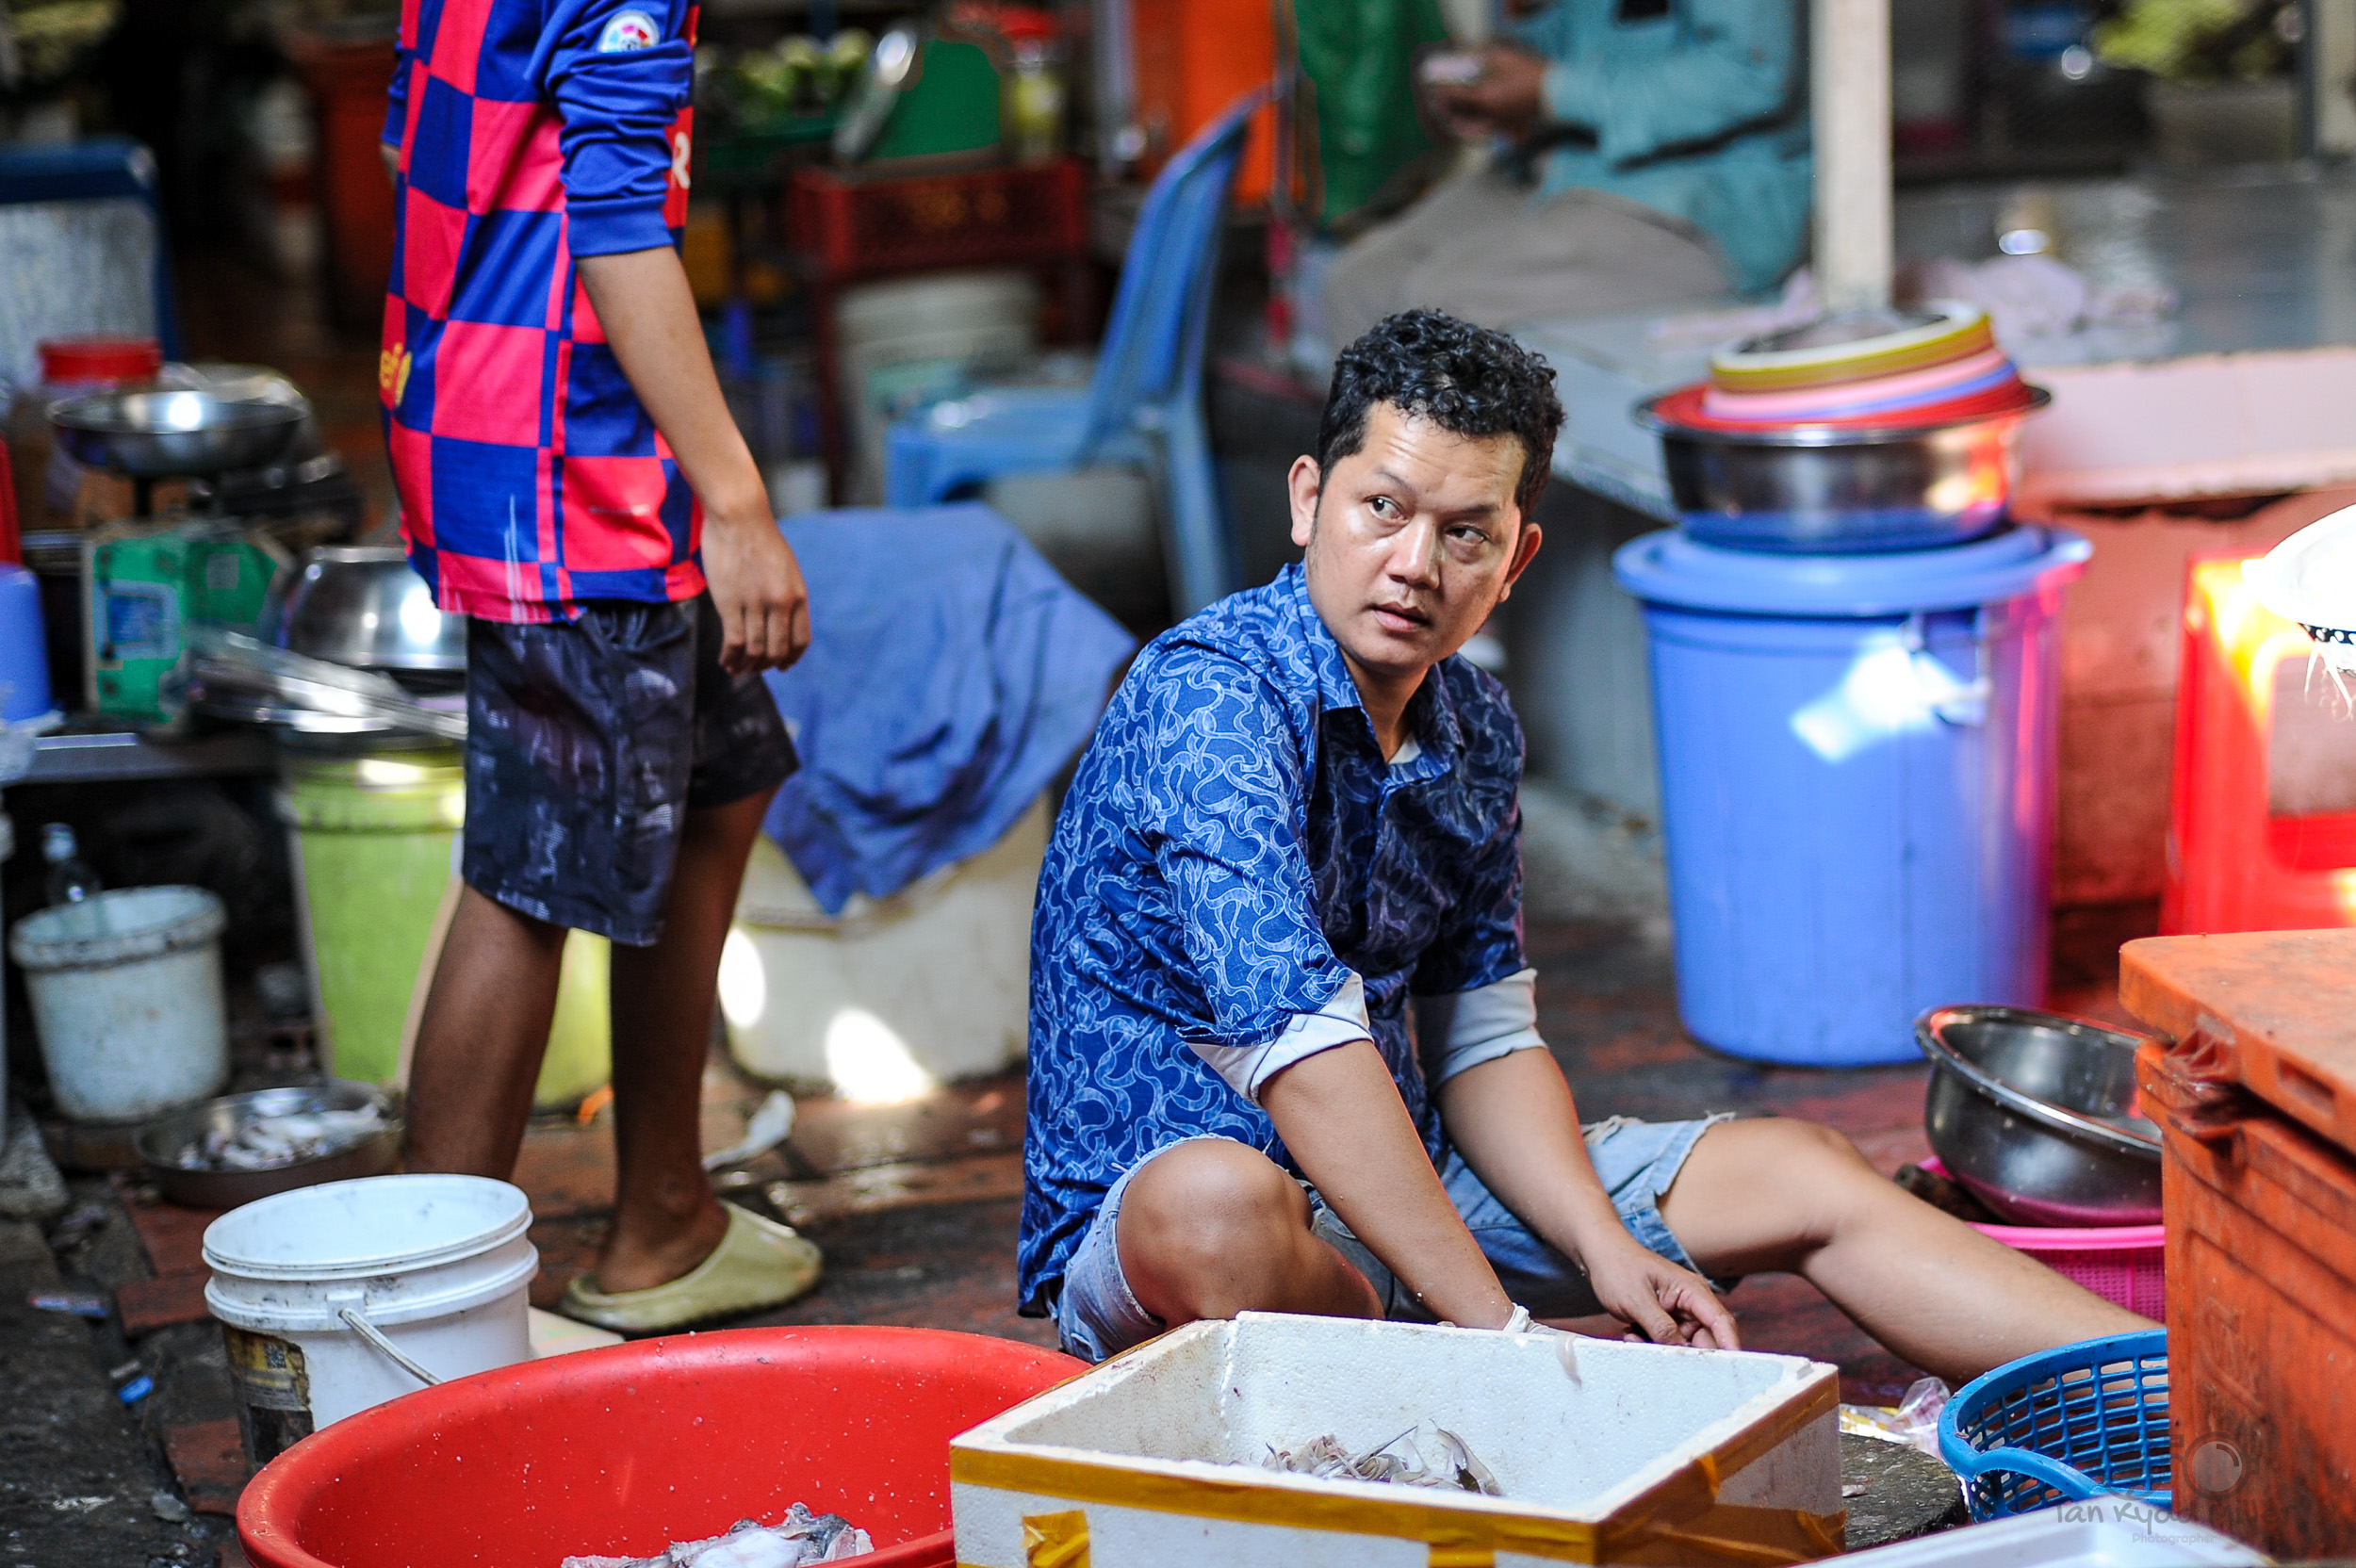
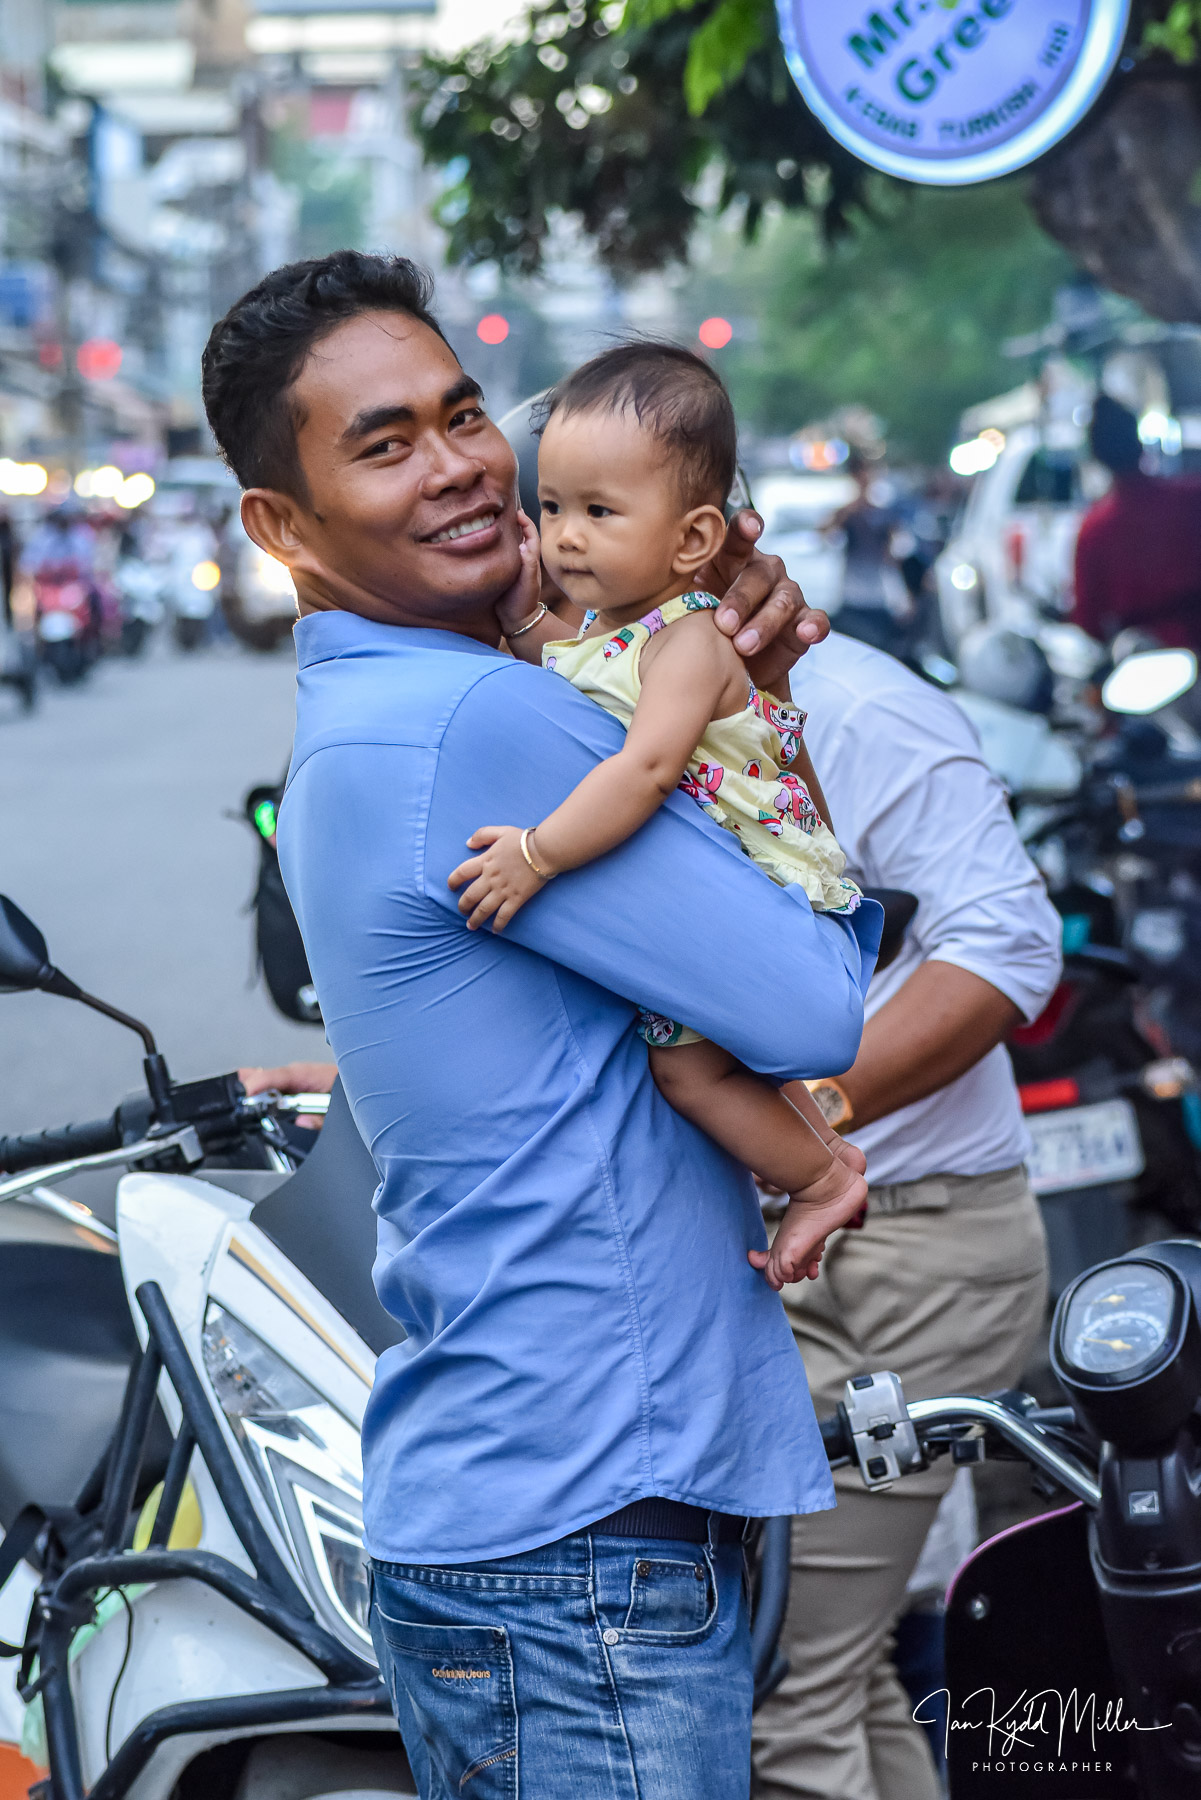
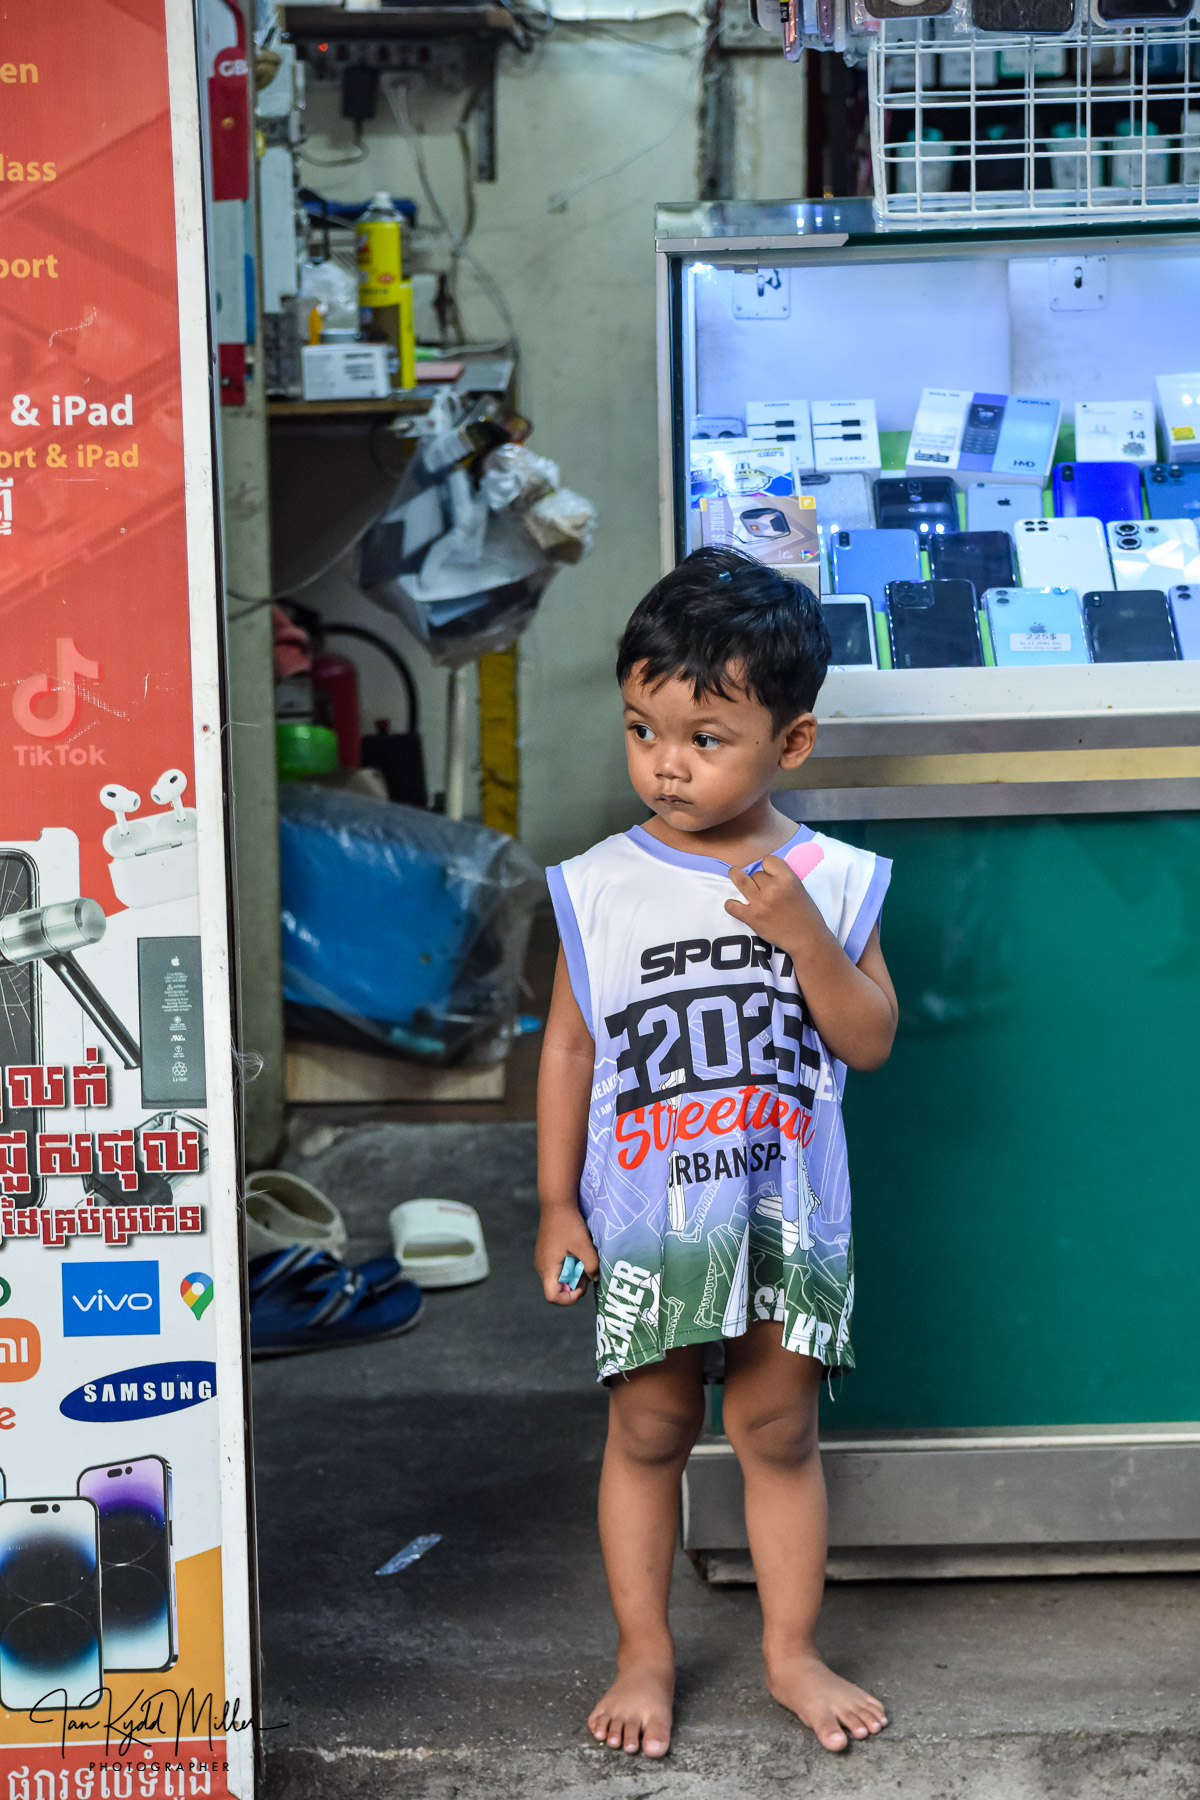
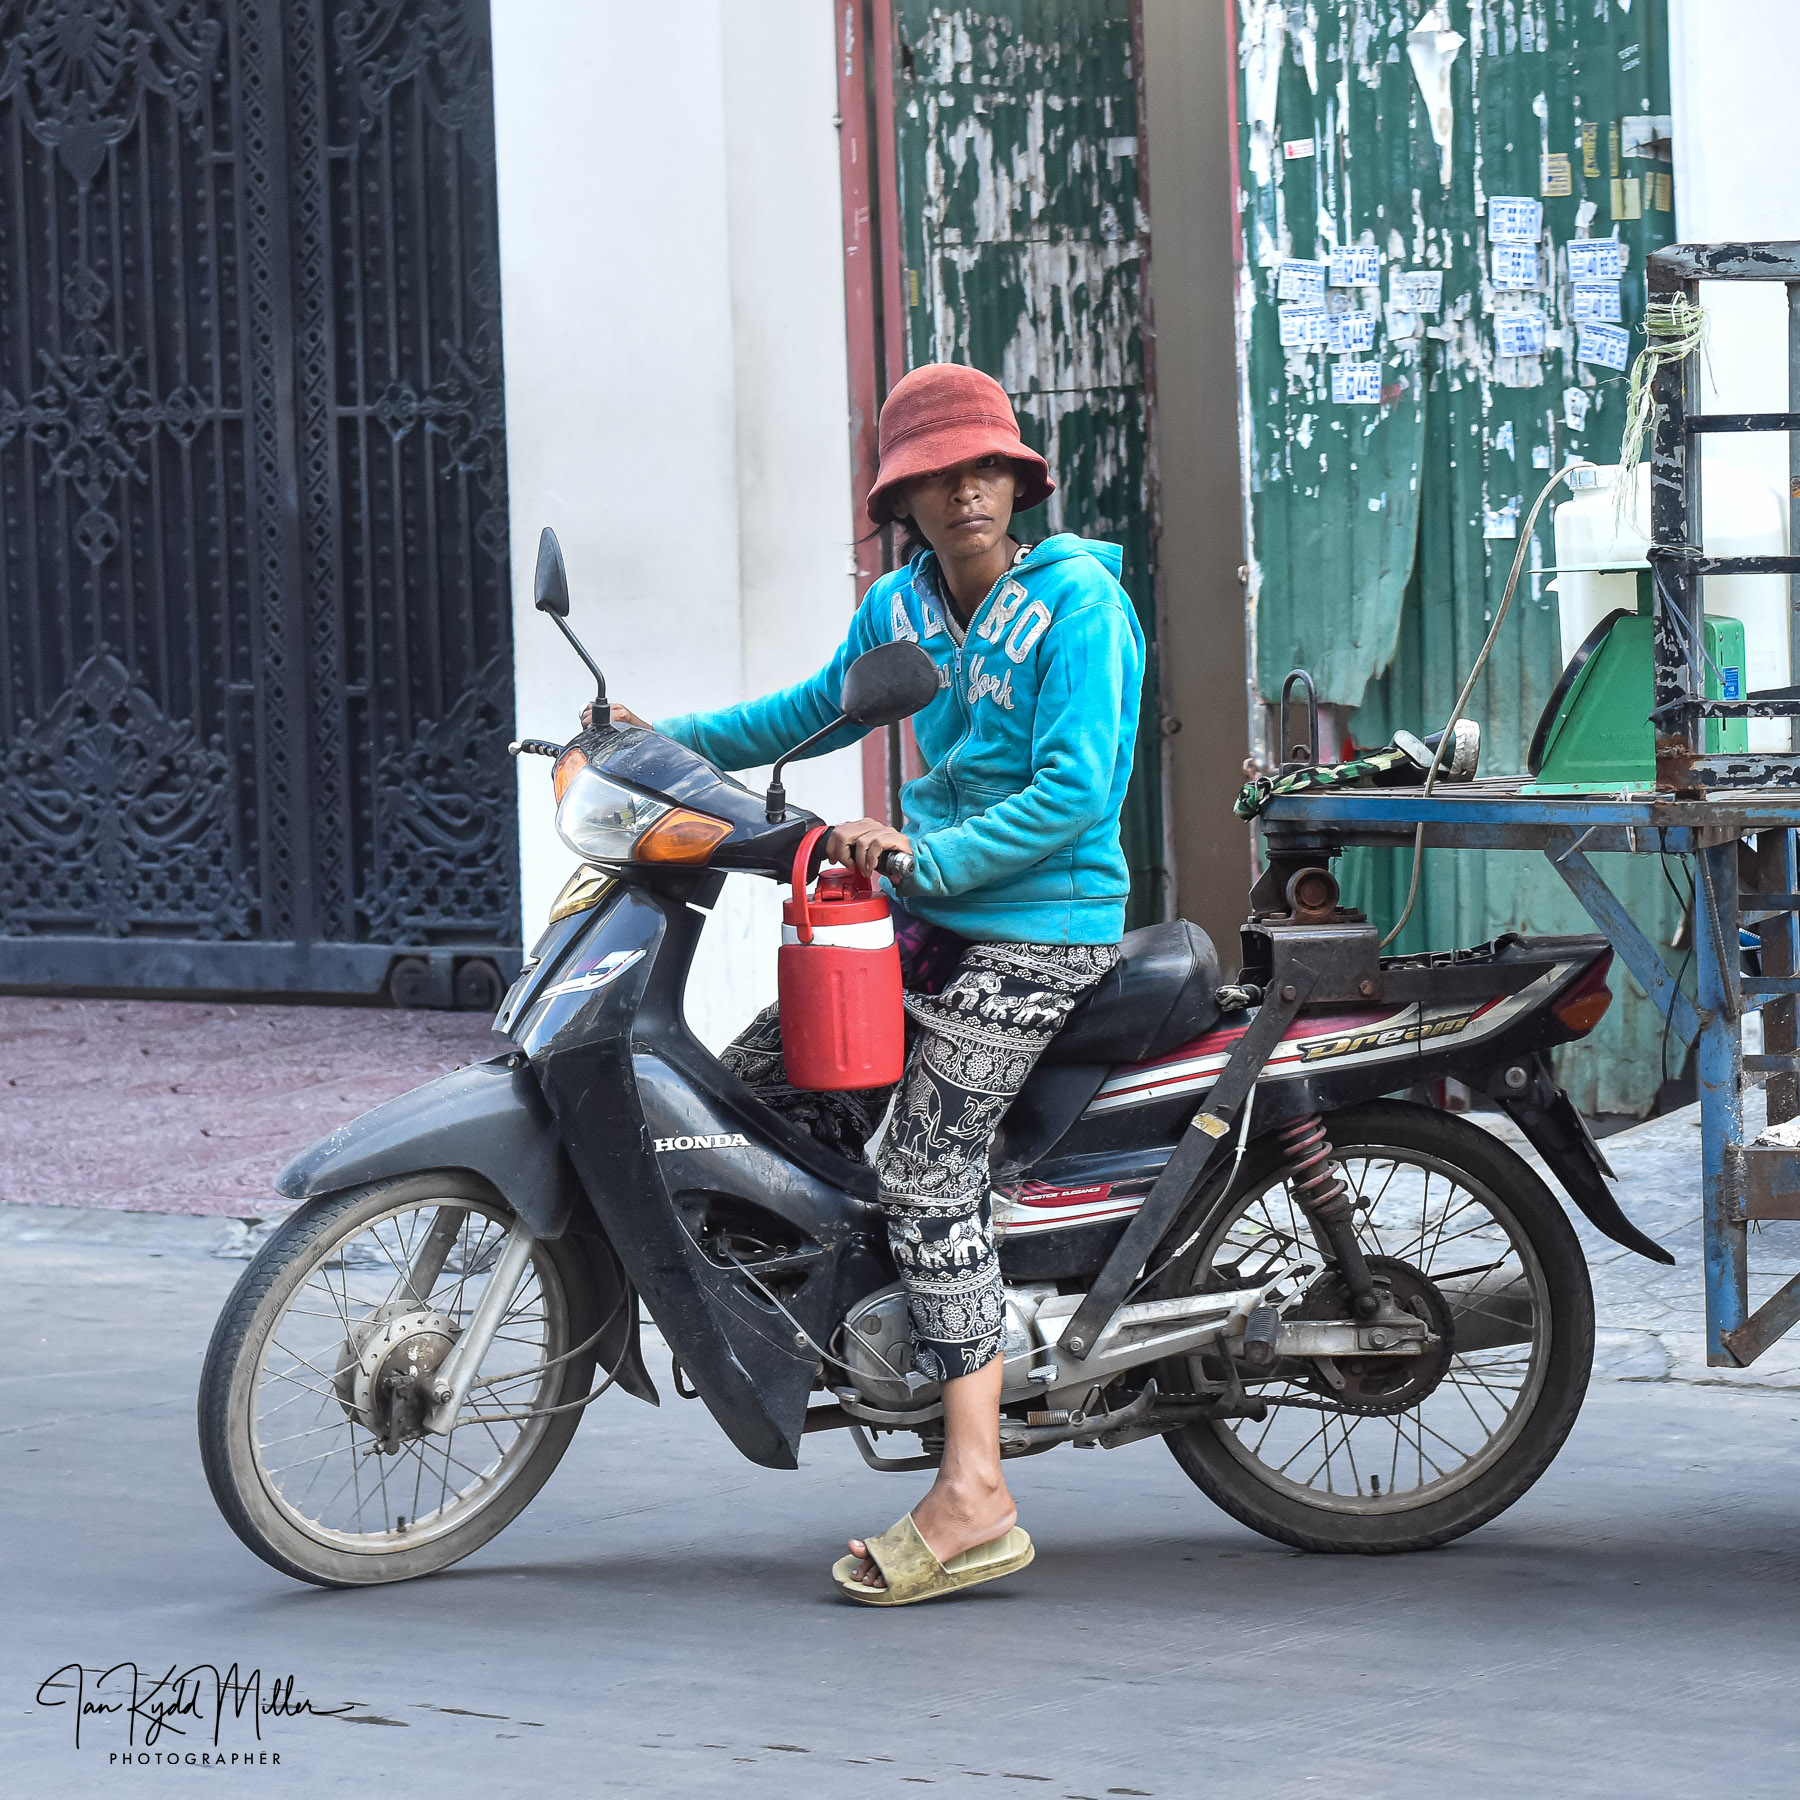
If someone handed me a clean D300S and a 35mm f/2D tomorrow, I’d happily spend a day wandering the streets of Phnom Penh making photographs. The camera may be old, but the experience of using it still feels remarkably alive. 📷
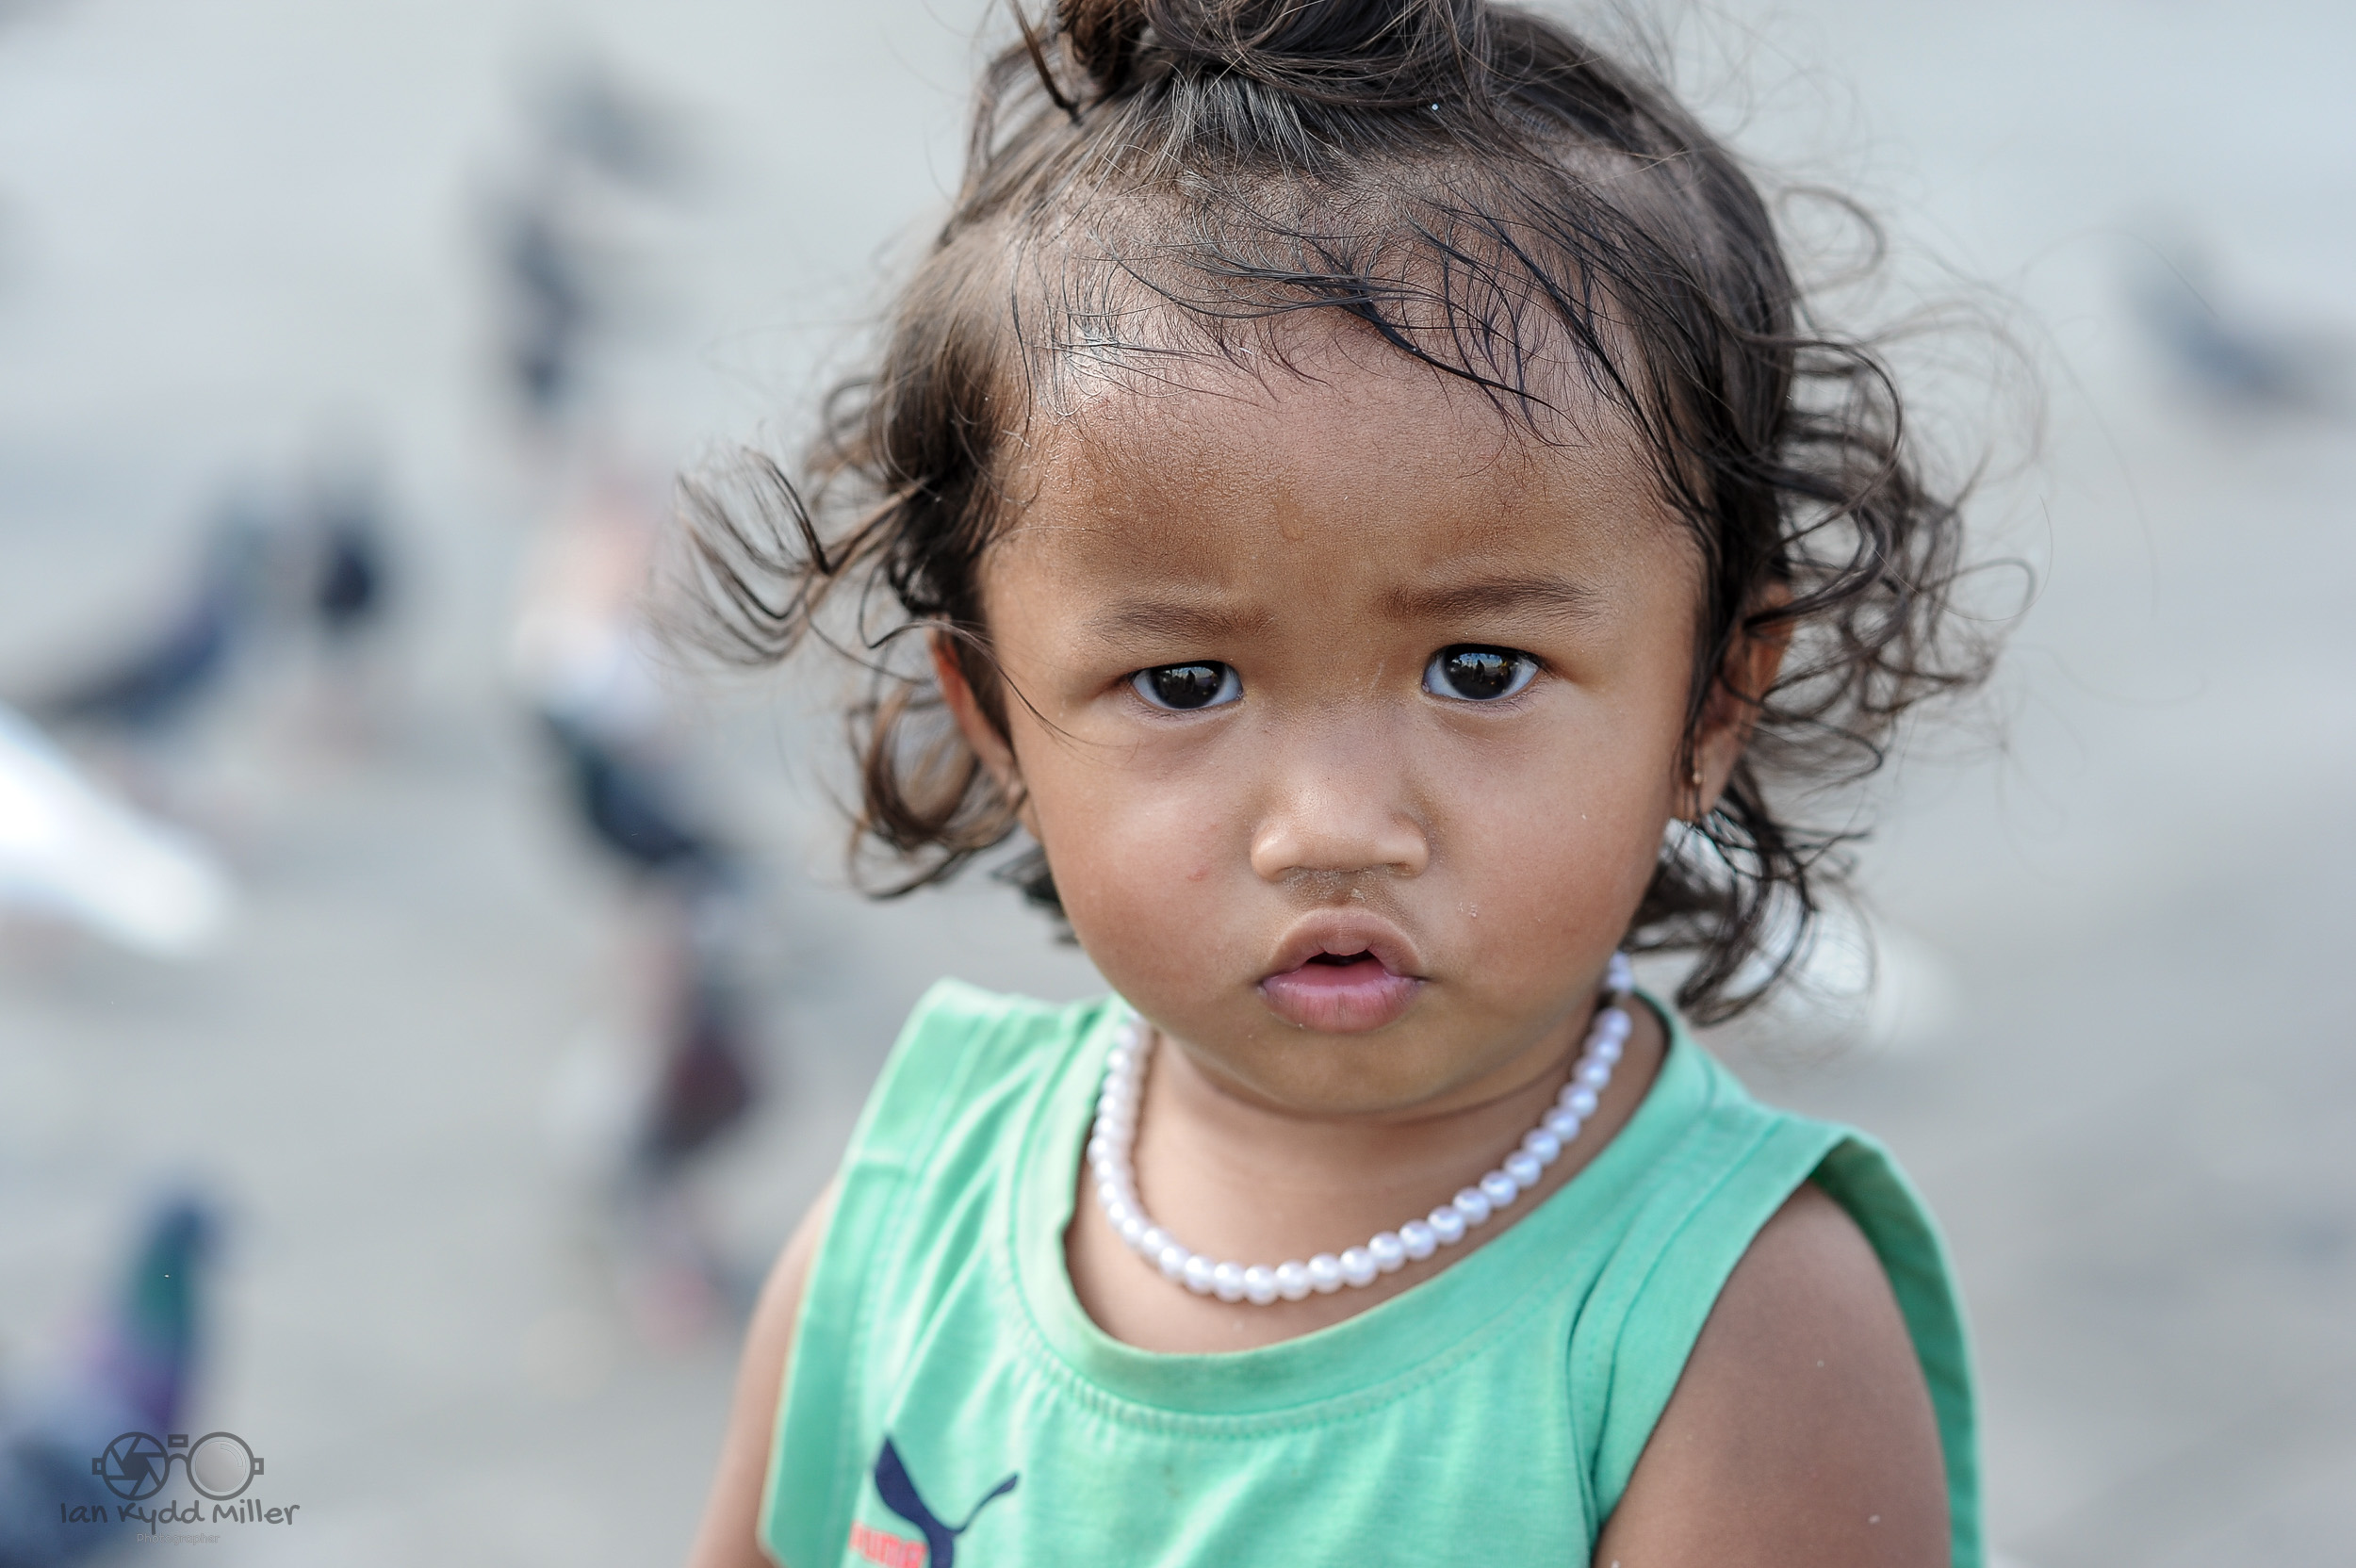
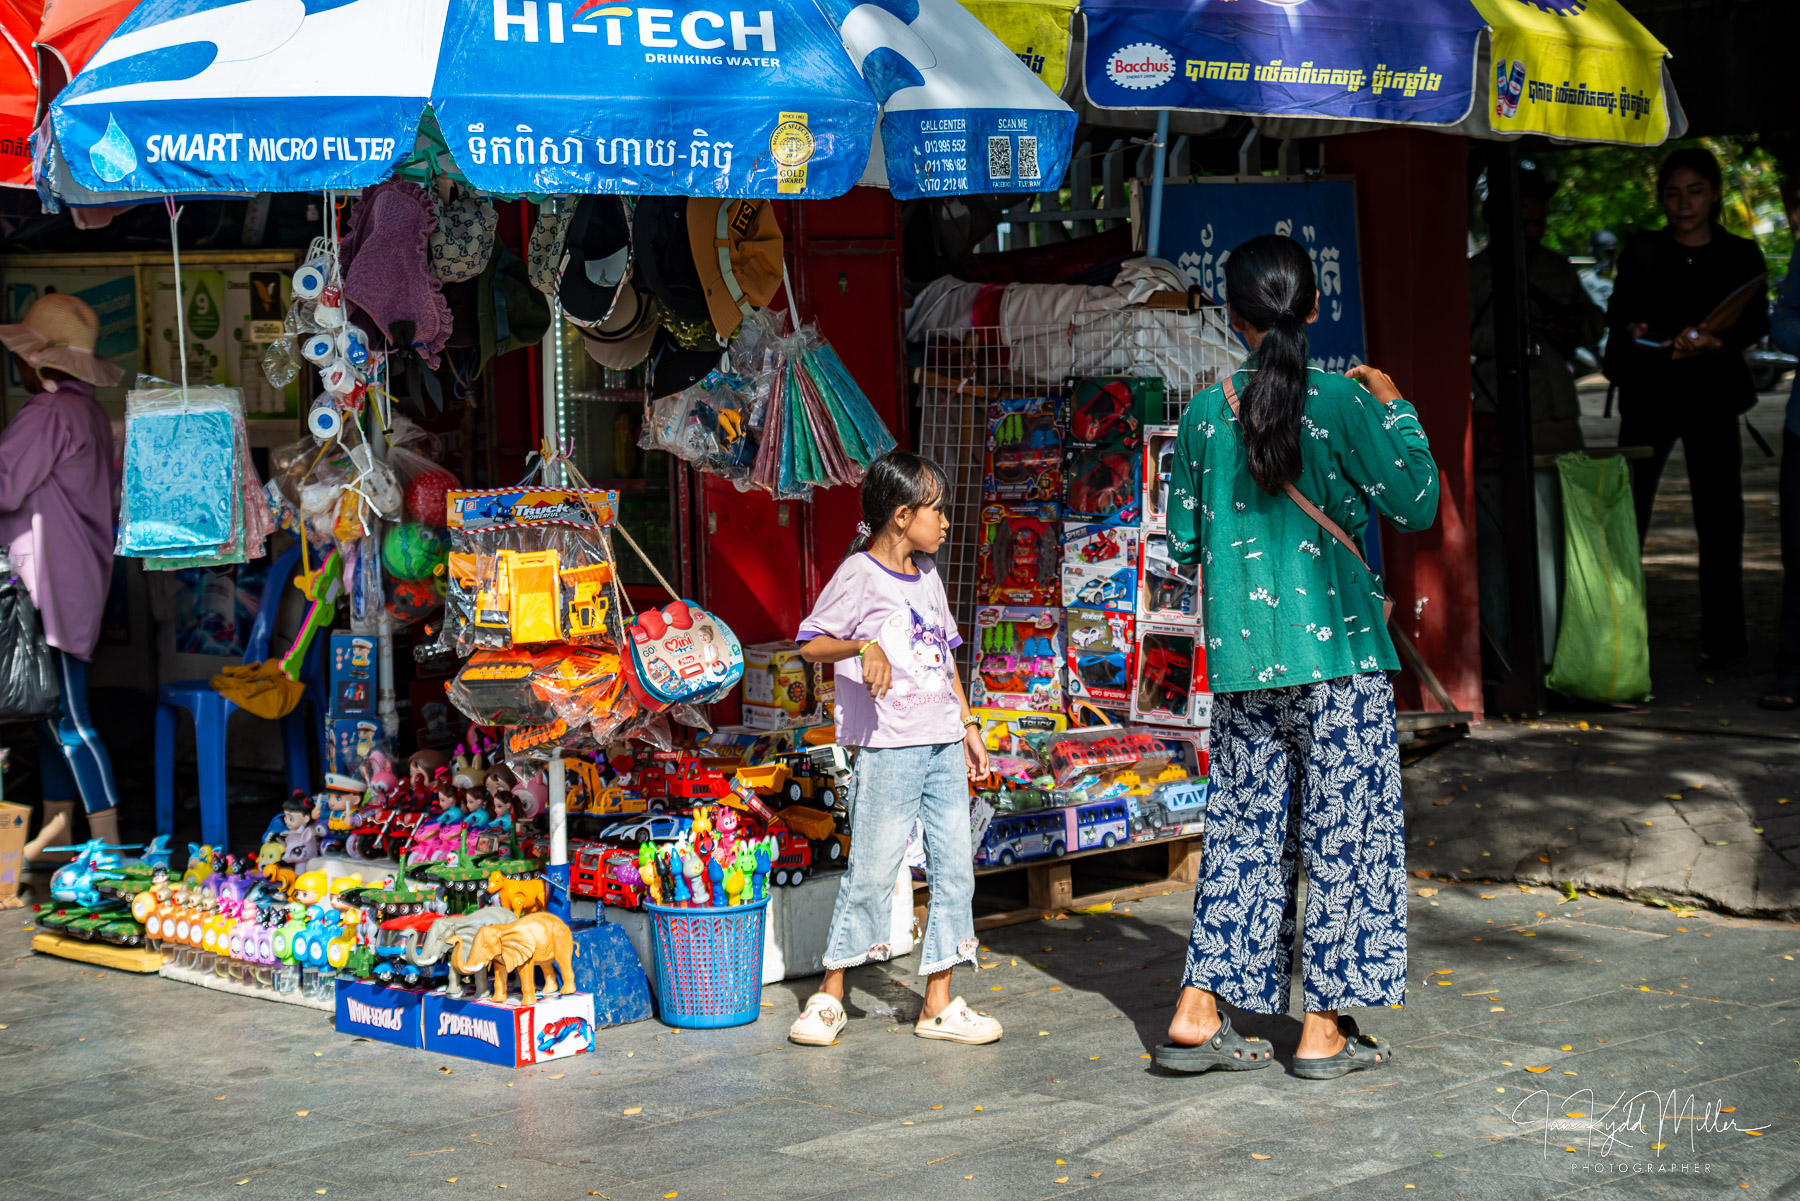
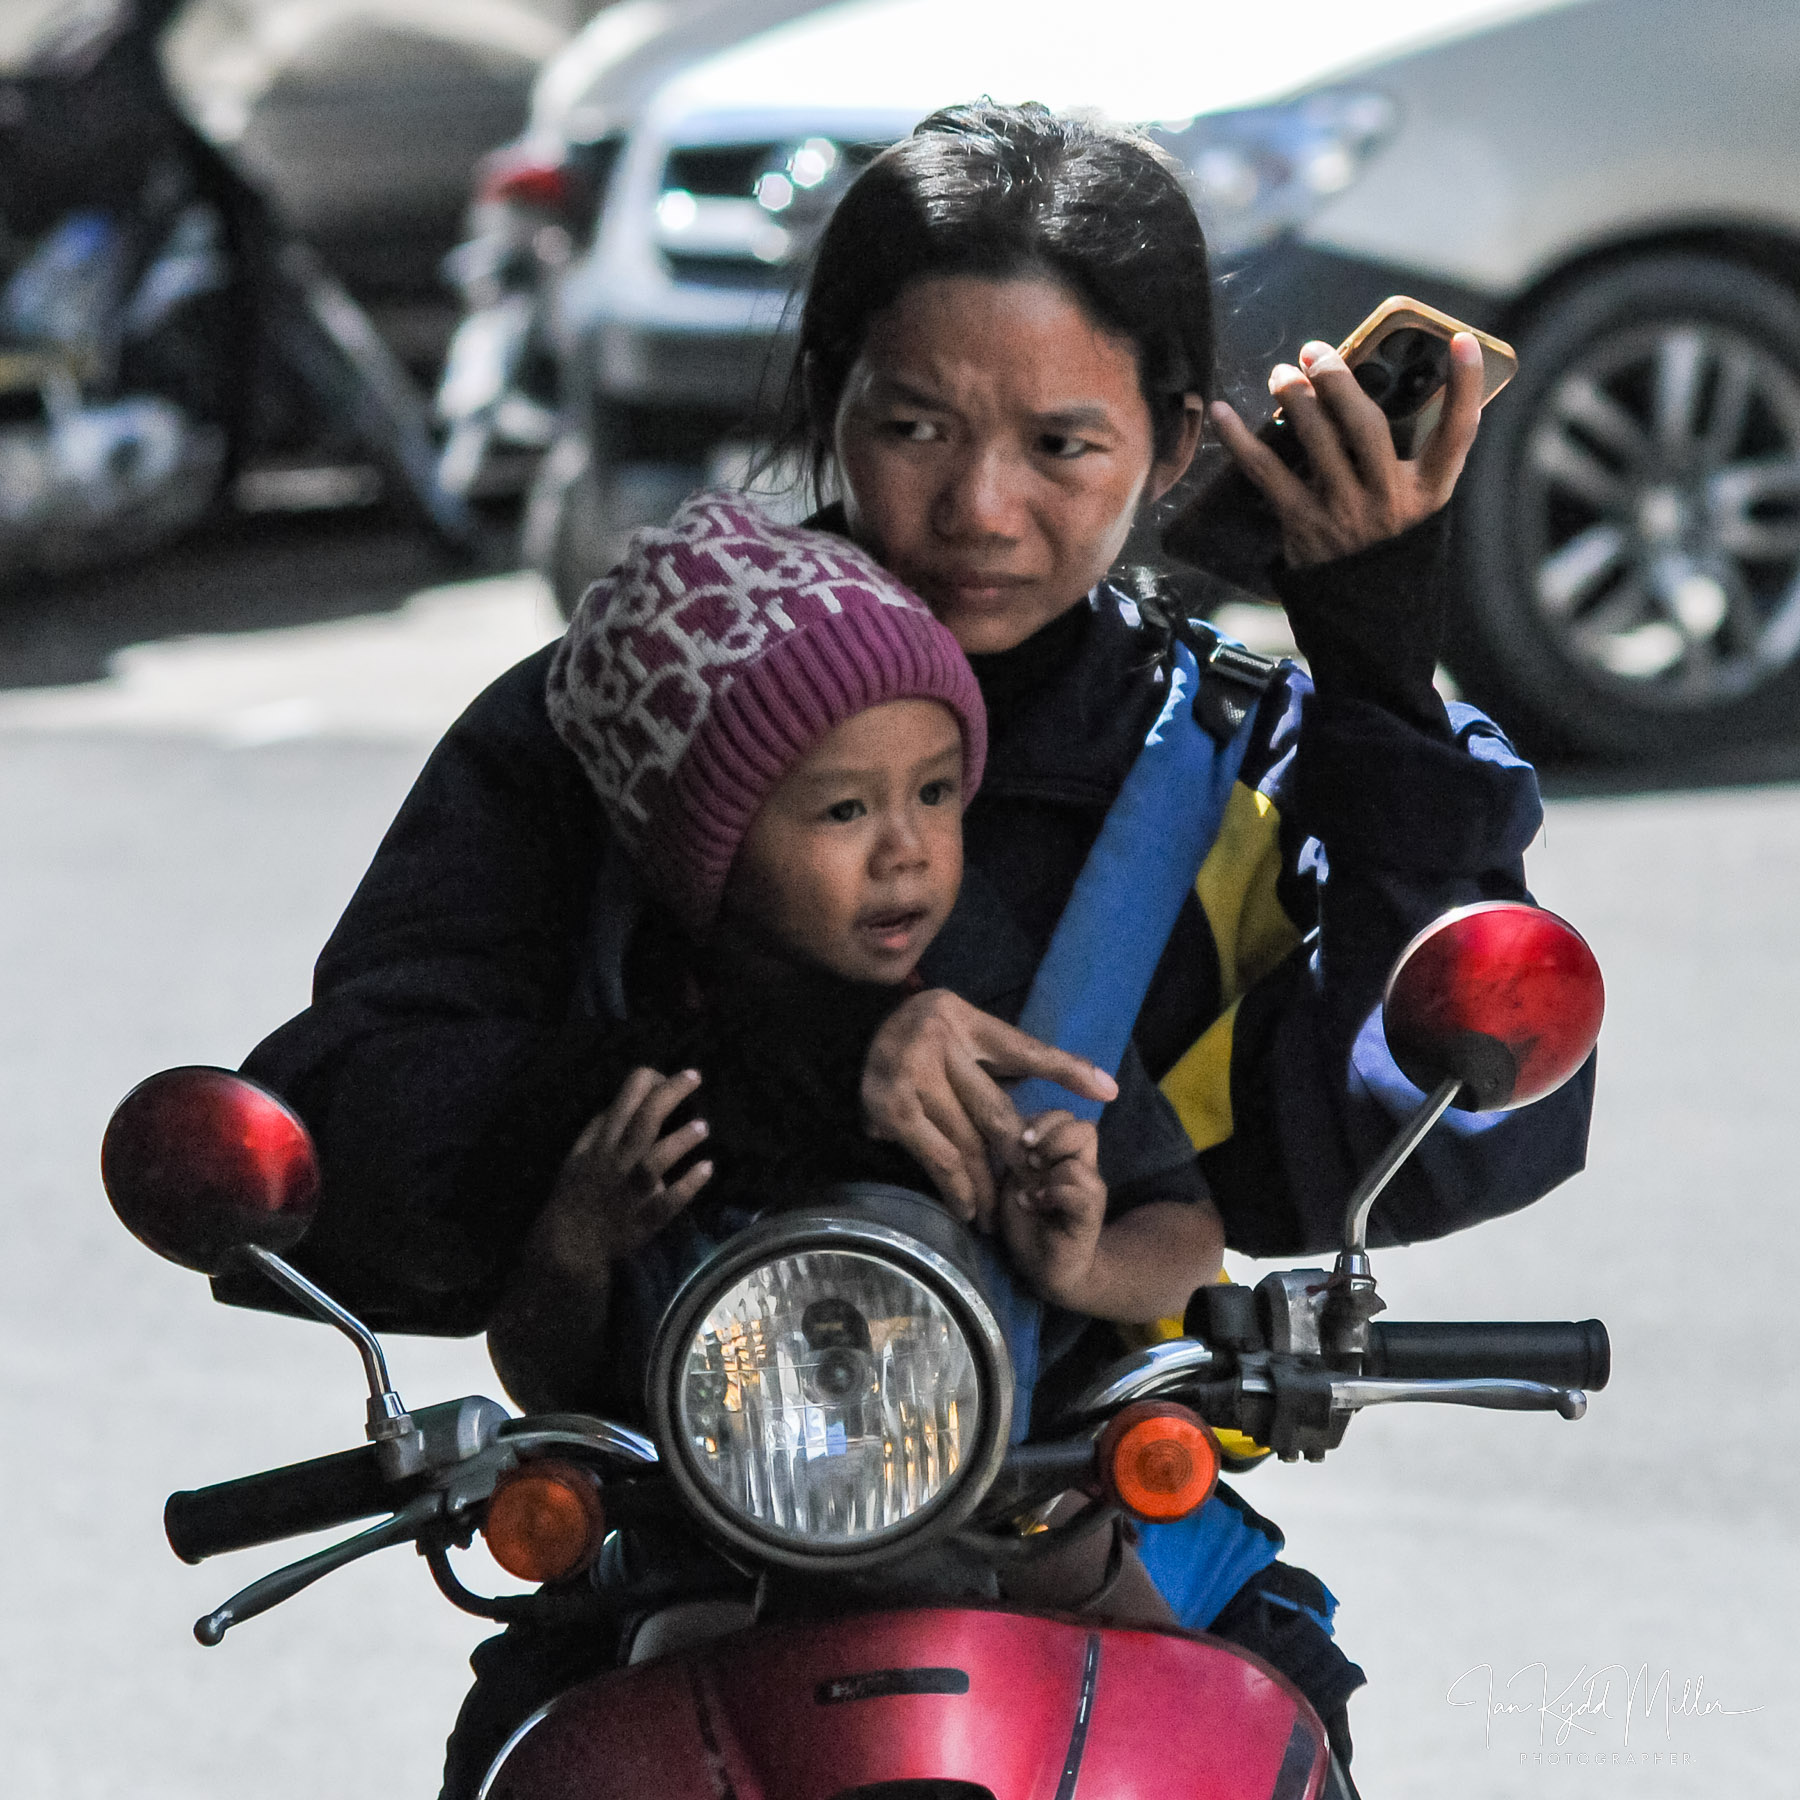
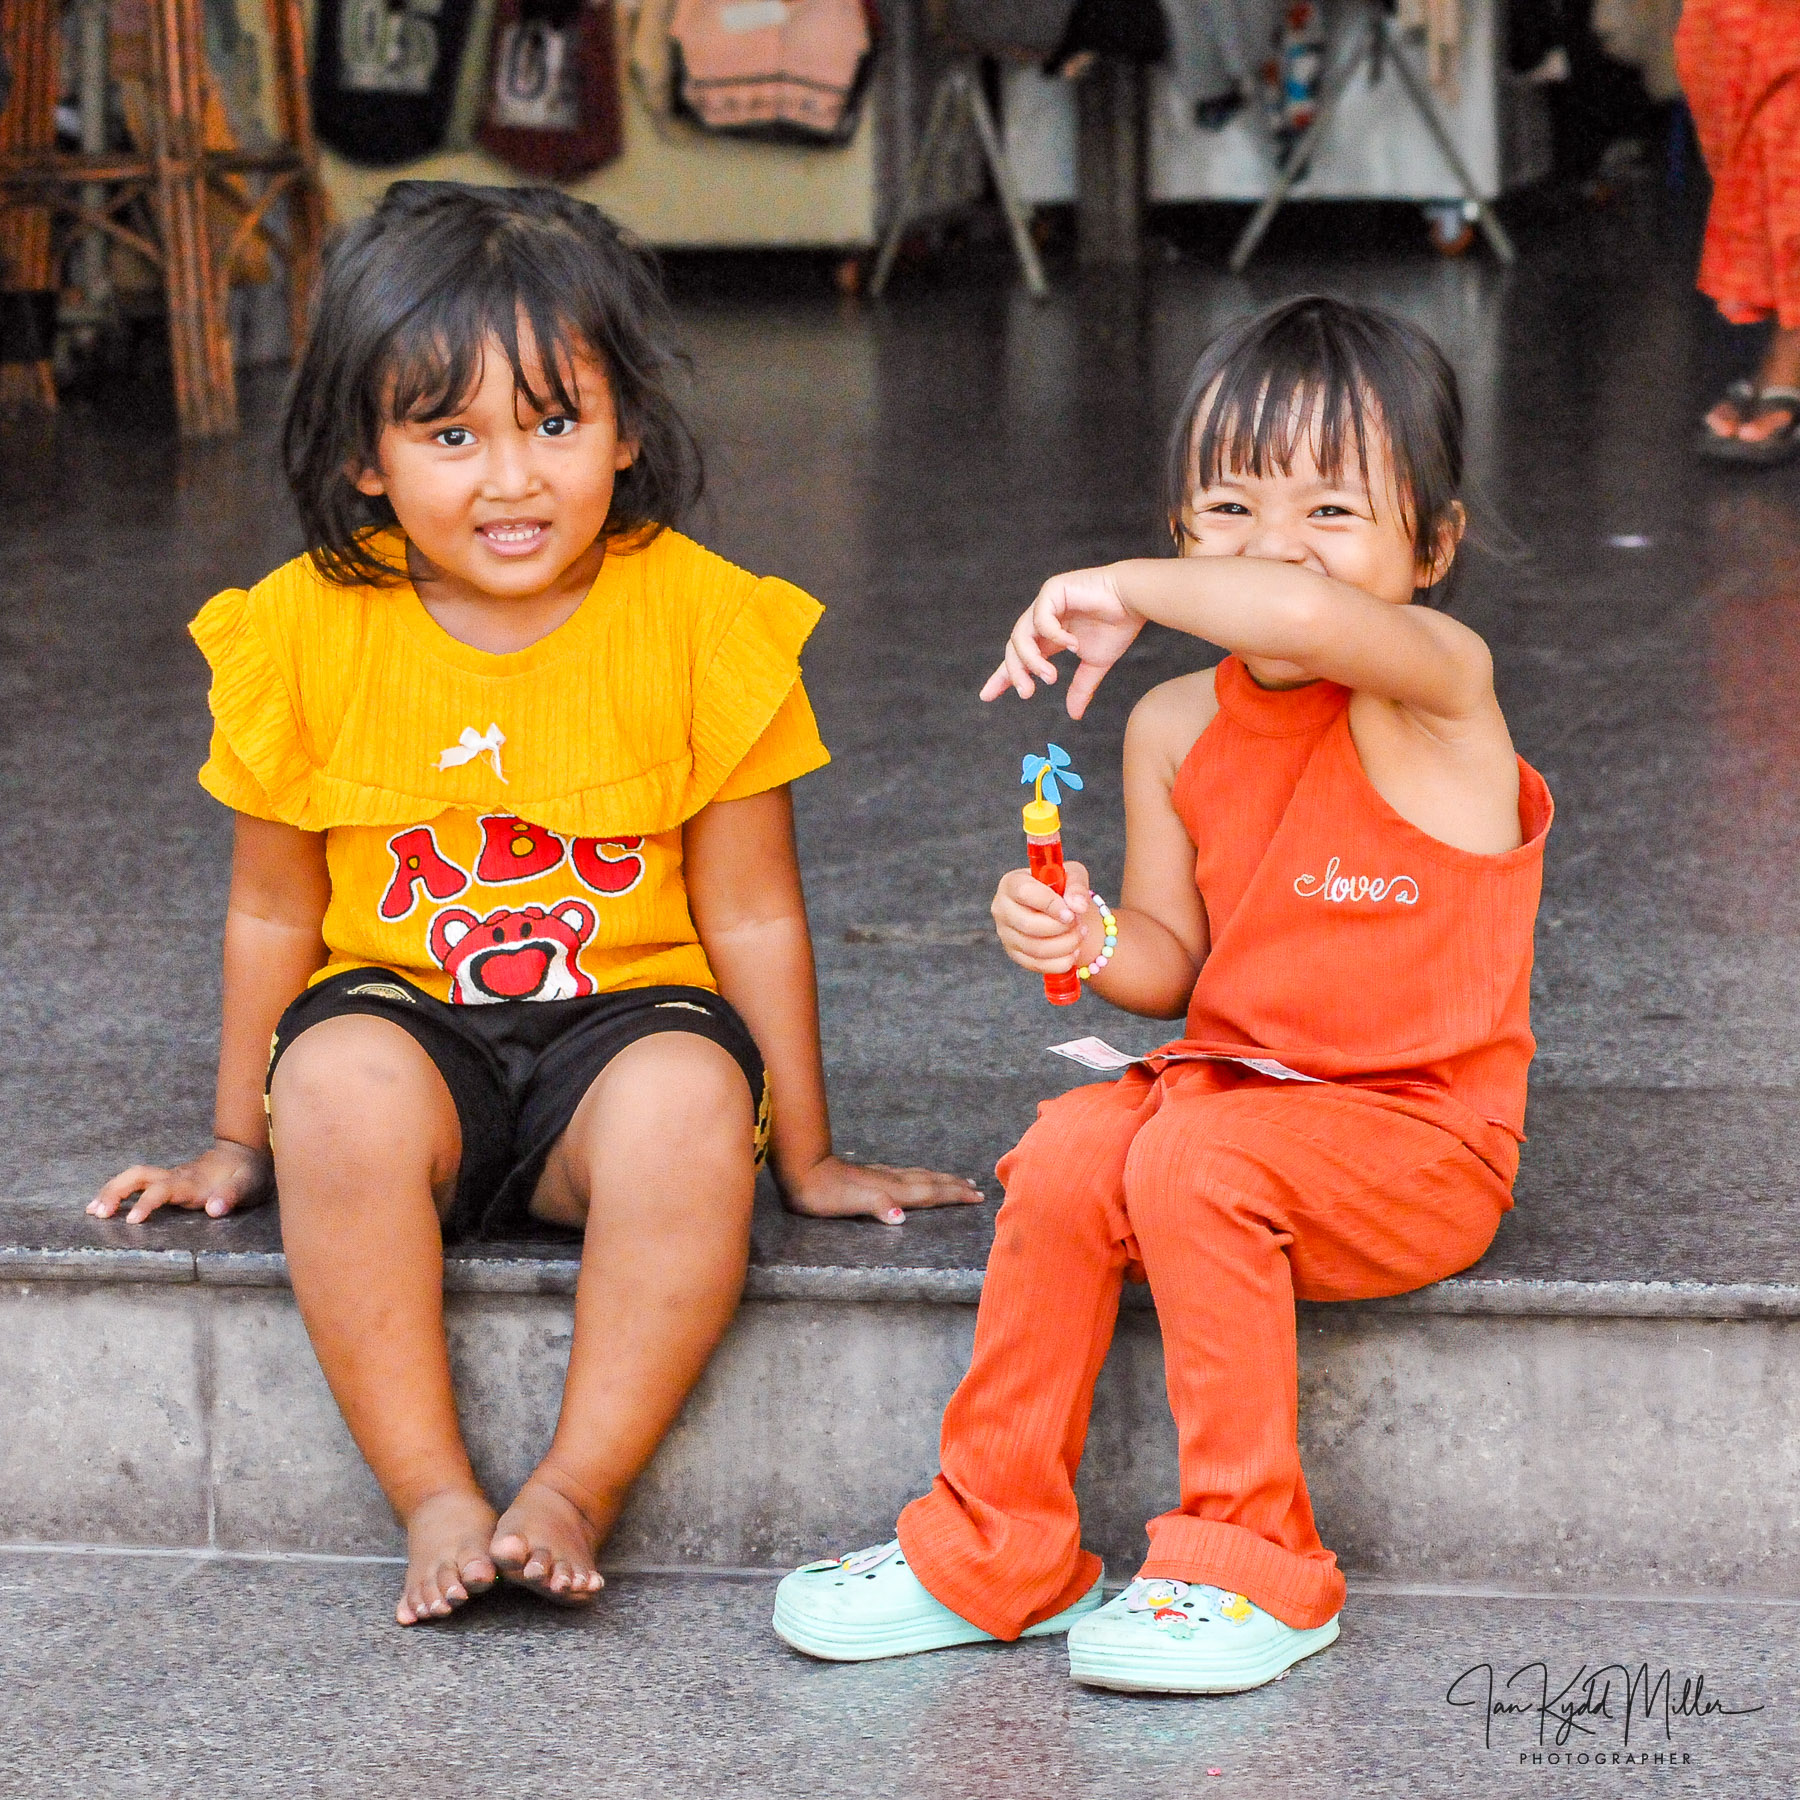
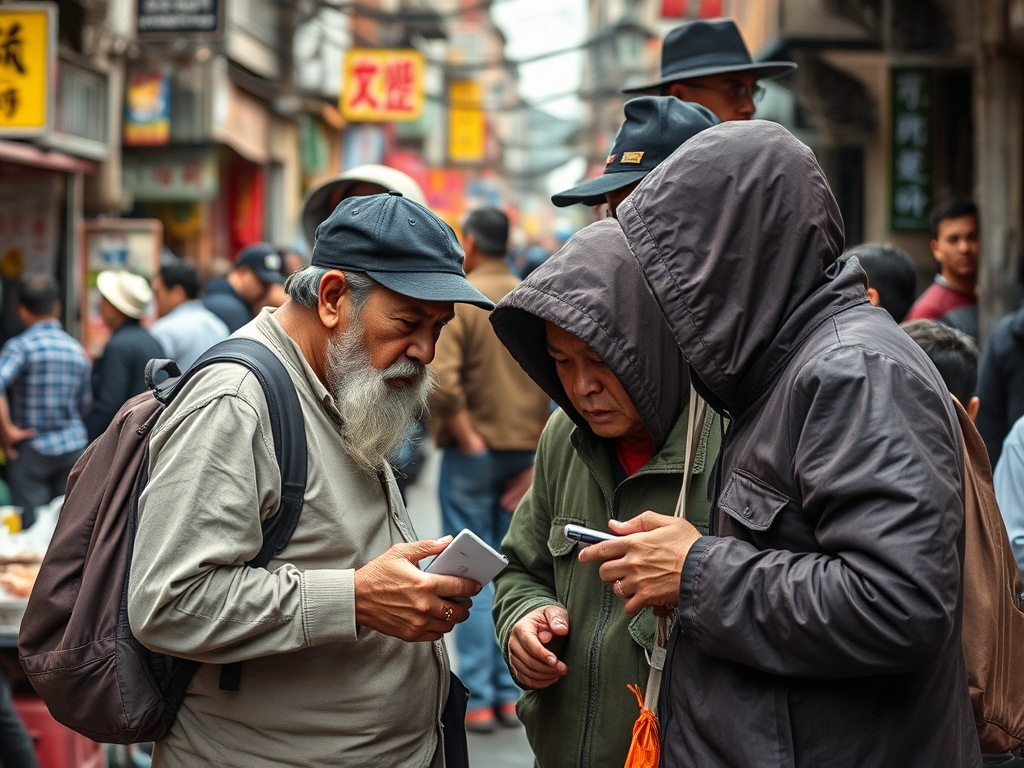
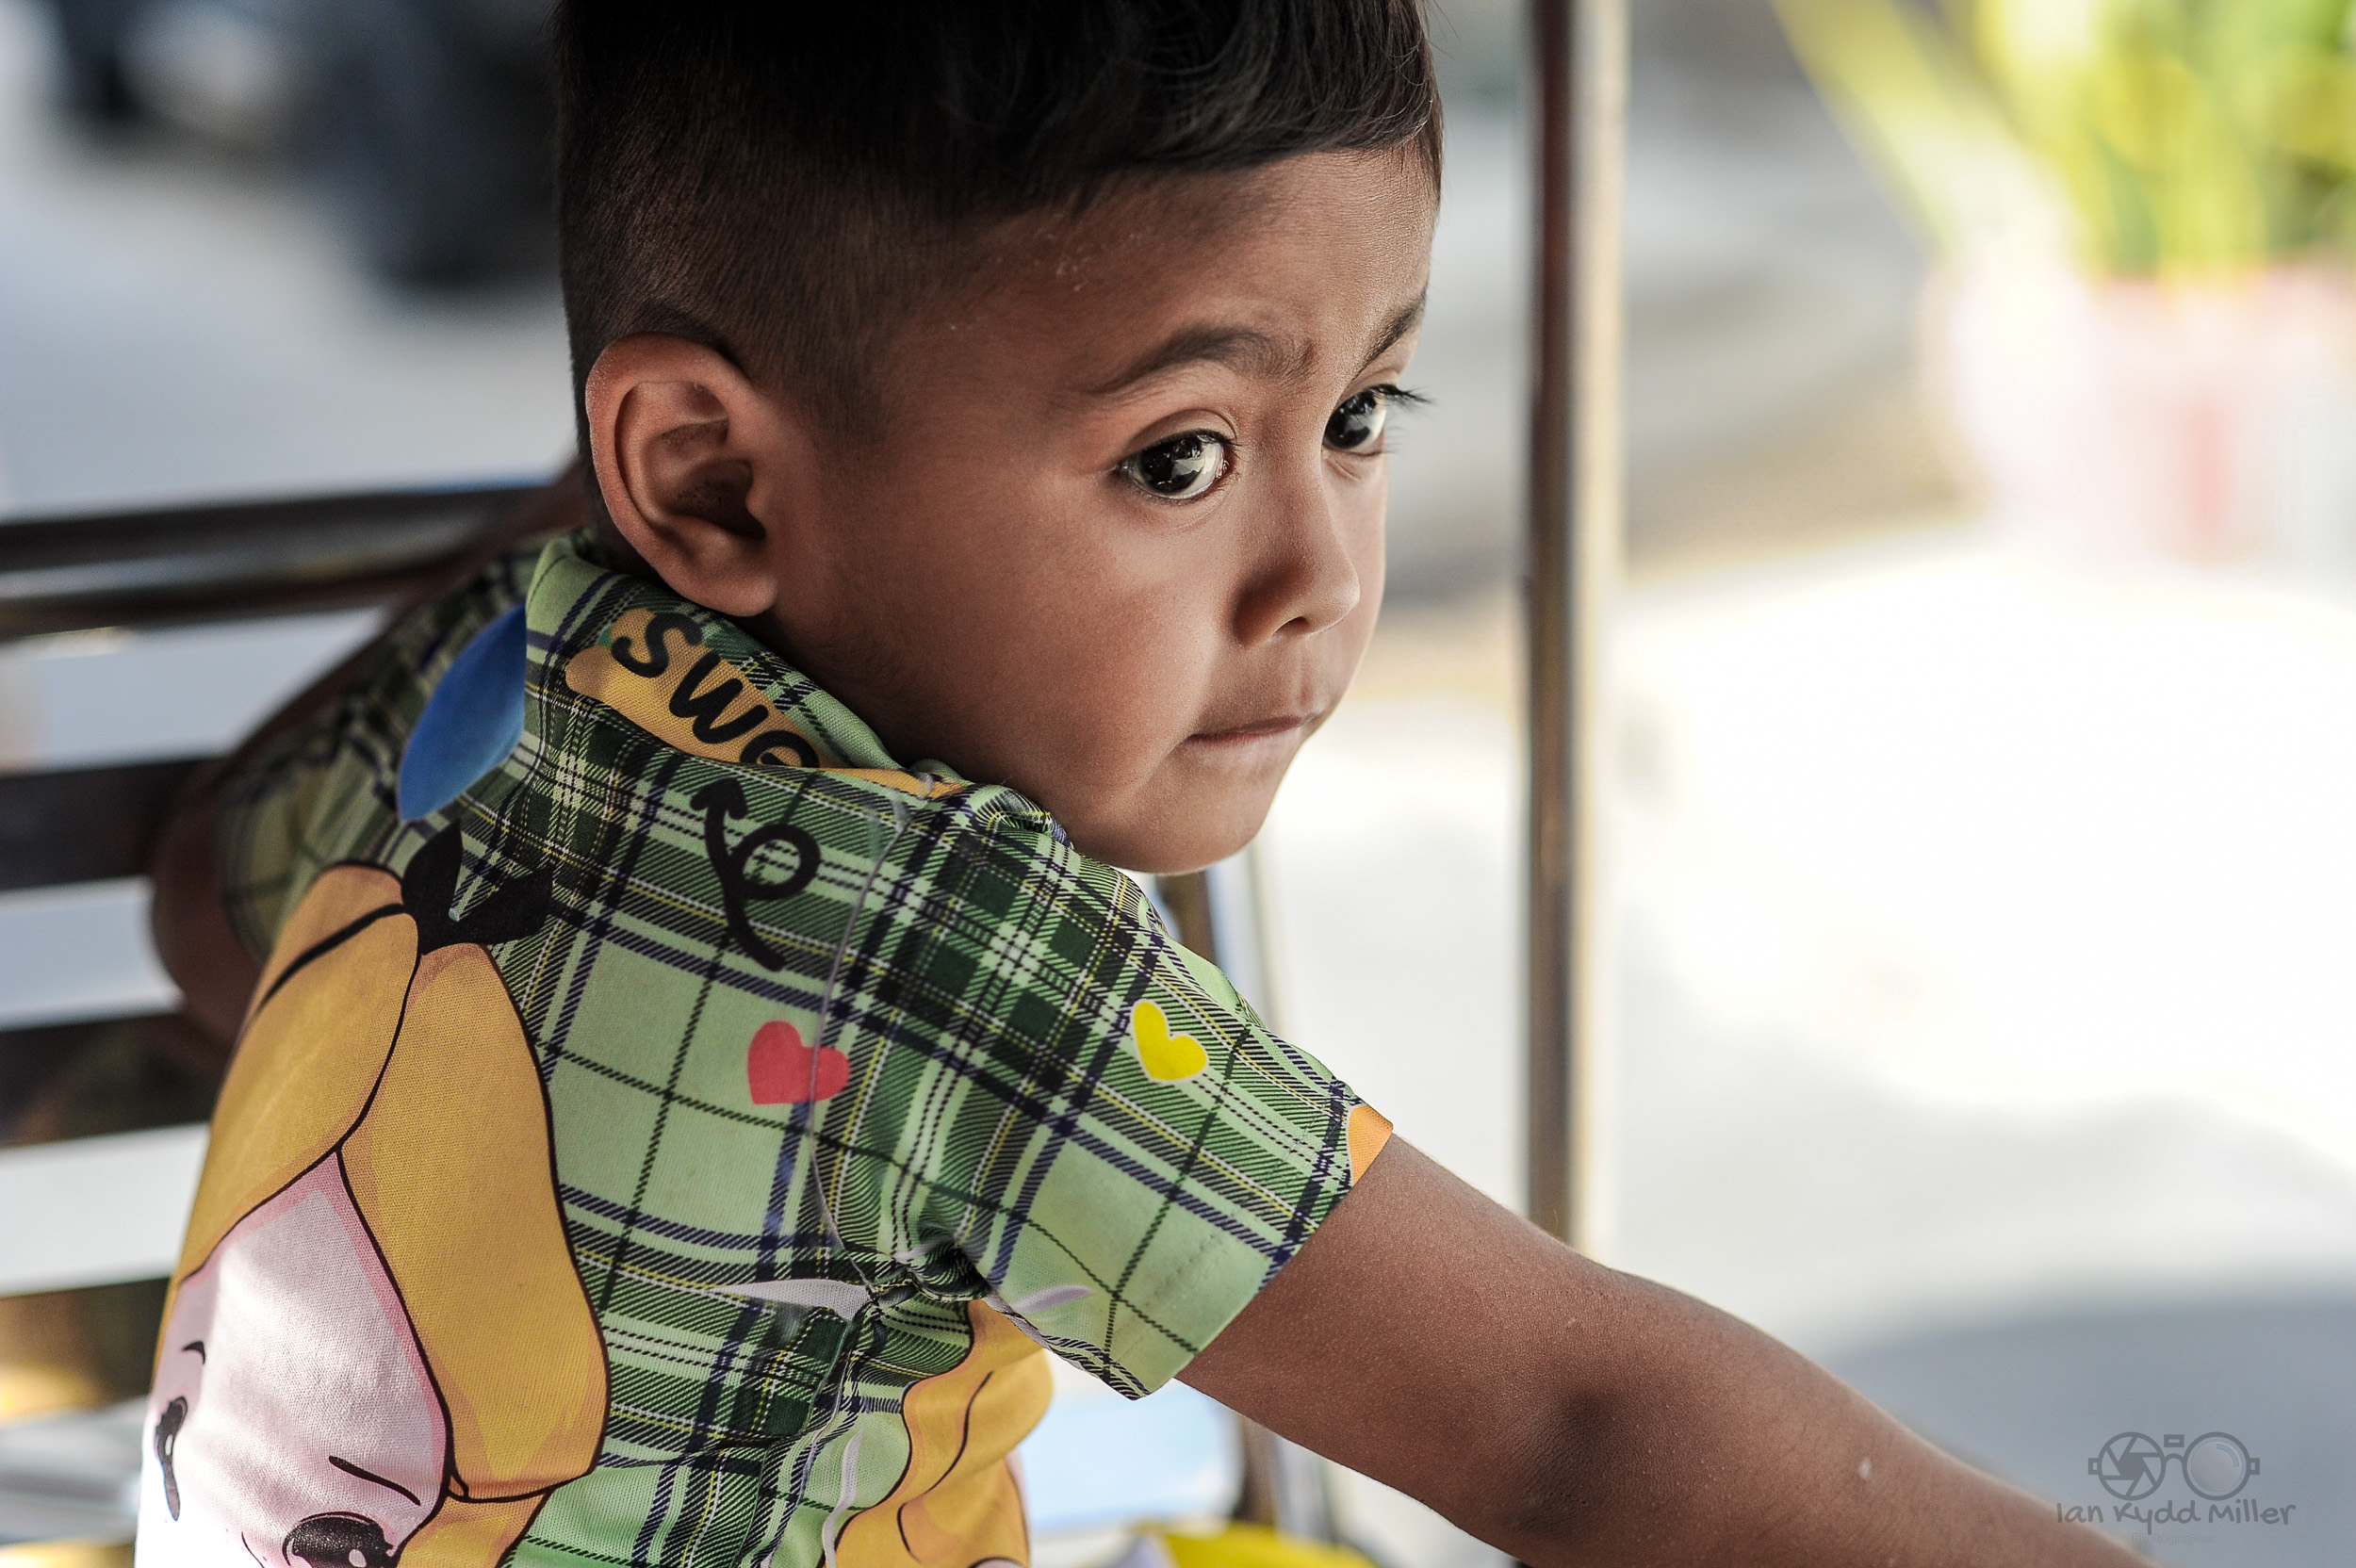
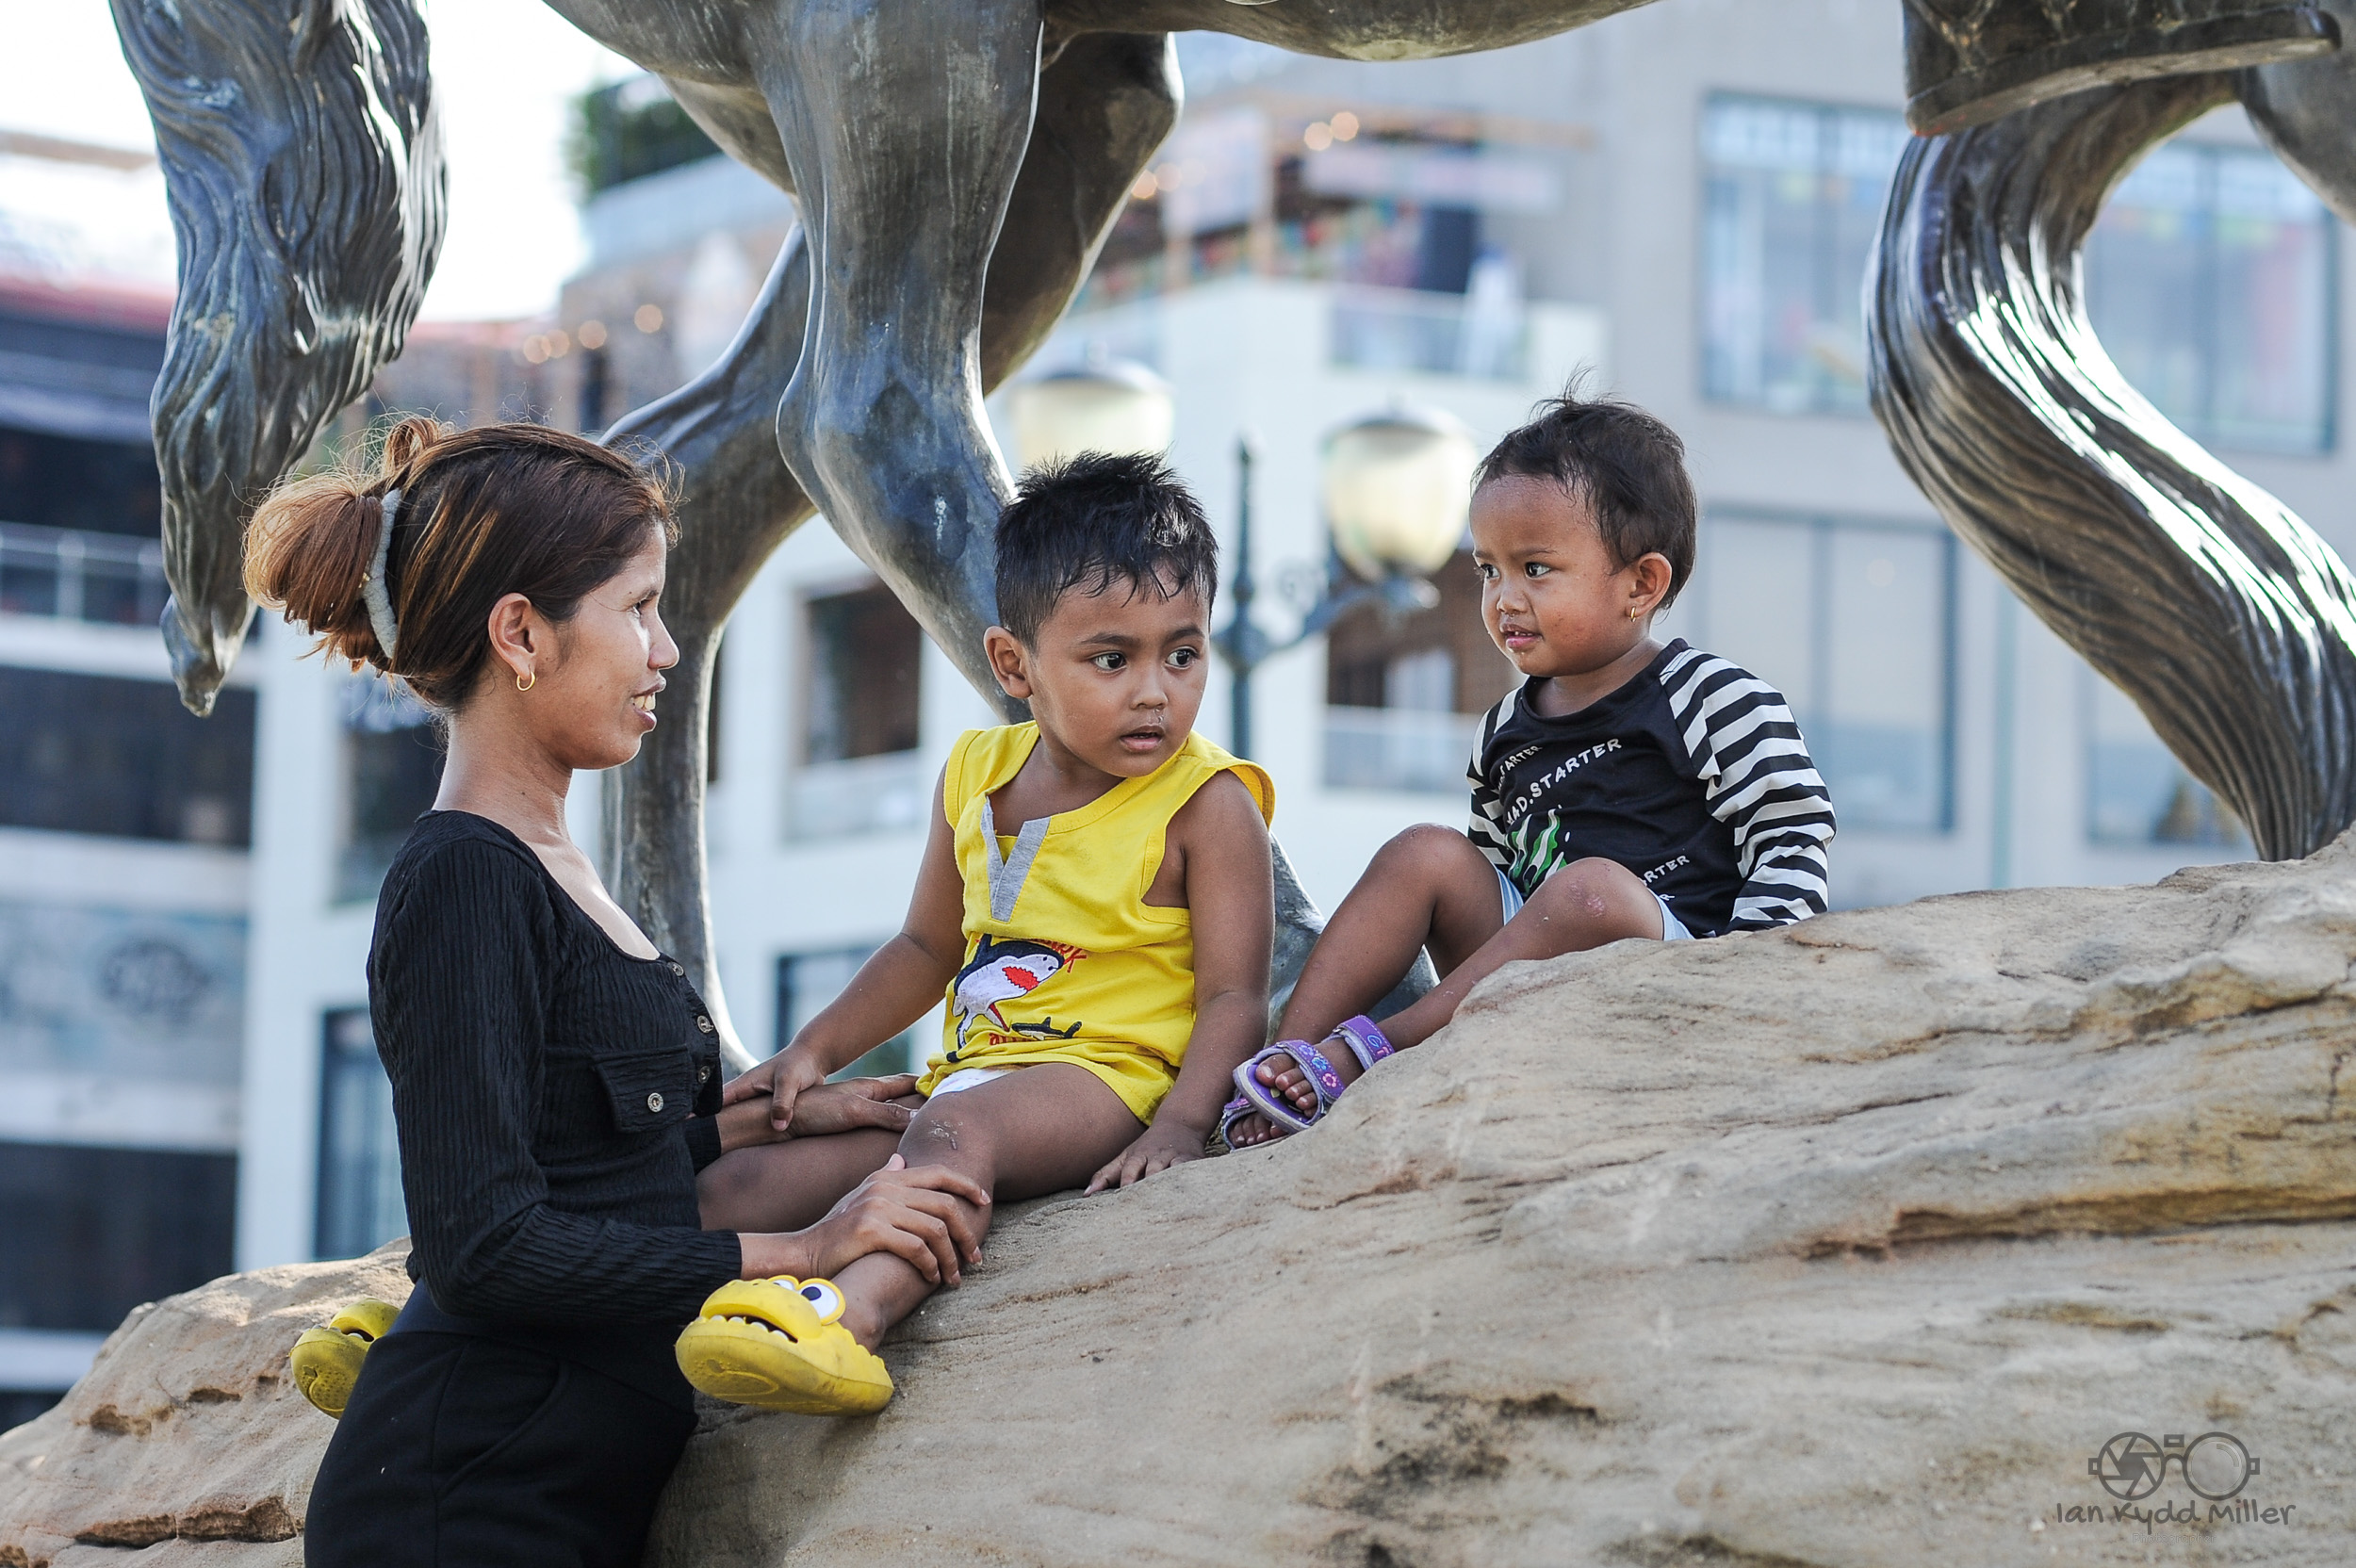
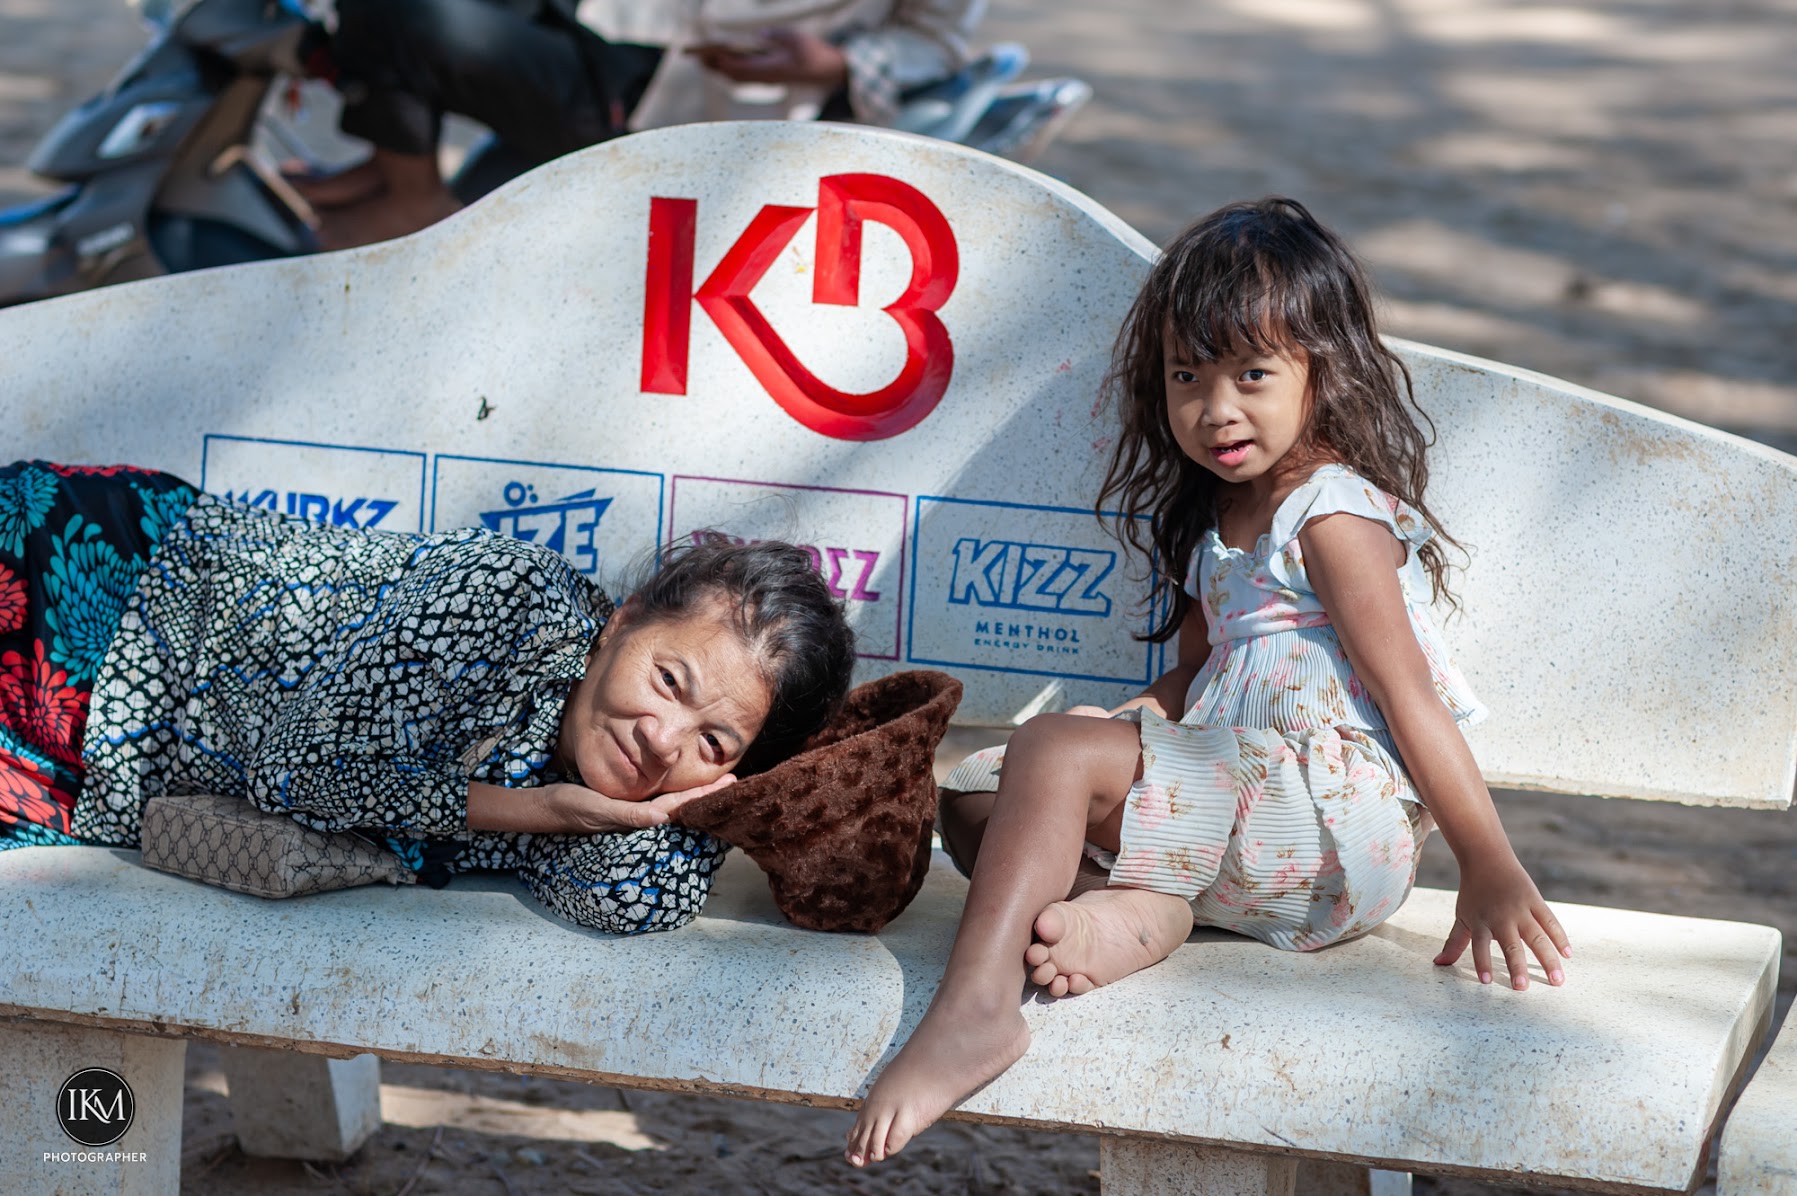
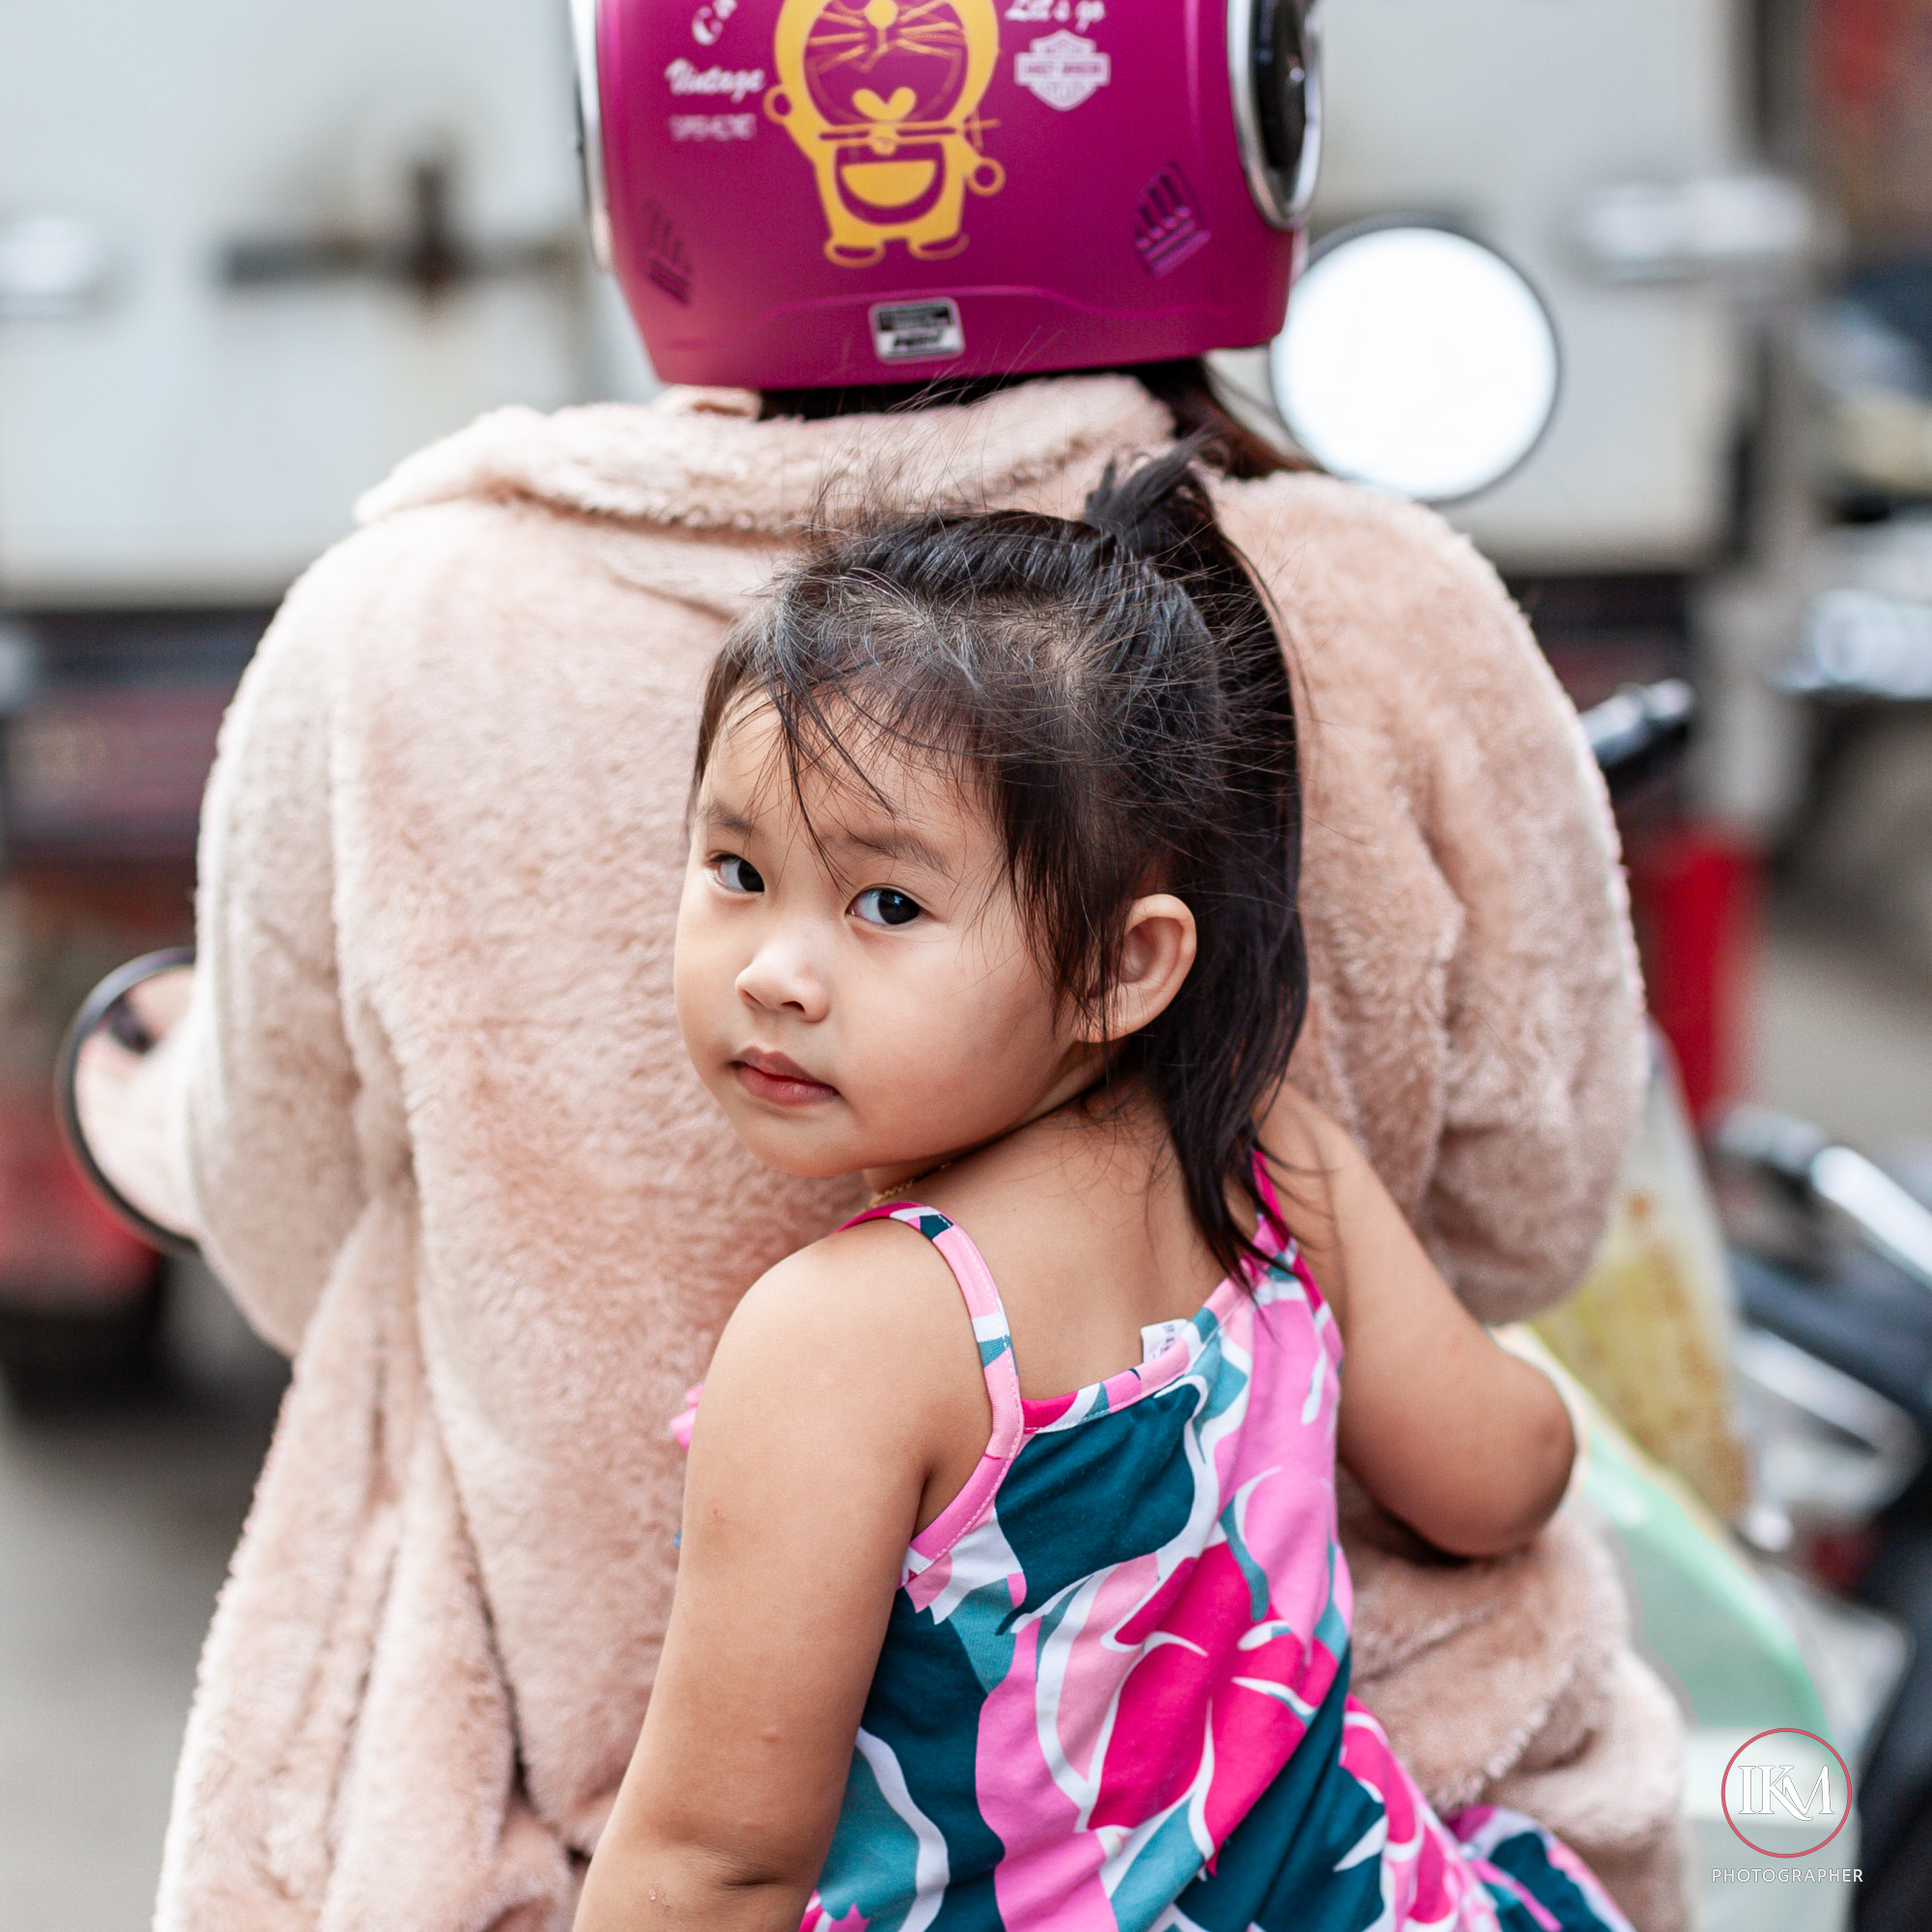
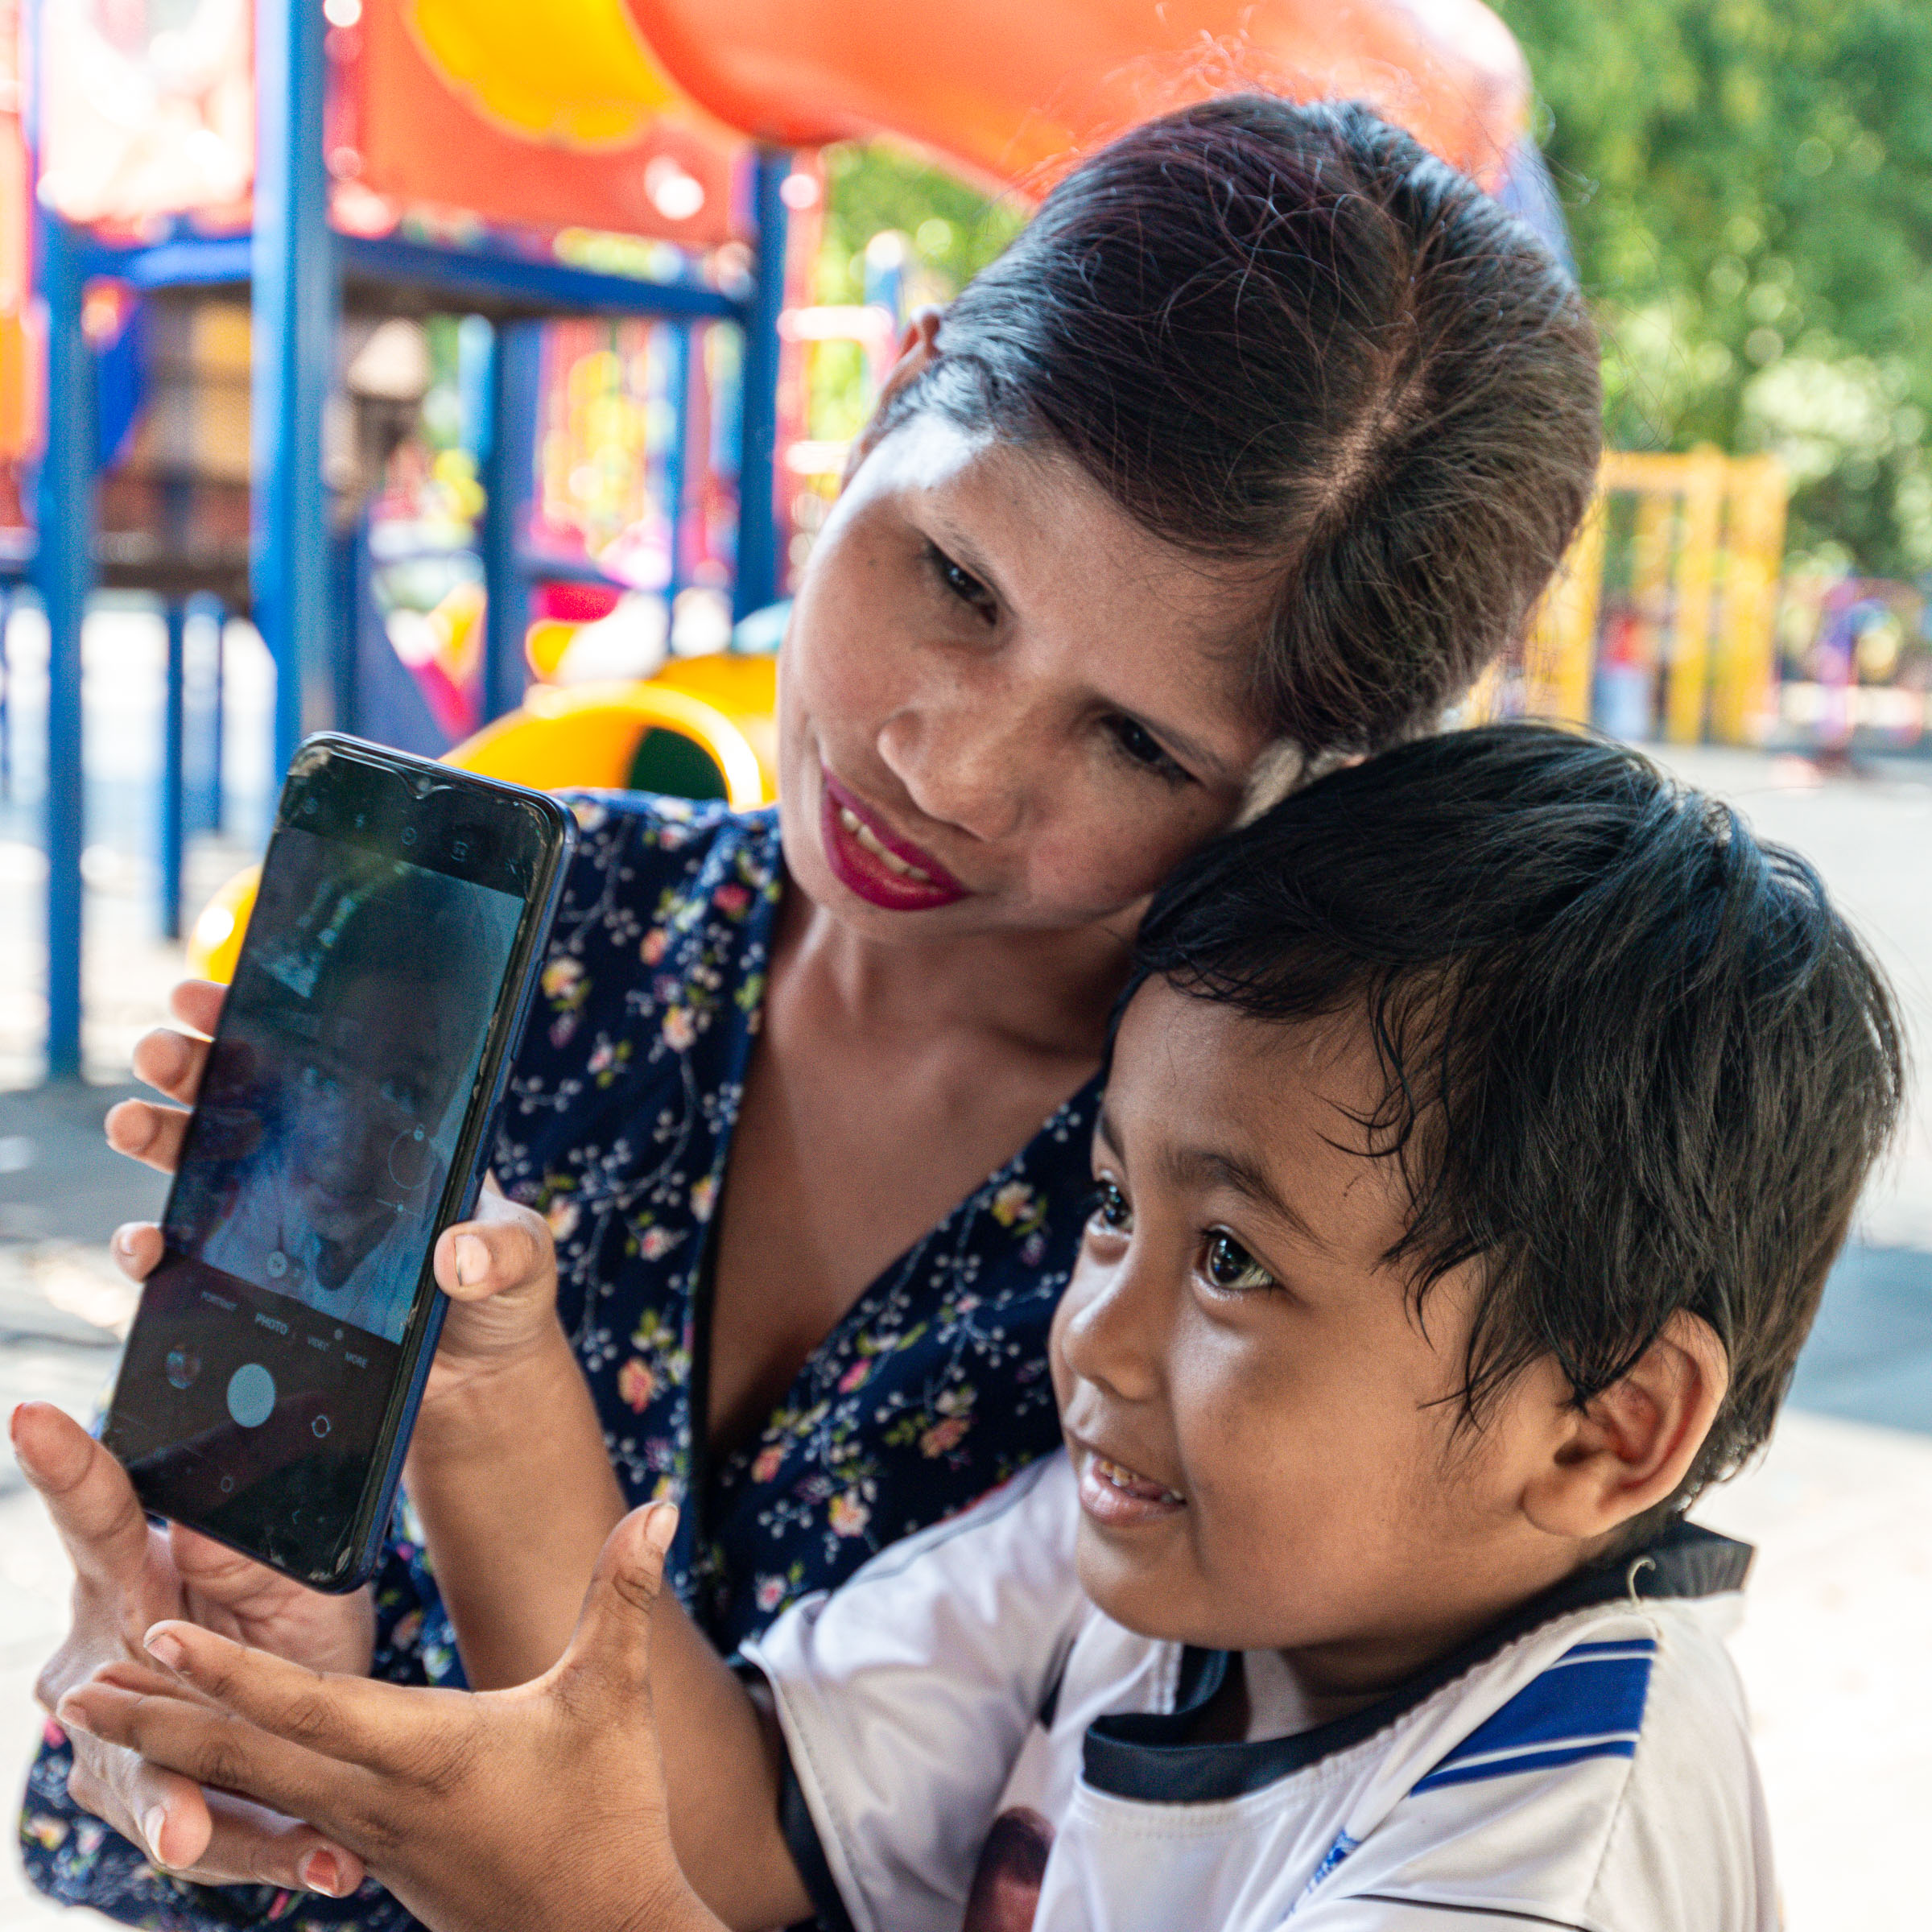
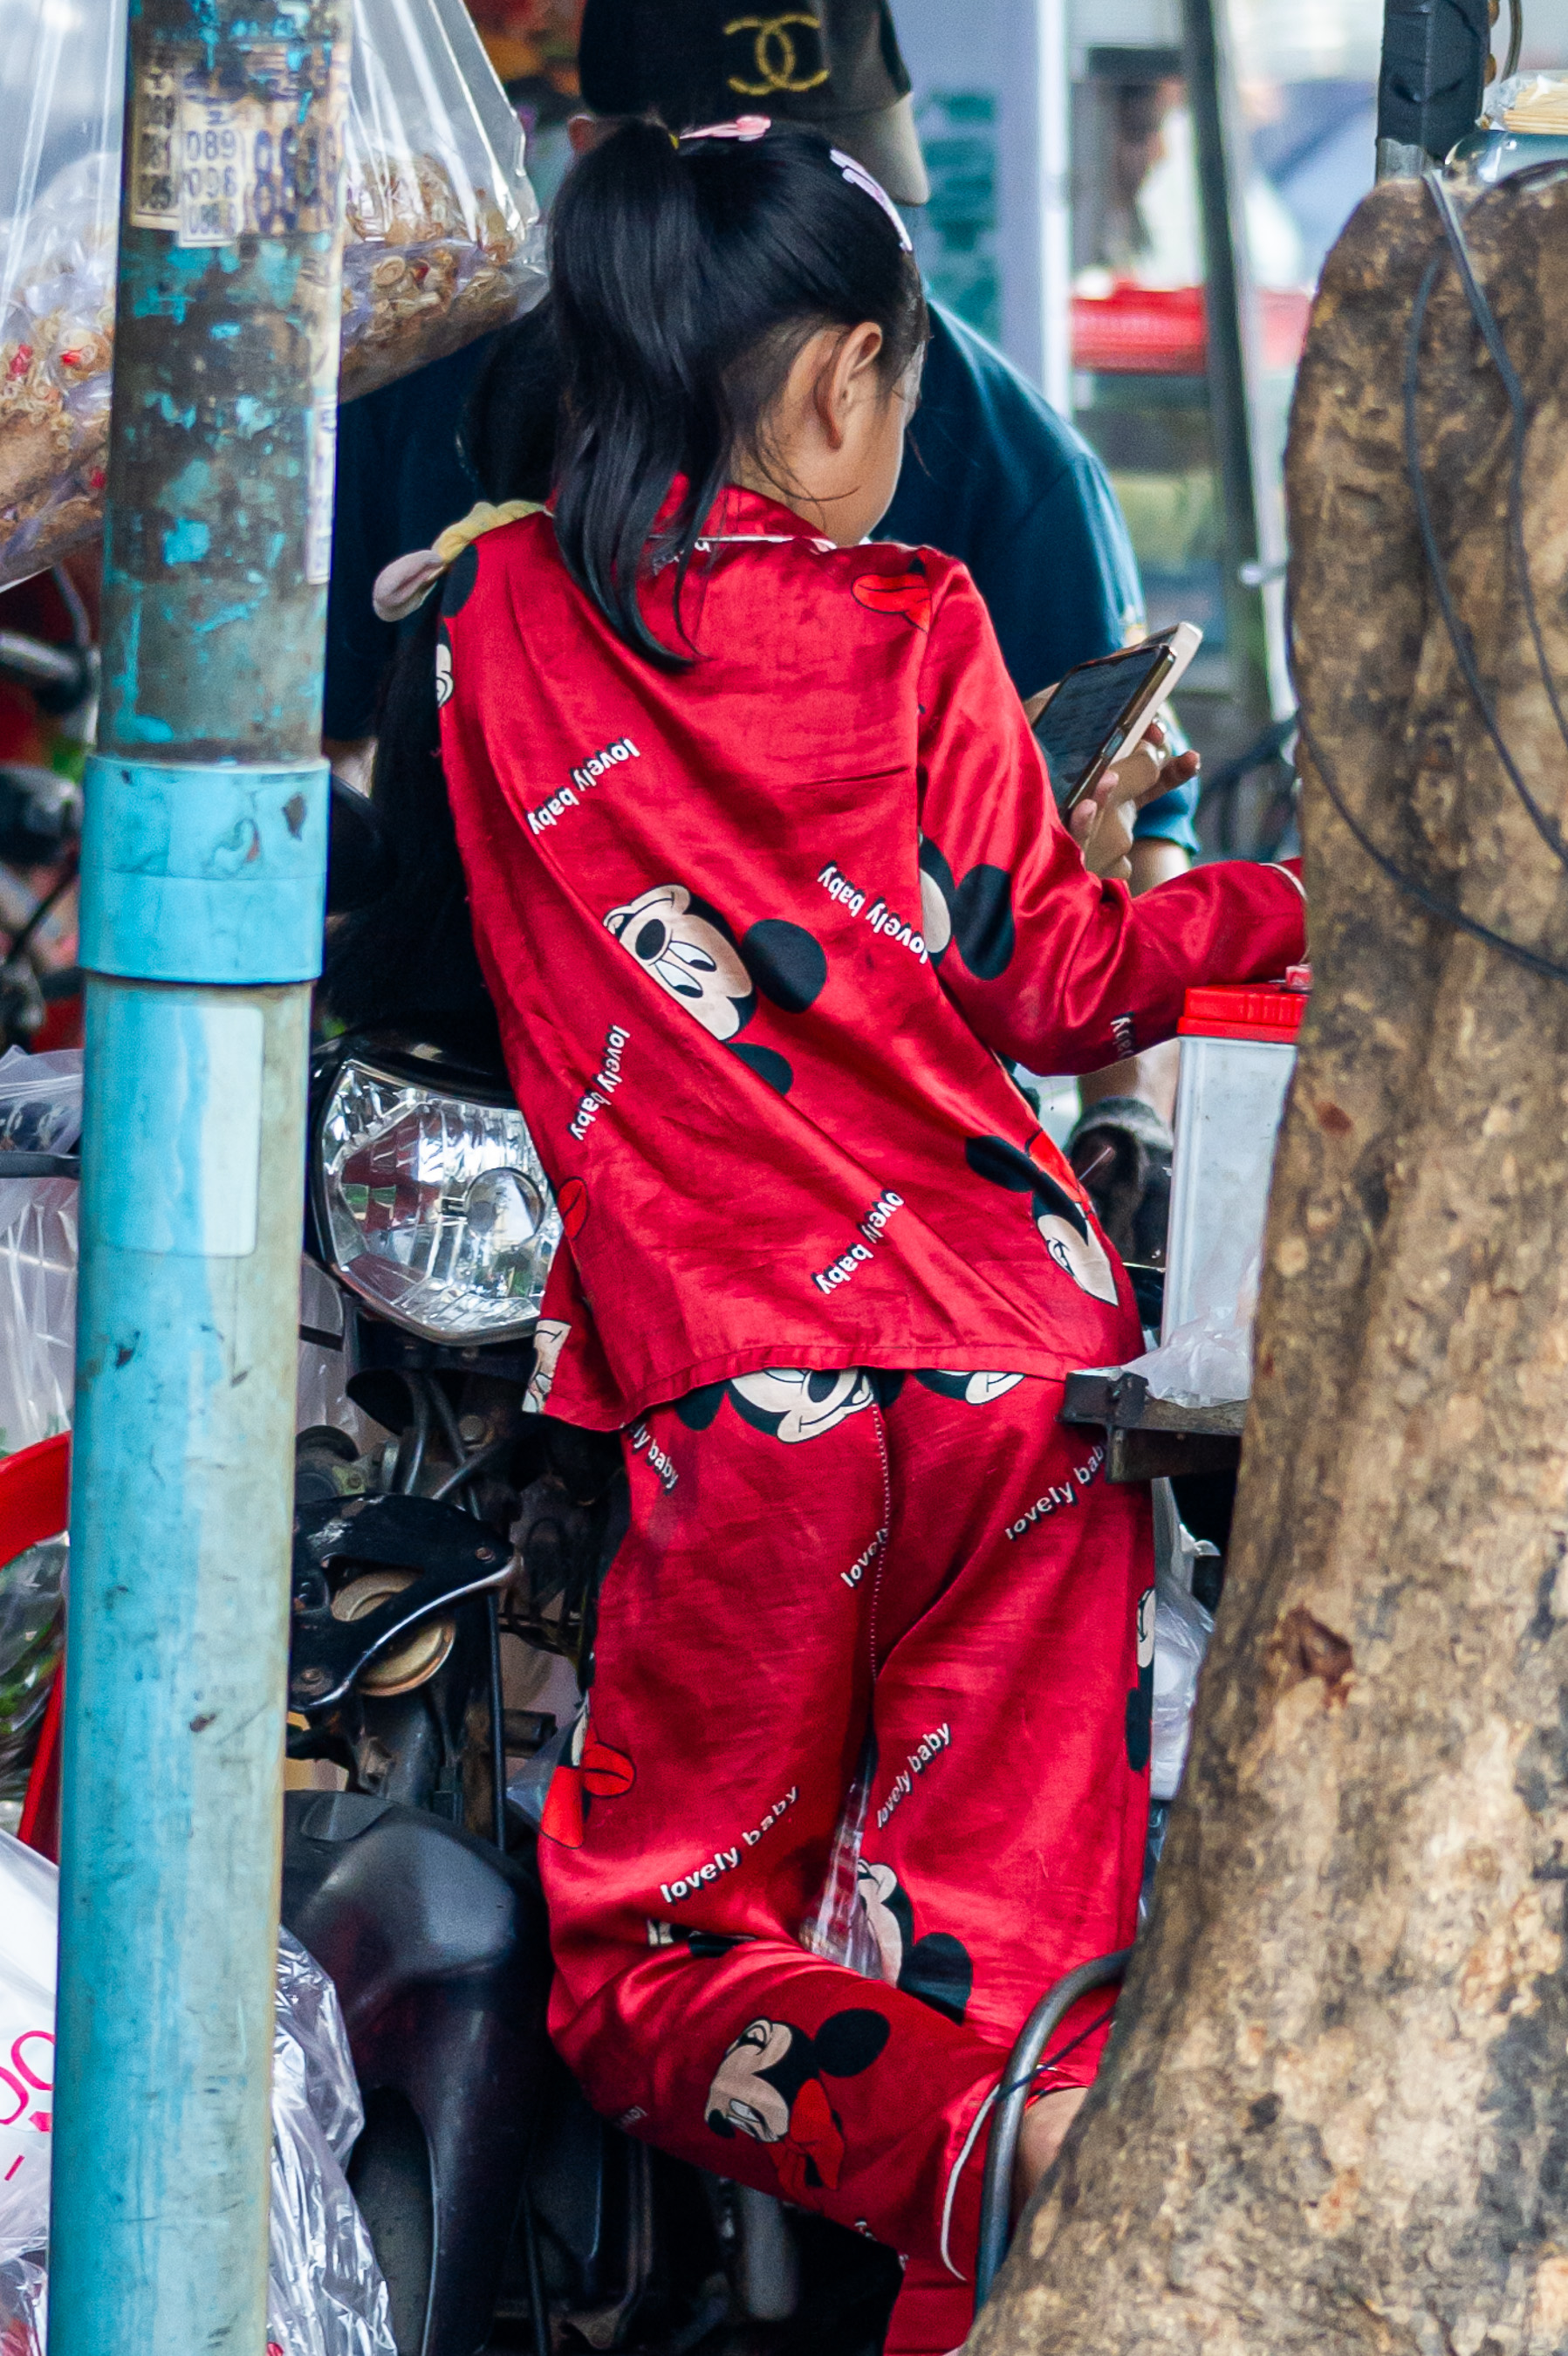
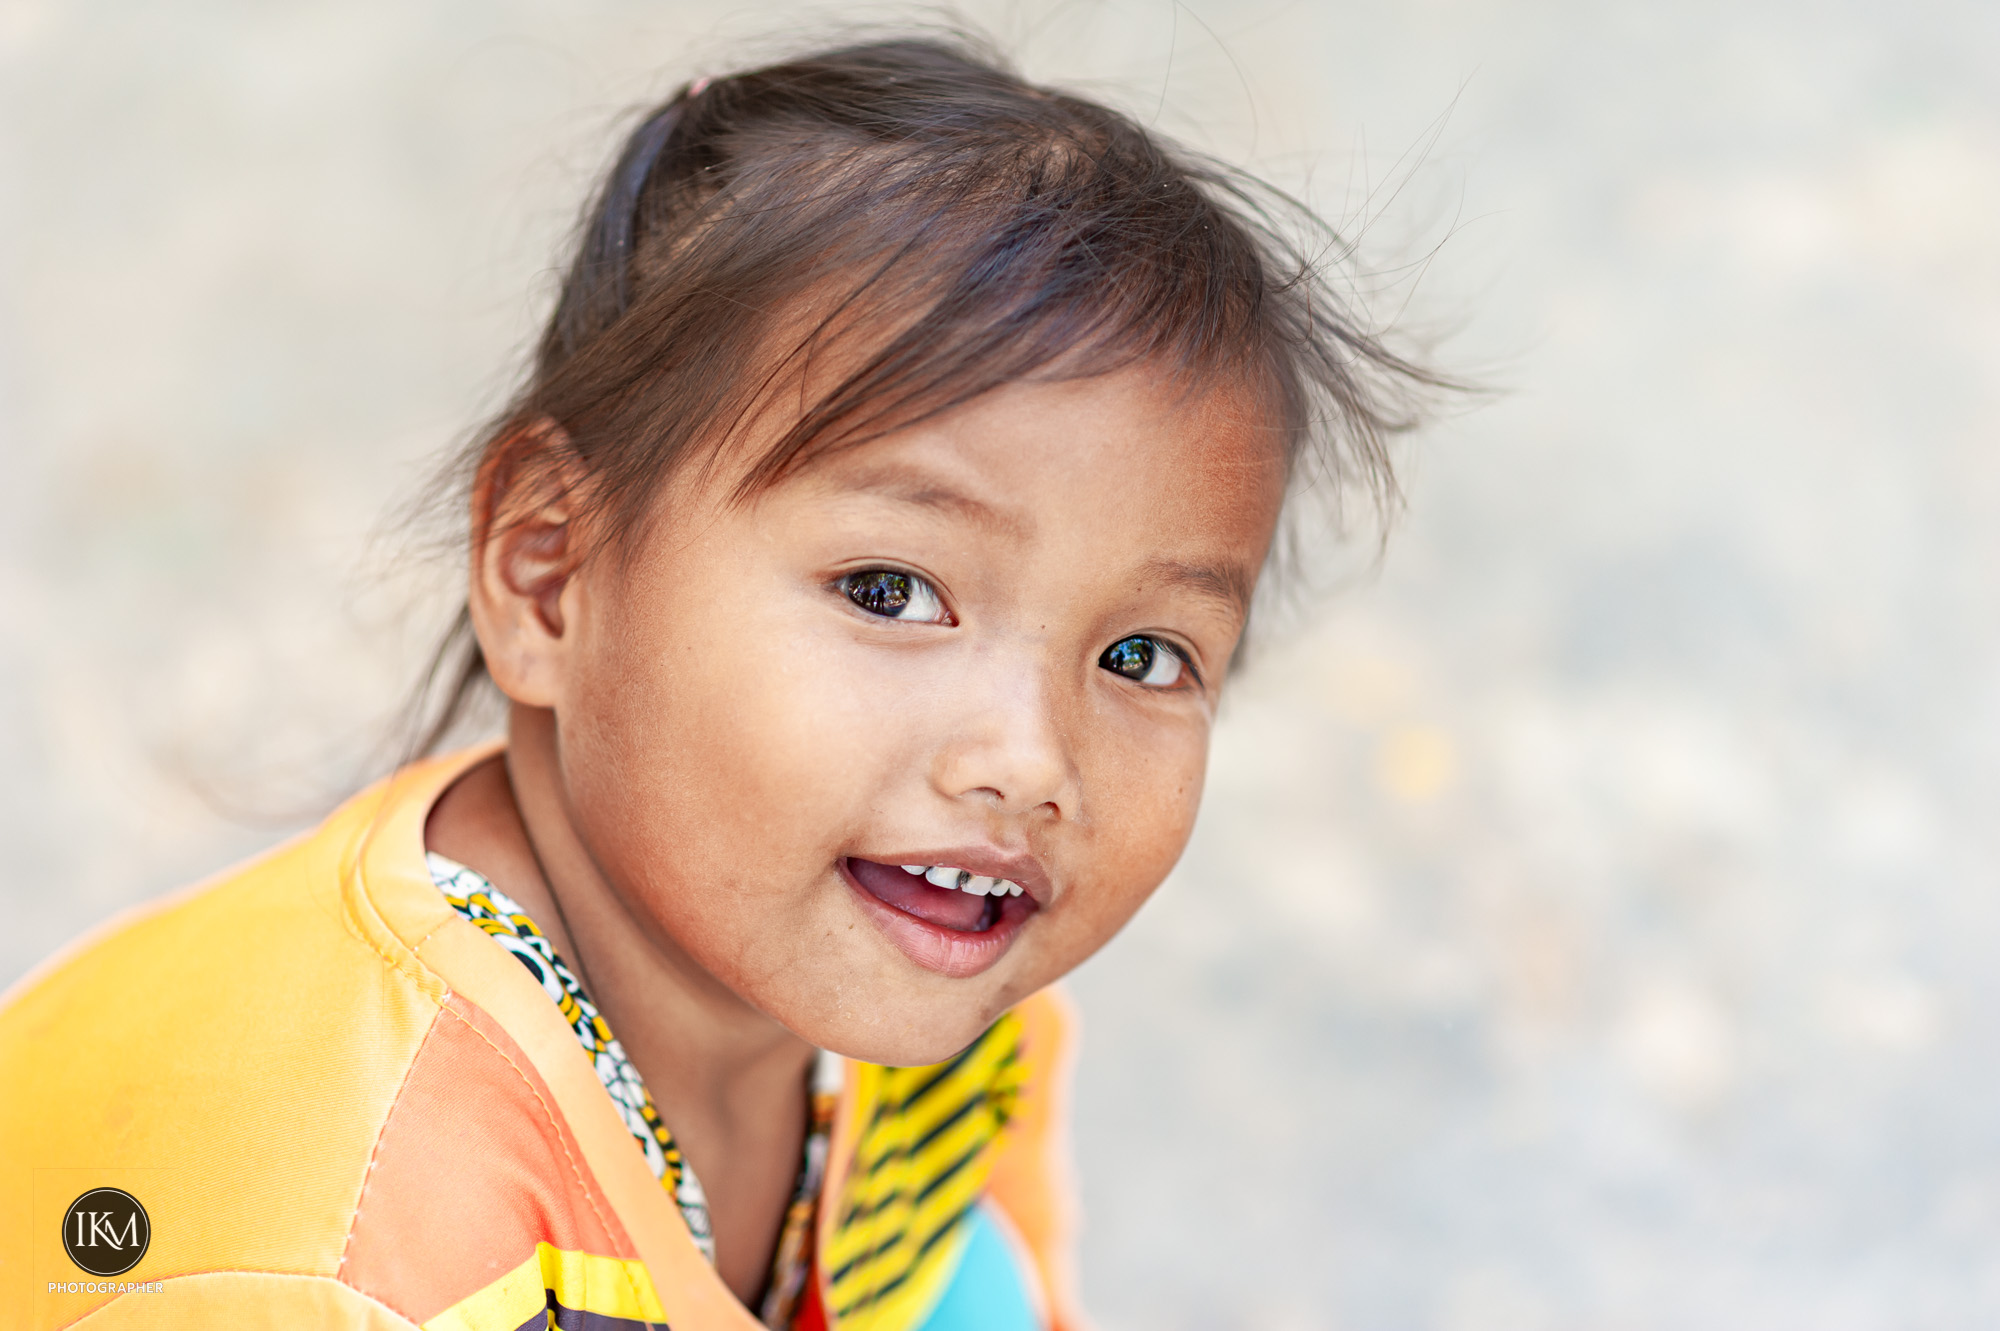
Are all pictures of strangers inherently invasive? How far does a person’s “right” to privacy extend? These are some of the questions that arise when we consider the ethics and legality of taking and posting photos of people we don’t know. According to some sources, taking photos of strangers without their consent is generally legal if they are in a public place where they have no reasonable expectation of privacy.
However, posting those photos on social media or using them for commercial purposes may violate their privacy and publicity rights. Privacy rights protect people from unwanted intrusion into their personal affairs, while publicity rights protect people from unauthorized use of their name, image, or likeness for profit or gain. Therefore, before taking or posting pictures of strangers, we should ask ourselves: Do they have a reasonable expectation of privacy in this situation?
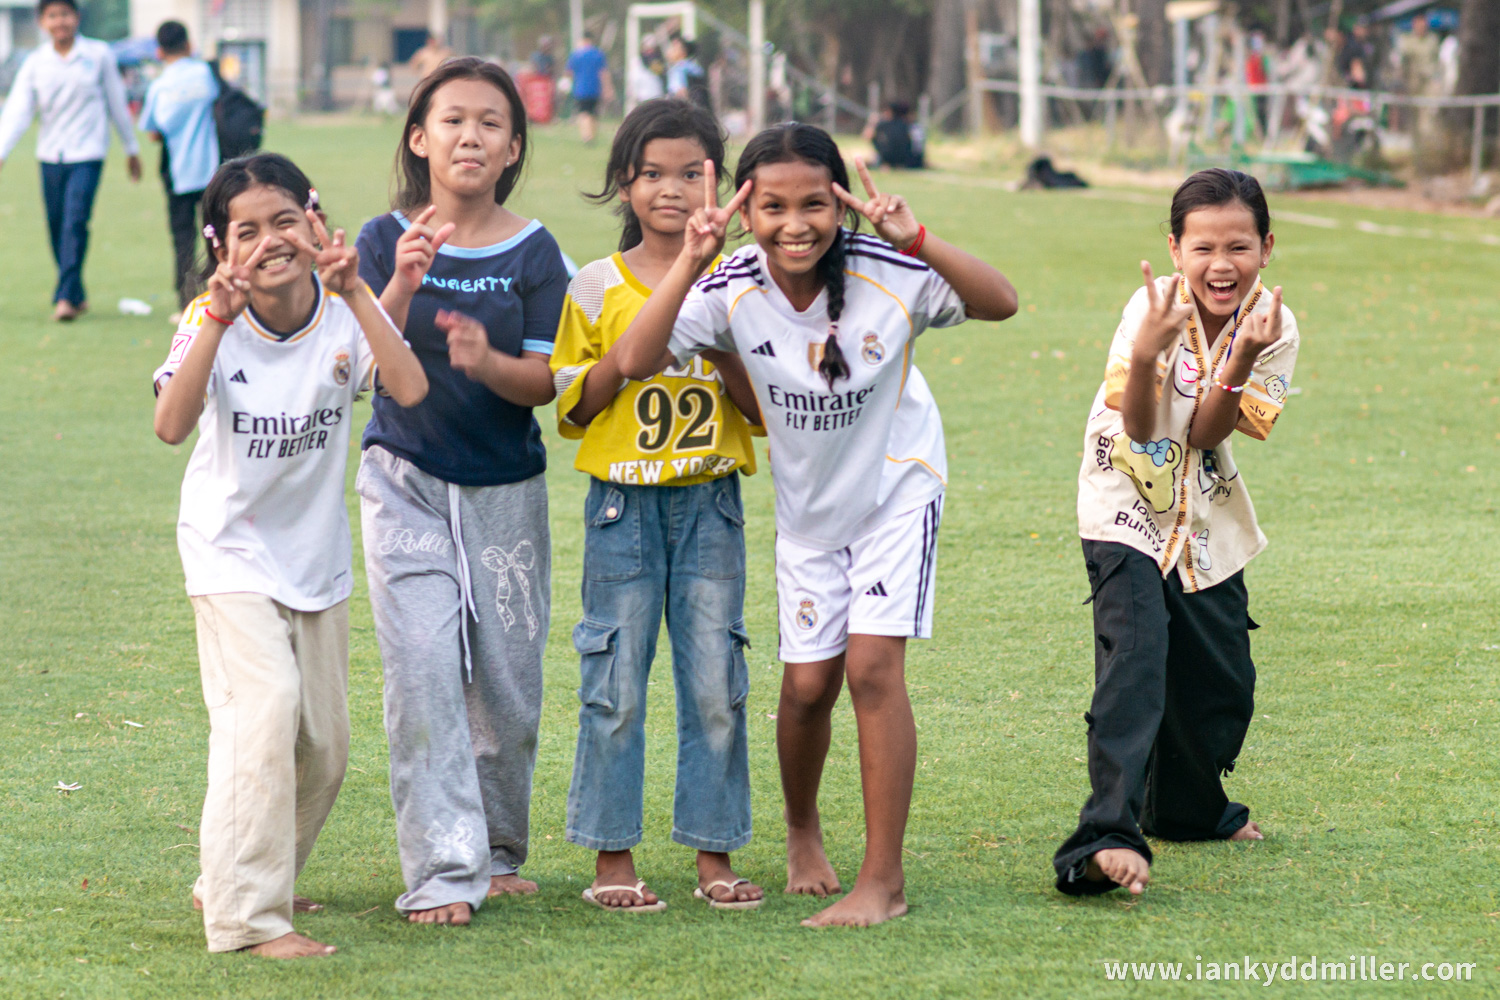
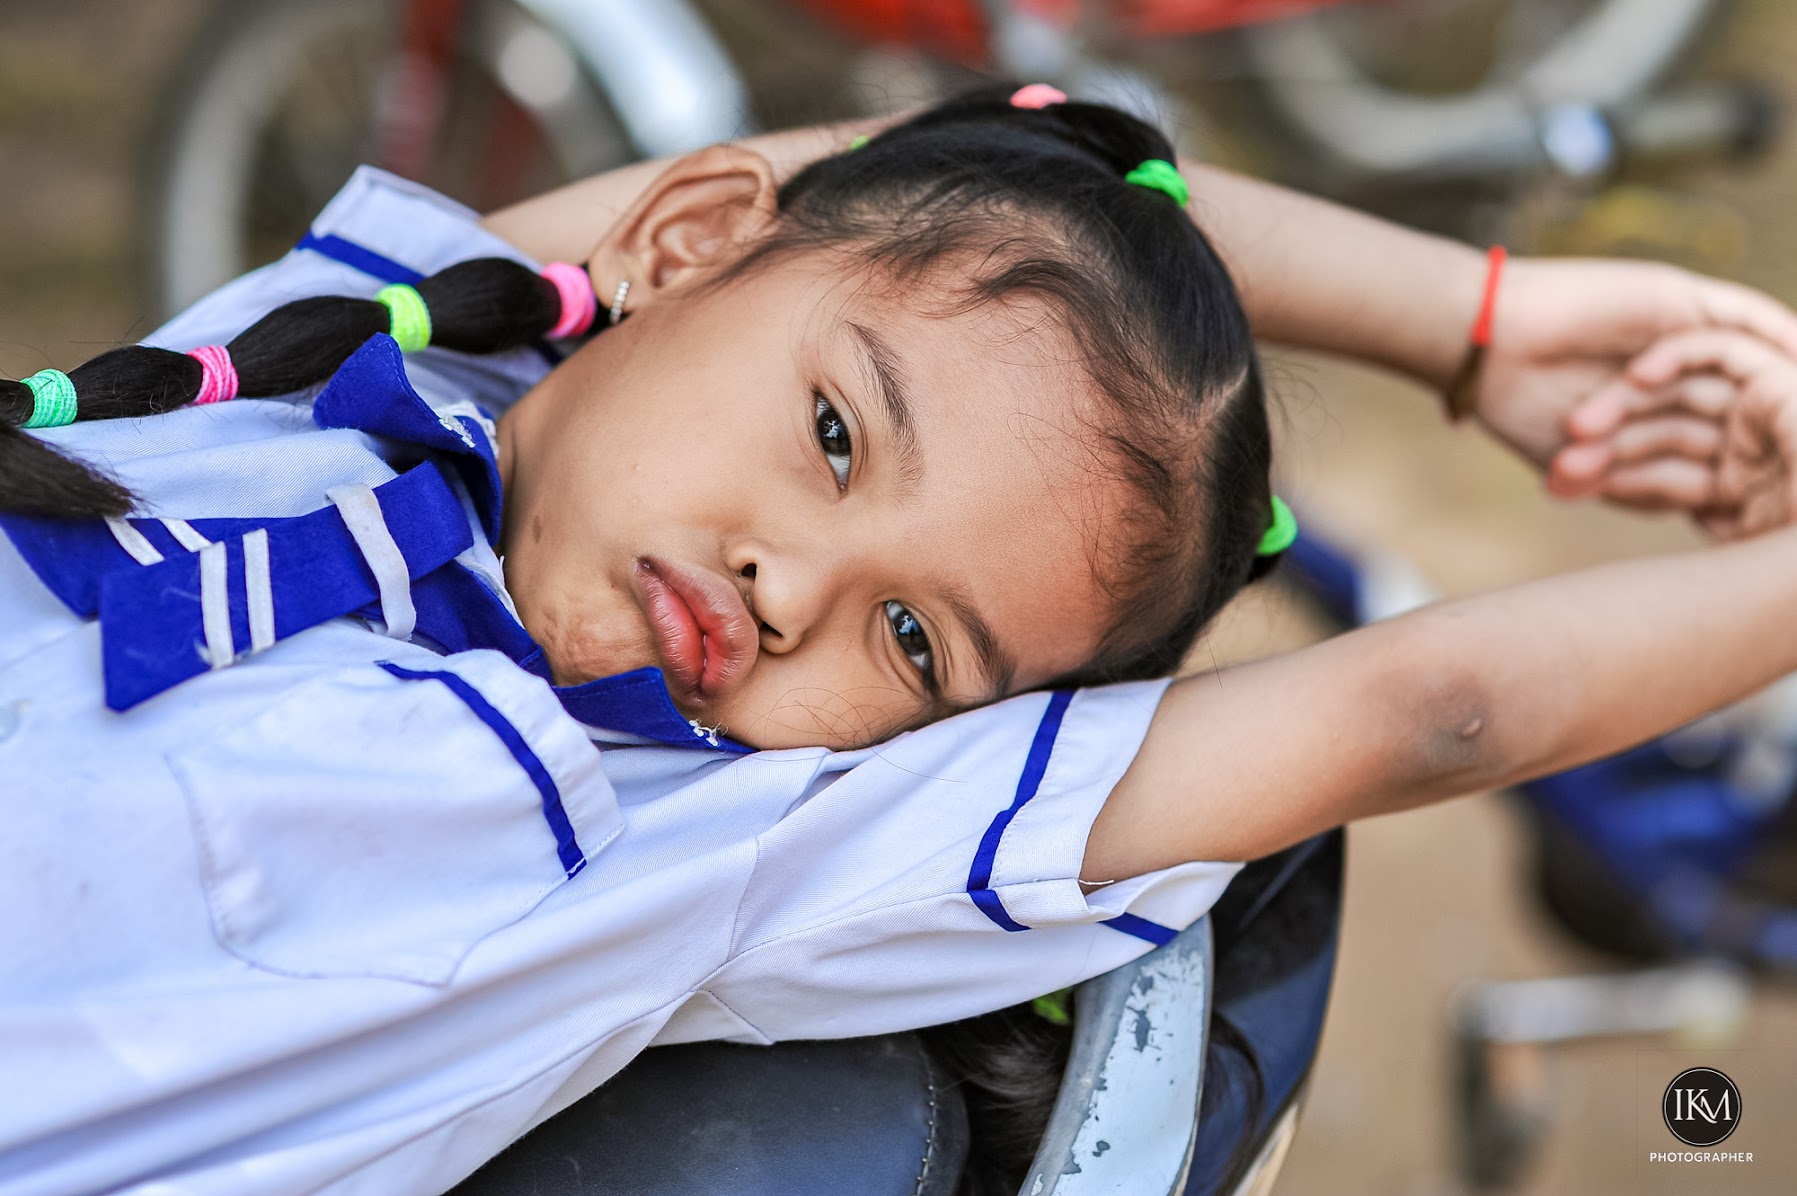
How would they feel if they saw their photo online or in a book? What is the purpose and context of using their image? Is it respectful, informative, artistic, or exploitative? Some photographers may argue that taking pictures of strangers is a form of artistic expression or social commentary and that asking for permission would ruin the spontaneity and authenticity of the moment.
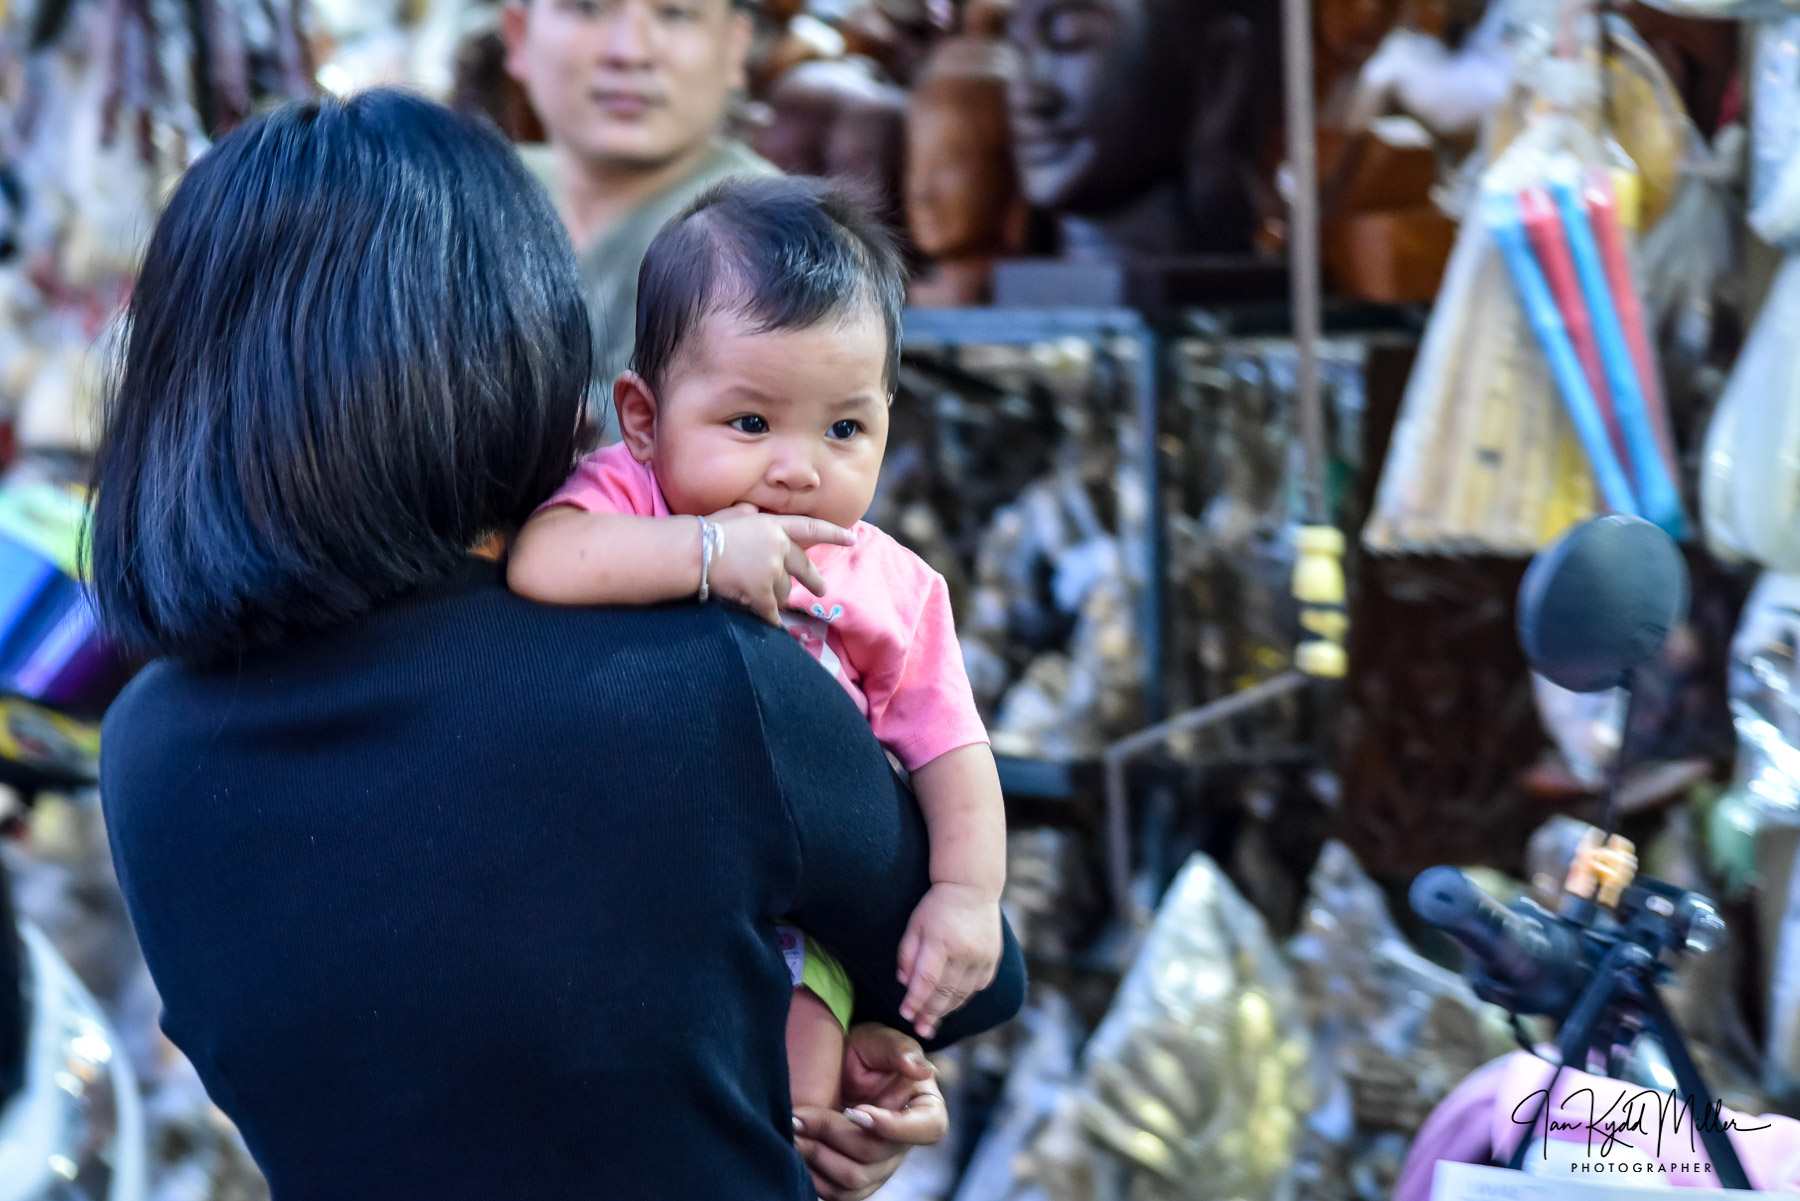
Others may say that taking pictures of strangers is a way of capturing the diversity and beauty of humanity and that sharing them online is a way of connecting with others. However, these arguments do not justify violating someone’s privacy or dignity, especially if the photos are embarrassing, misleading, or harmful to the person depicted.
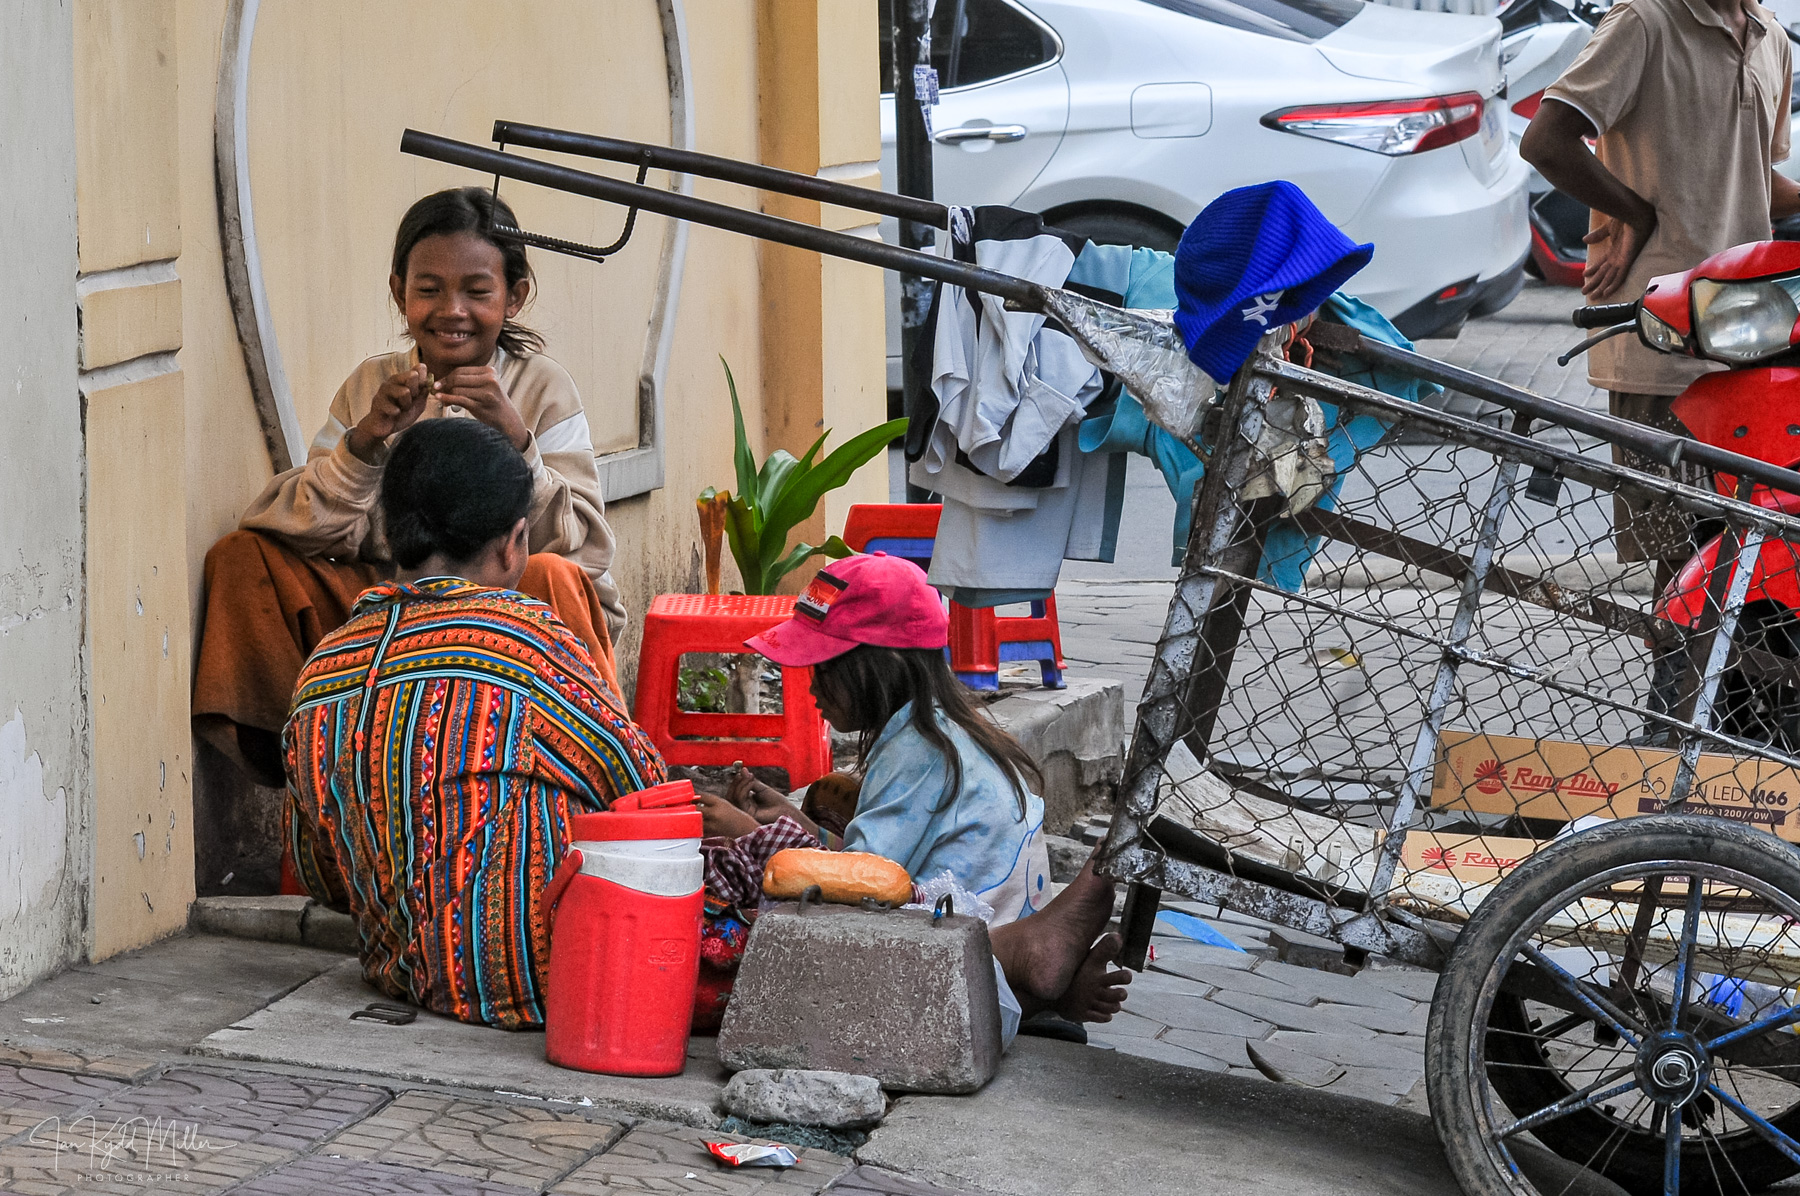
The best practice is to always ask for permission before taking or posting pictures of strangers unless it is clearly impossible or impractical to do so. This shows respect and courtesy, and may also lead to interesting conversations and stories. If permission is denied or cannot be obtained, we should refrain from taking or posting the picture, or at least blur out any identifying features. We should also be mindful of the laws and customs of different countries and cultures when travelling and photographing people abroad. Taking pictures of strangers can be a rewarding and enriching experience, but it also comes with responsibilities and risks. We should always consider the impact of our actions on others, and treat them as we would like to be treated ourselves.
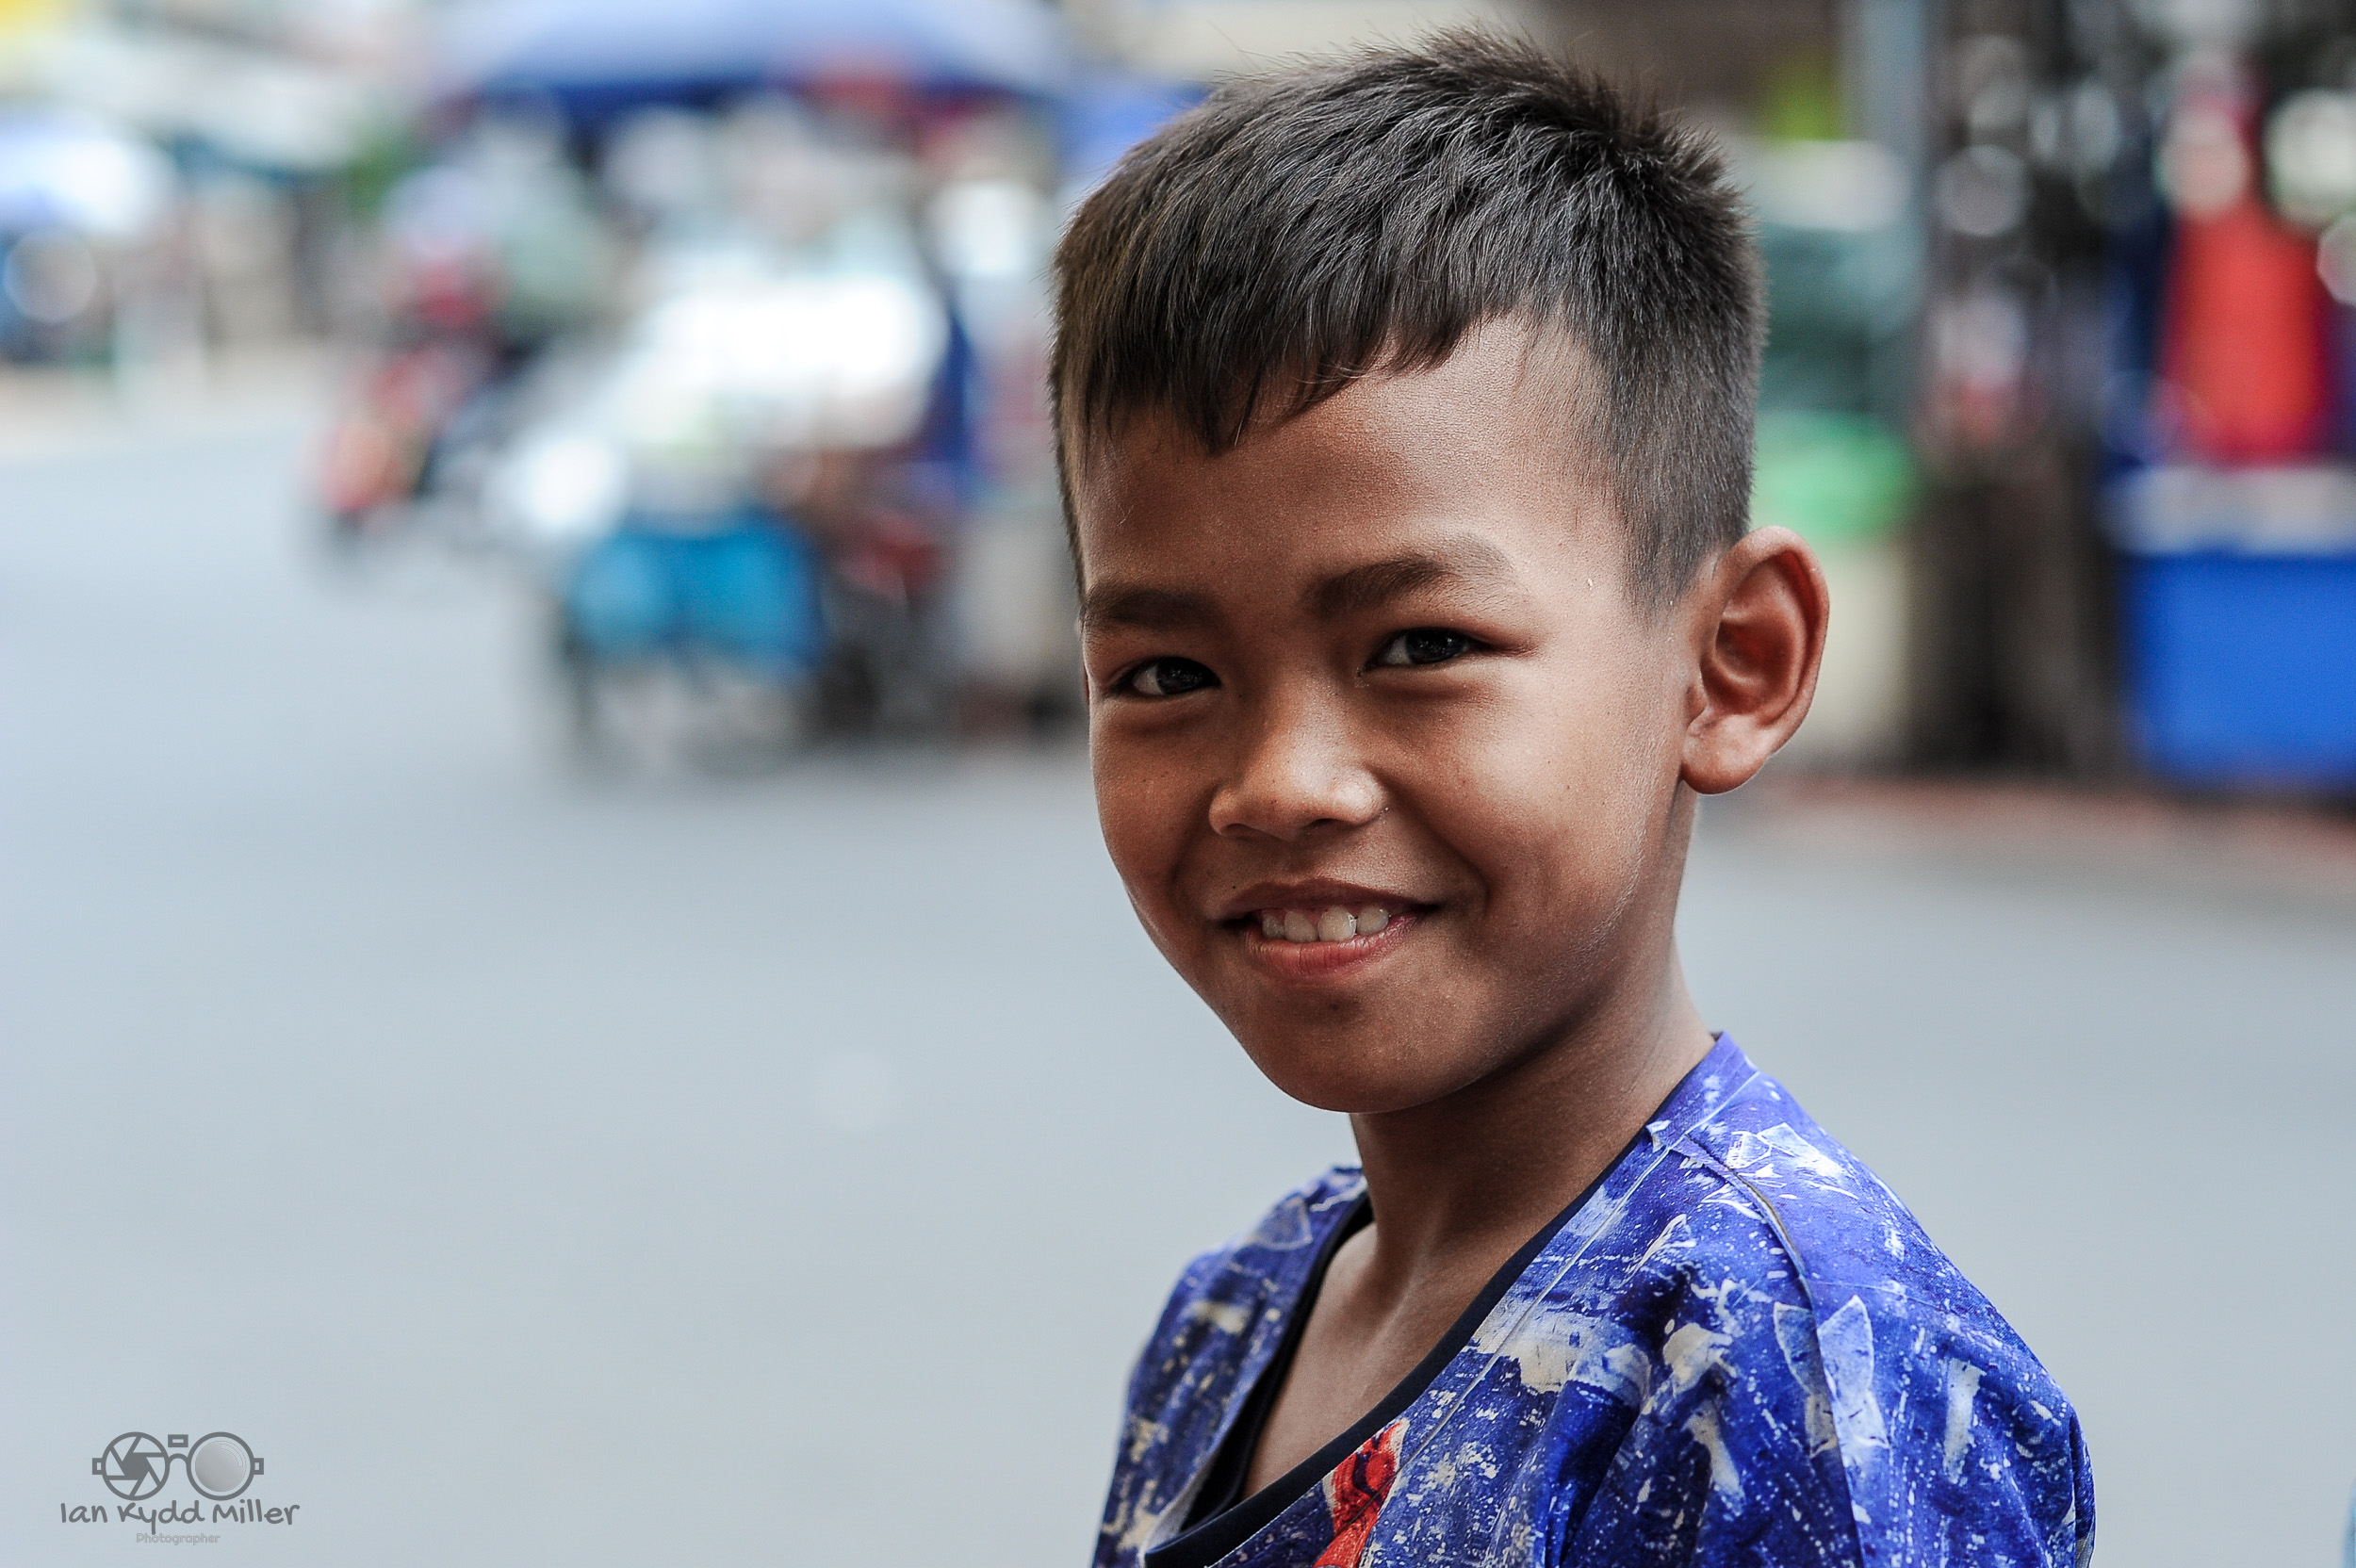
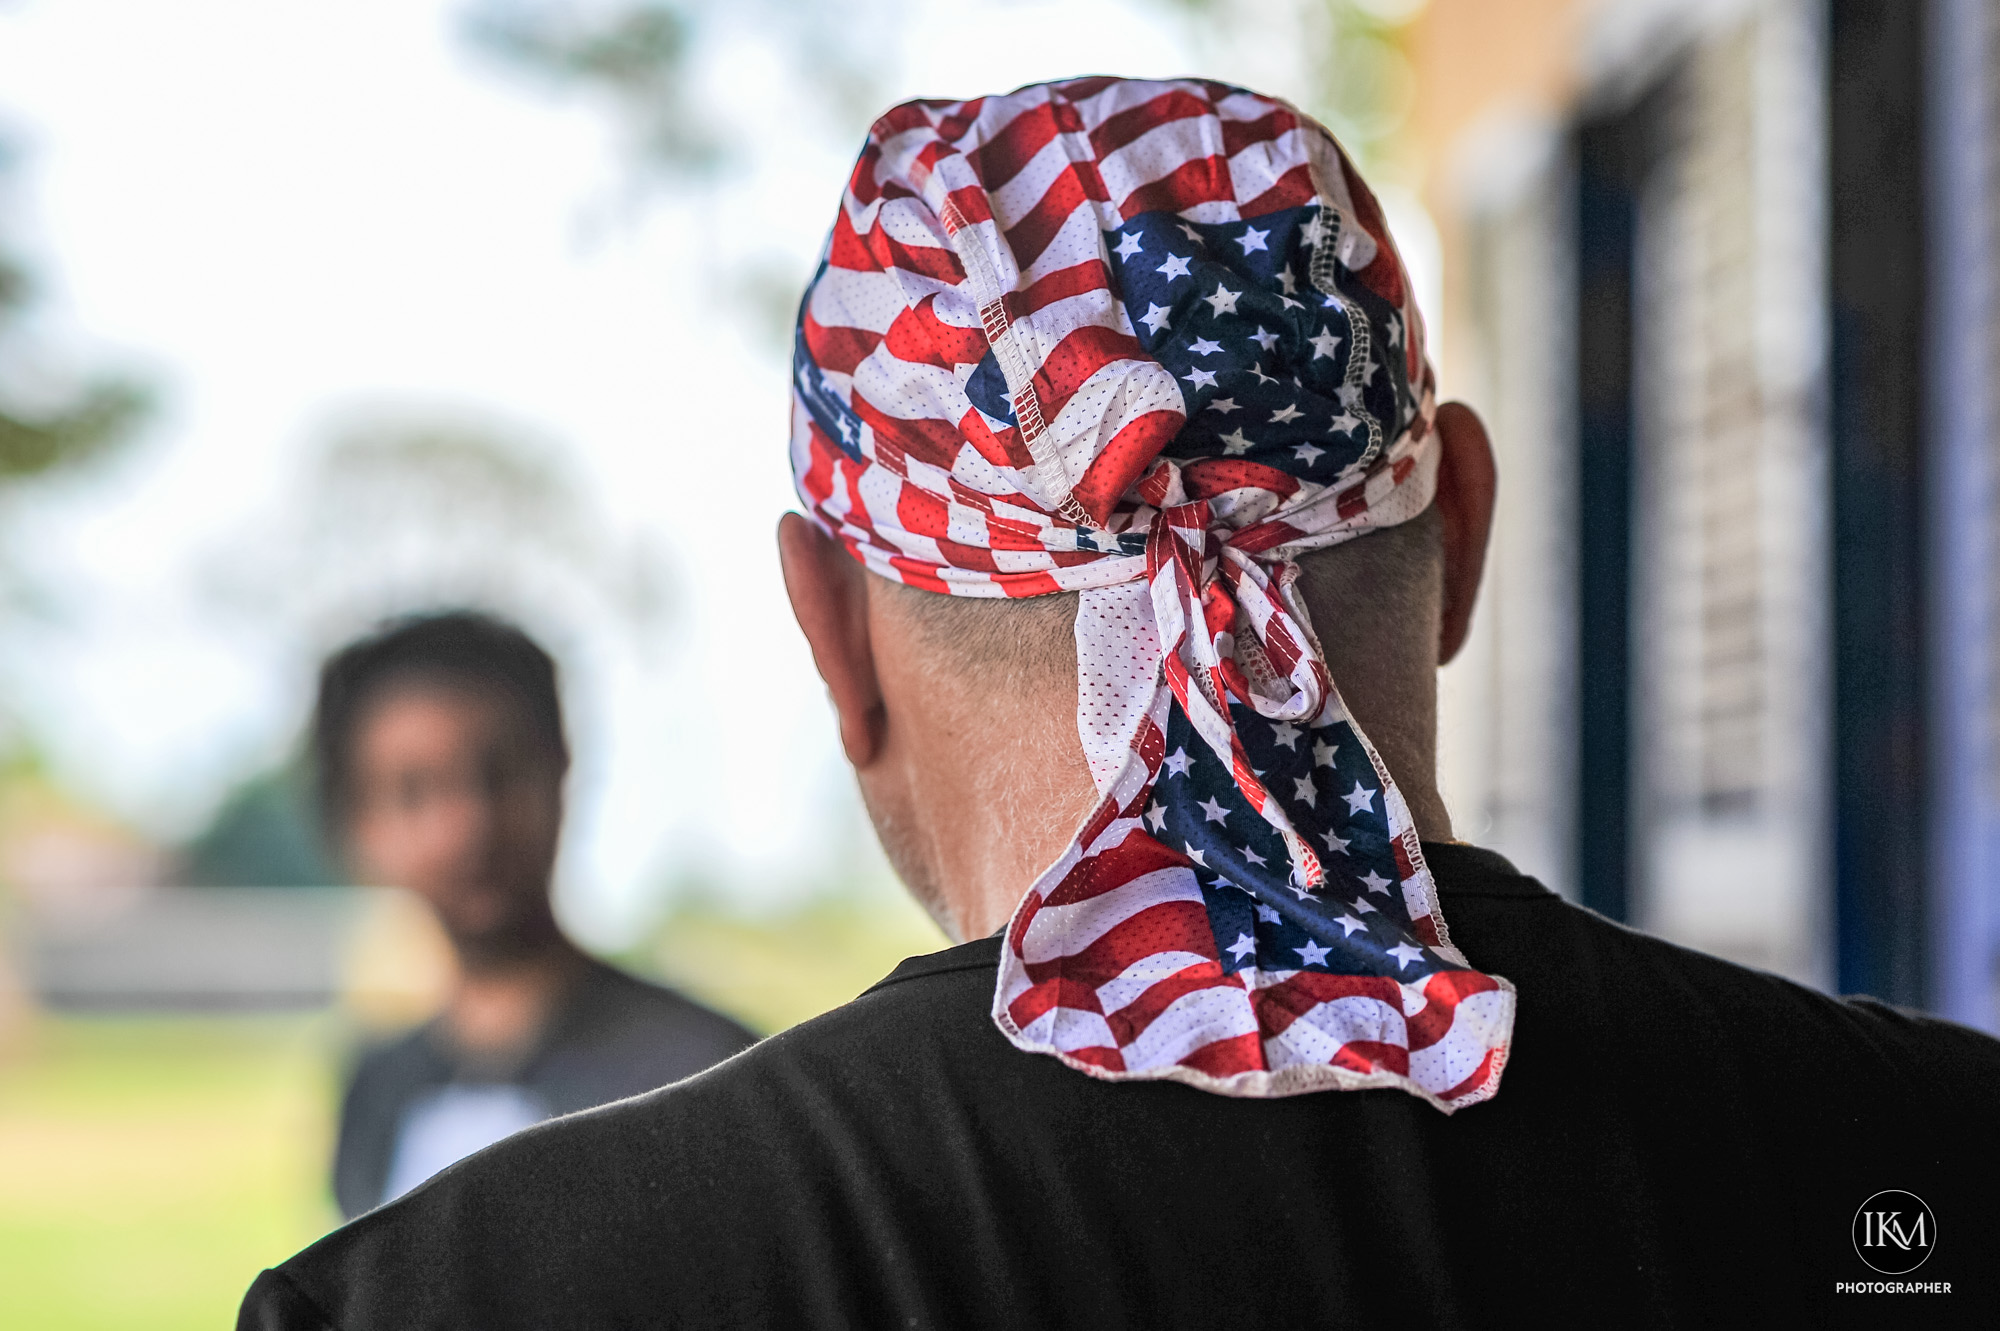
This raises one of the most fascinating gray areas in modern ethics: the tension between legality and morality when it comes to photographing strangers.
📸 Legality vs. Ethics
Legal side: In most countries, taking photos of people in public spaces is allowed because there’s no “reasonable expectation of privacy” in a park, street, or plaza.
Ethical side: Just because it’s legal doesn’t mean it’s respectful. Posting those images online can expose strangers to unwanted attention, ridicule, or even harassment.
⚖️ Two key rights at play
Privacy rights: Protect against intrusion into personal life. Even in public, people may feel violated if photographed in vulnerable or intimate moments.
Publicity rights: Protect against unauthorized commercial use of someone’s likeness. Using a stranger’s photo in ads or merchandise without consent can be unlawful.
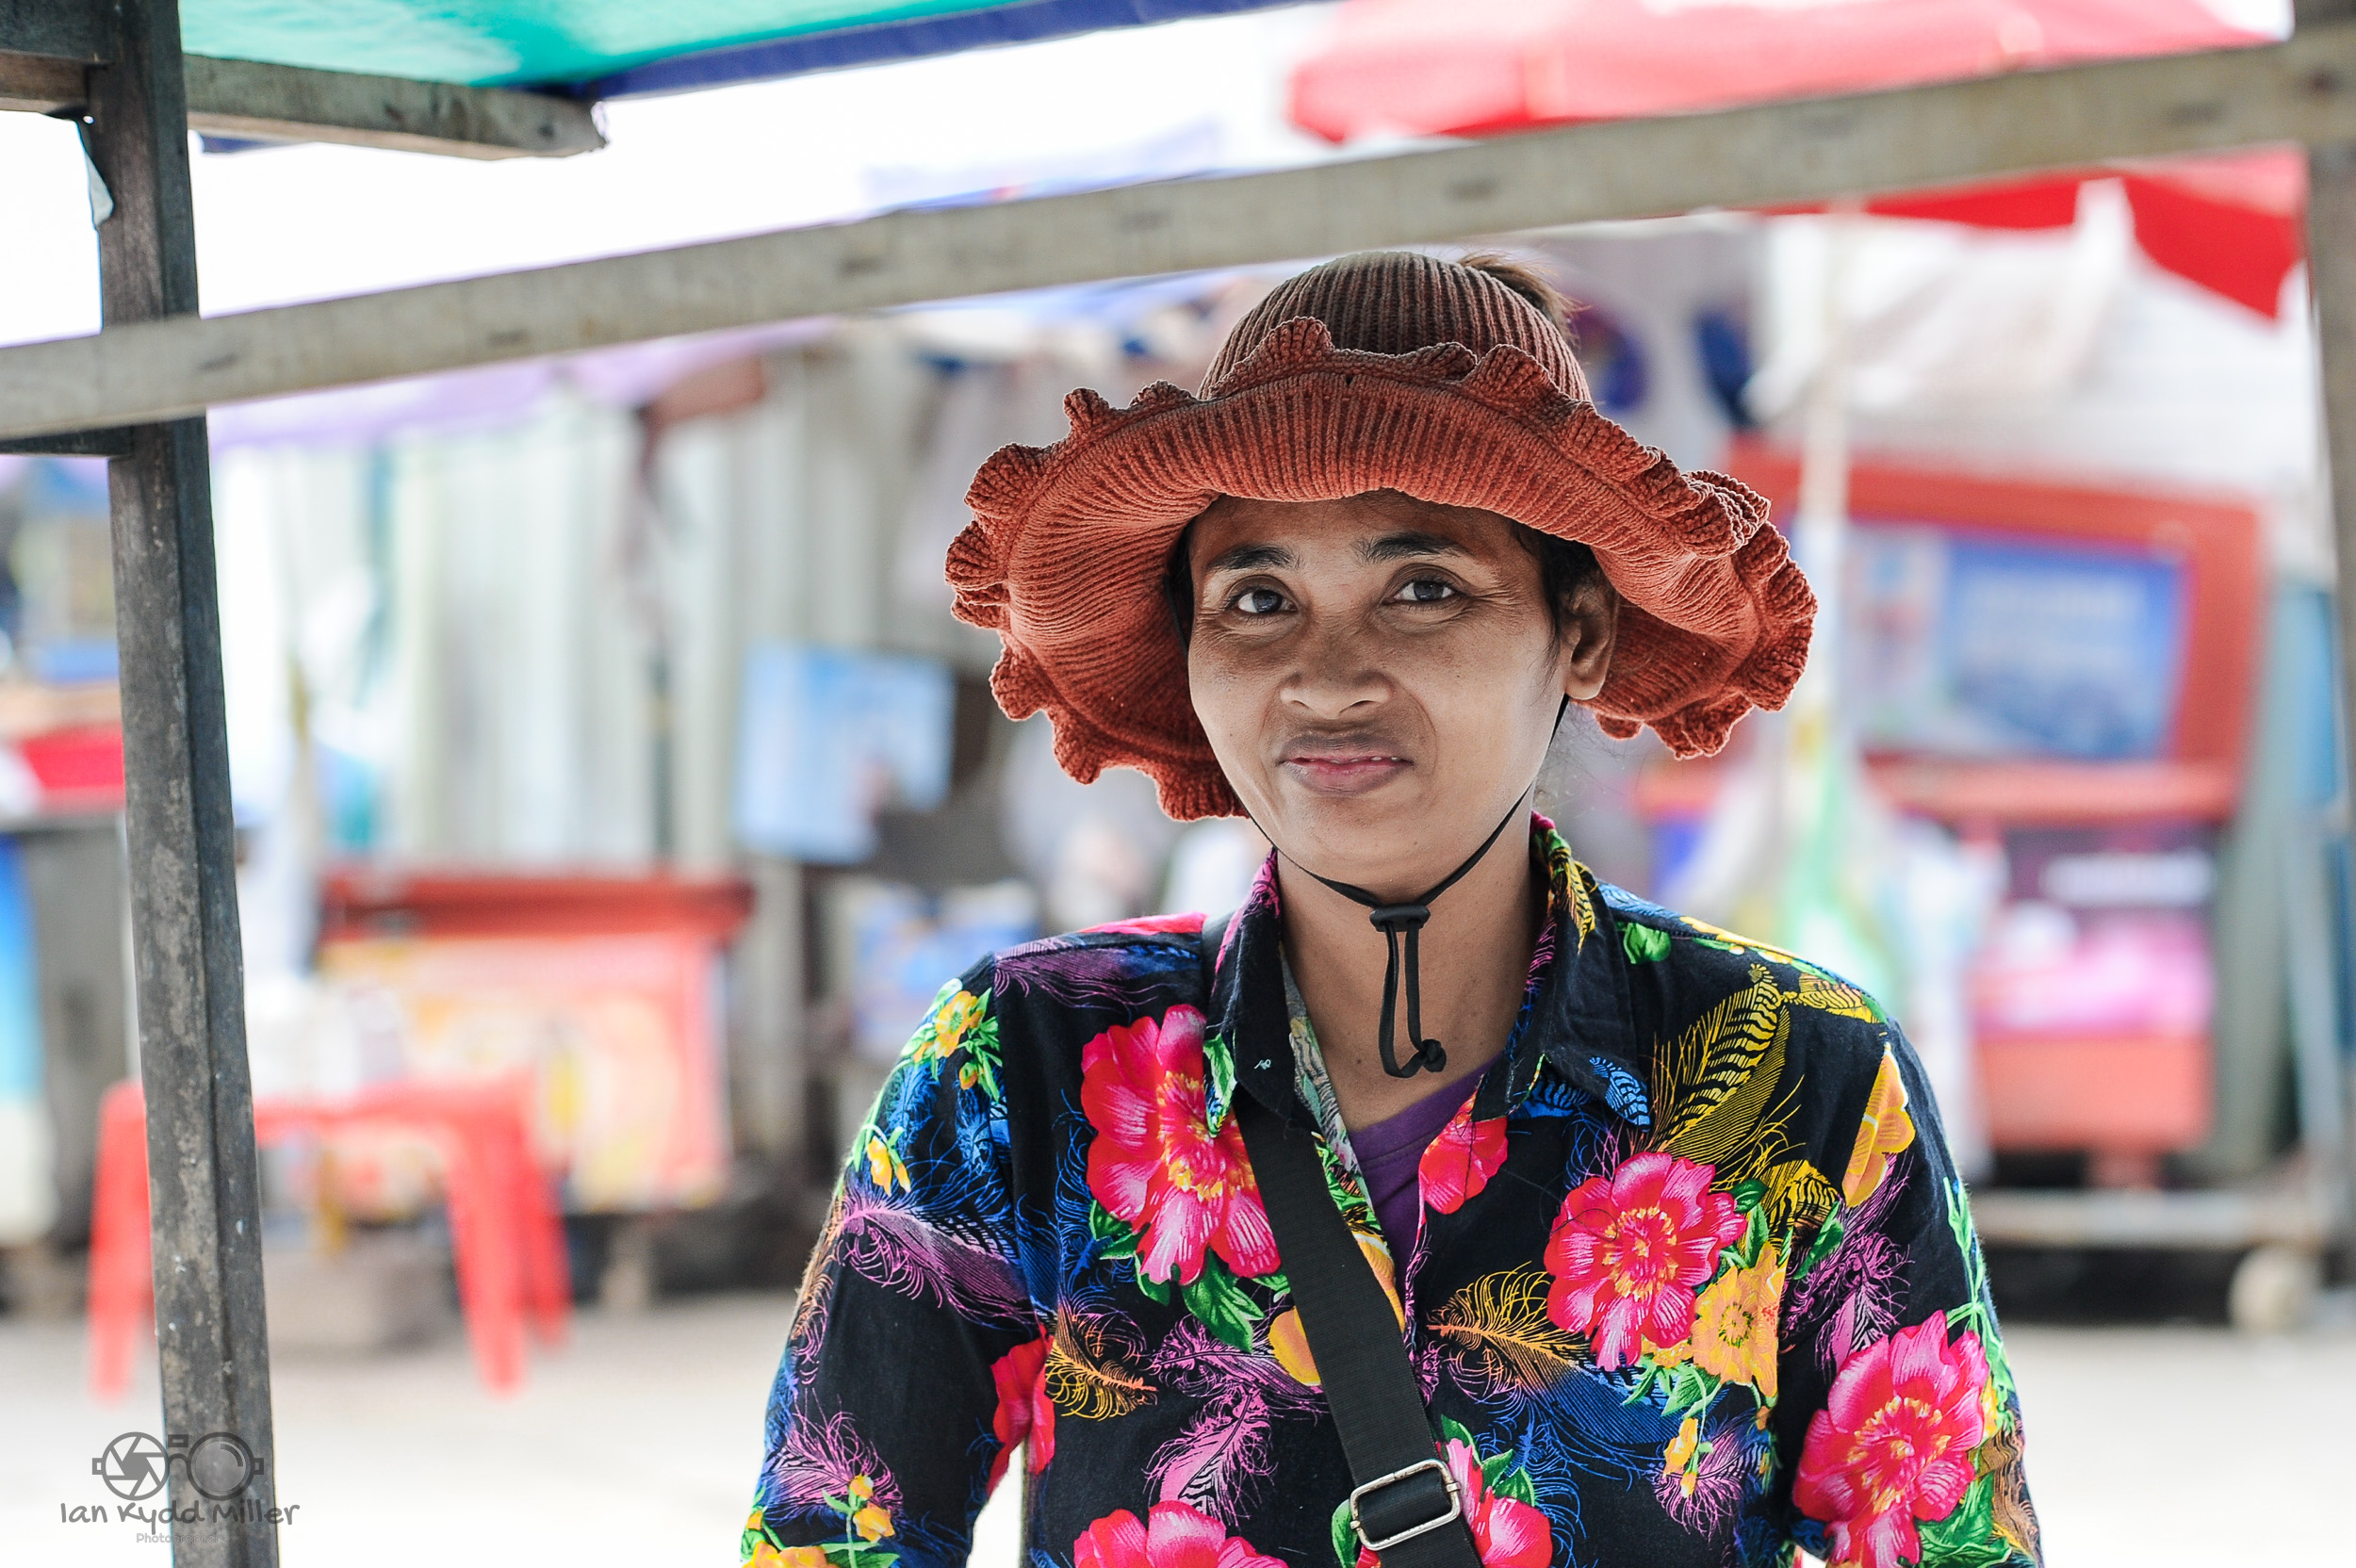
🎨 The artistic argument
Street photographers often defend candid shots as authentic social commentary. They argue that asking permission alters the moment.
Yet, critics point out that spontaneity doesn’t outweigh dignity. A photo that embarrasses or misrepresents someone can cause real harm.
🌍 Cultural differences
In some countries, photographing strangers without consent is frowned upon or even illegal.
In others, candid street photography is celebrated as an art form.
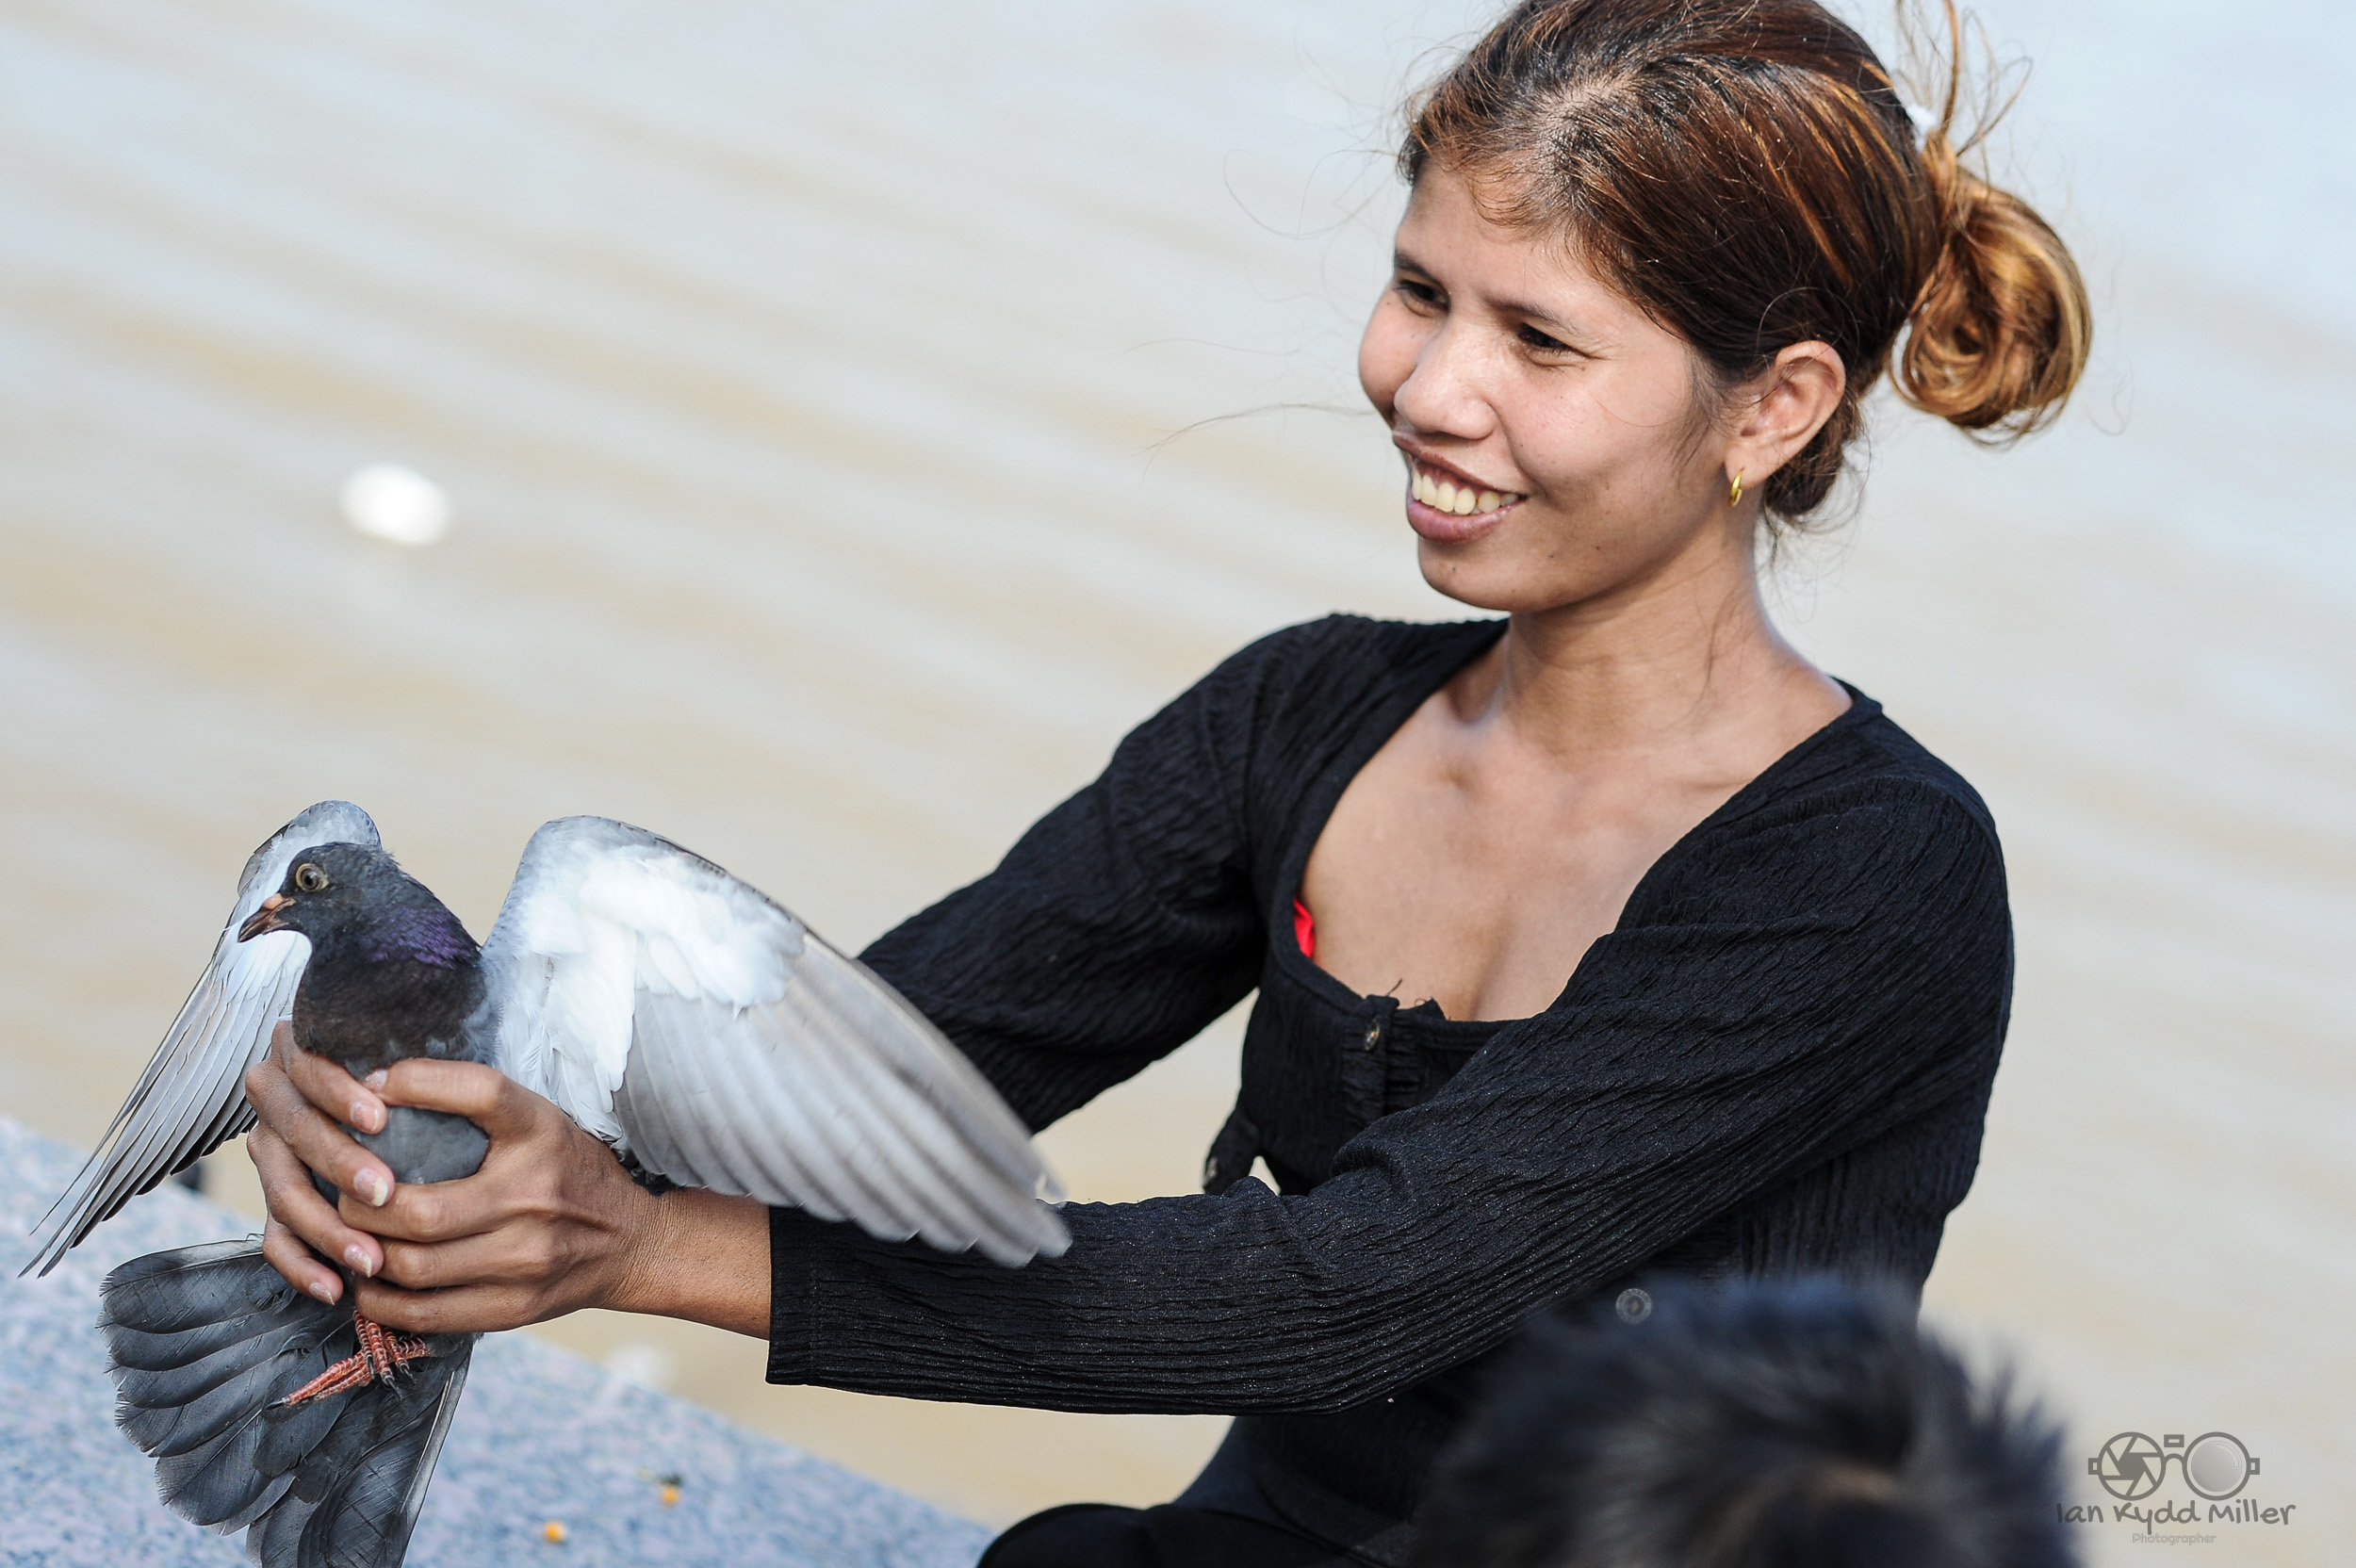
✨ Best practice
Ask permission when possible.
Blur identifying features if consent isn’t given.
Consider intent: is the photo respectful, informative, or exploitative?
Treat others as you’d want to be treated if the roles were reversed.
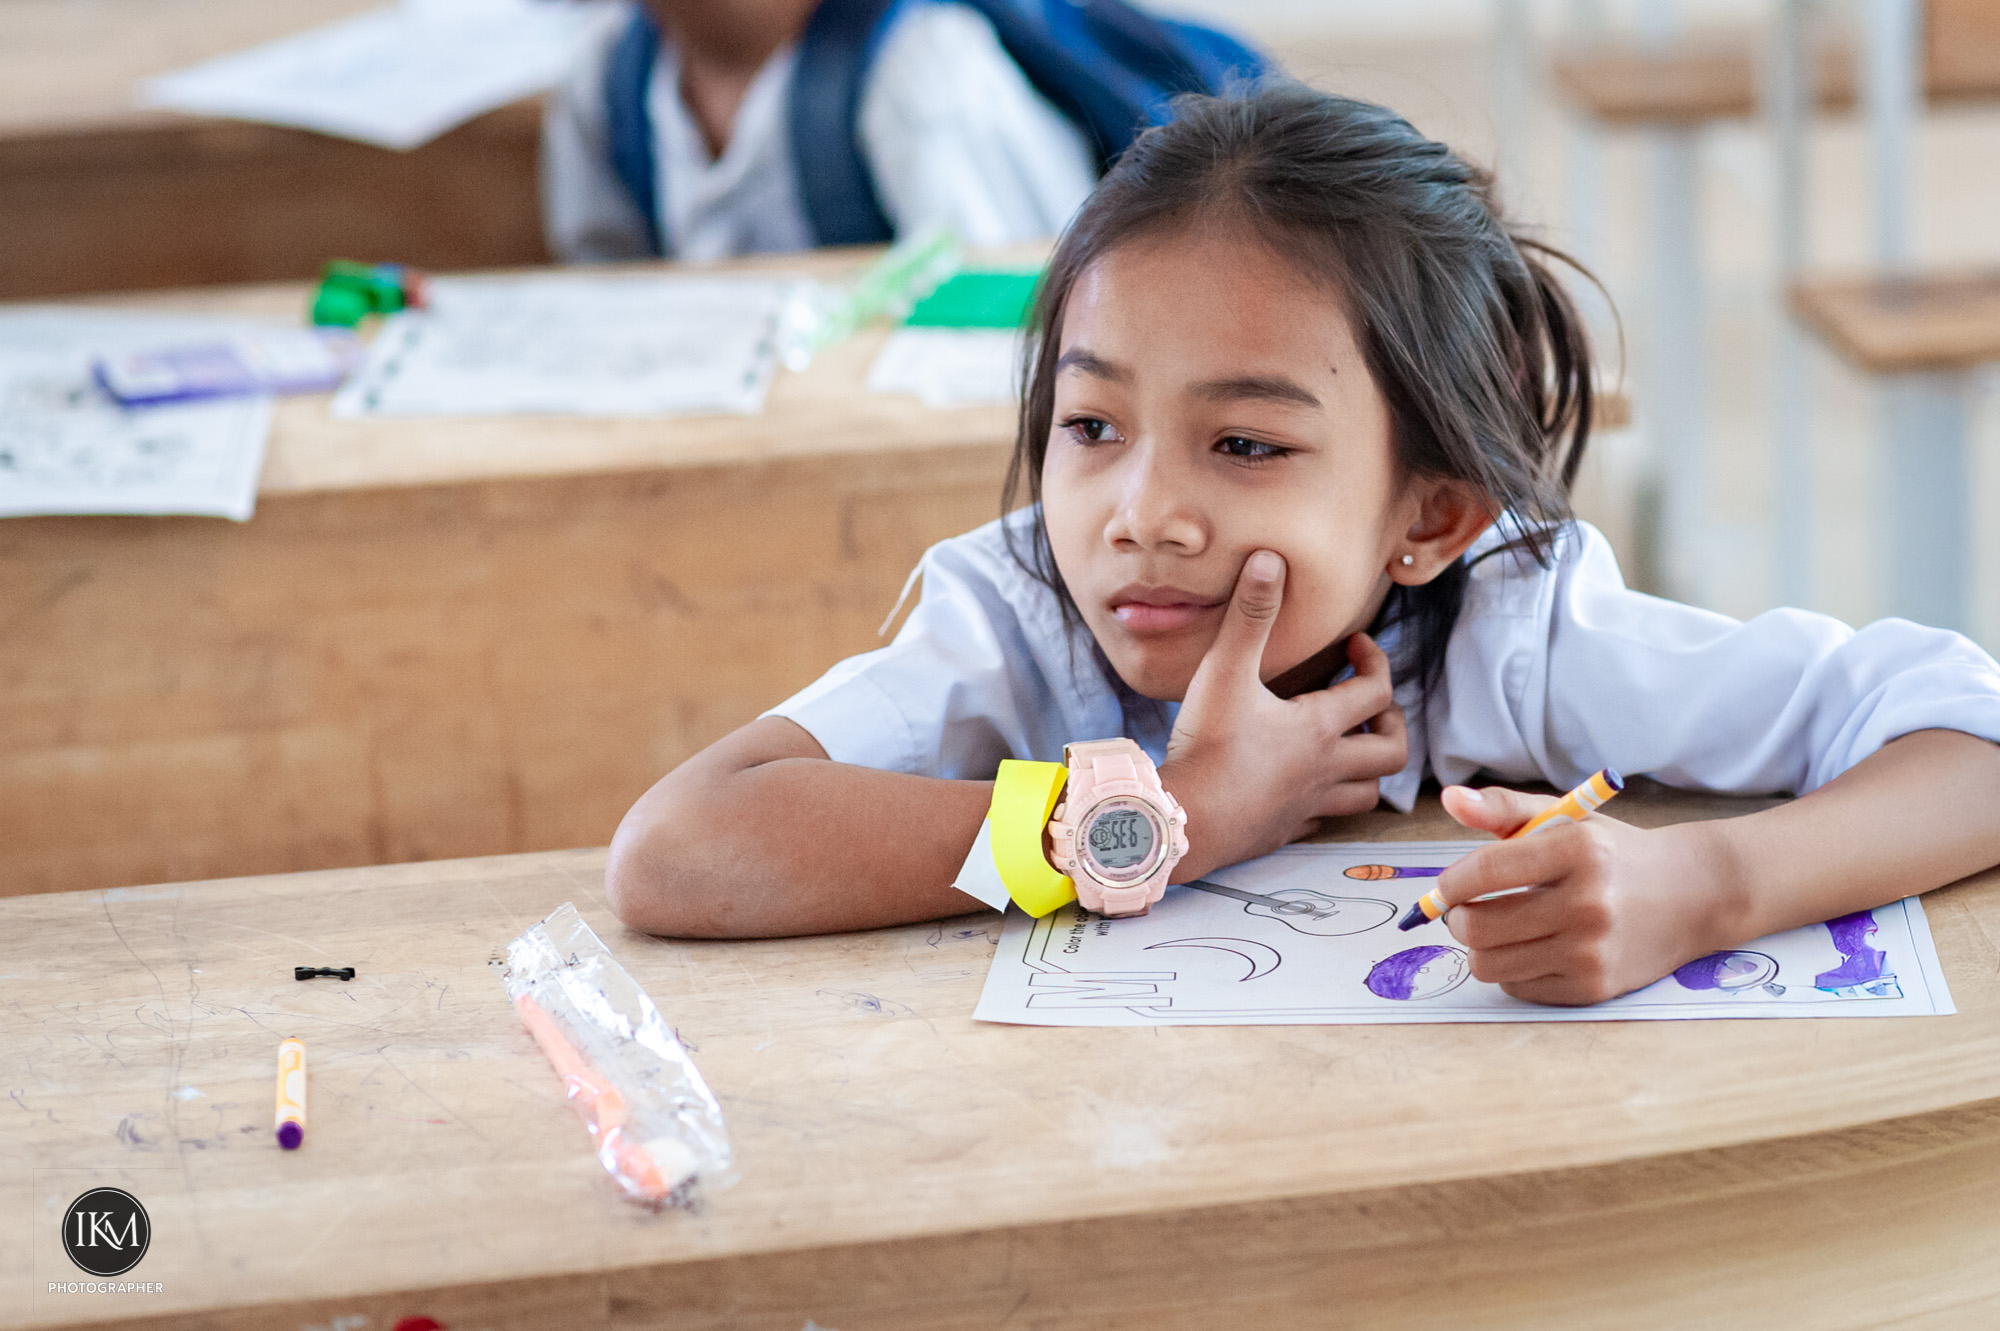
The heart of the issue is this: a stranger’s image is not just a visual object, it’s part of their identity. Respecting that identity is what separates art from exploitation.
In an era where photographers obsess over the latest mirrorless bodies and razor-sharp professional lenses, there is something quietly satisfying about picking up older equipment and discovering just how capable it remains. One combination that deserves far more attention than it receives is the Nikon D300S paired with the Nikon 24-120mm f/4G VR.
At first glance it seems like an odd match. The 24-120mm f/4G was designed as a full-frame lens, intended for cameras such as the D700, D750, D800 and D810. The D300S, meanwhile, is a professional DX camera from another era entirely. Yet together they create a surprisingly versatile photographic tool that remains highly relevant today.
The first thing to understand is the effect of the D300S’s crop sensor. The 1.5x crop factor transforms the lens into the equivalent of a 36-180mm zoom. While the numbers on the barrel remain unchanged, the field of view narrows considerably.
Some photographers immediately view this as a disadvantage. They see the loss of true wide-angle coverage and dismiss the combination. They have a point. Twenty-four millimetres on a full-frame camera is genuinely wide. On the D300S it becomes roughly equivalent to a moderate 36mm lens. For landscape photographers or those who enjoy dramatic architectural images, this limitation can become frustrating.
But photography is always about trade-offs, and what is lost at one end is often gained elsewhere.
The D300S uses only the central portion of the lens’s image circle. This is significant because the centre of most lenses is where optical performance is strongest. Corner softness becomes largely irrelevant. Vignetting virtually disappears. Edge performance improves. Distortion is less obvious than it is on full-frame bodies.
In practical use, the lens often appears sharper on the D300S than many photographers expect.
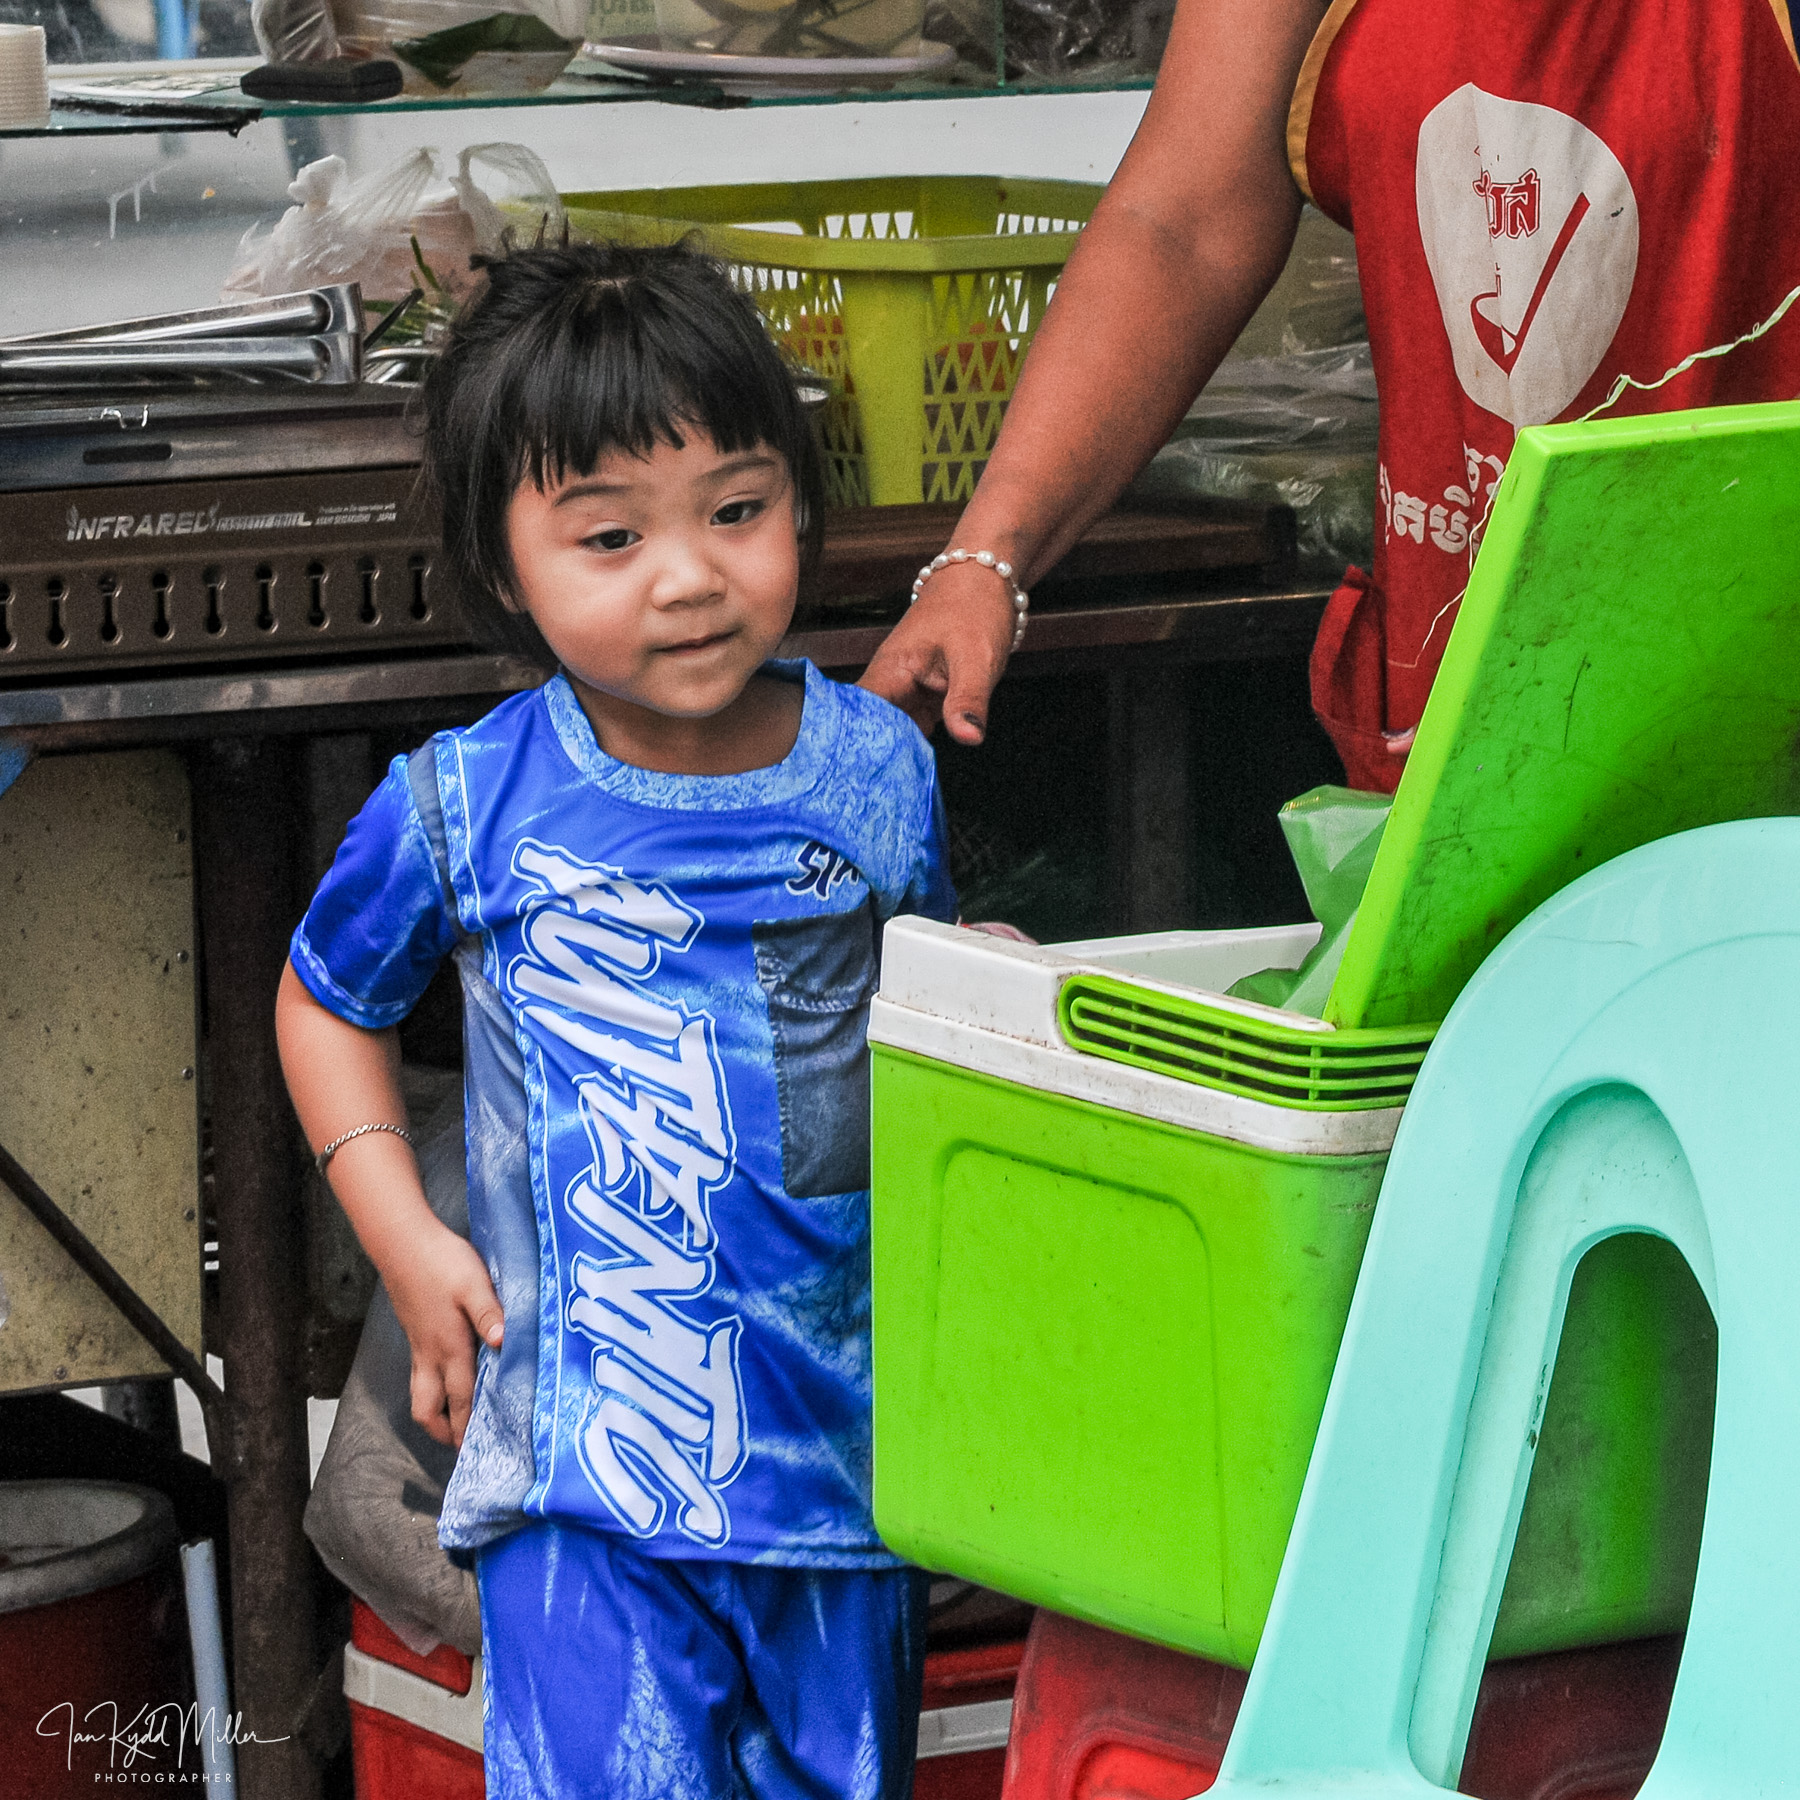
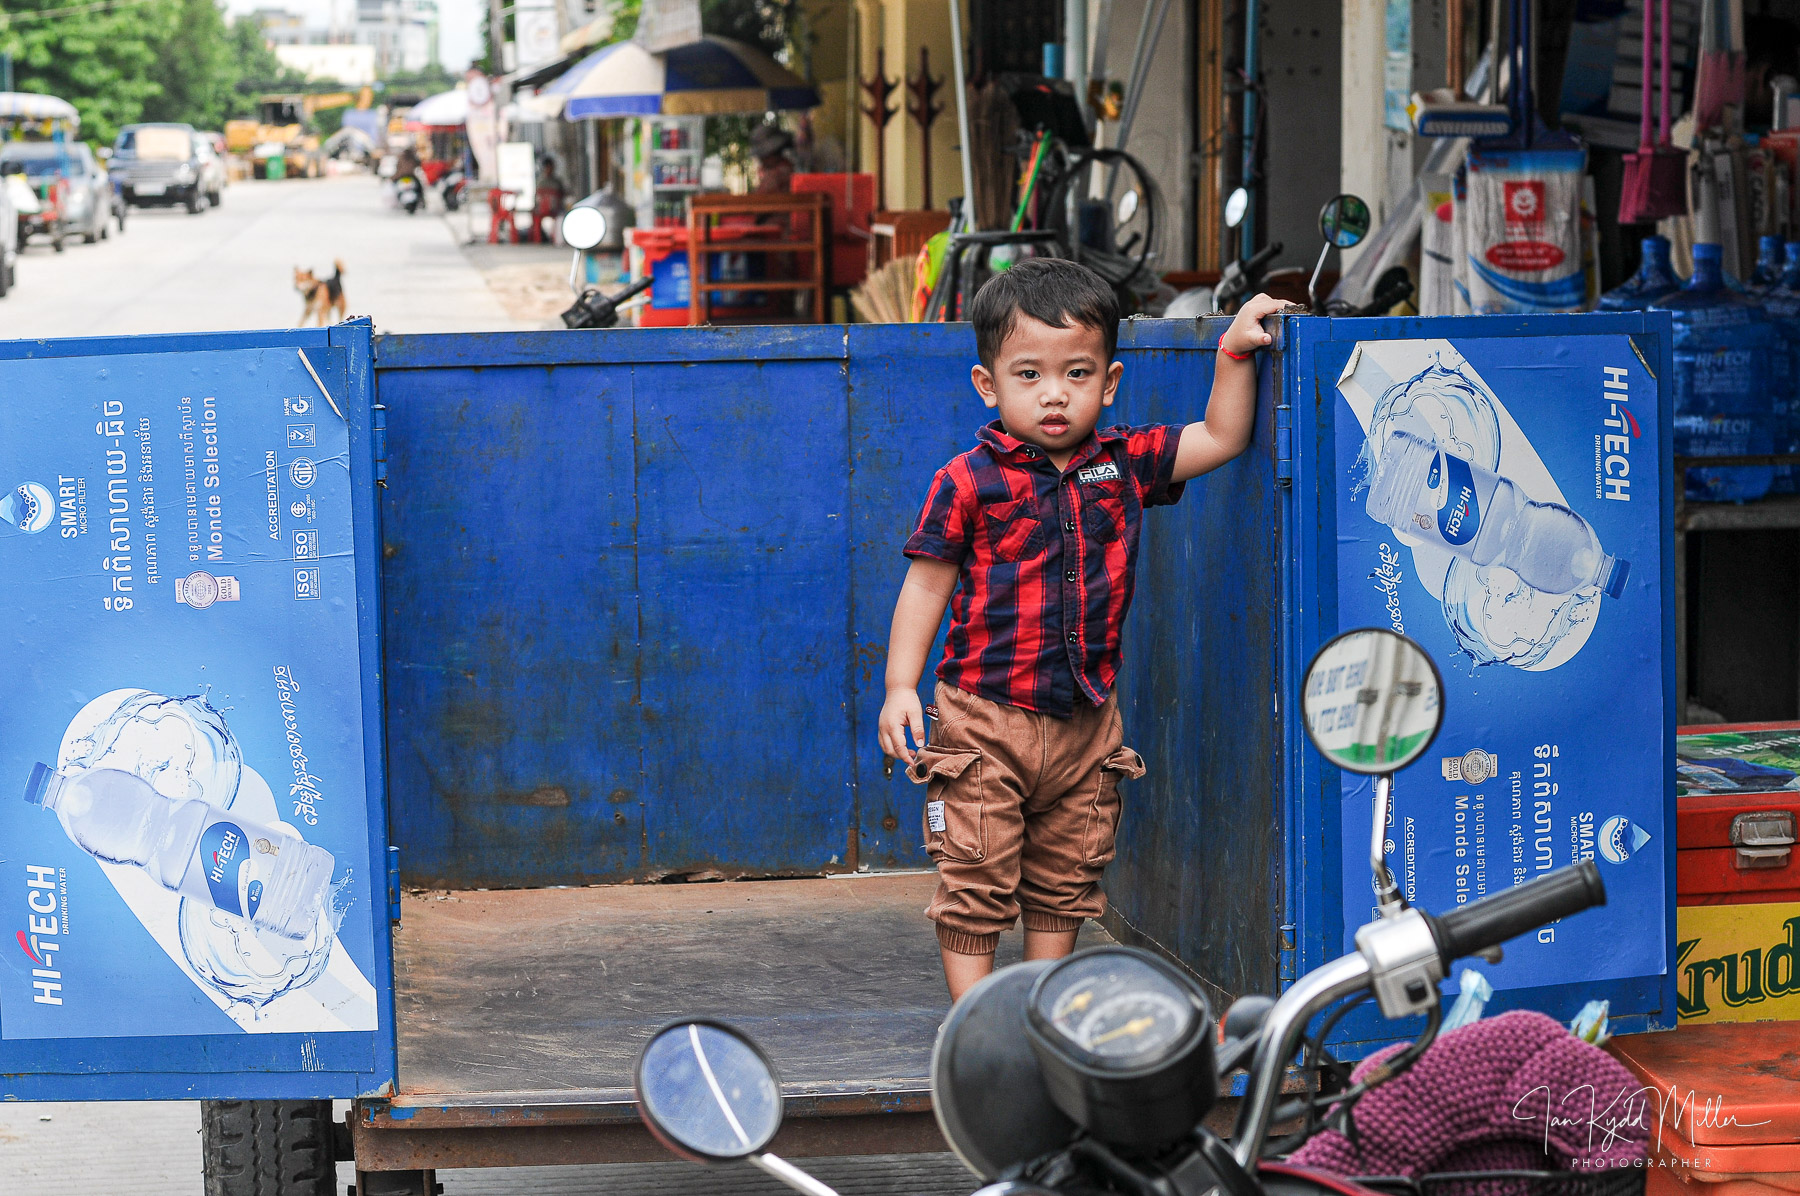
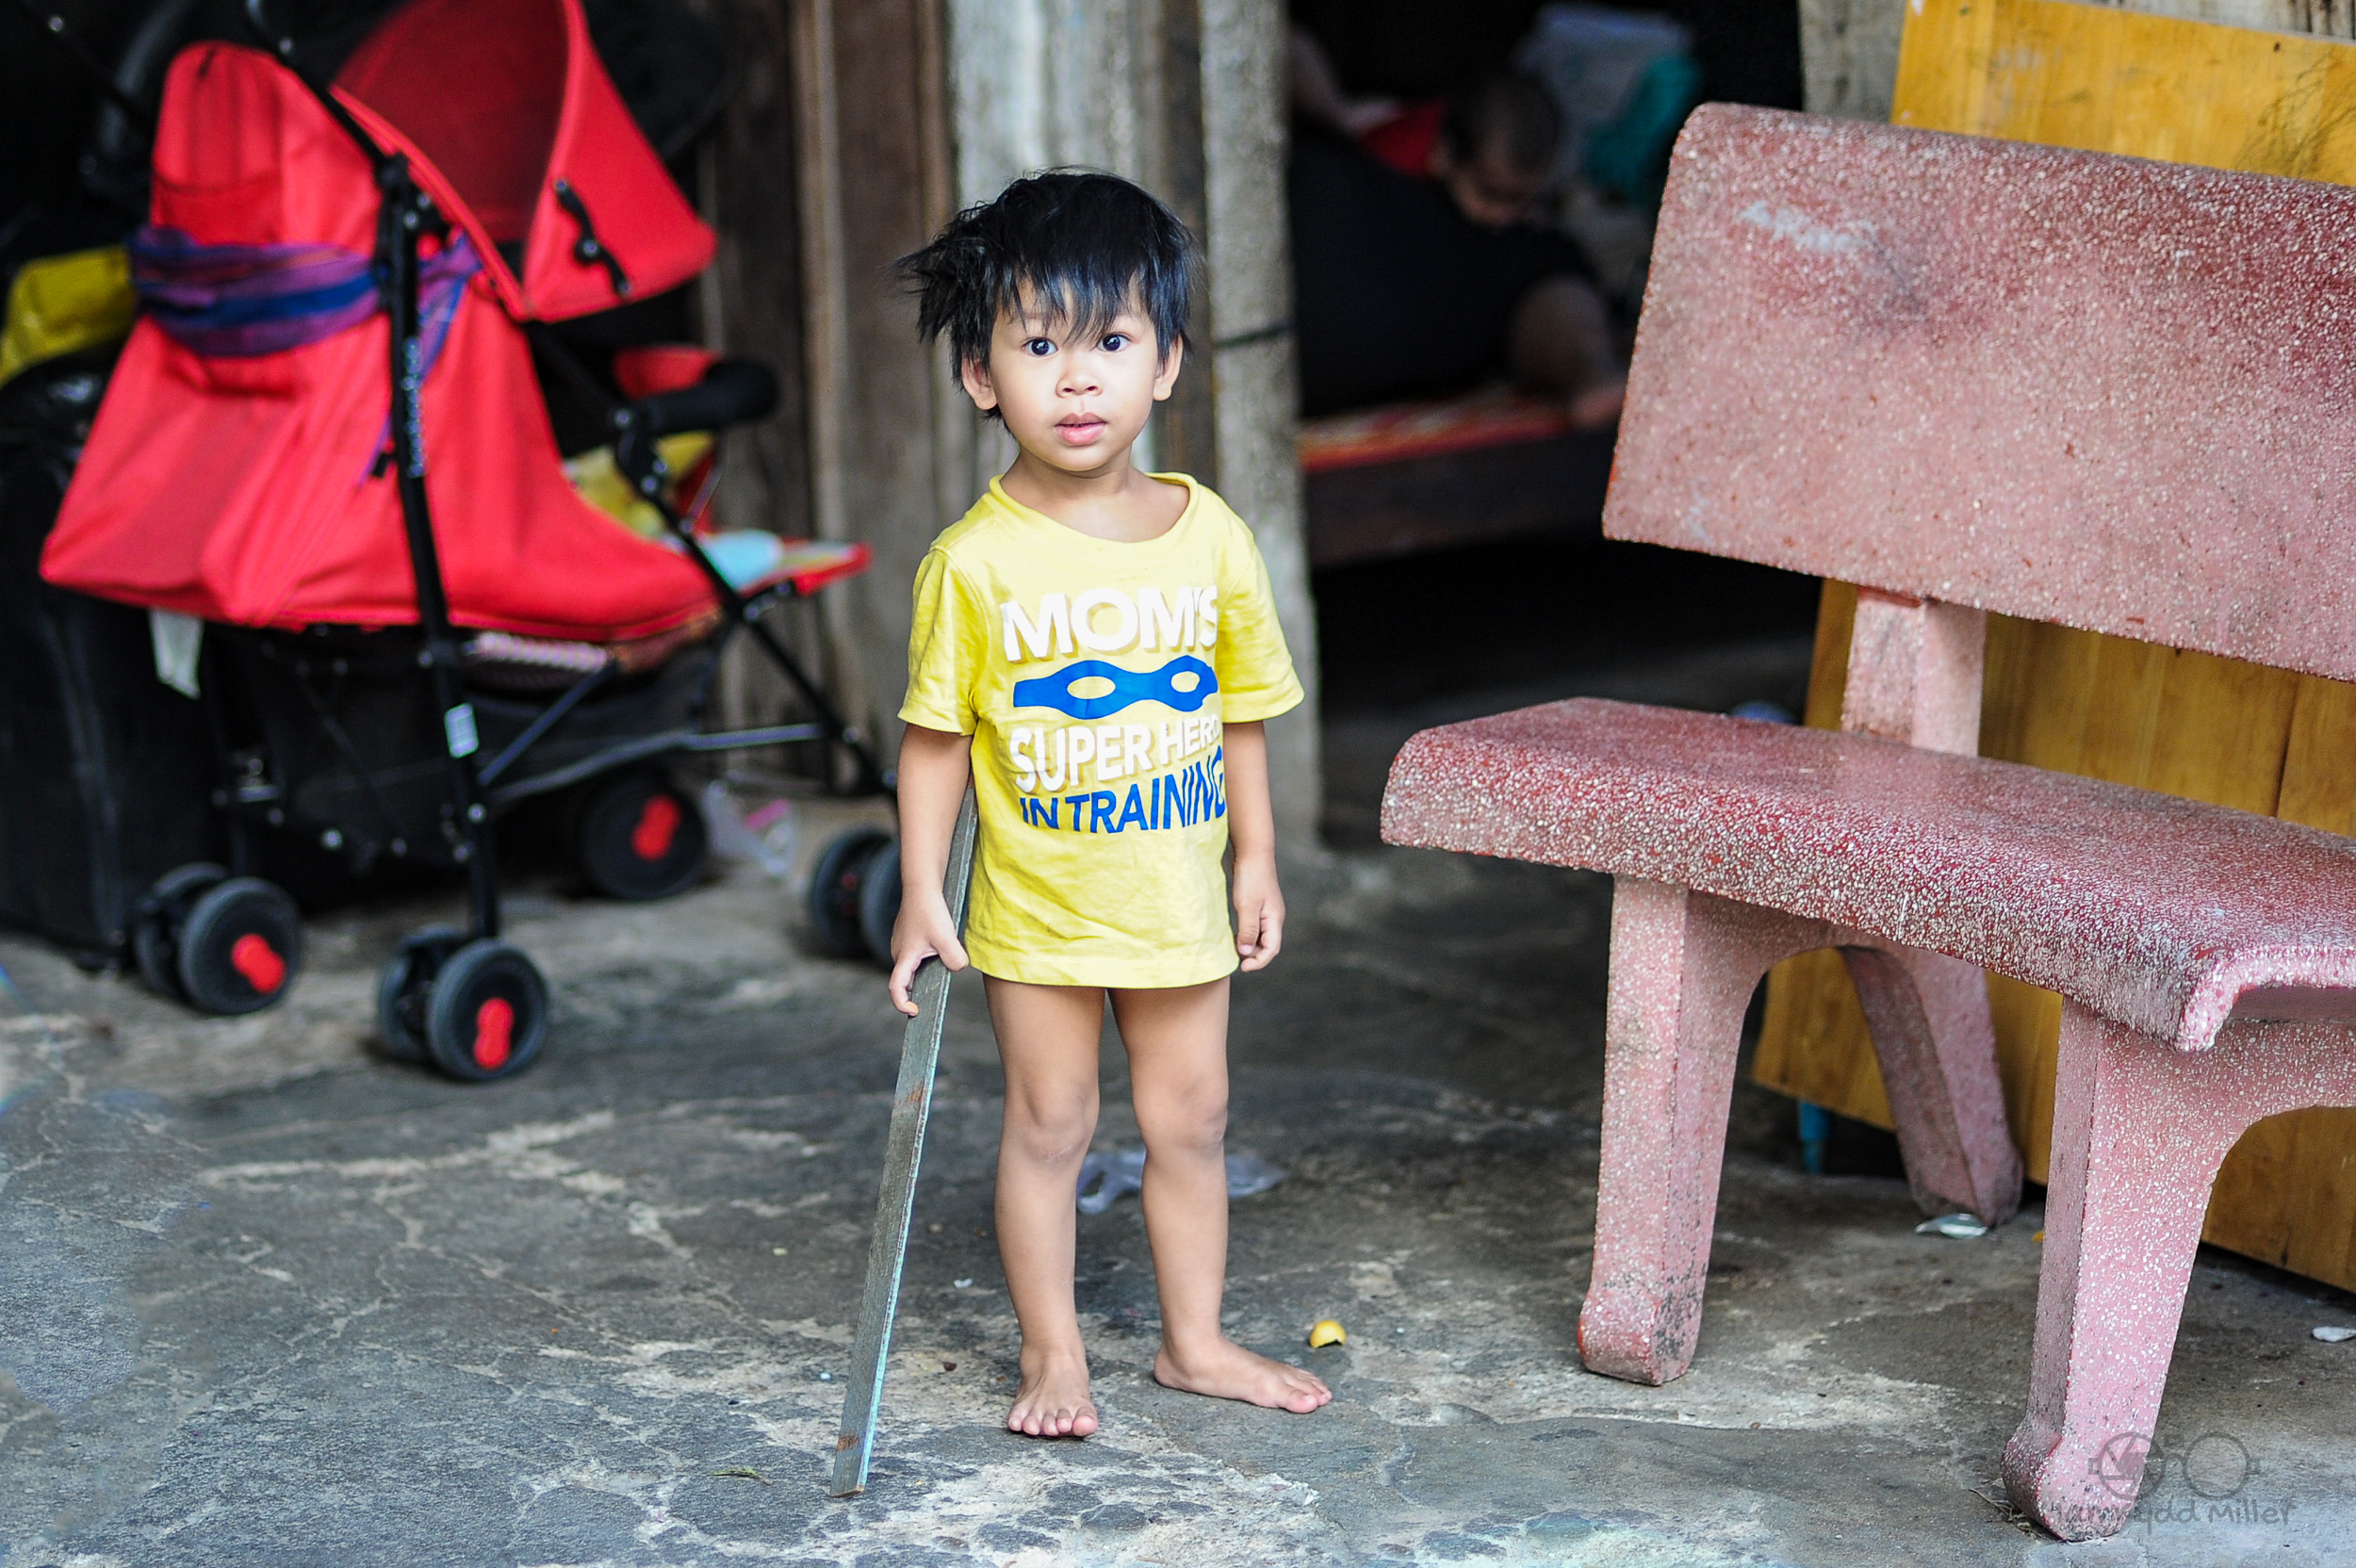
What emerges is a remarkably useful focal range. At the short end, the equivalent 36mm view is ideal for documentary work, environmental portraits and general street photography. Around the middle of the zoom range, the lens covers the classic perspectives associated with 50mm and 85mm lenses. At the long end, the equivalent 180mm reach allows photographers to isolate subjects from a distance, compress perspective and work discreetly.
For photographers who enjoy observing rather than inserting themselves into the middle of a scene, this can be enormously valuable.
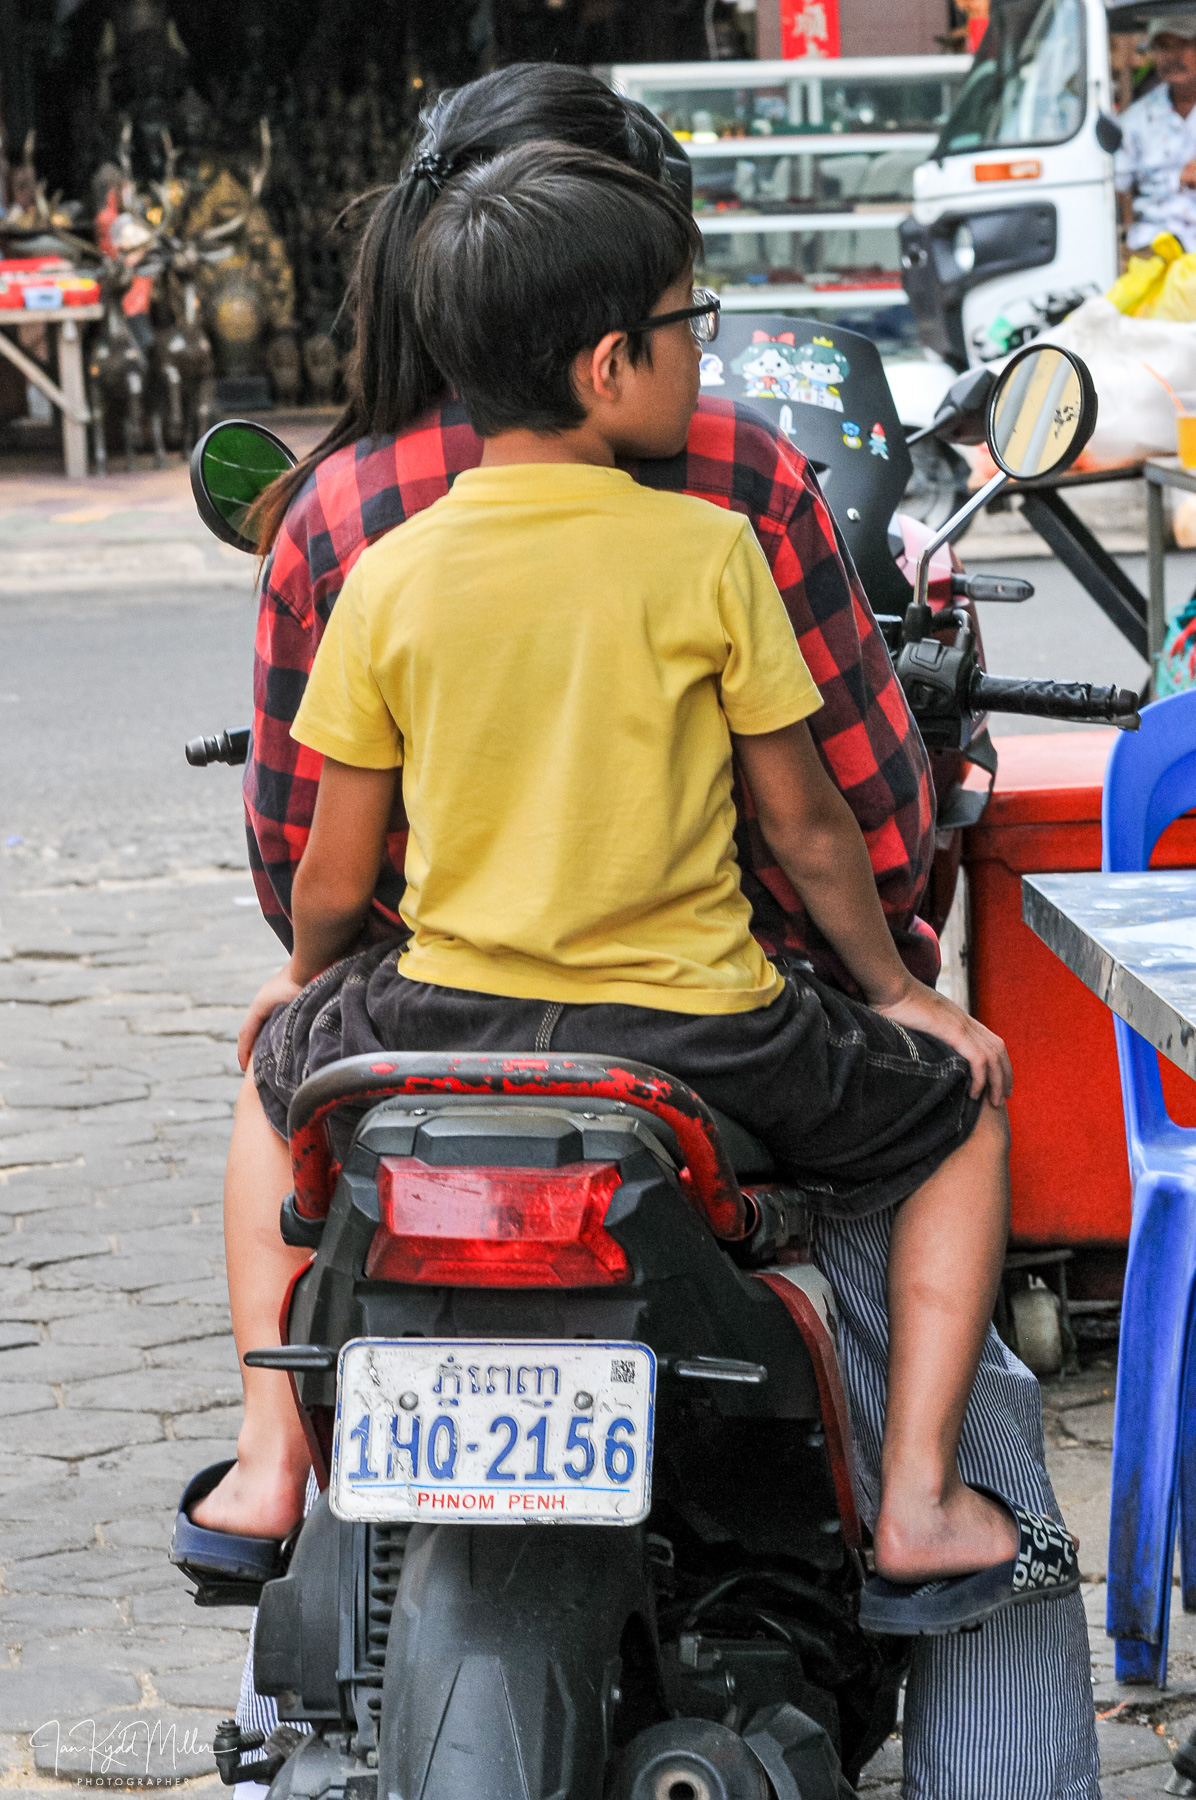
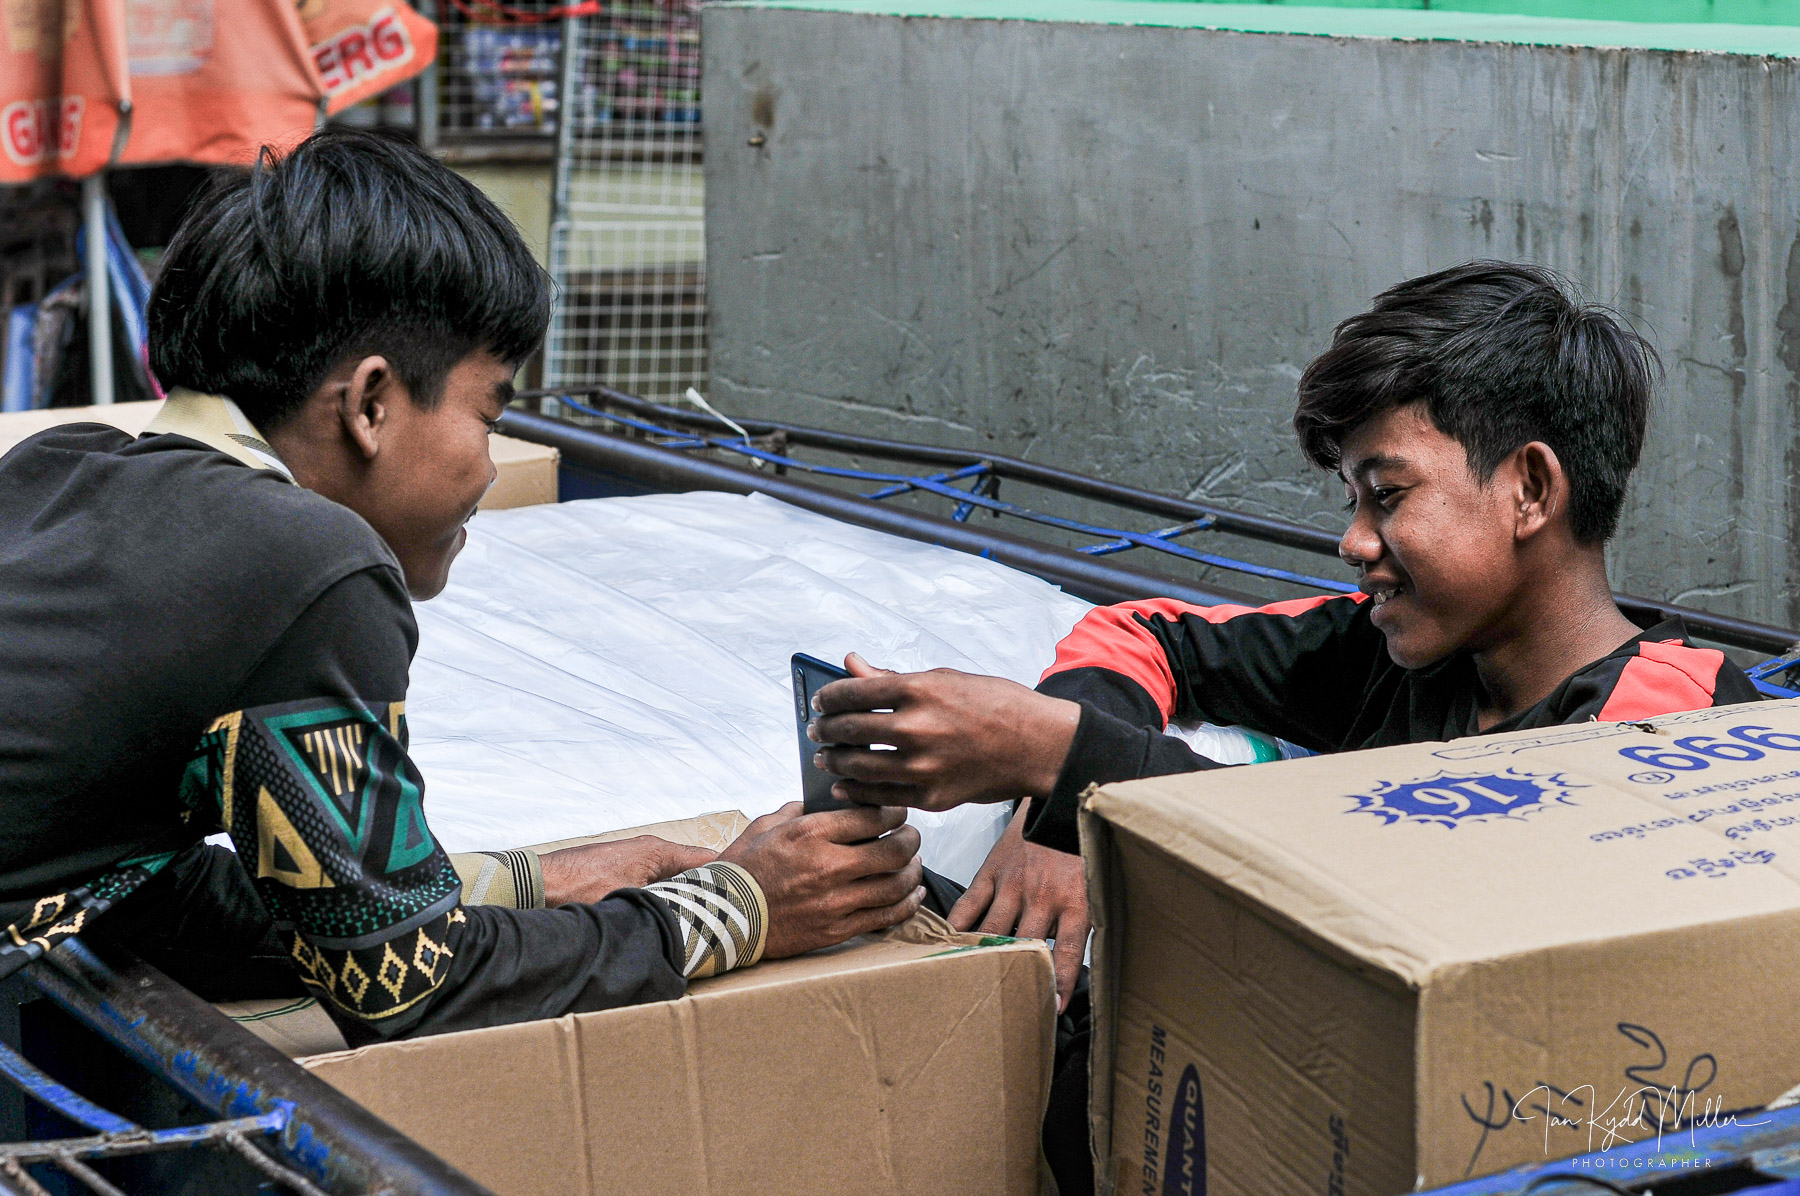
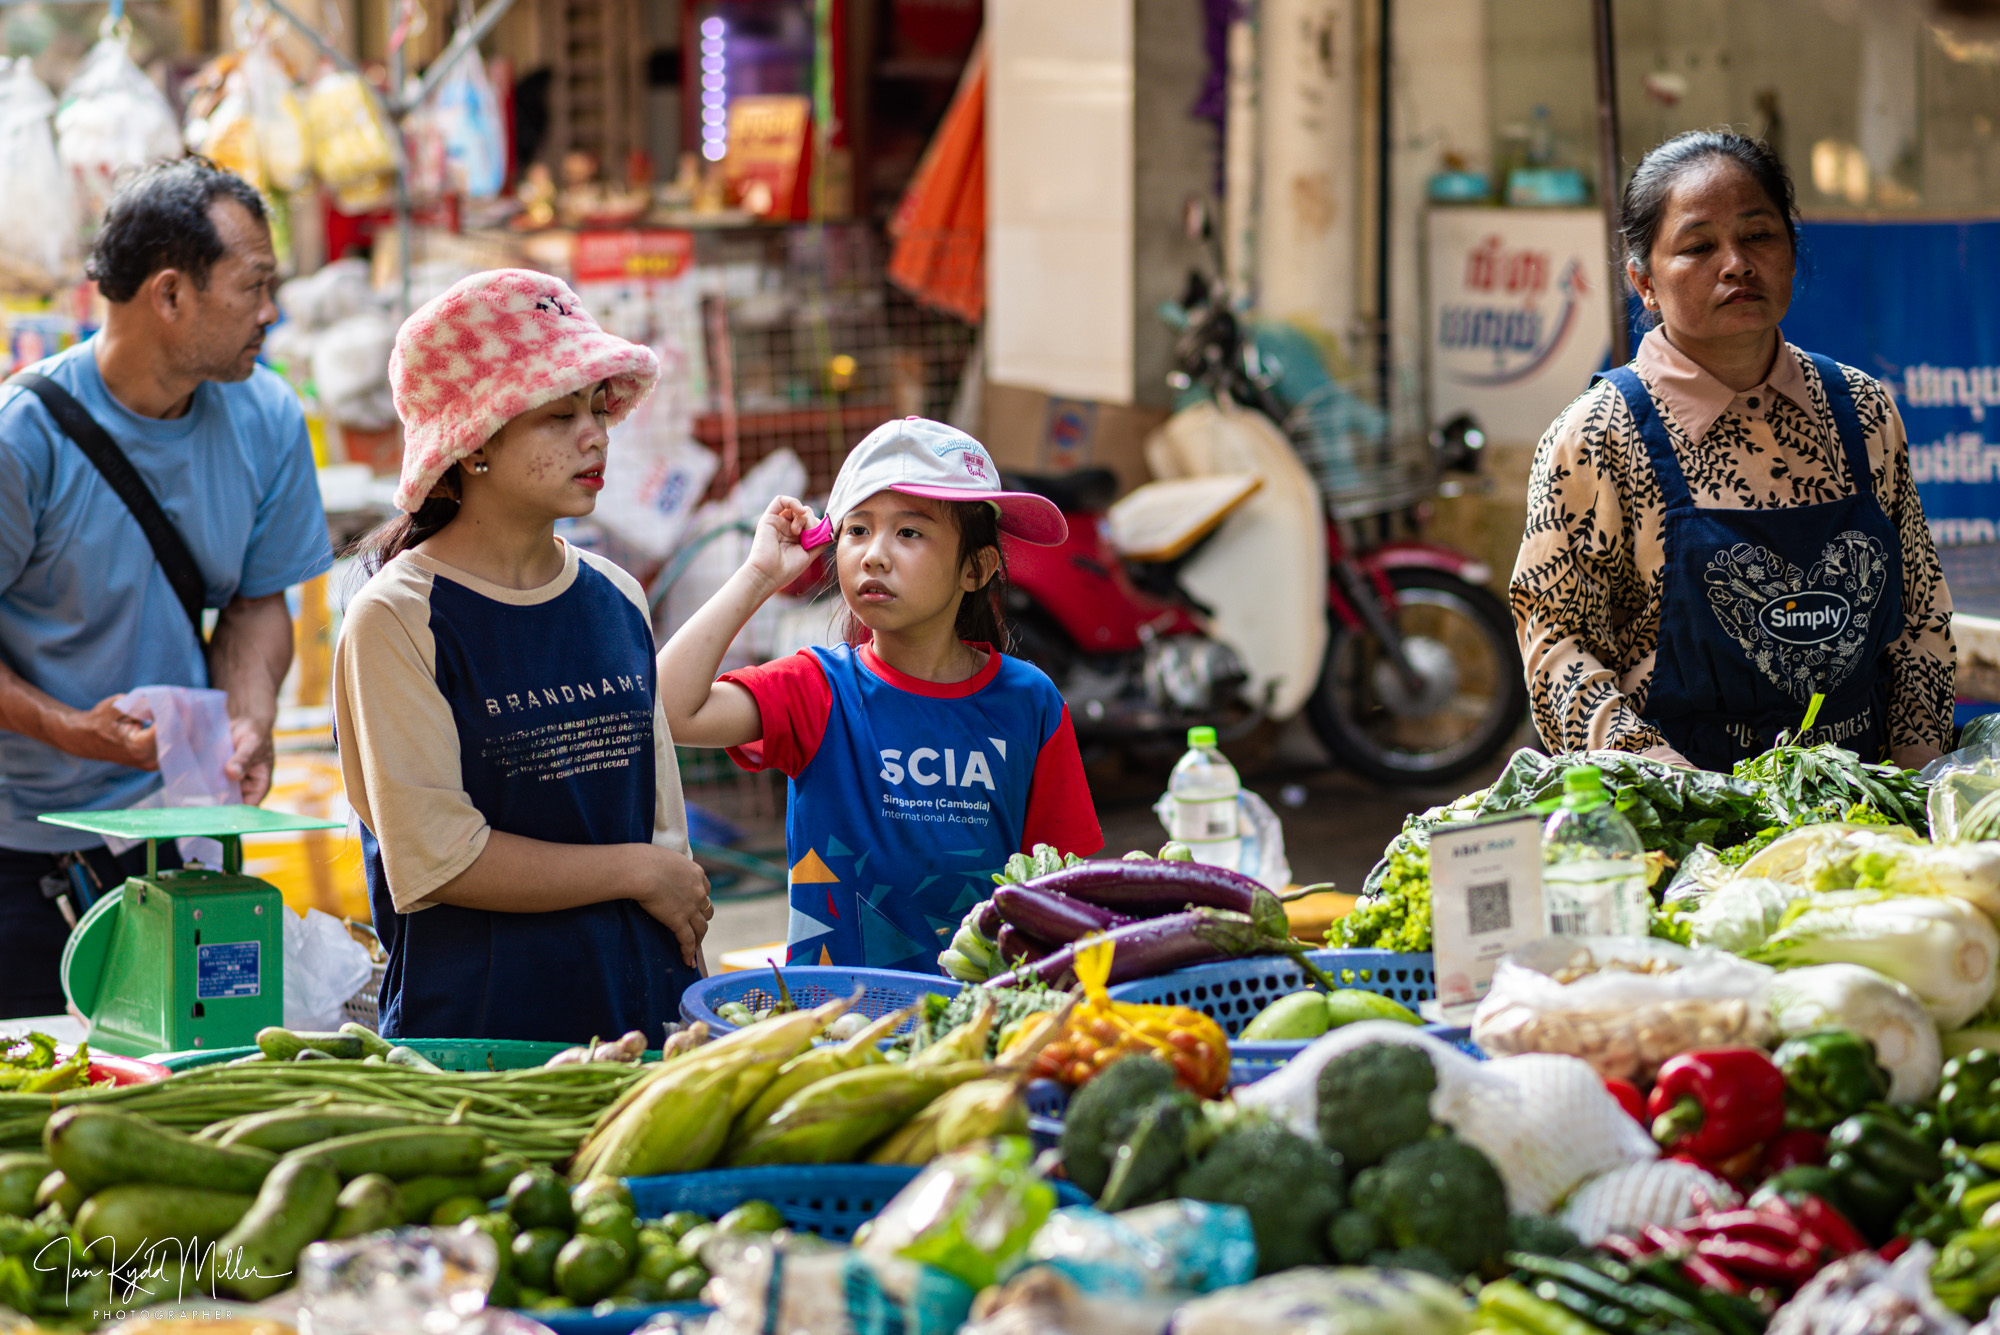
Street photography is often associated with wide-angle lenses and close physical proximity. Yet there is another tradition, one built around patience, observation and distance. The 24-120mm on the D300S fits naturally into this approach.
A photographer can move through a market, a city street or a crowded public space without changing lenses. One moment they can capture a wider scene that establishes context. Seconds later they can isolate an expression across the street or pick out a fleeting gesture that would otherwise be missed.
This flexibility is the lens’s greatest strength.
The constant f/4 aperture also deserves recognition. While it lacks the glamour of an f/2.8 professional zoom or the shallow depth of field of a fast prime, it provides consistency. Exposure remains unchanged throughout the zoom range. Combined with Nikon’s effective vibration reduction system, the lens remains practical in a wide variety of lighting conditions.
Of course, there are compromises. Low-light performance cannot compete with an 85mm f/1.8 or a 50mm f/1.4. Background separation is more modest. Photographers who crave the distinctive rendering of fast prime lenses may find the images technically excellent but emotionally restrained.
Yet that criticism misses the point.
The 24-120mm f/4G was never intended to be a specialist lens. It was designed to be a problem solver. It is the lens you mount when you do not know what the day will bring. It is the lens that allows you to leave the house carrying one camera instead of a bag full of equipment.
In many ways it reflects a more practical era of photography. An era when photographers worried less about corner sharpness at 300 percent magnification and more about whether they captured the moment.
Mounted on a Nikon D300S, the lens becomes exactly that kind of tool. Dependable. Flexible. Uncomplicated.
It may not be fashionable. It may not generate excitement on internet forums. But photography has never been about owning fashionable equipment. It has always been about making pictures.
For photographers willing to look beyond specifications and marketing hype, the Nikon 24-120mm f/4G on the Nikon D300S remains one of the most underrated combinations in the Nikon system. More than a decade after both were introduced, they still deliver what matters most: the ability to walk out the door and come back with photographs worth keeping.
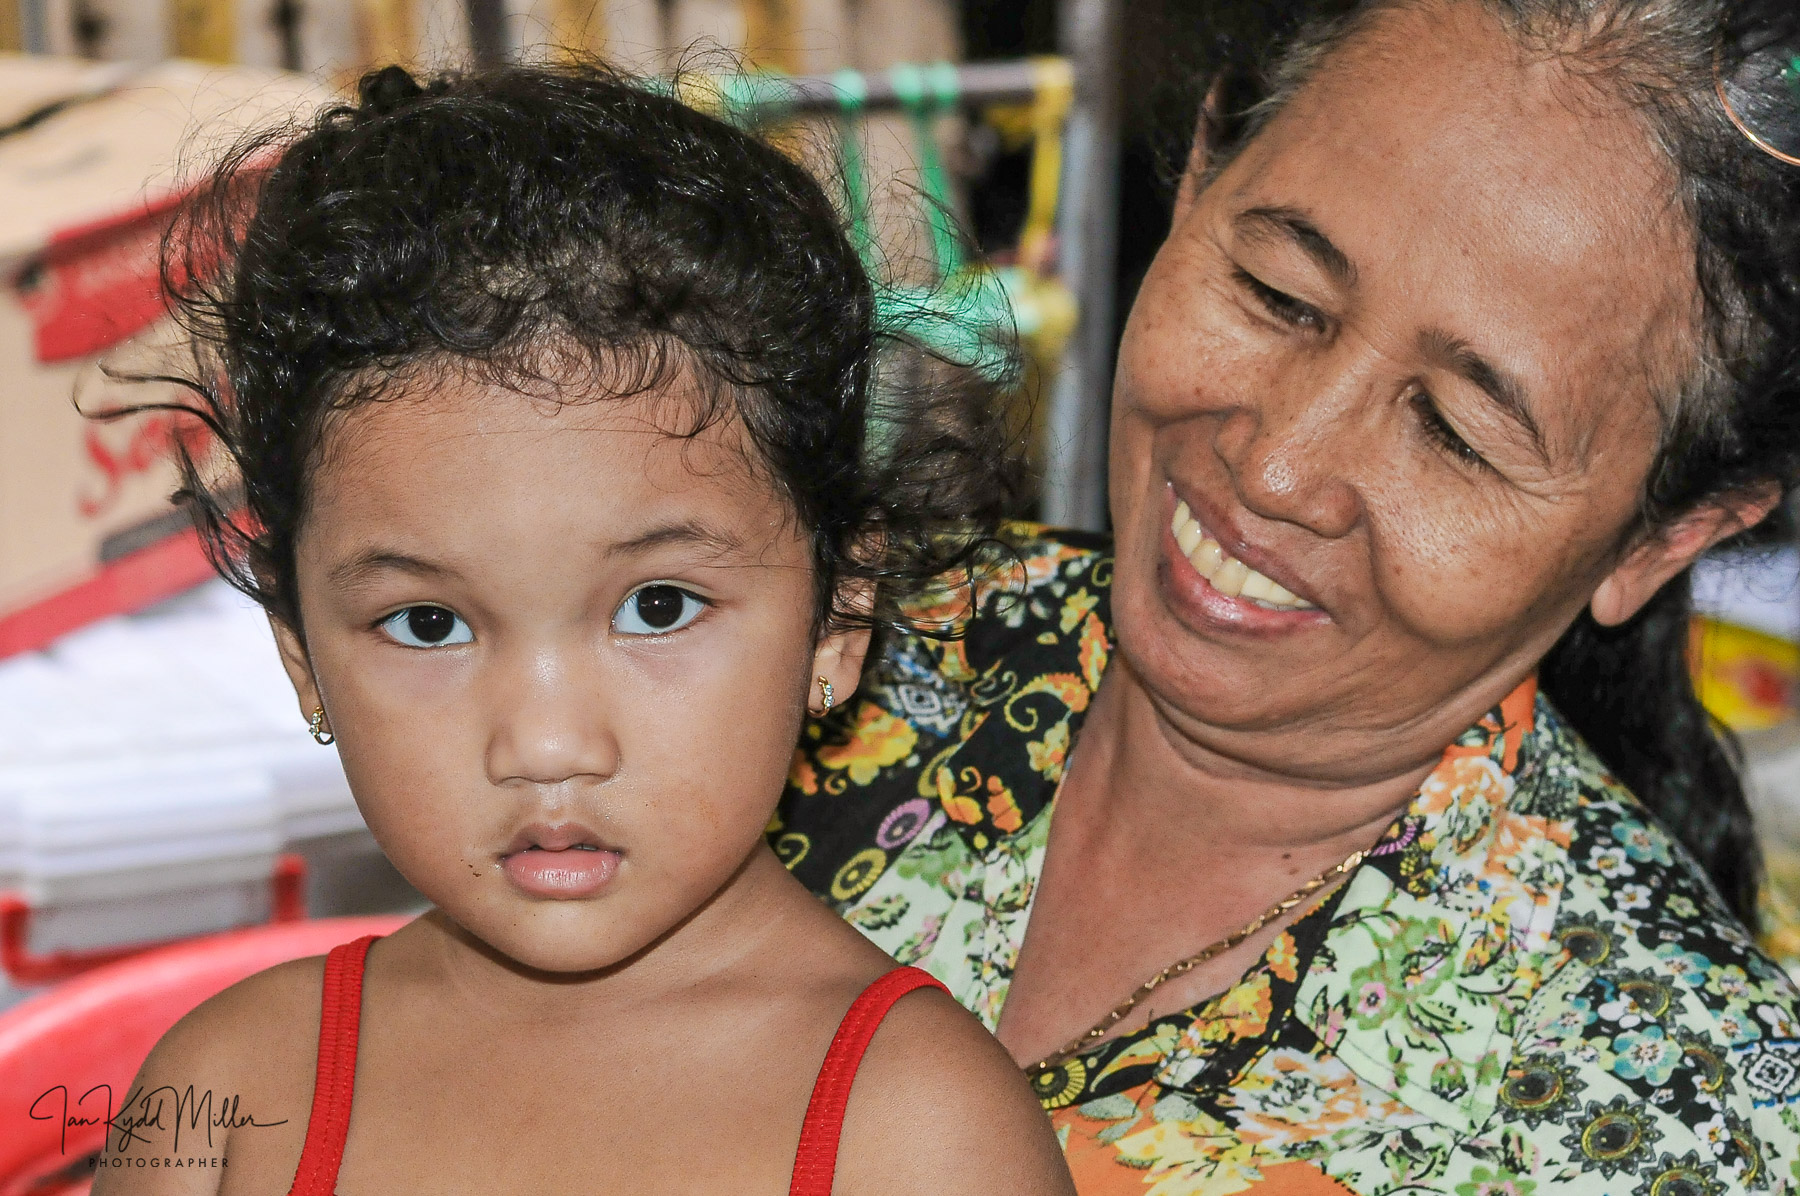
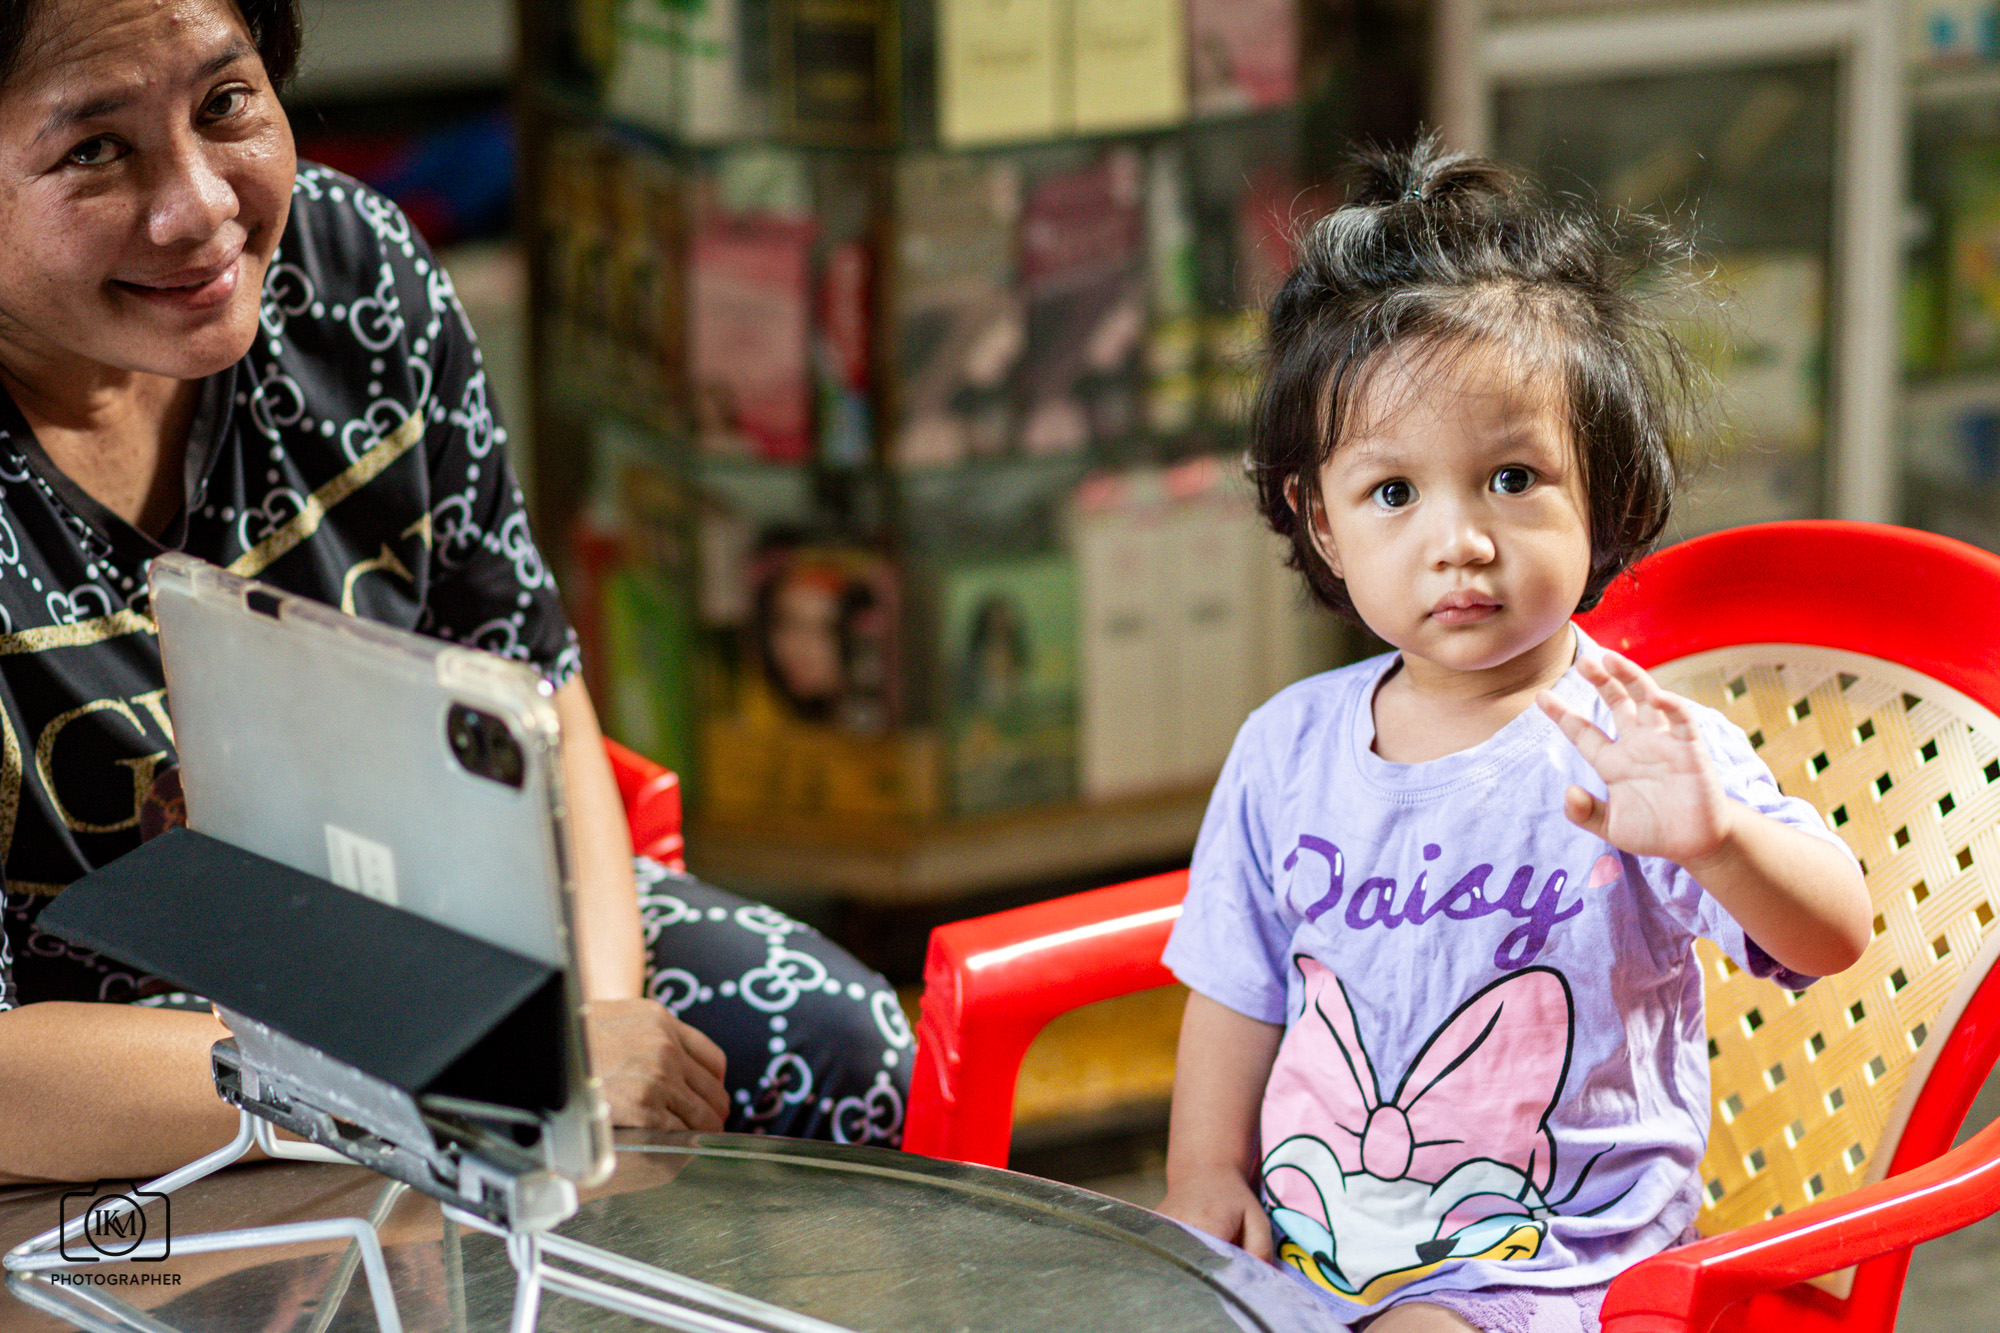
📷 As someone who often prefers photographing people rather than buildings, and who already appreciates longer focal lengths such as the 85mm, this combination makes a lot of sense. The D300S turns the 24-120mm into a versatile documentary lens that lets you work both close and discreetly from a distance—particularly useful when wandering city streets where moments appear and disappear in seconds.
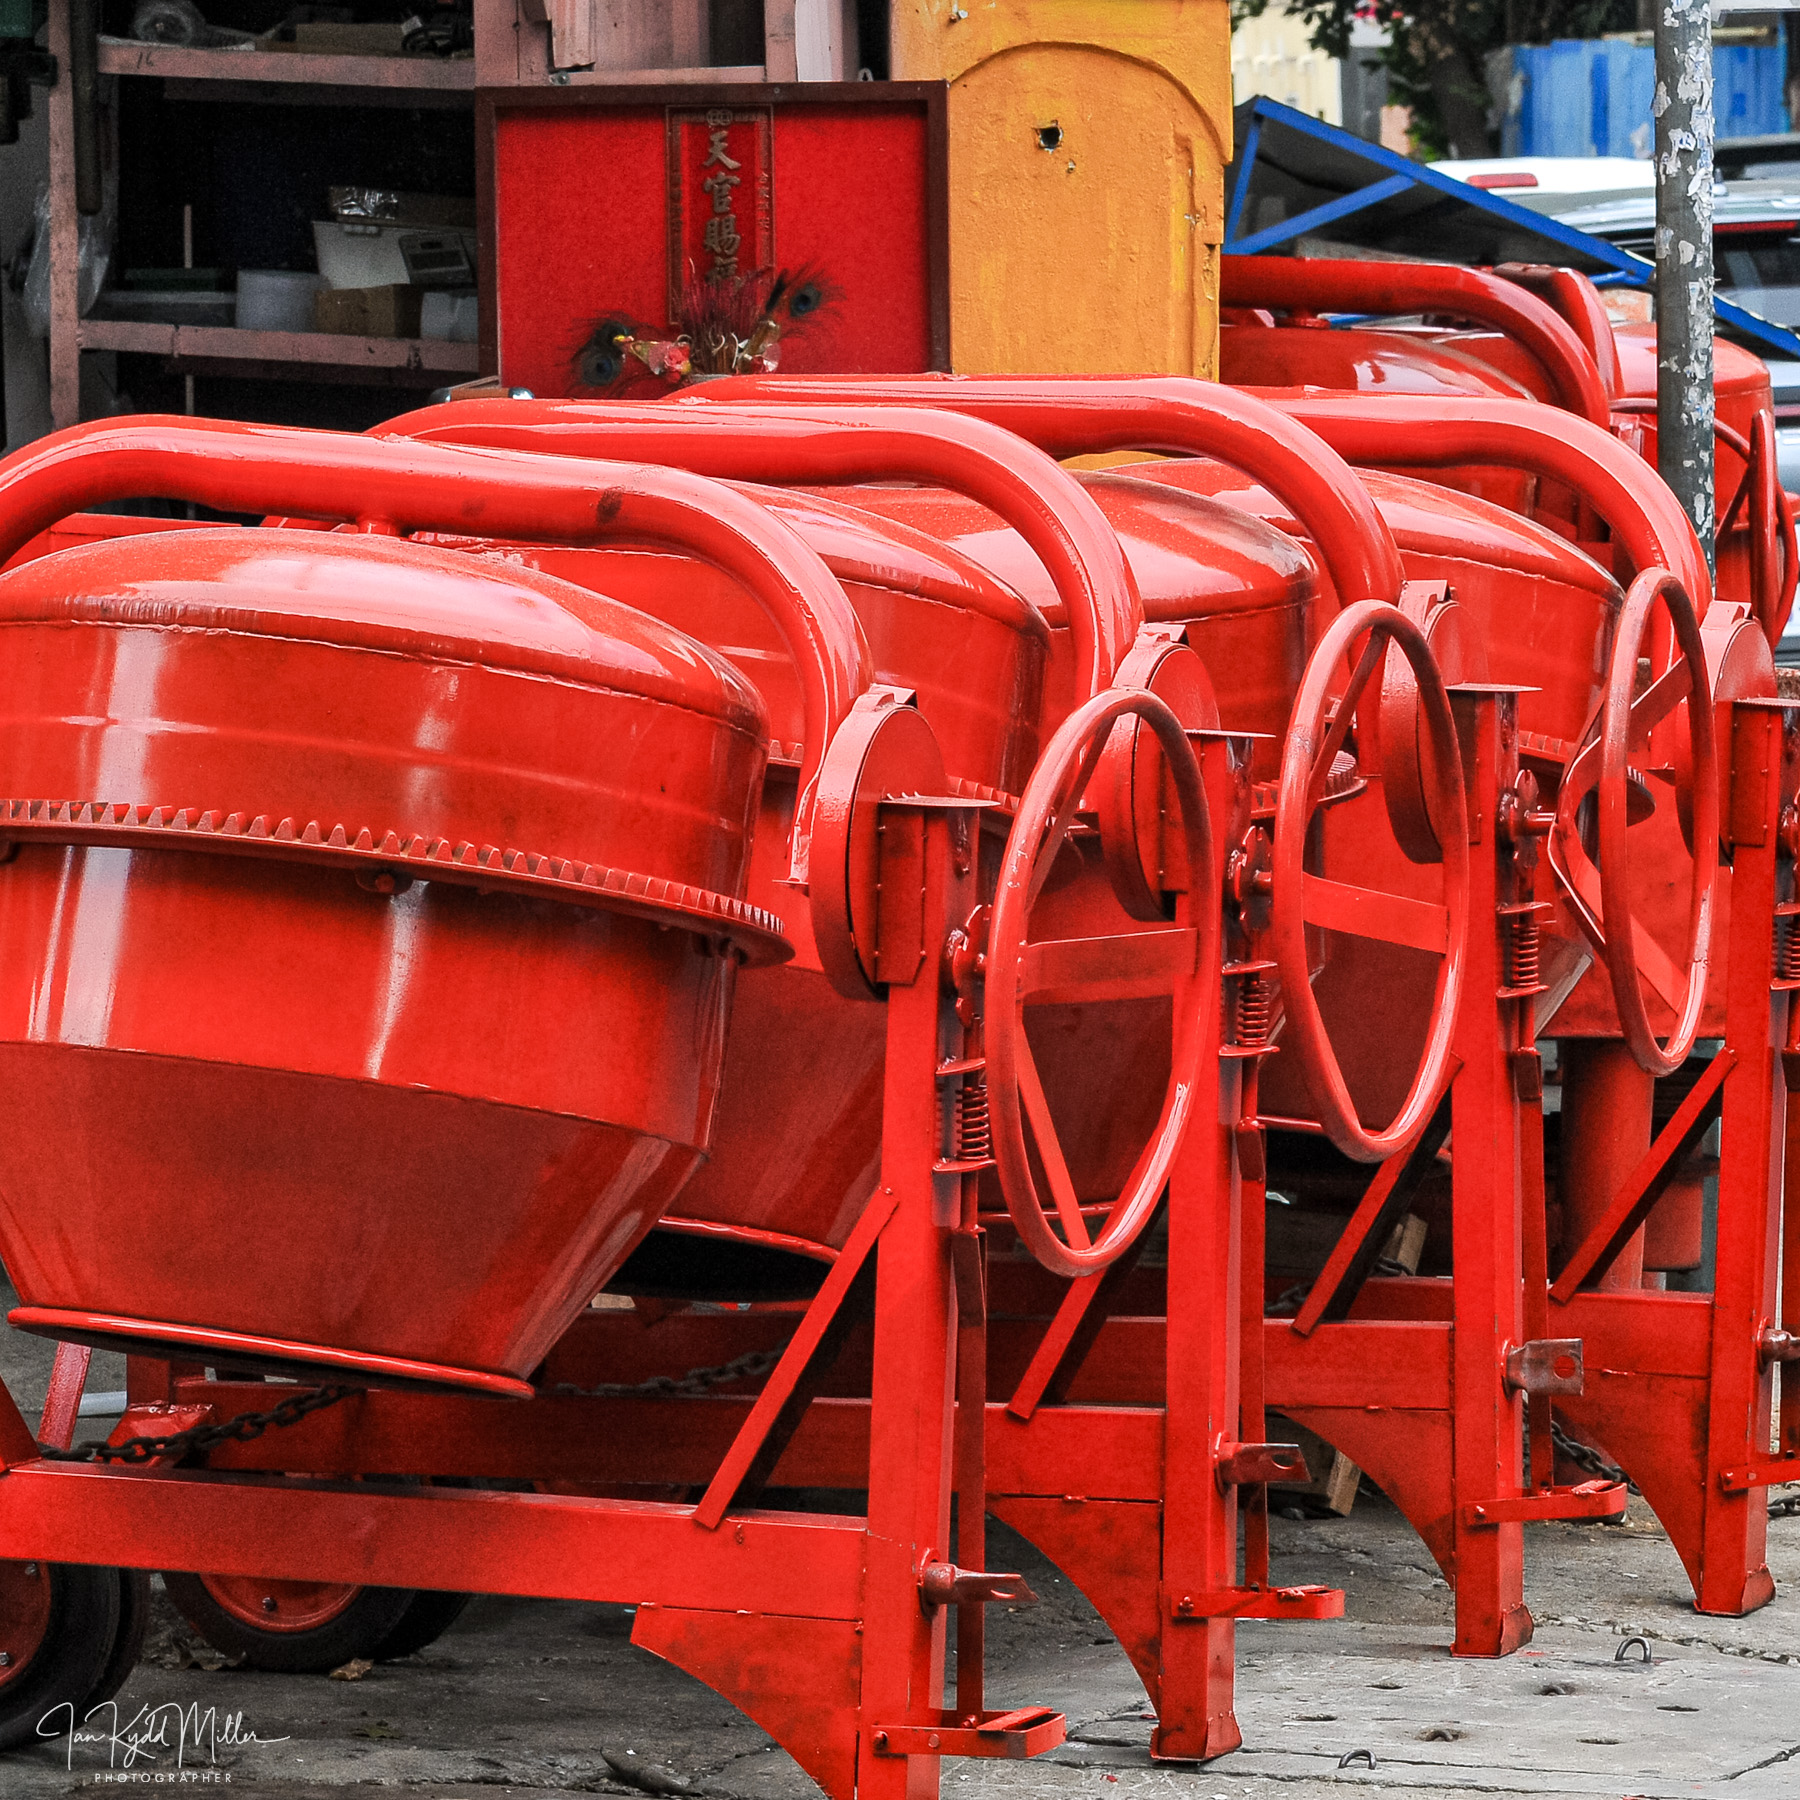
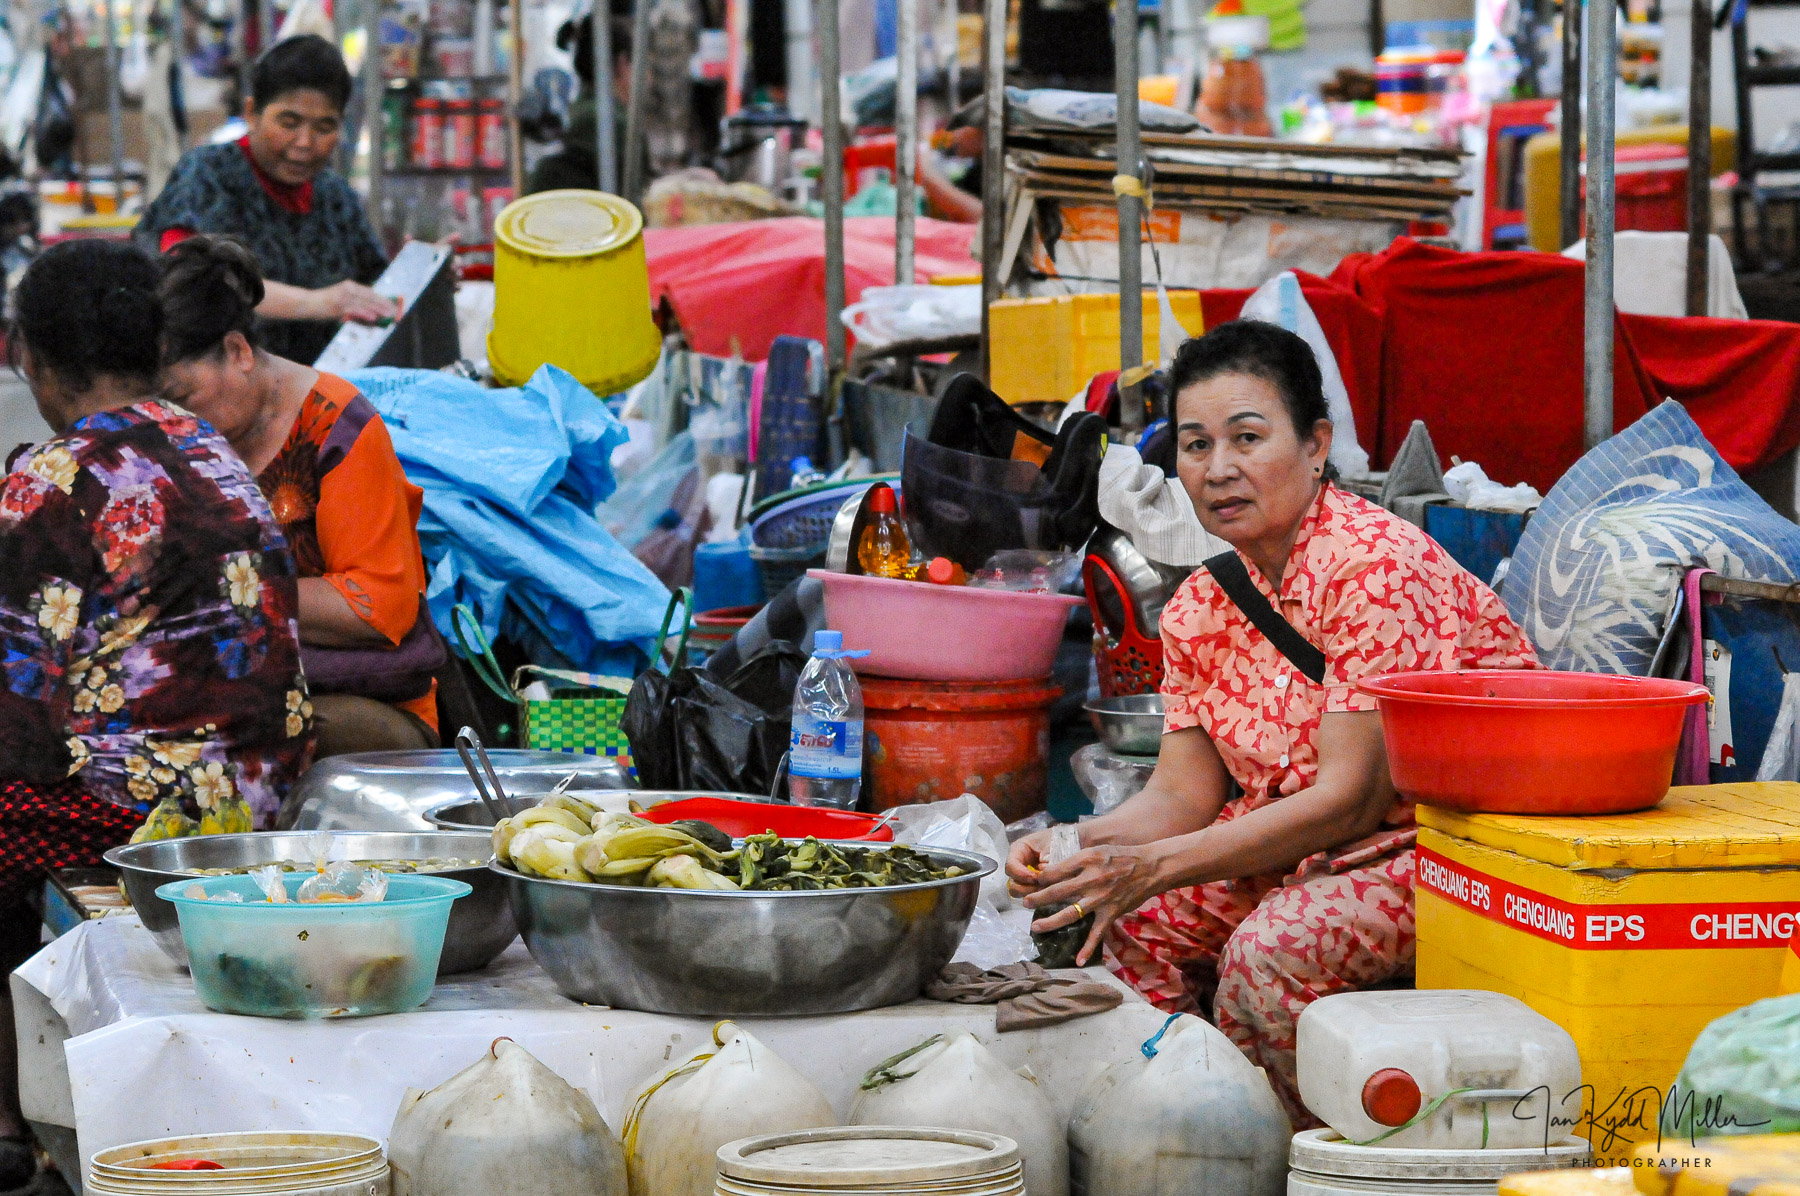
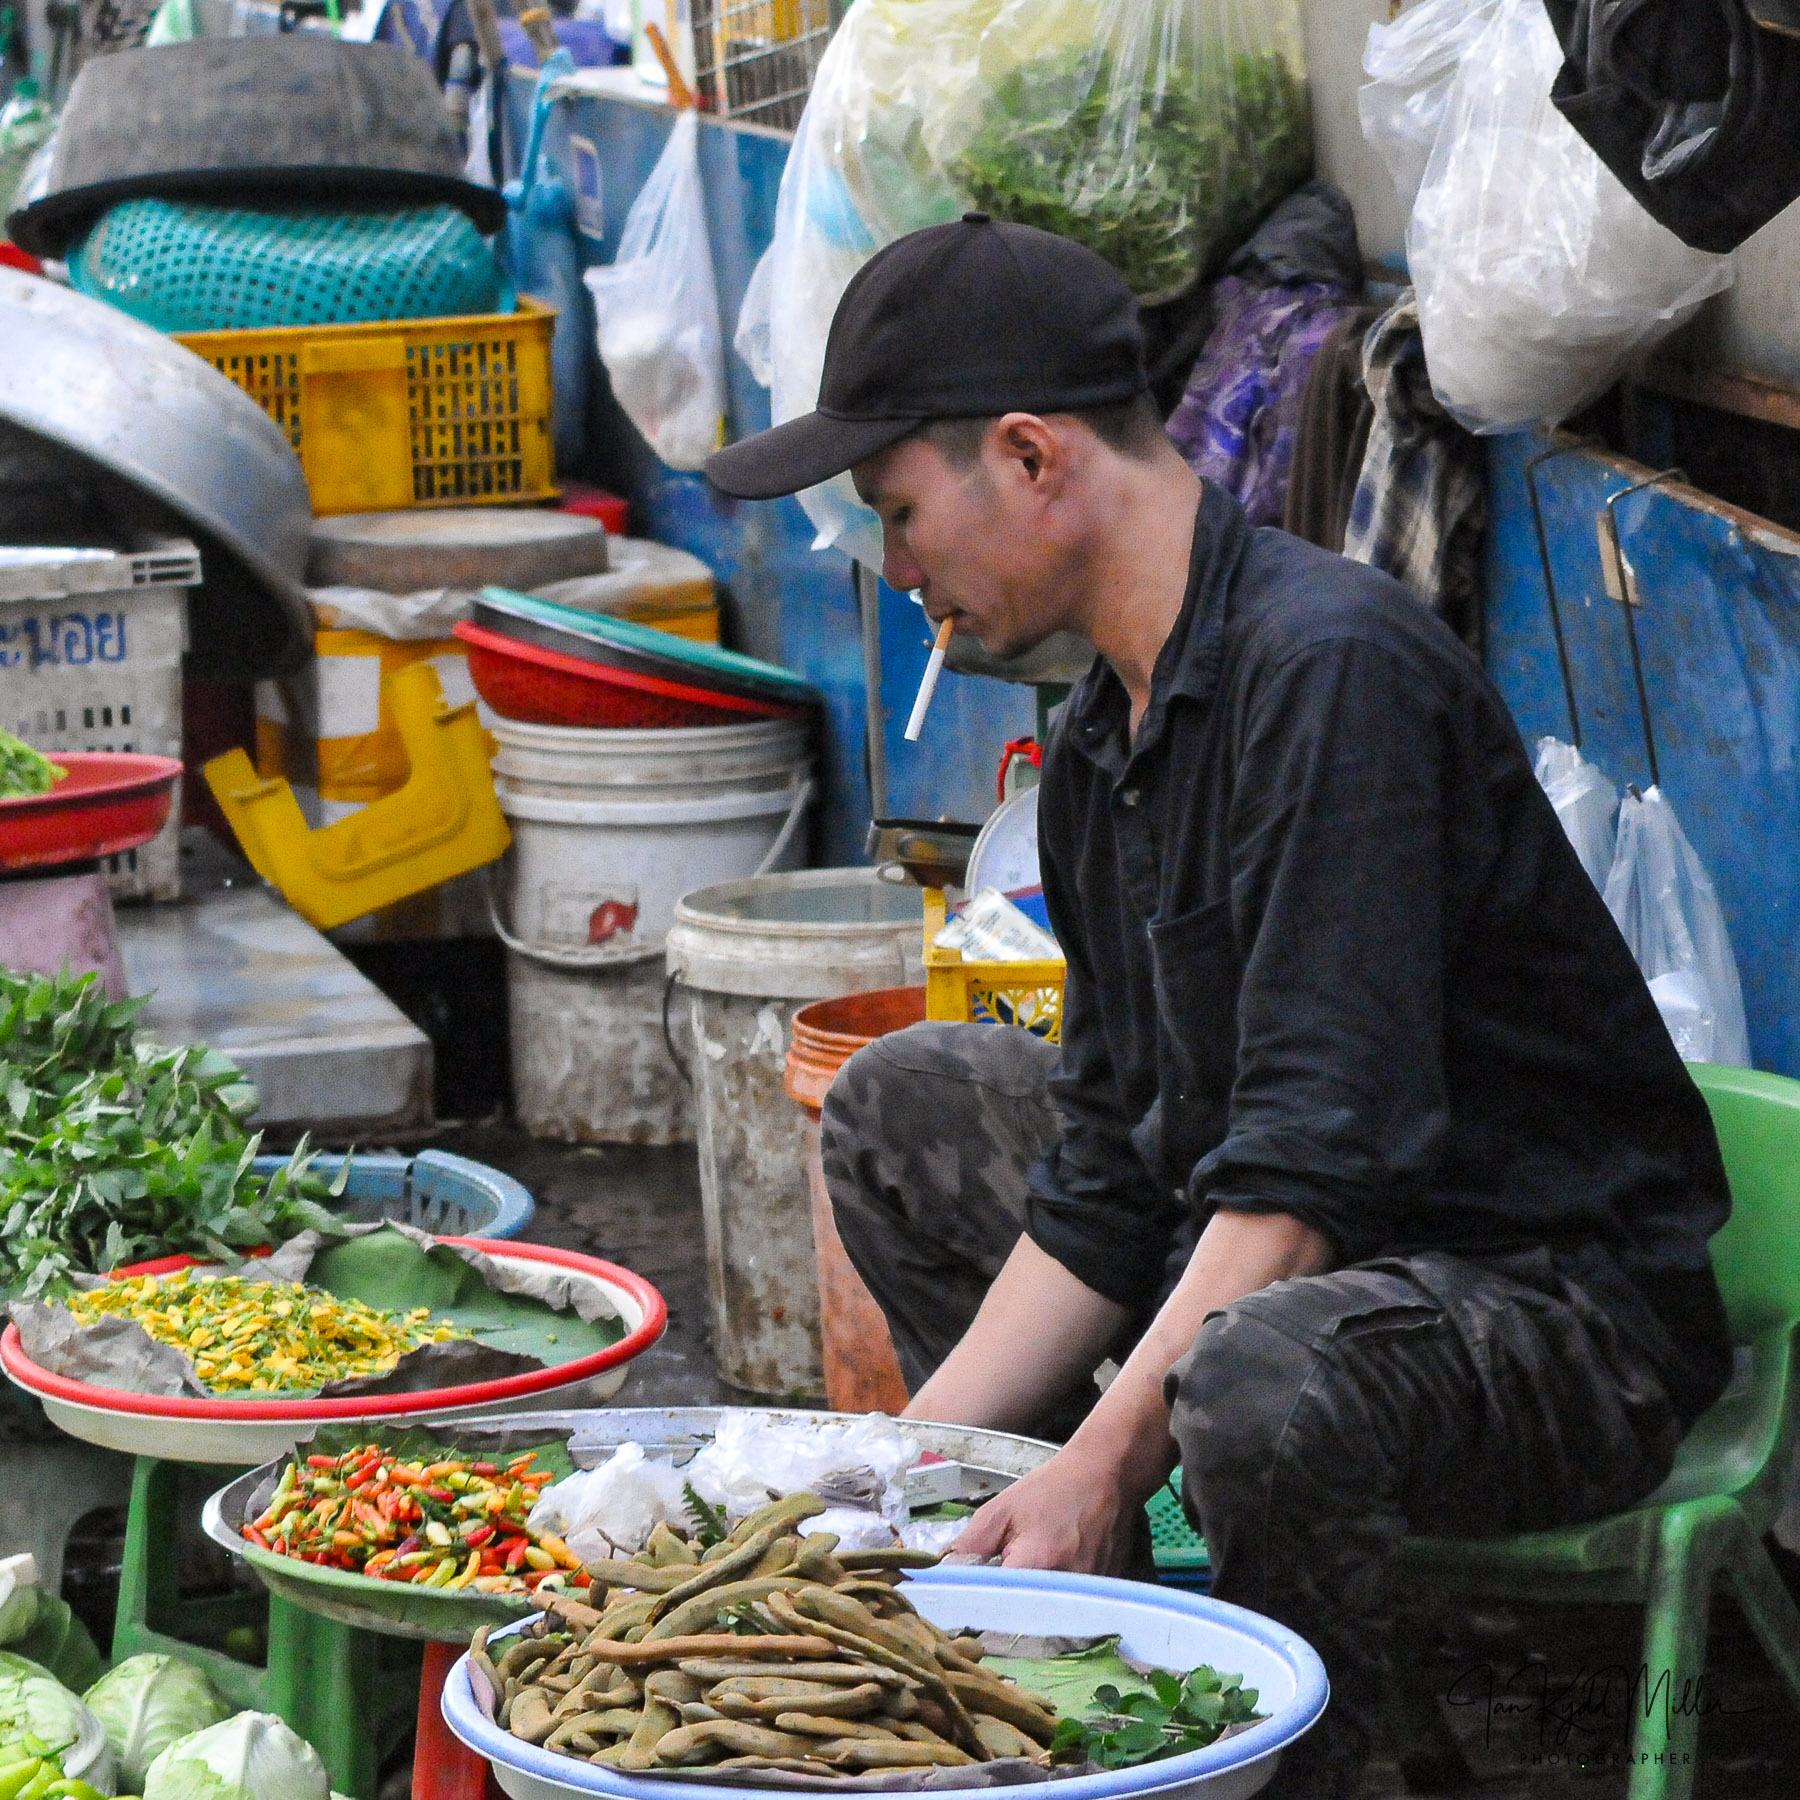
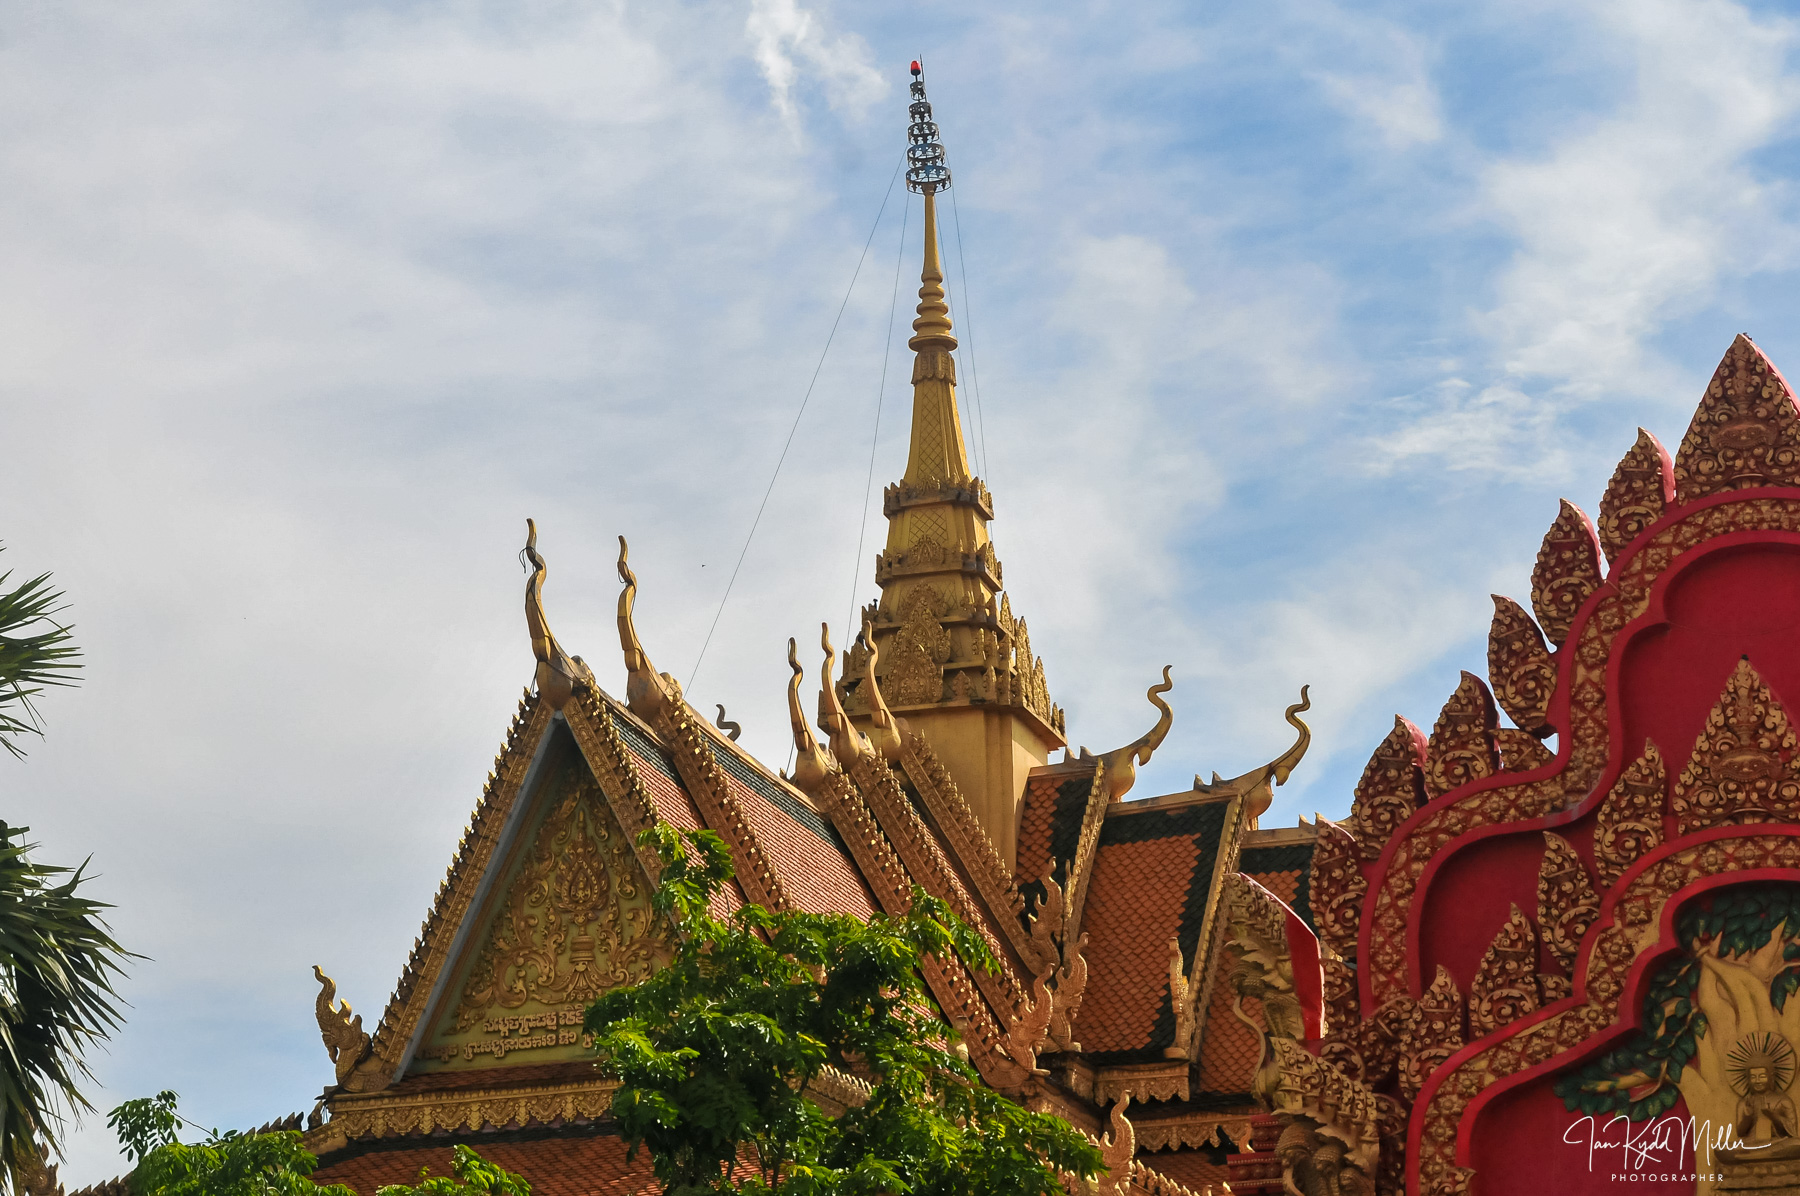
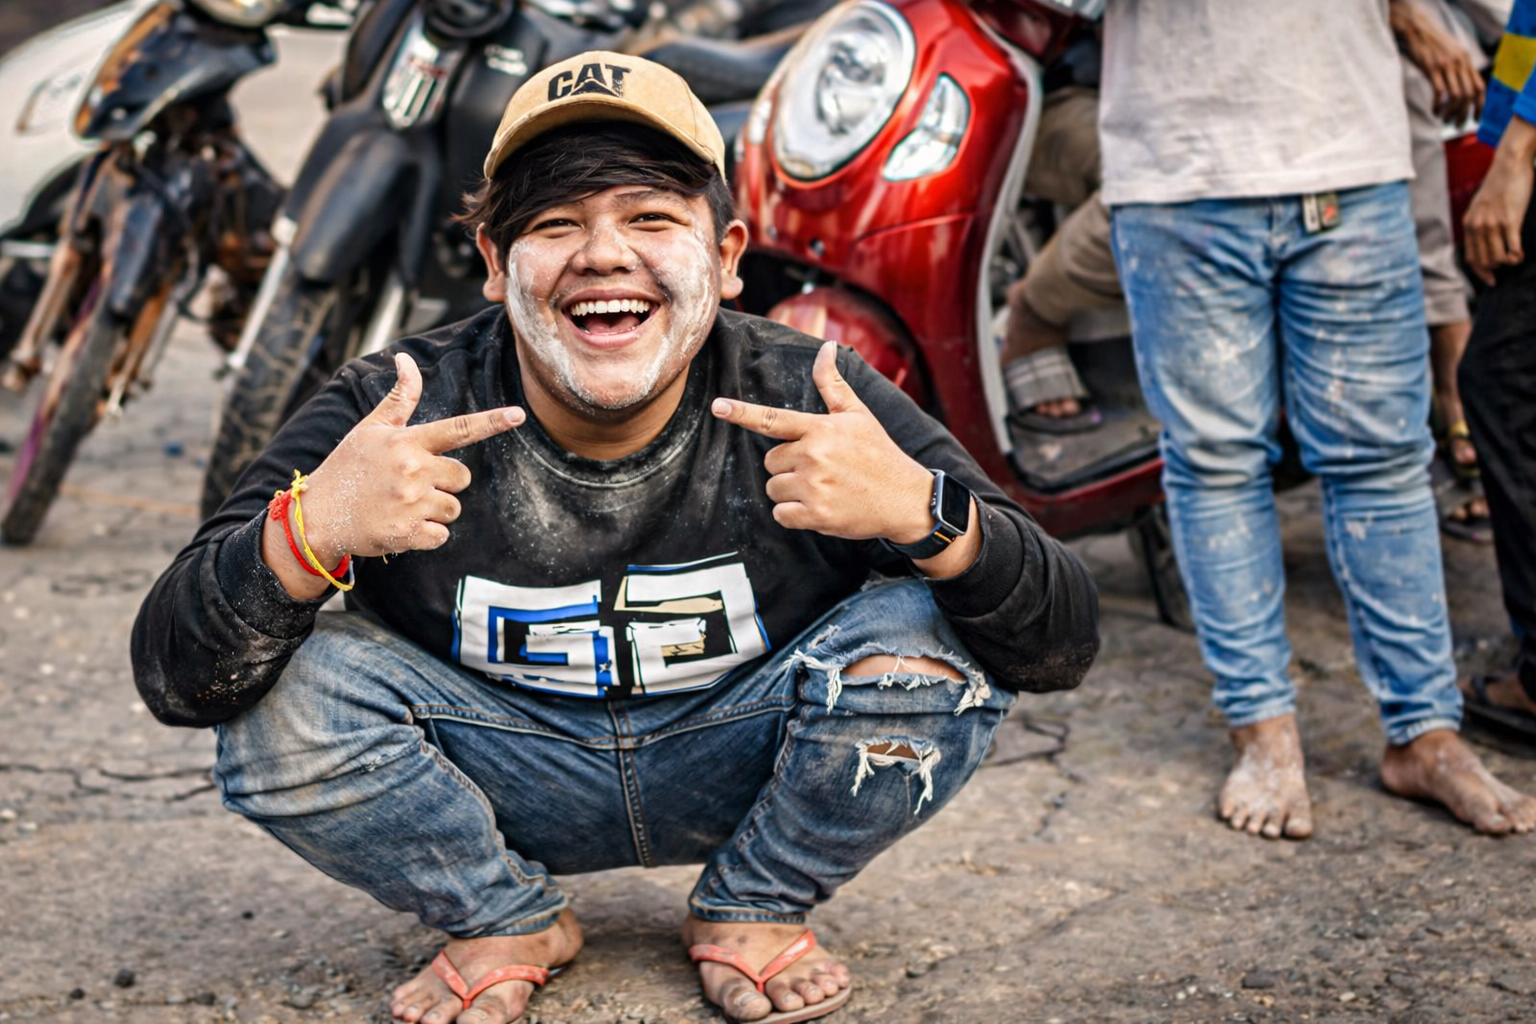
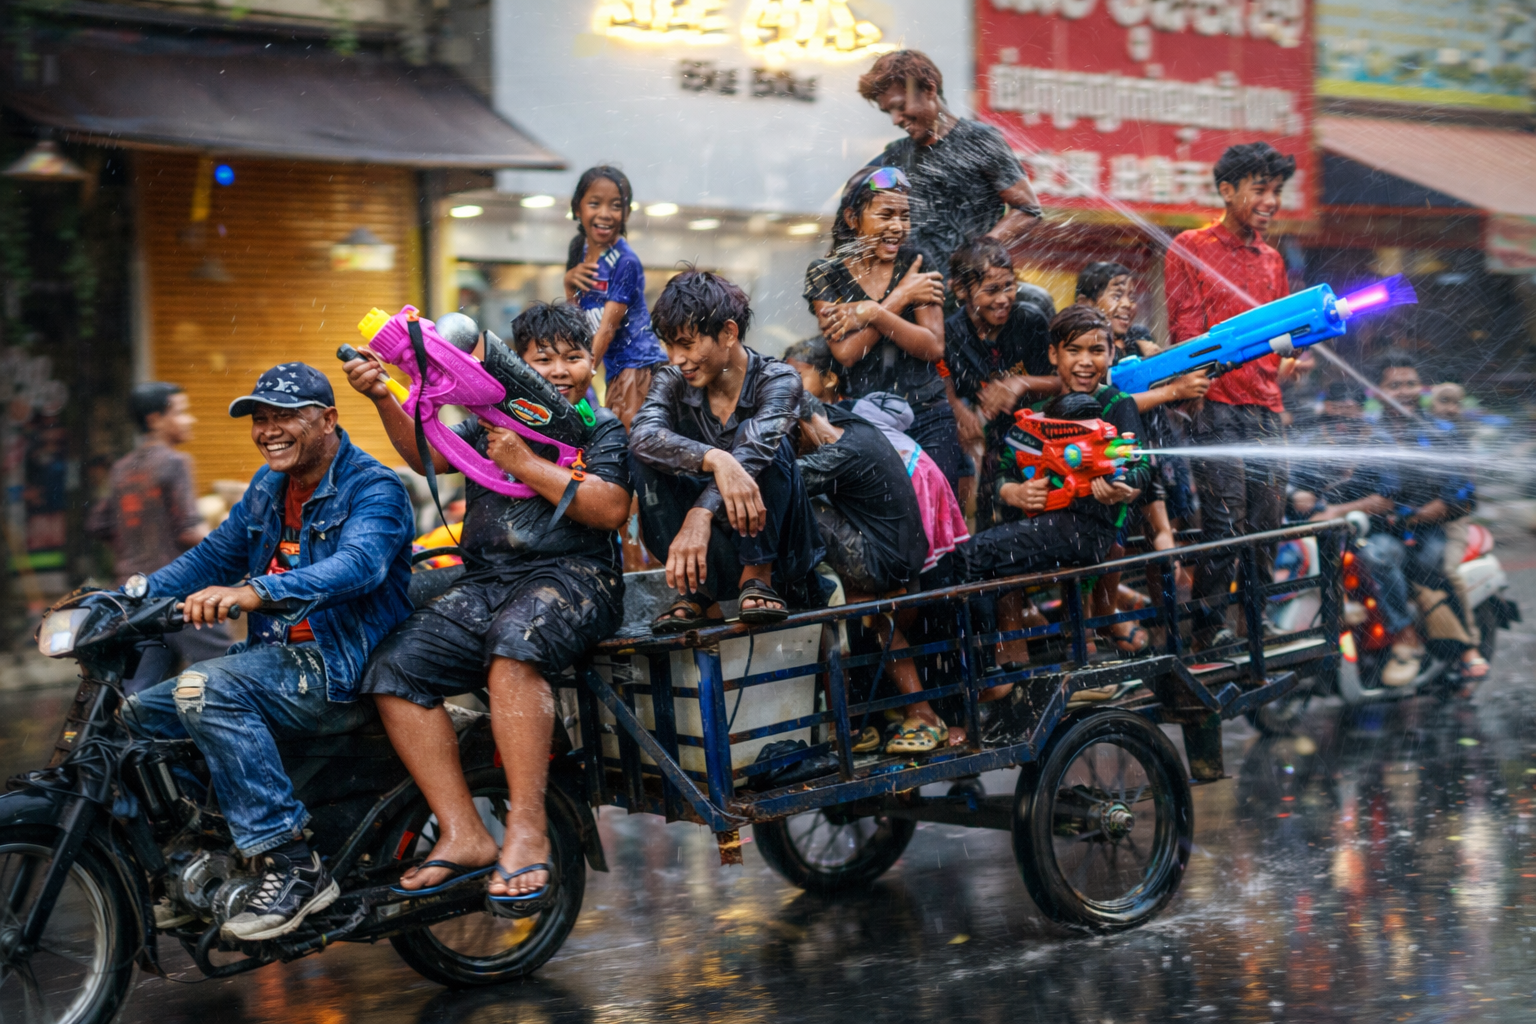
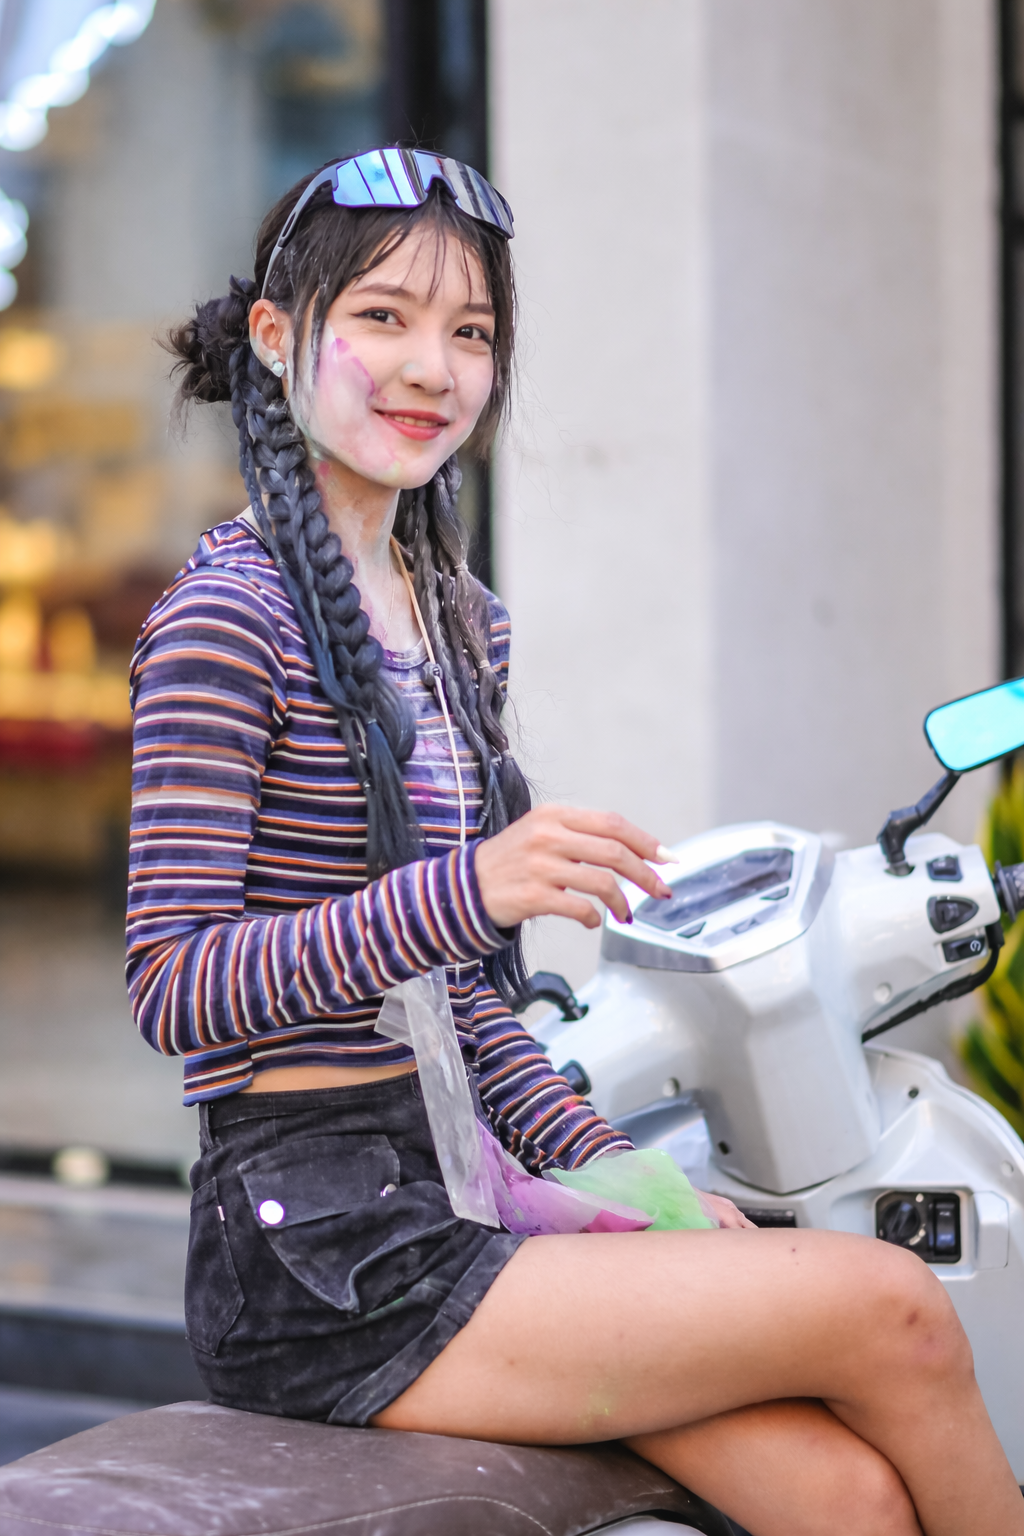
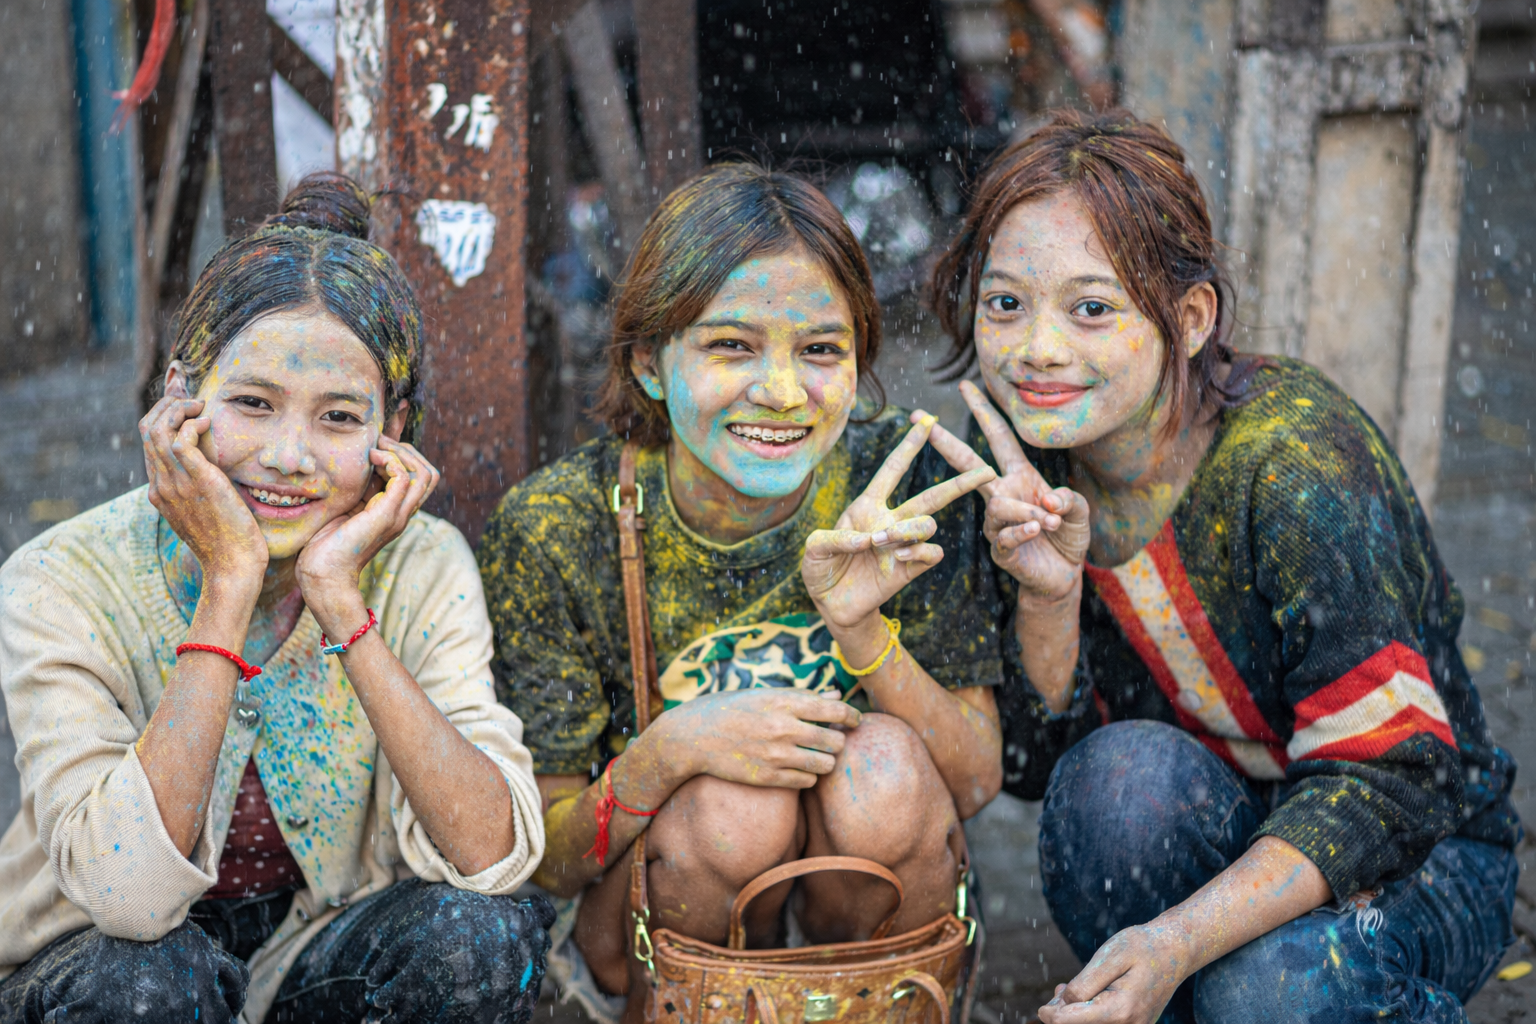
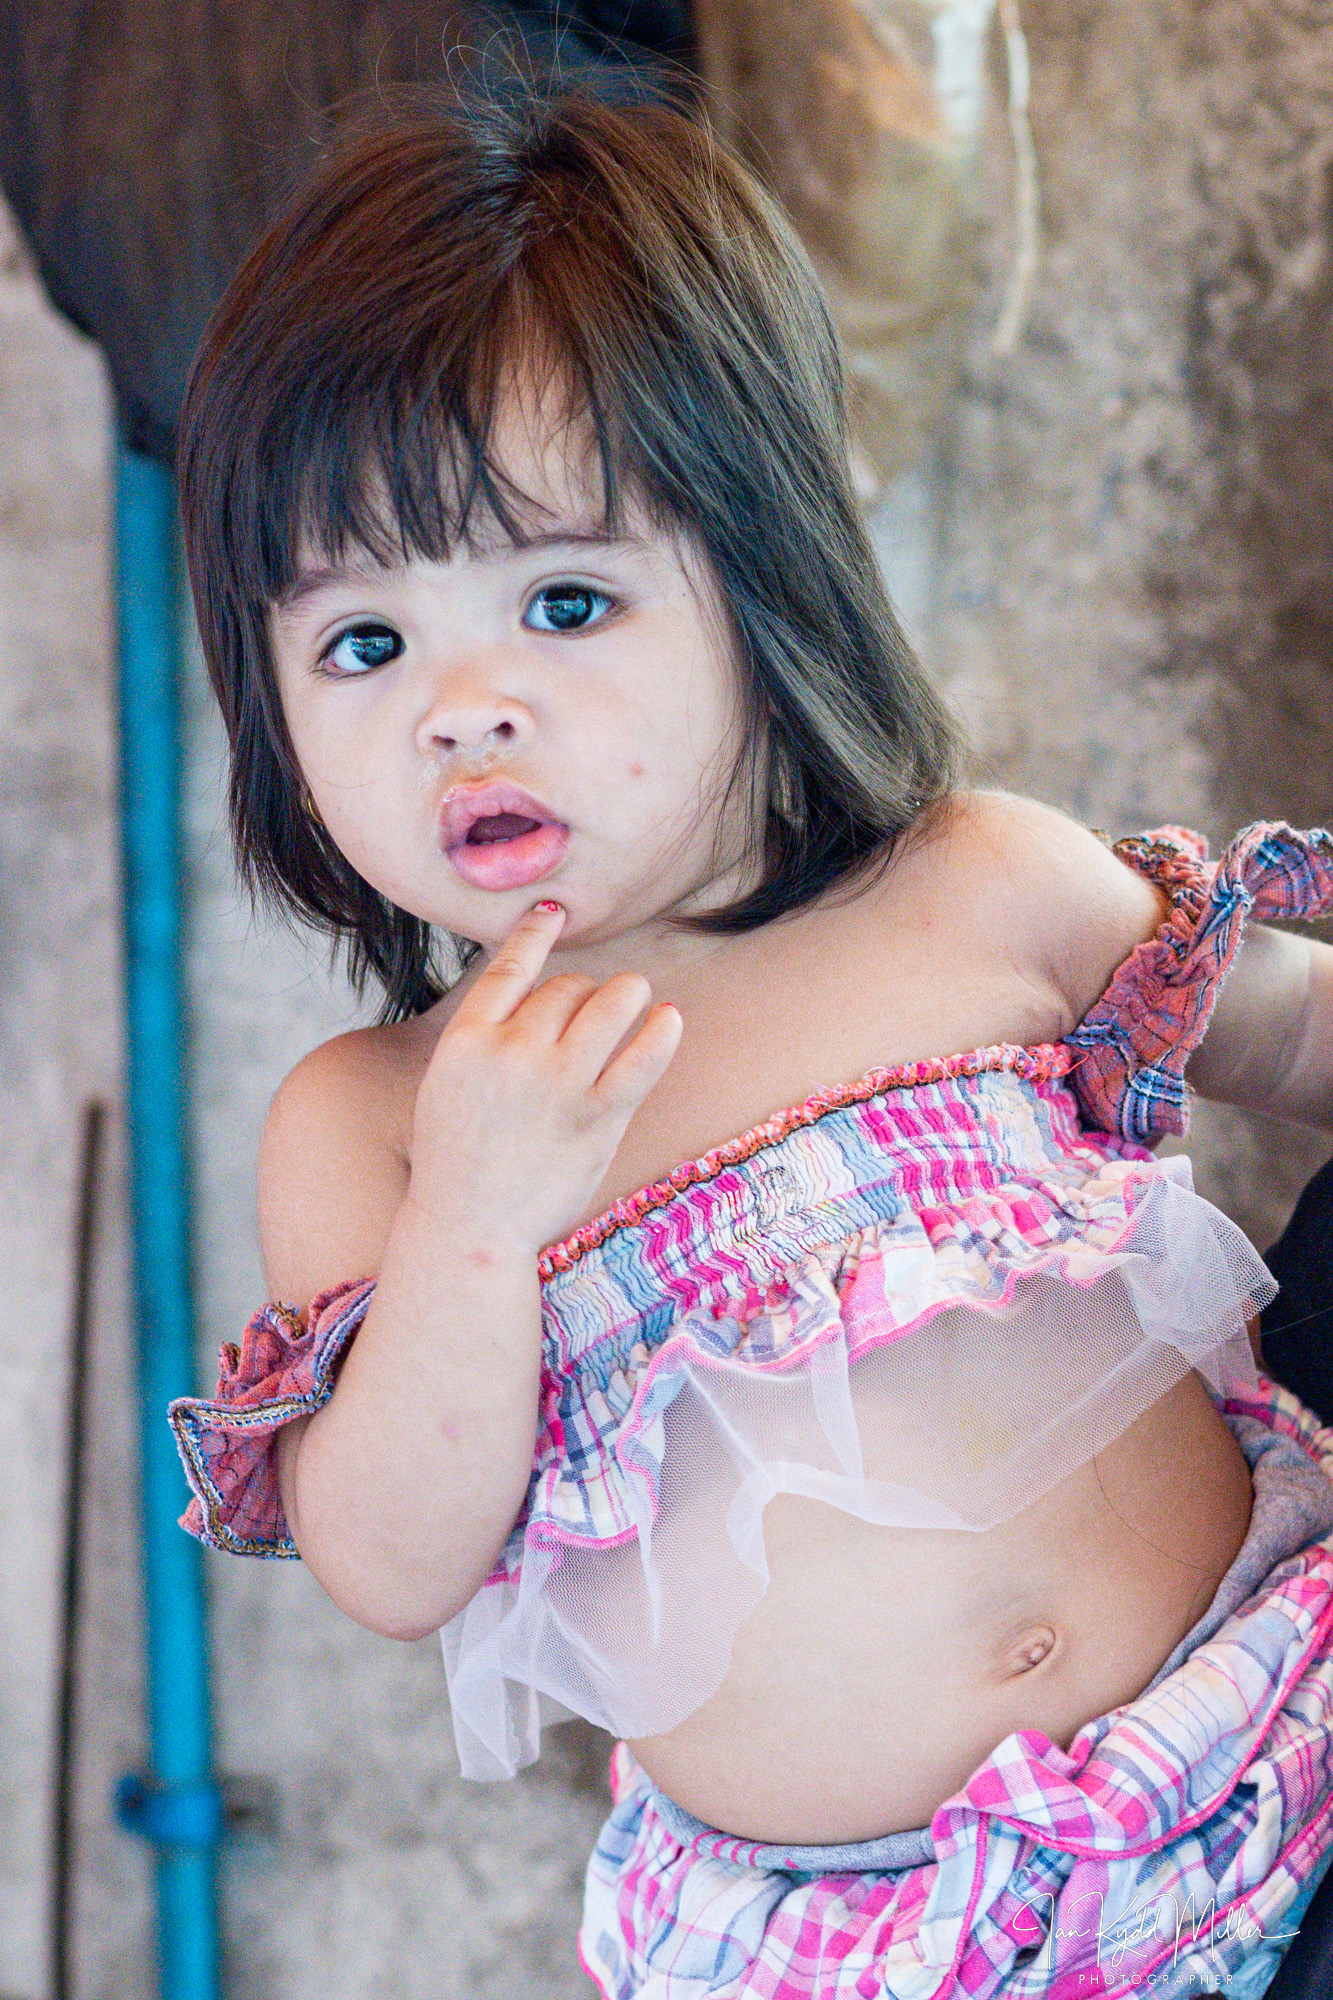
There is a point, sometime in mid-April, when the heat in Cambodia stops being something you endure and becomes something you surrender to. The air thickens, the roads empty, the city slows—then, quite suddenly, it erupts. Buckets appear. Water guns materialise. Talcum powder drifts like a soft, absurd fog. And for three days, sometimes four, the country gives itself permission to behave differently.
Khmer New Year—Chaul Chnam Thmey—is, on paper, a tidy cultural marker: the end of the harvest, the turning of the traditional solar calendar, a ritualised renewal. In practice, it is something messier, louder, and far more revealing. It is what happens when tradition and release collide in public.
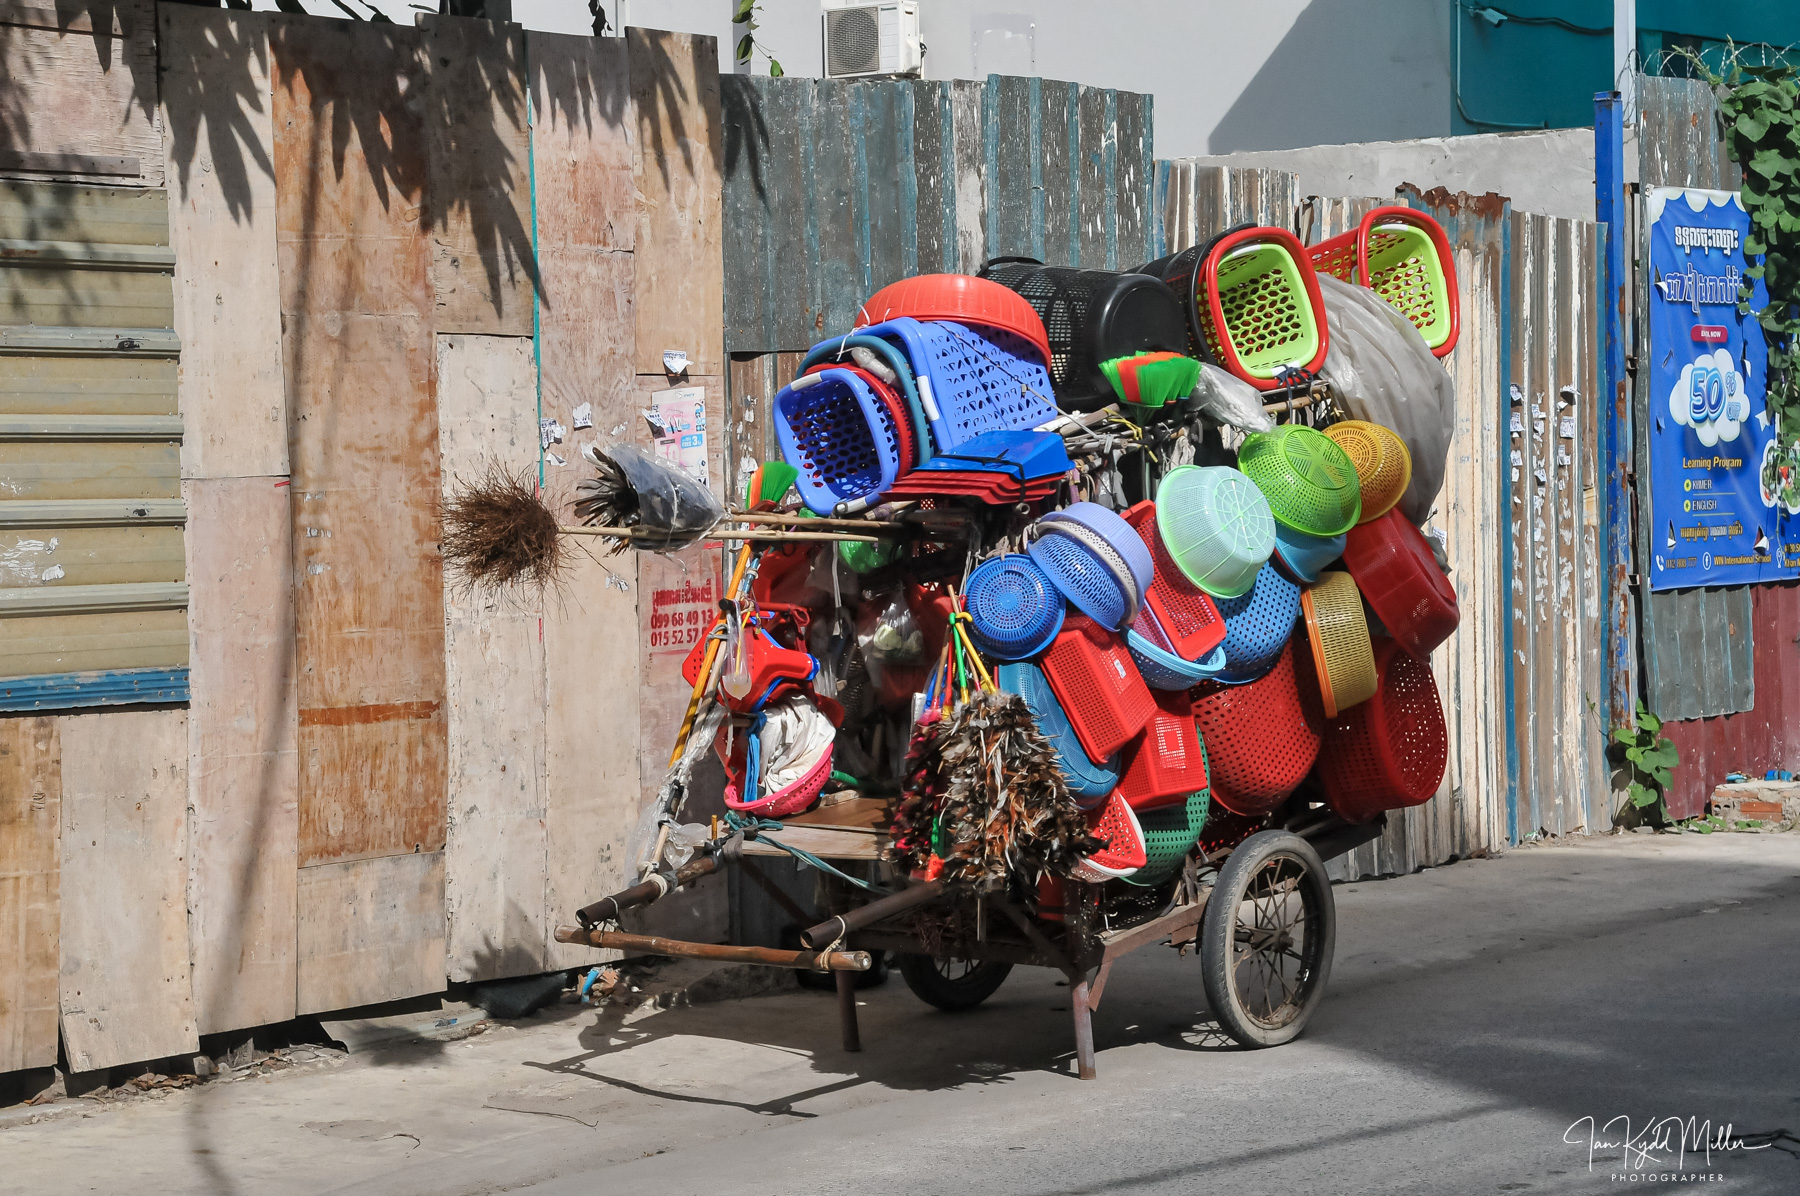
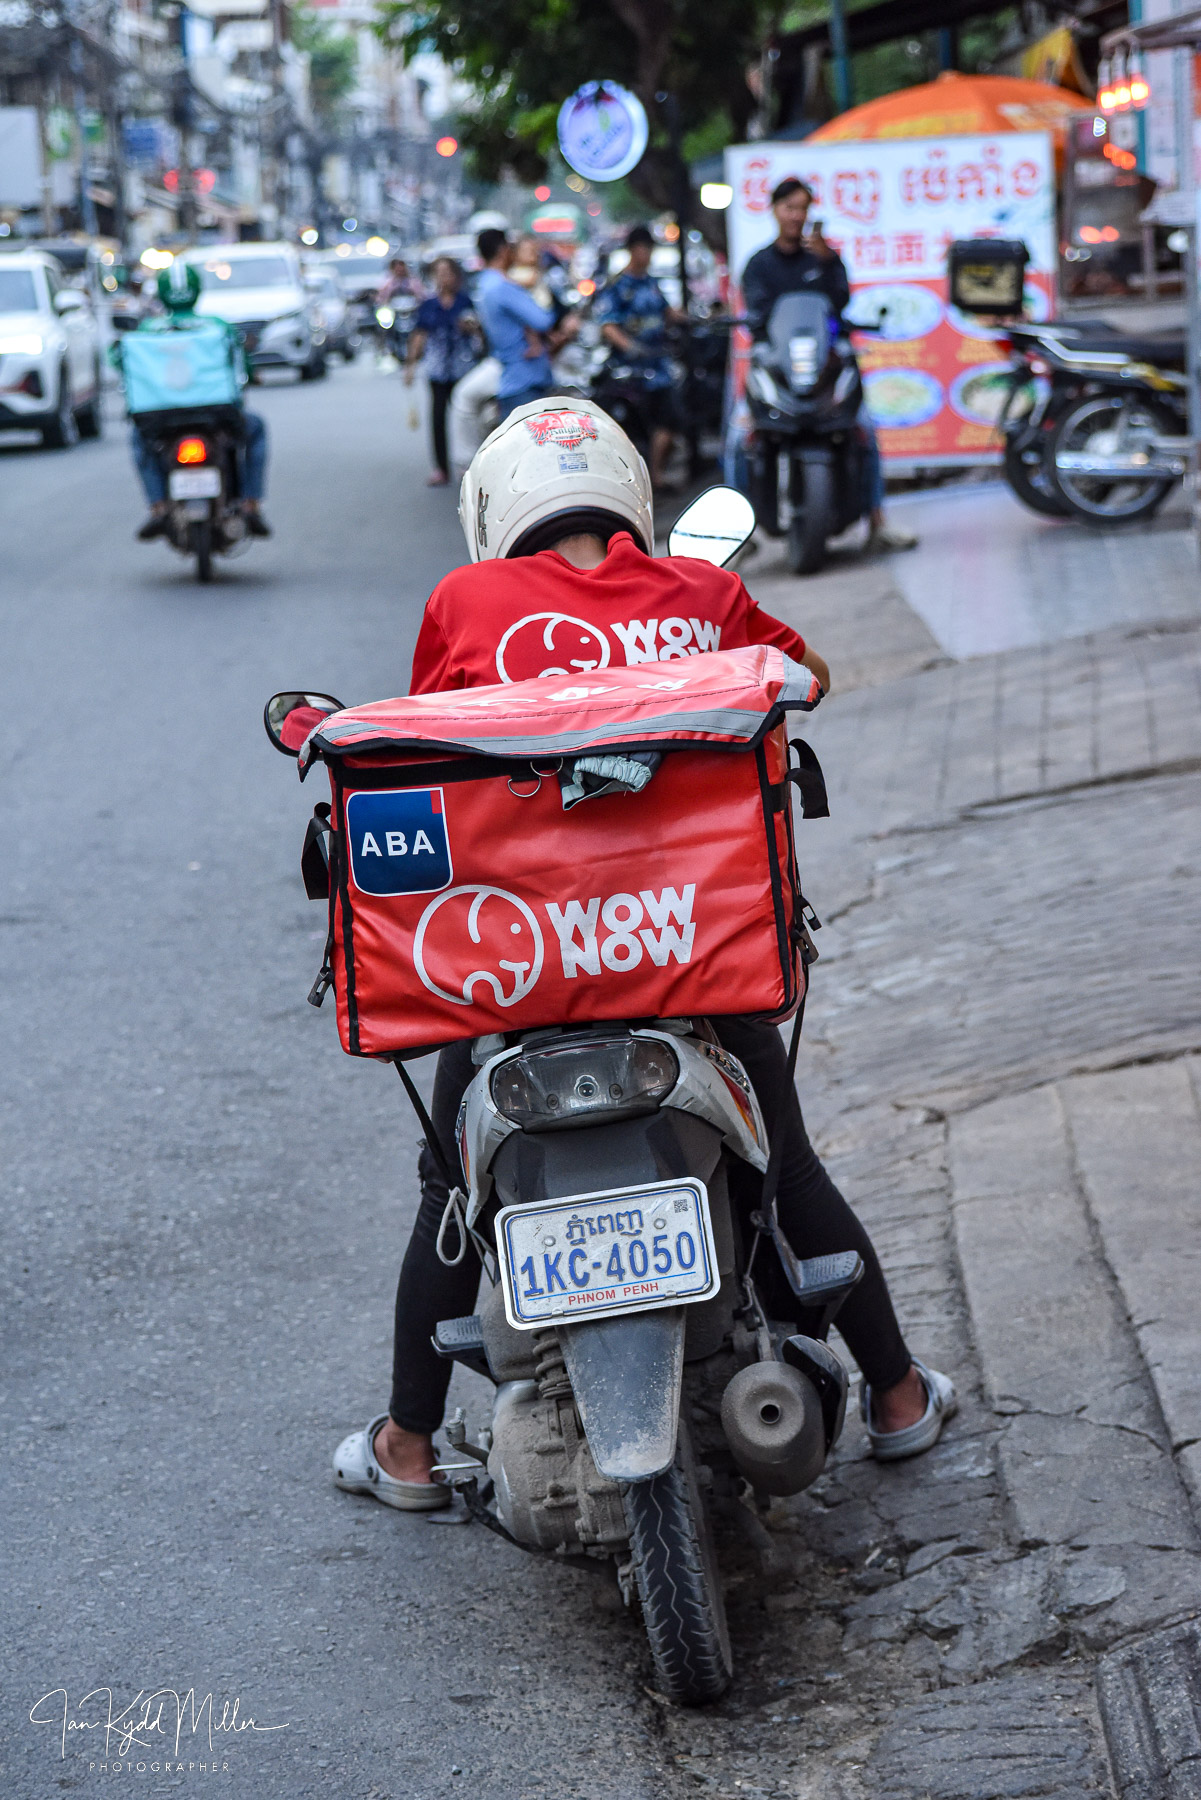
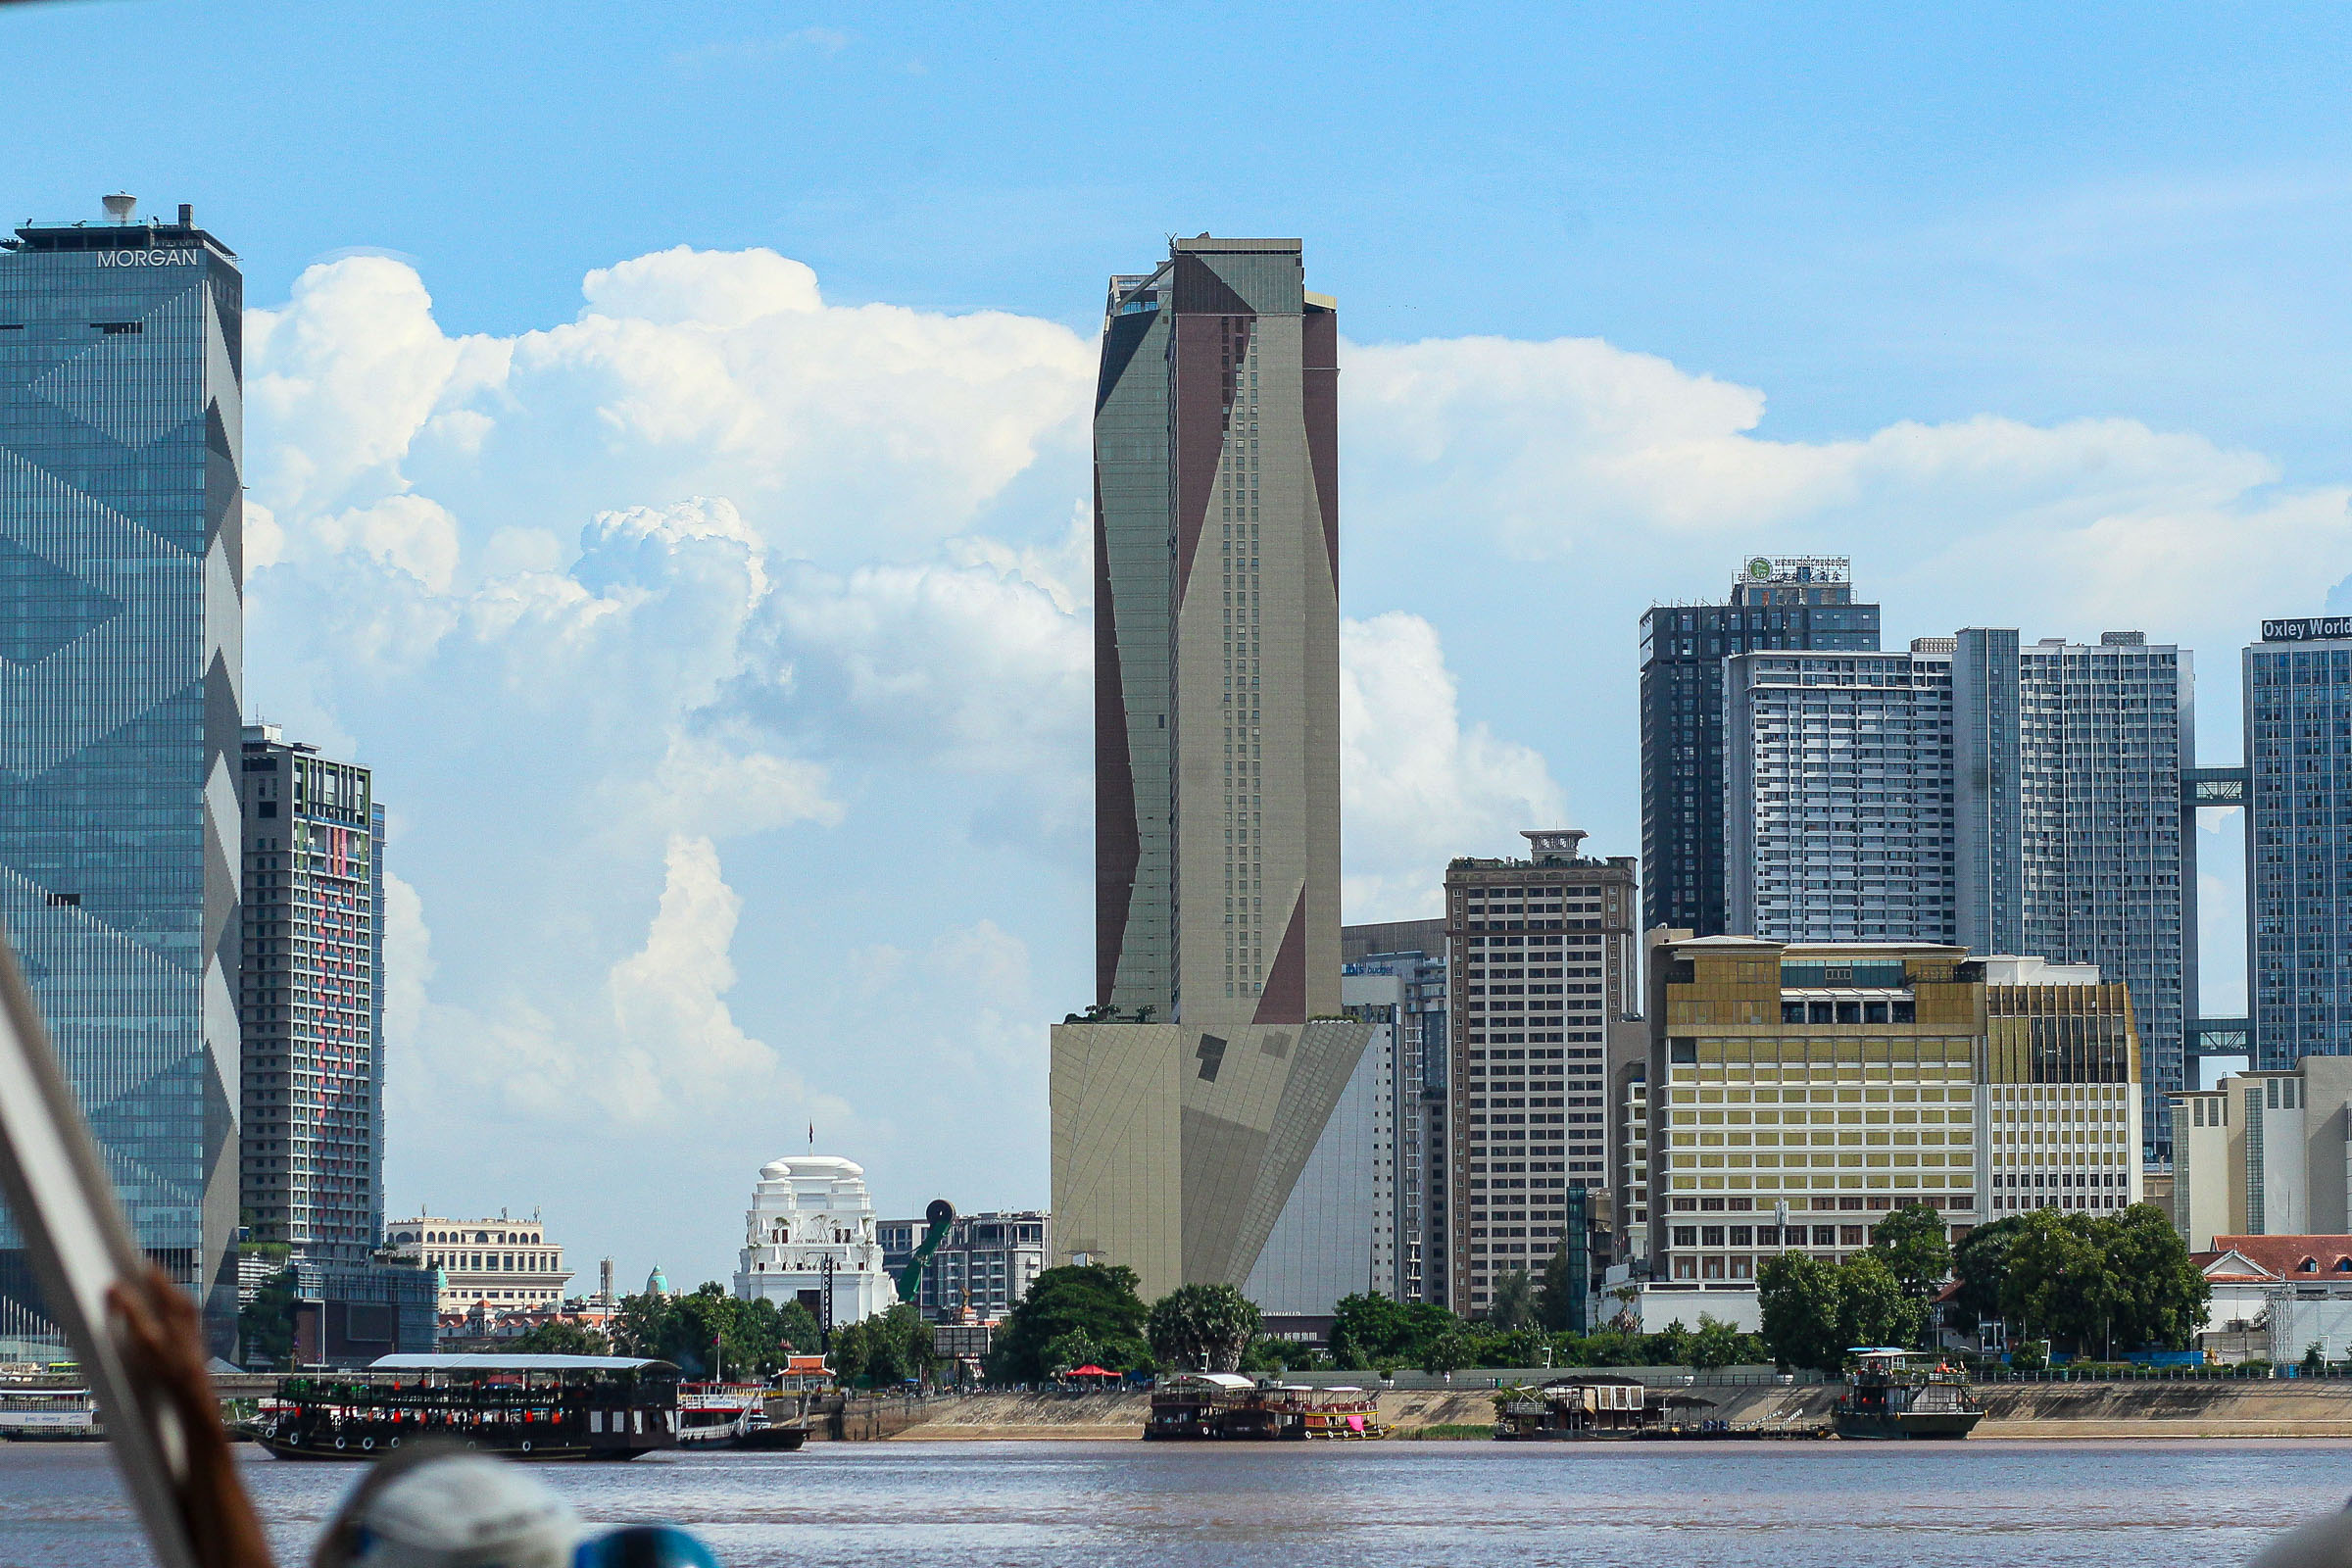
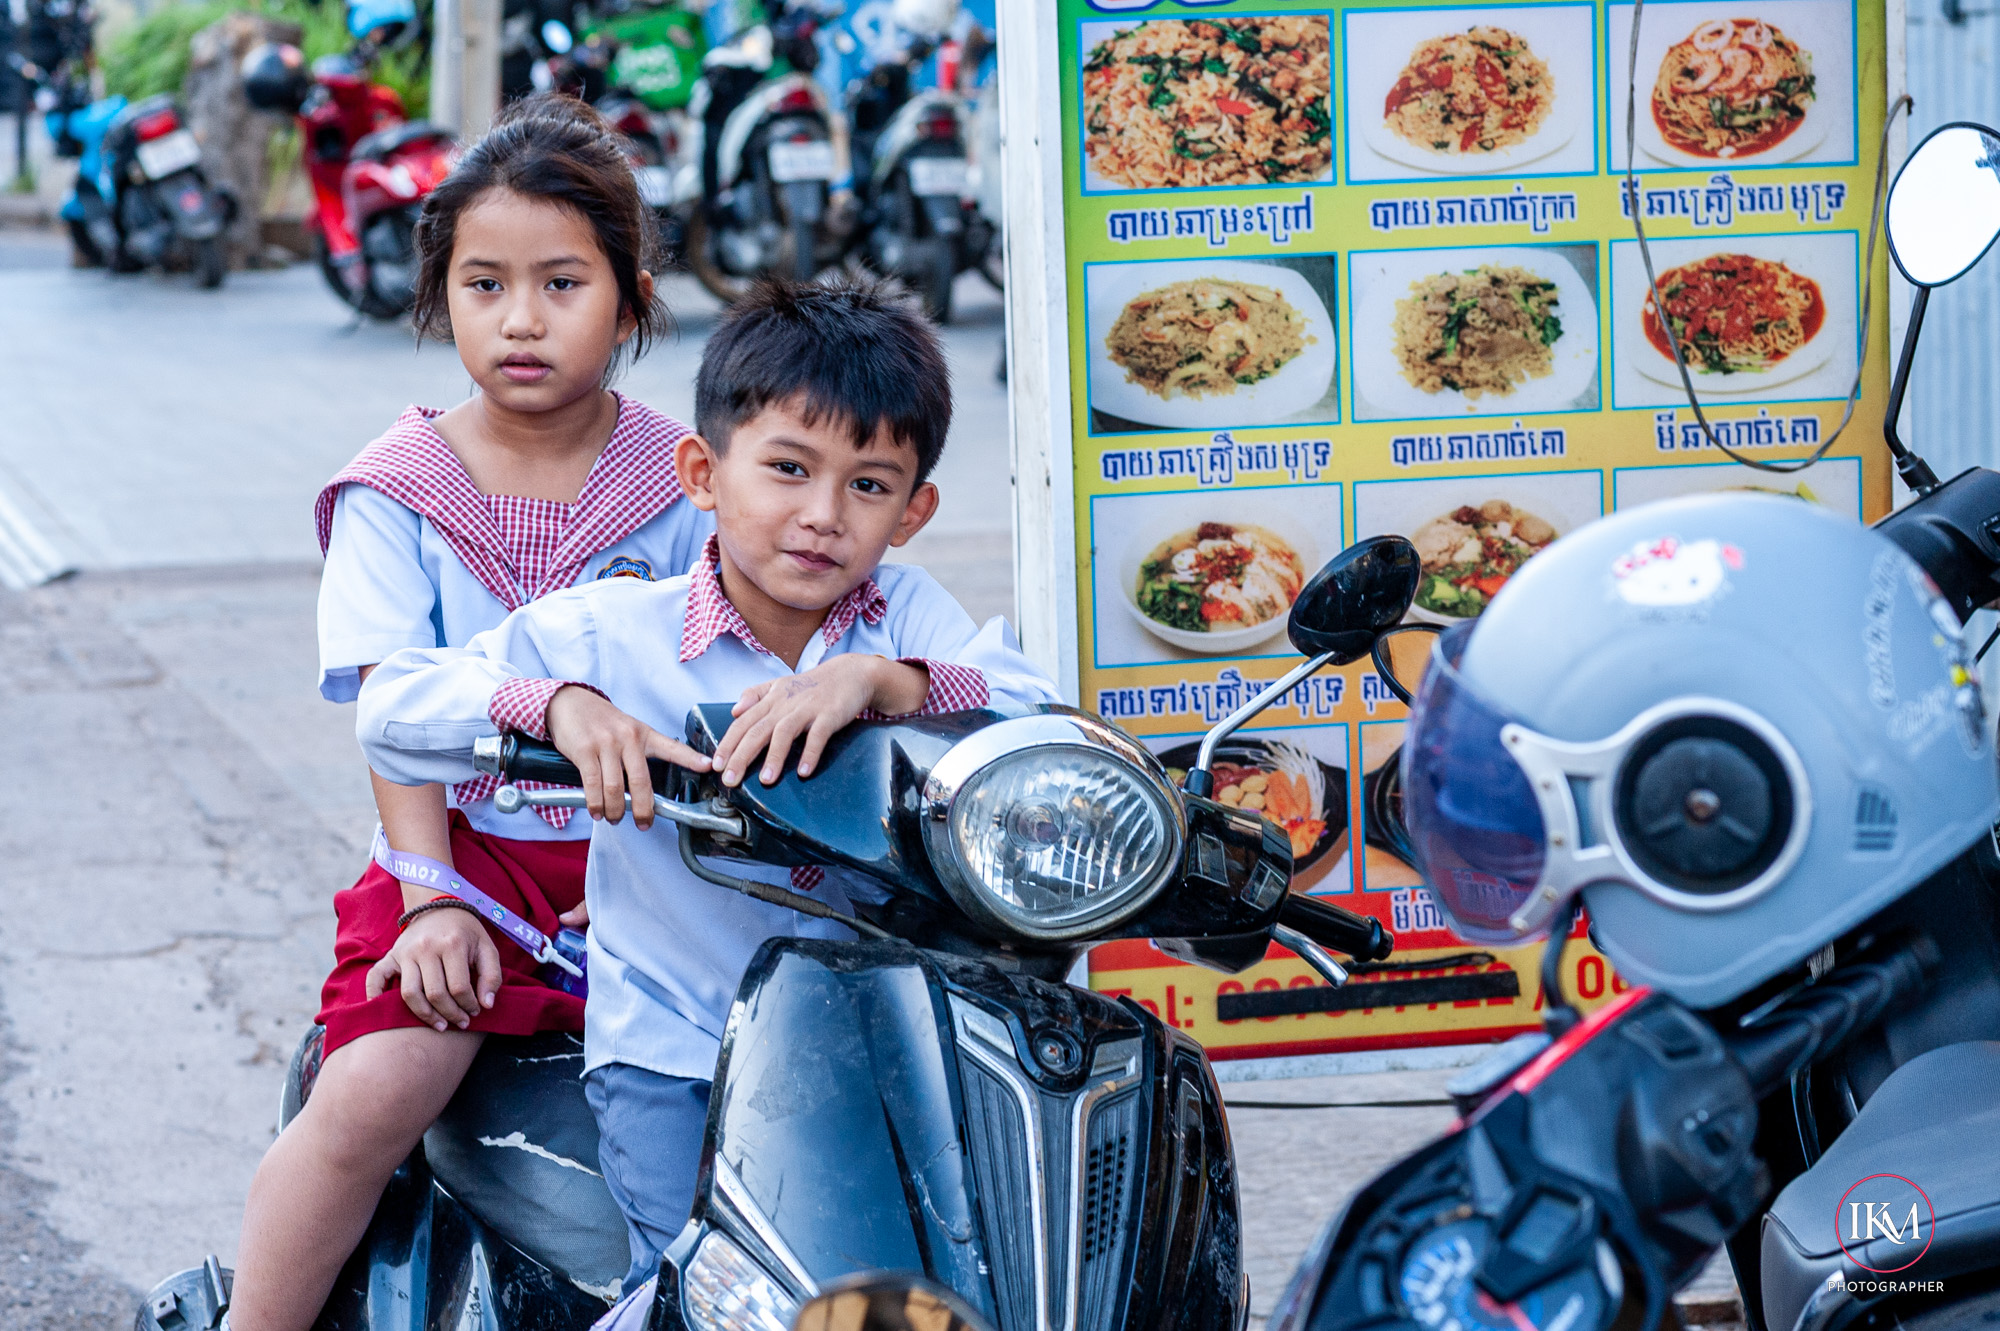
In Phnom Penh, the capital loosens its collar. Offices close. Families travel. Those who remain drift towards the streets, where pickup trucks loaded with teenagers circle like improvised carnival floats, music blaring, water sloshing dangerously close to the edge. Strangers become targets, then accomplices. No one is exempt for long. There is an egalitarianism to being soaked to the bone.
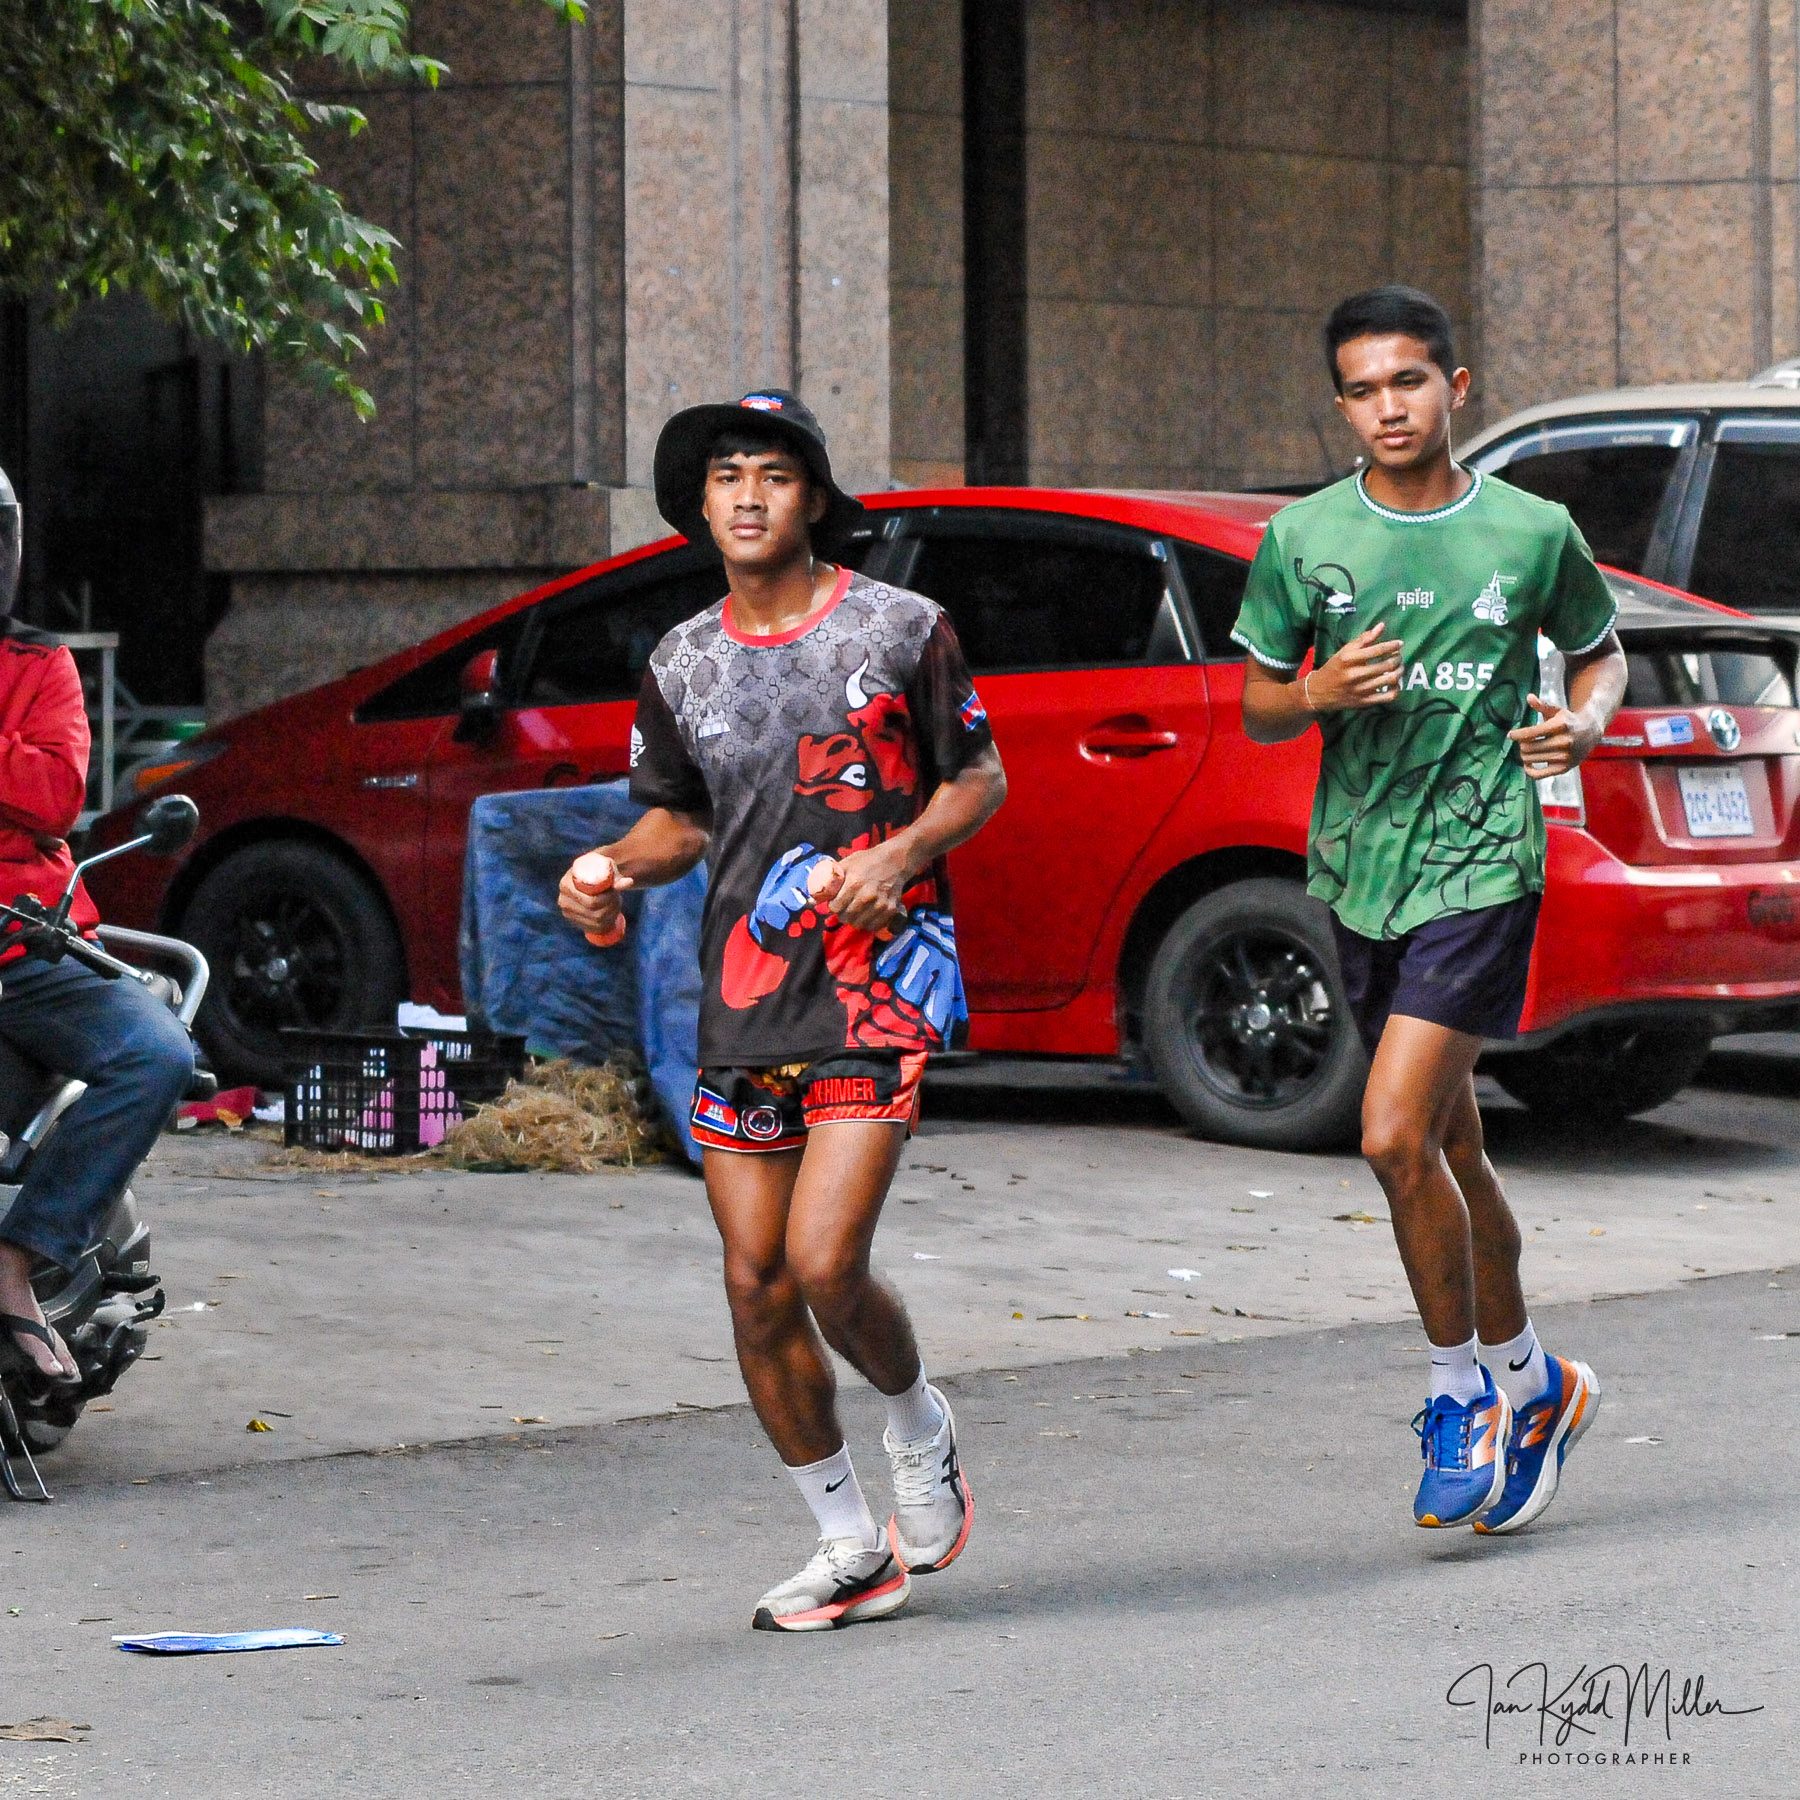
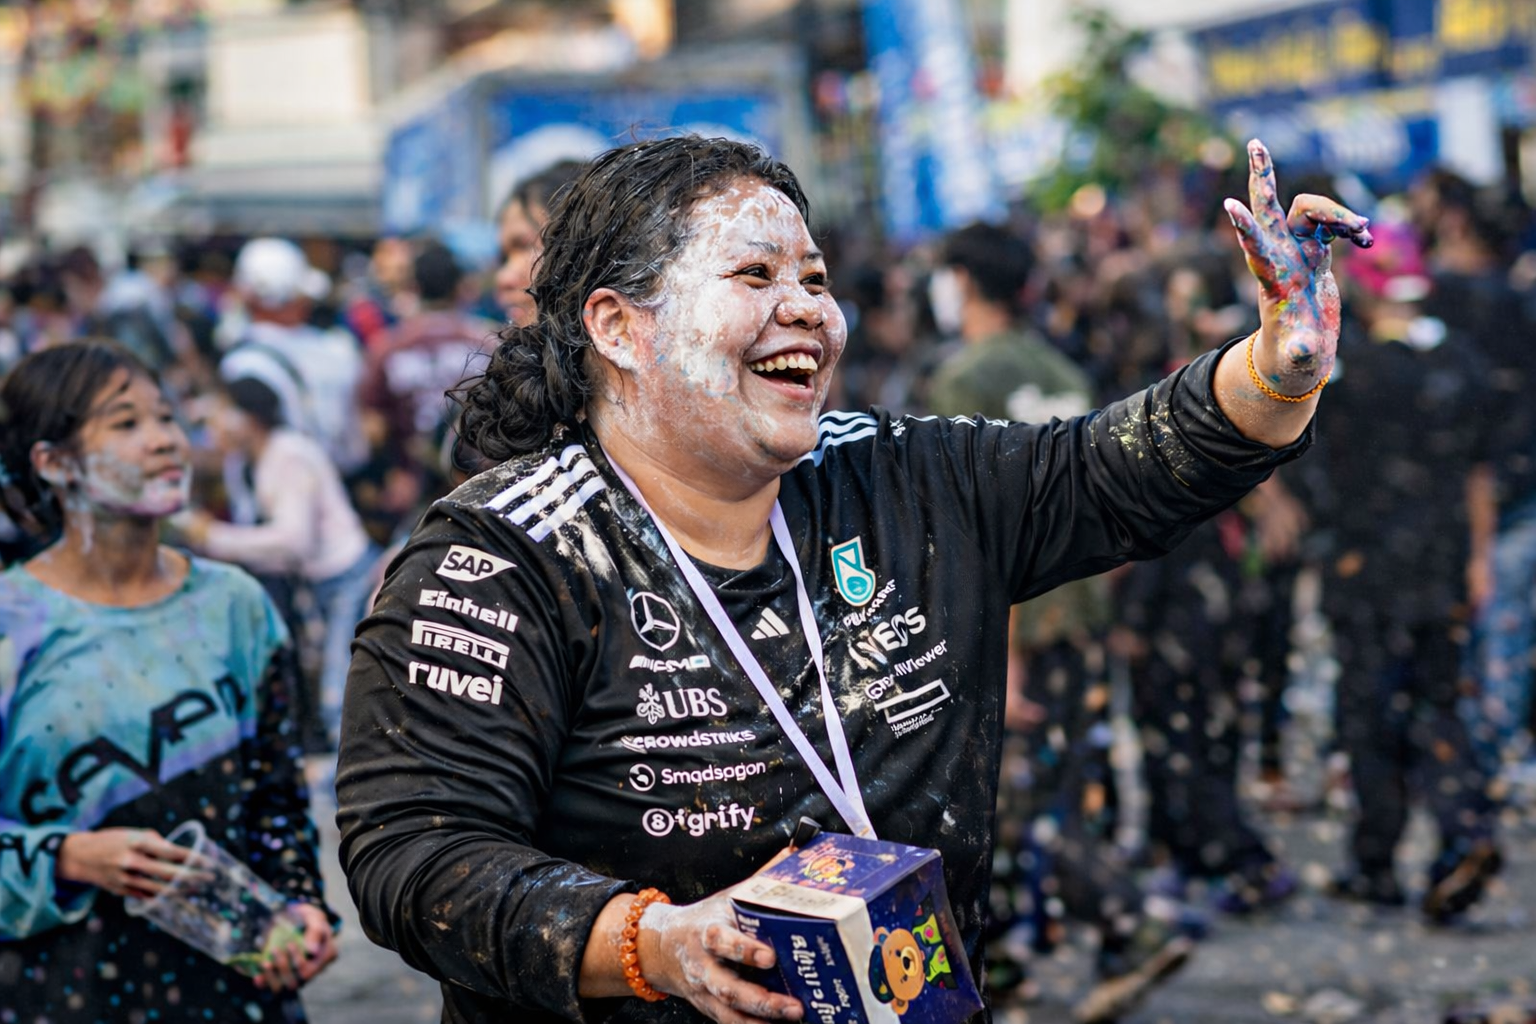
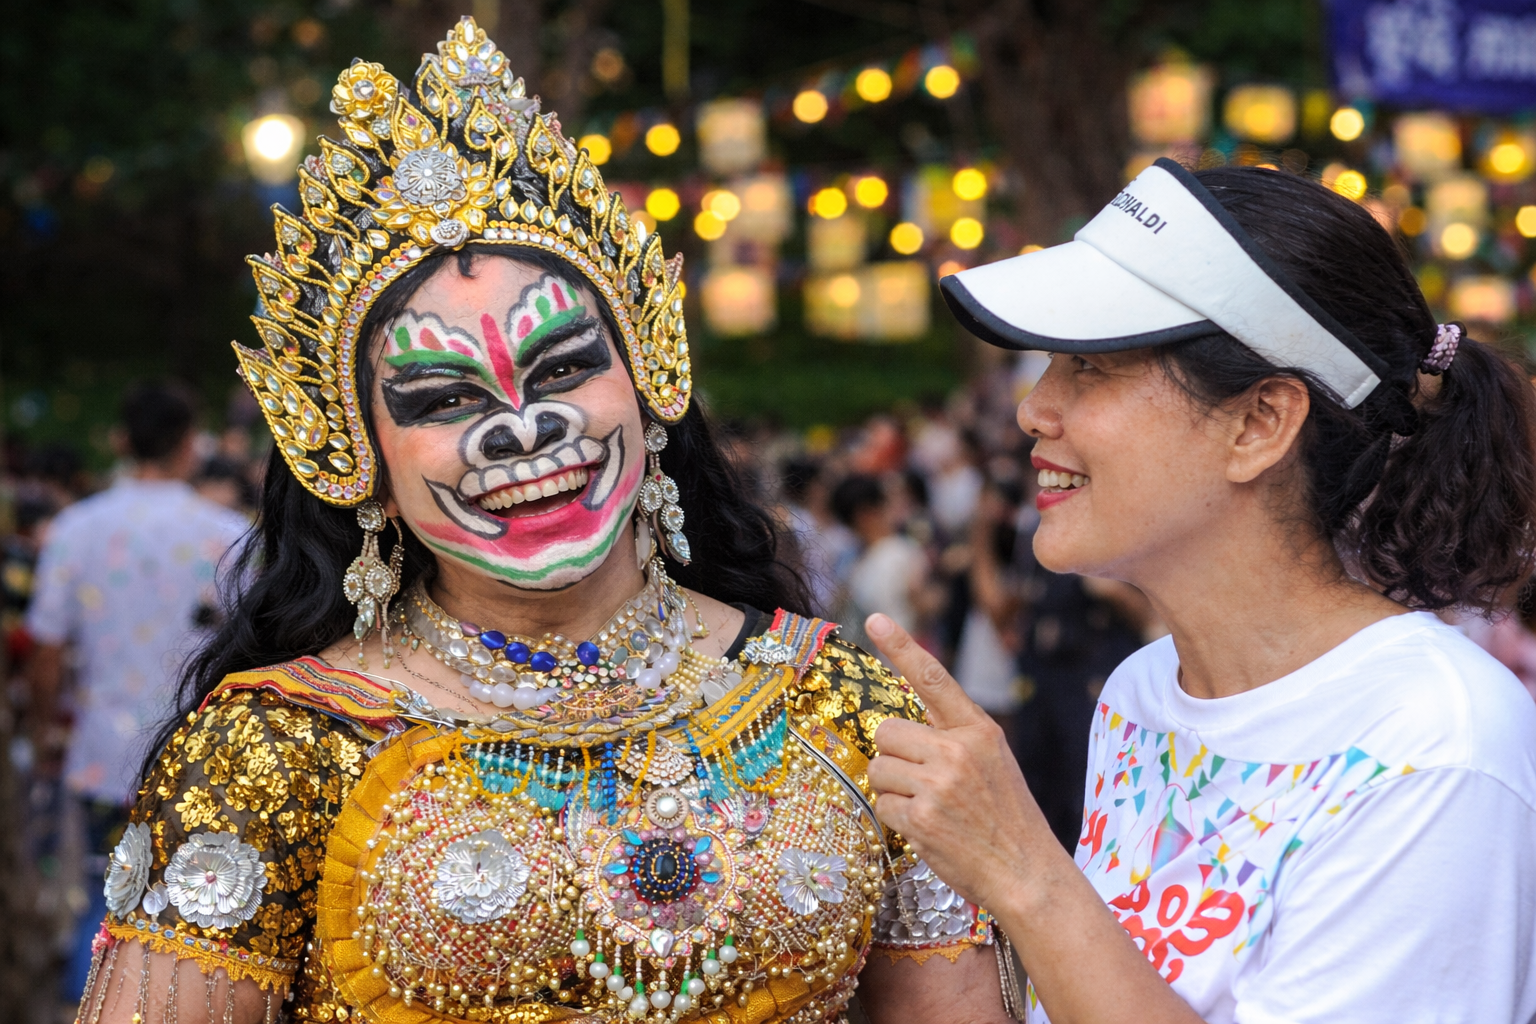
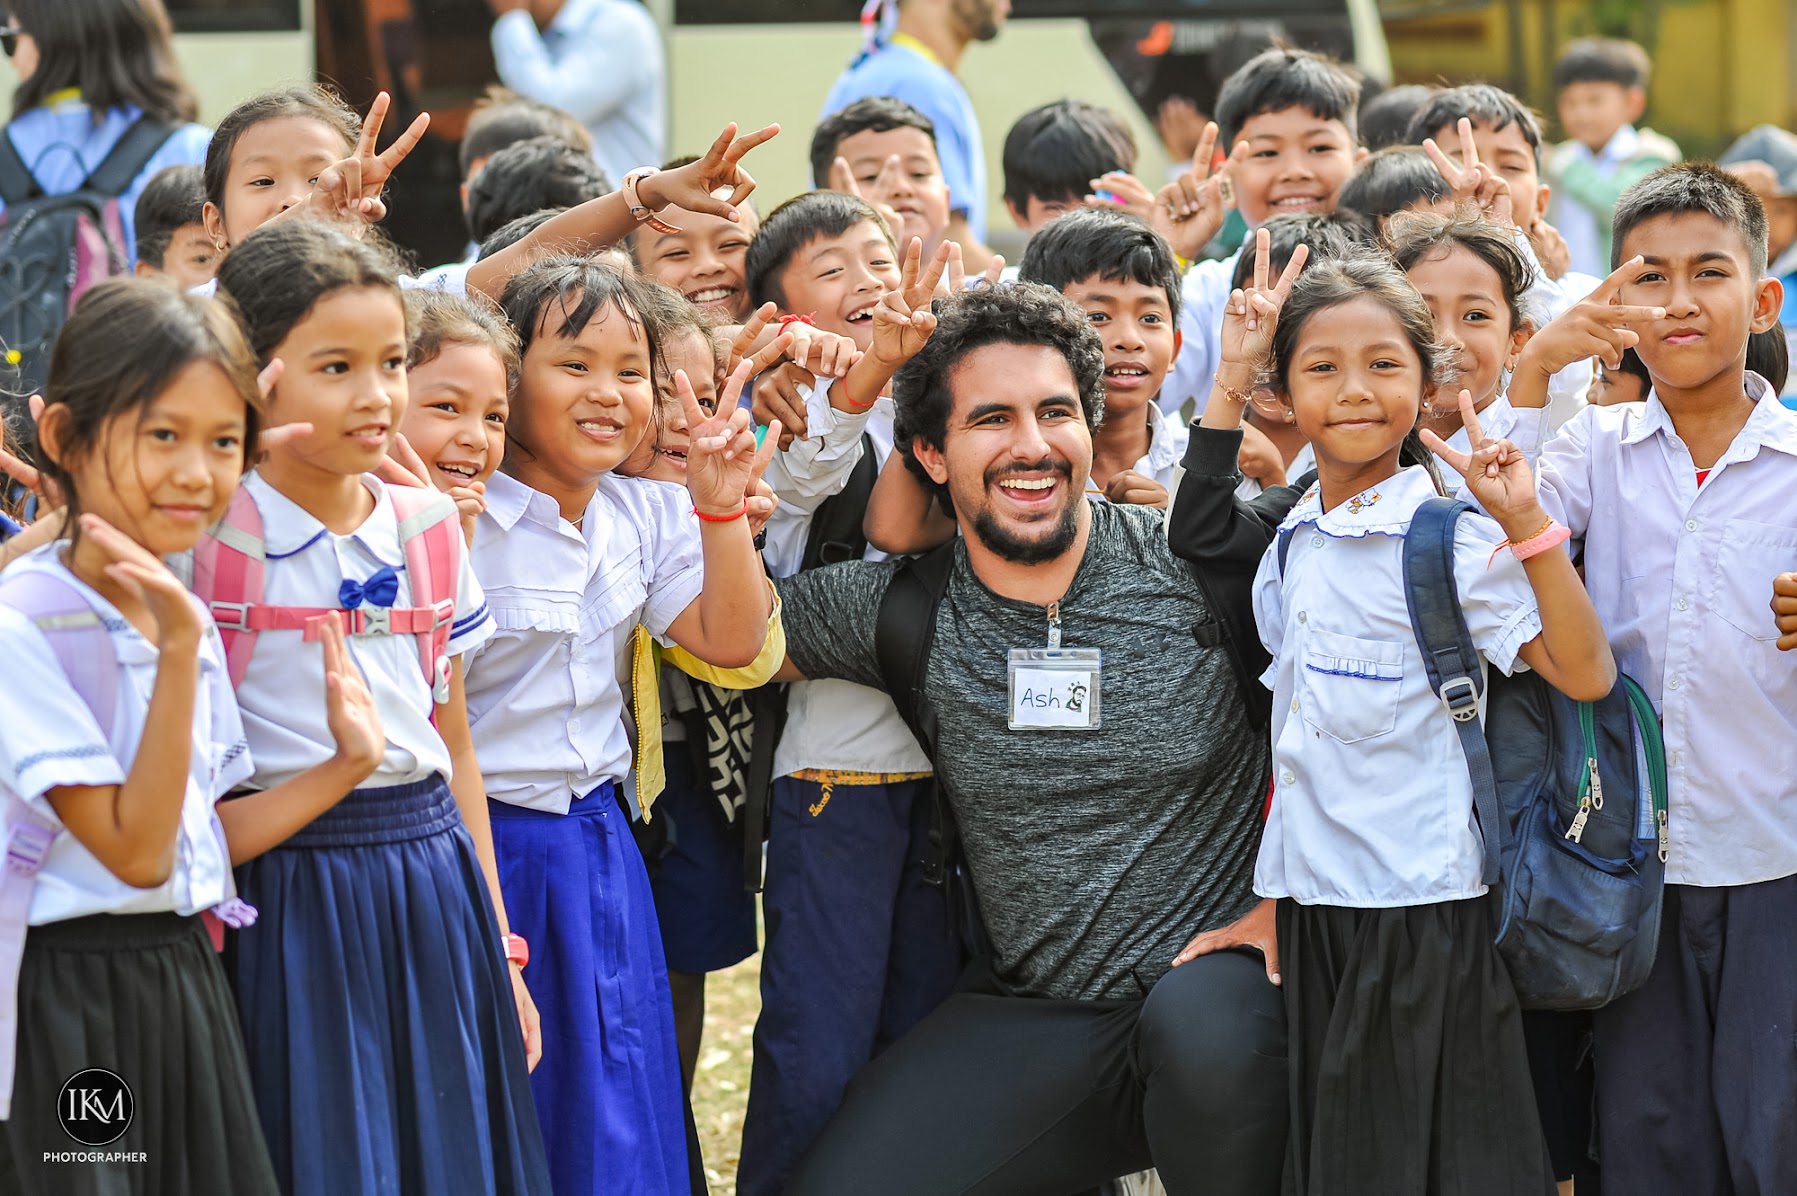
Further north, in Siem Reap, the festival takes on a more curated intensity. The Angkor Sankranta celebrations—part cultural showcase, part organised spectacle—draw crowds that swell into something approaching the uncontrollable. Traditional games are played with theatrical enthusiasm; dancers move with studied grace; and all around them, a less choreographed energy pushes in, demanding space. It is here that Cambodia performs itself, for tourists and for its own younger generation, who seem less interested in preservation than participation.
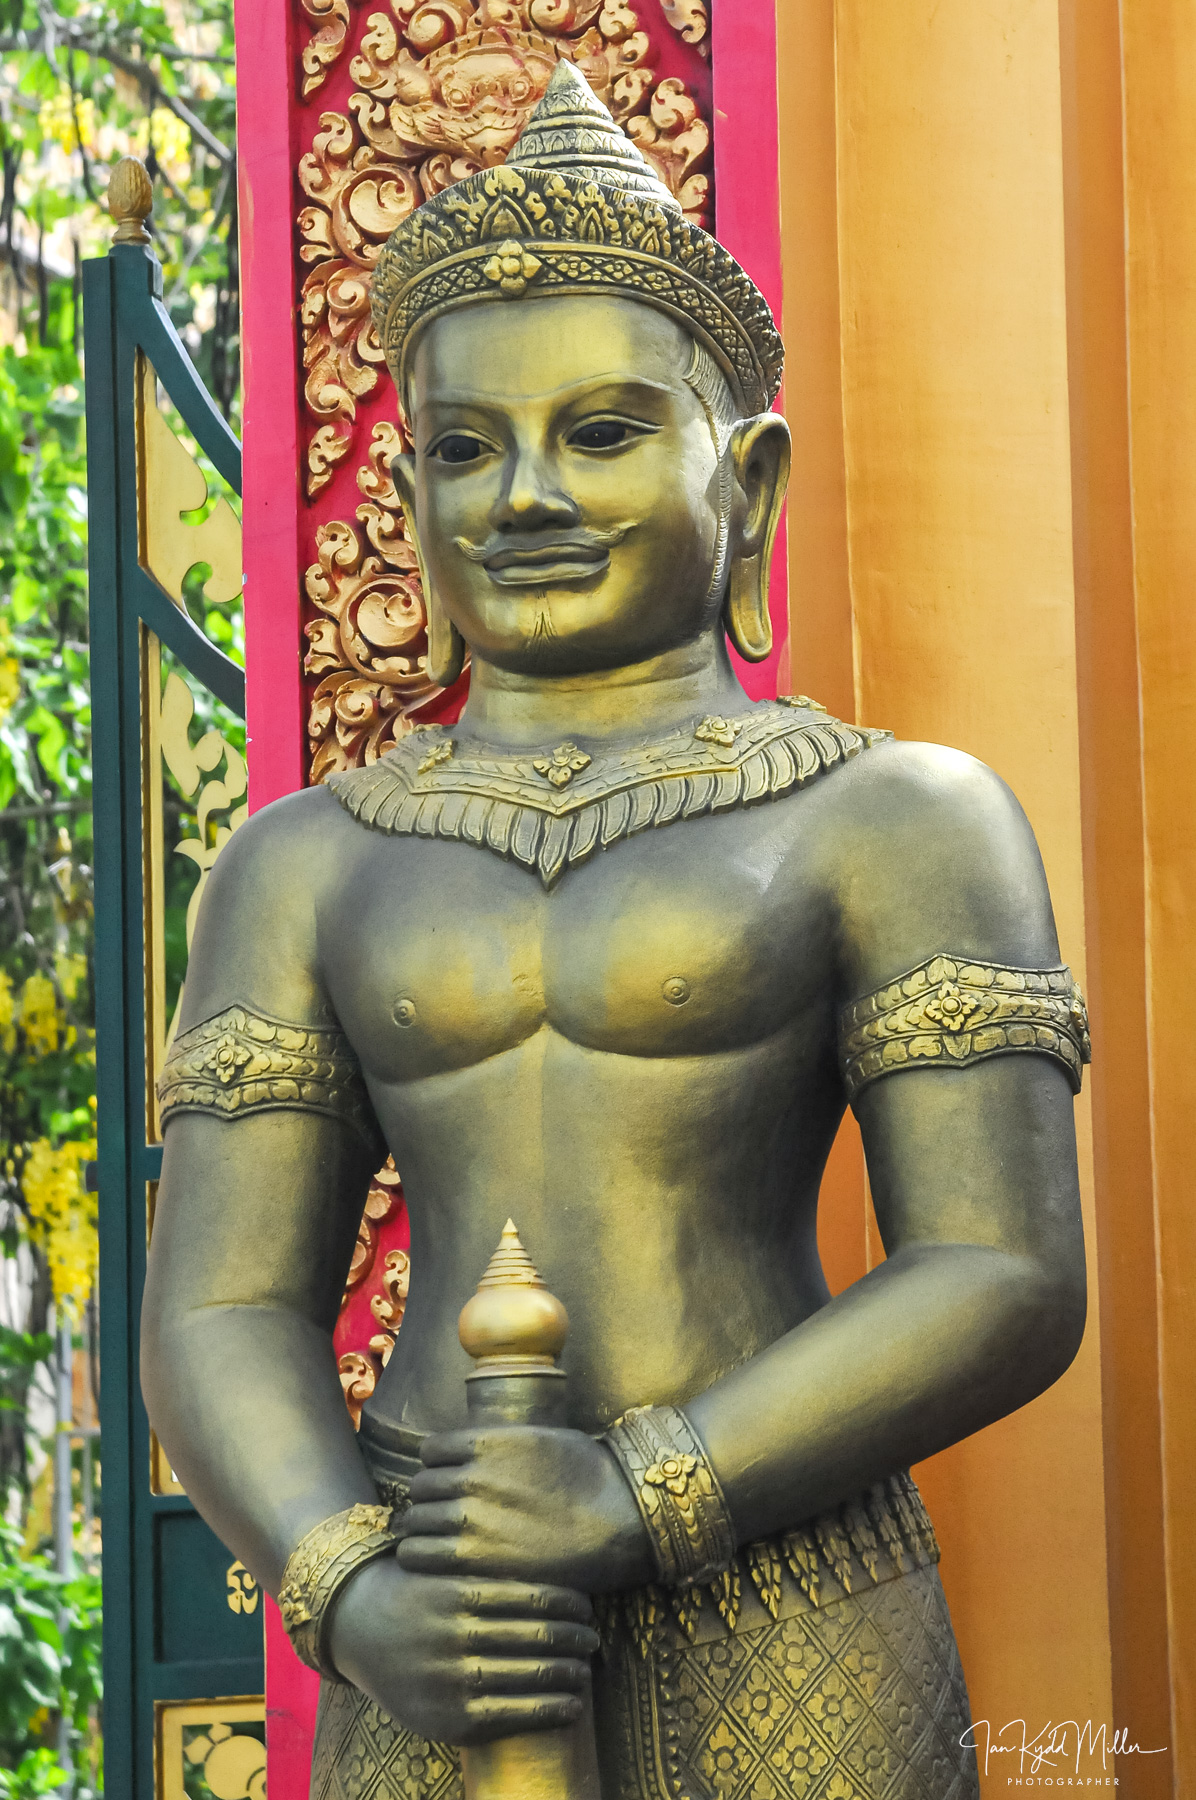
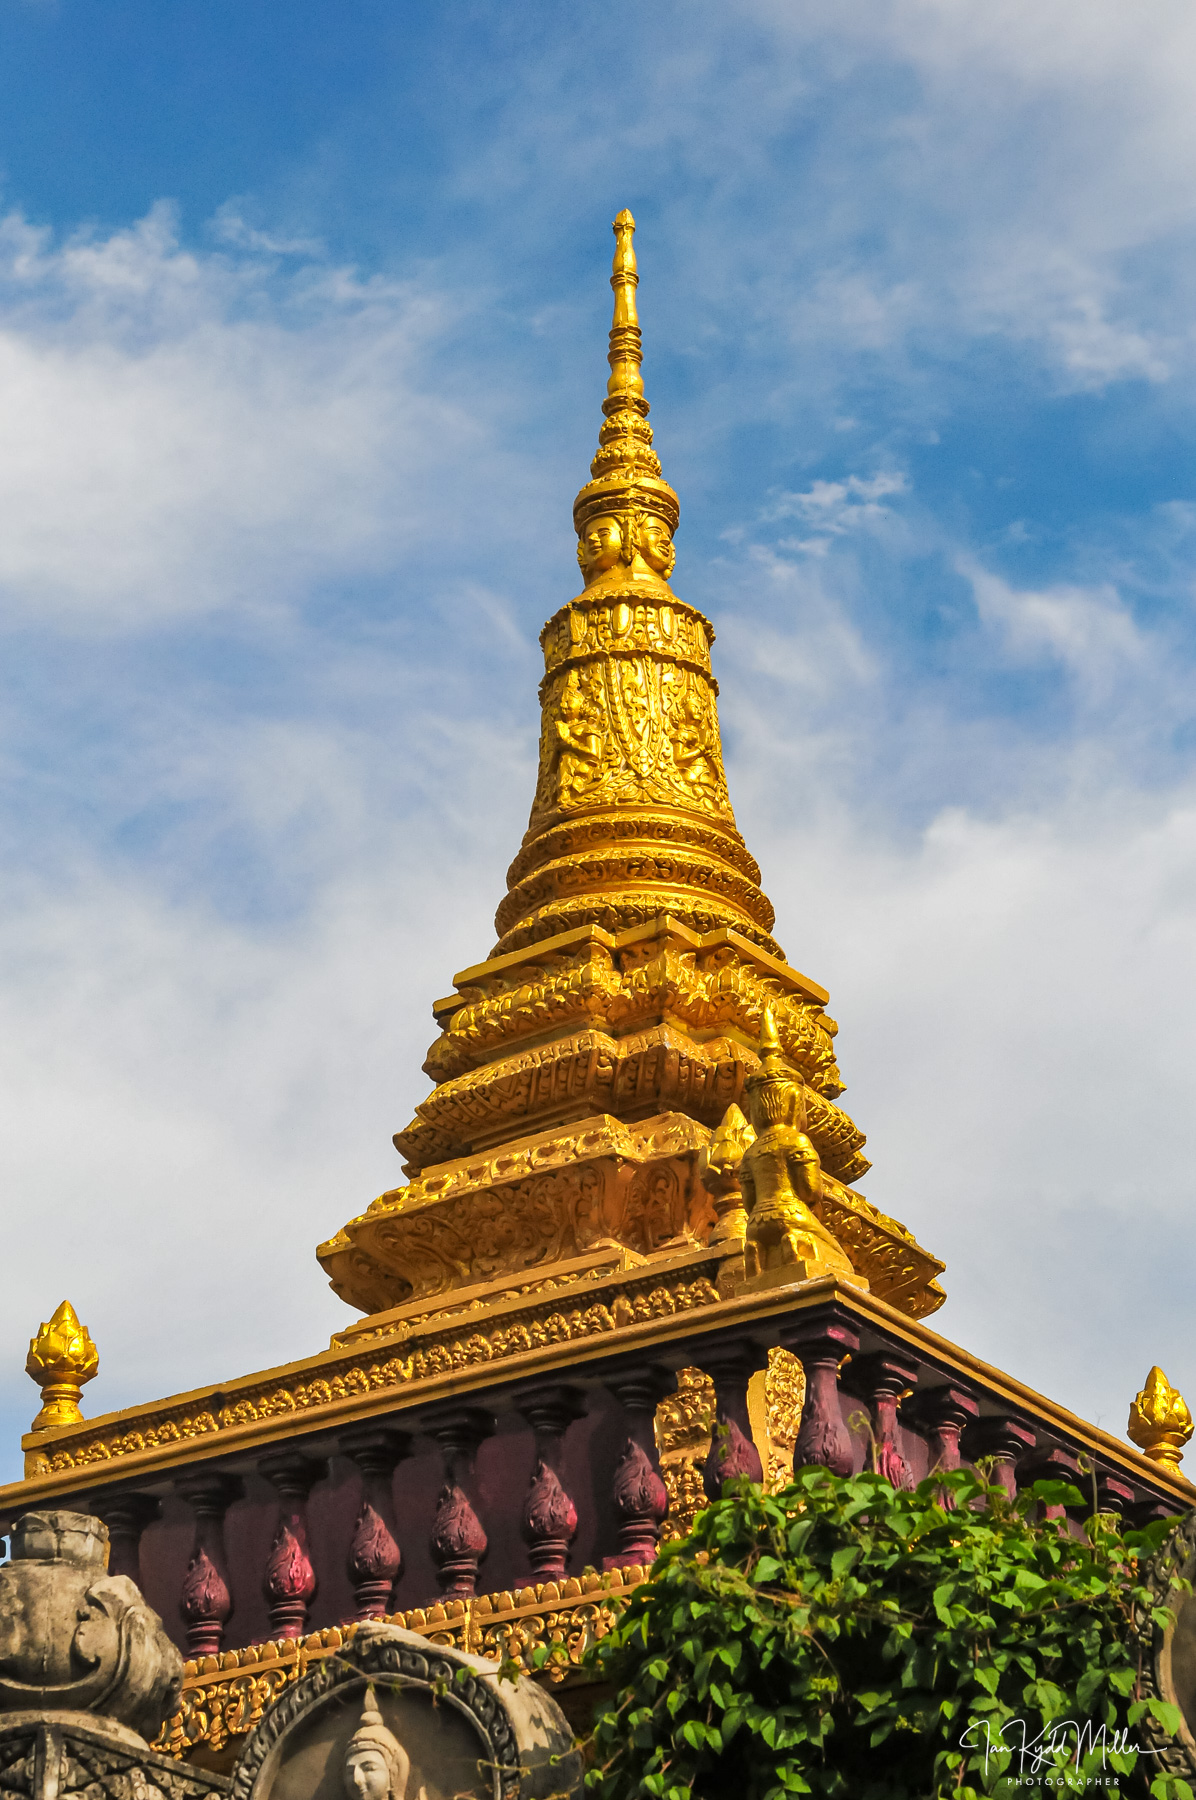
But to understand the festival solely through its public exuberance is to miss its quieter logic. Khmer New Year is, at its core, an act of recalibration. Homes are cleaned. Altars prepared. Offerings made. At pagodas across the country, sand is carried, shaped into small stupas, and left as a gesture of merit—a symbolic investment in a better future. The ritual is simple, almost austere, and it sits in deliberate contrast to the chaos outside the temple gates.
Inside those grounds, time moves differently. Elders are gently washed with perfumed water, a gesture of respect and continuity. Buddha statues are bathed in the same way, the act less about cleansing than about acknowledgement. These are not grand spectacles but small, repeated gestures, performed with an understanding that renewal is less an event than a habit.
The tension between these two worlds—the reflective and the riotous—is where the festival finds its meaning. Cambodia is a country with a long memory and a young population. Khmer New Year allows both to coexist, briefly, without friction. The past is honoured; the present is loudly, unapologetically lived.
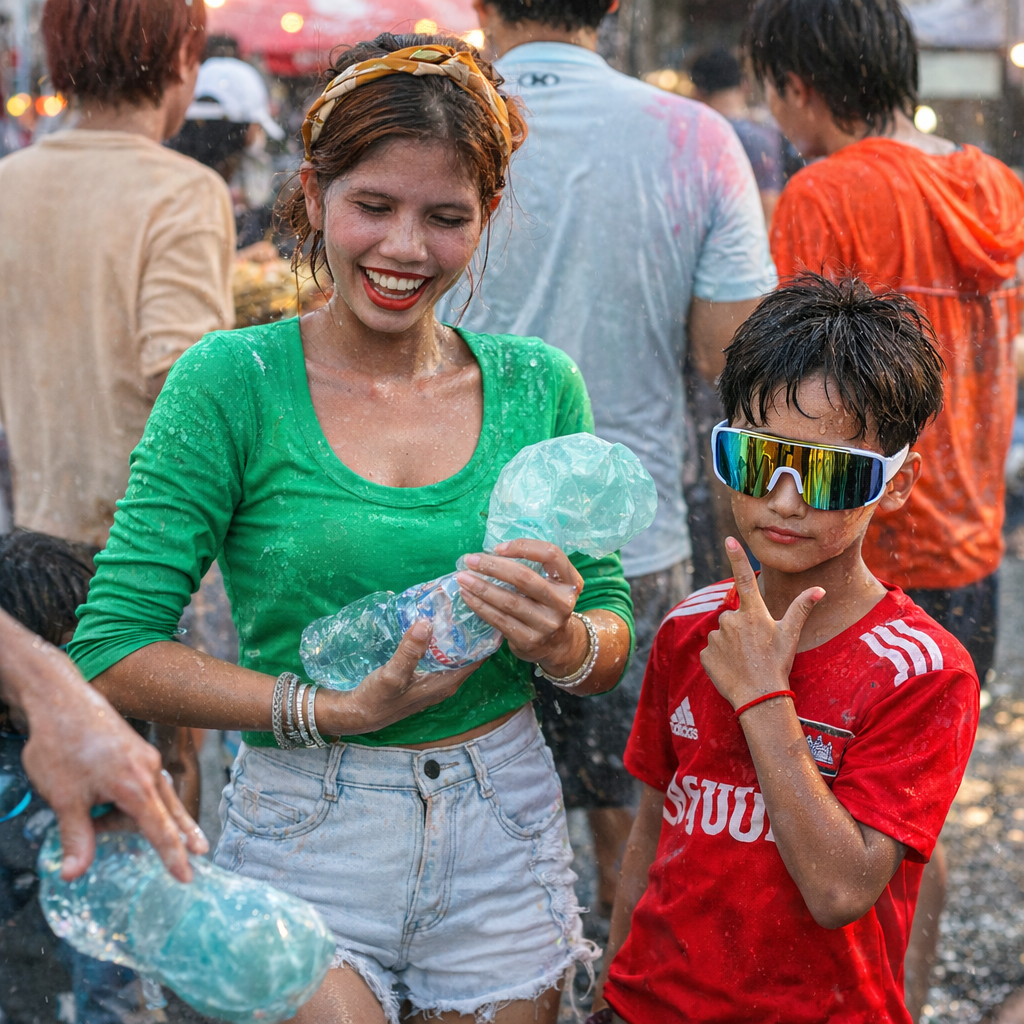
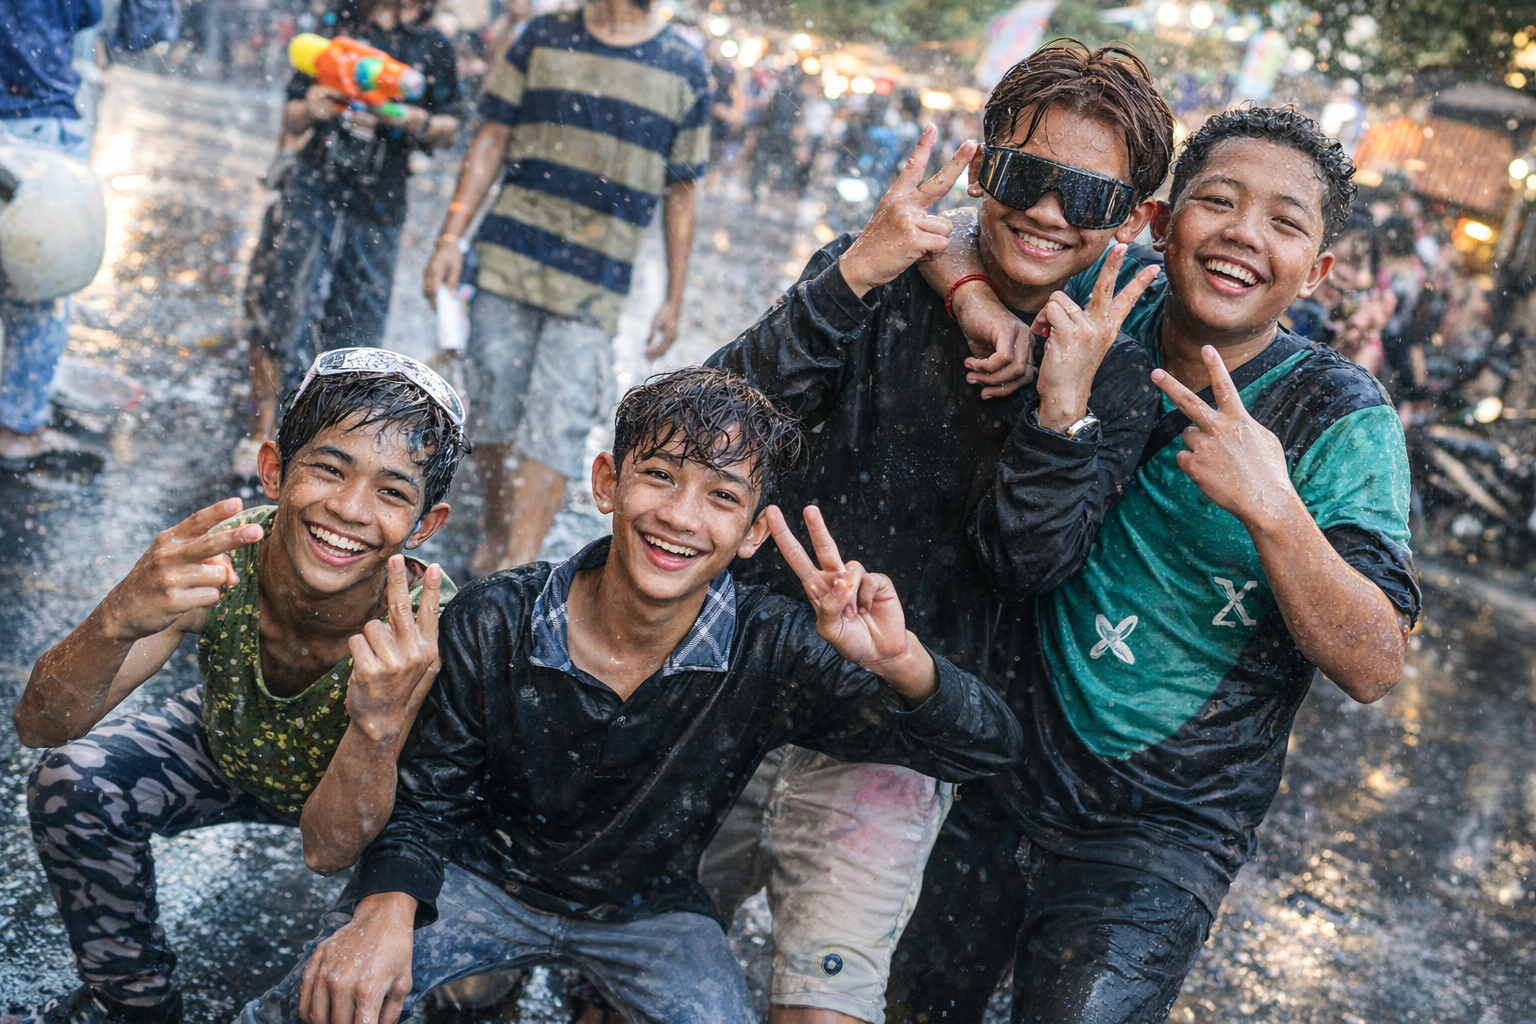
There is also, unmistakably, a sense of release. For a few days, hierarchies soften. The office worker and the street vendor, the local and the visitor, the cautious and the reckless—all are reduced to the same soaked, powdered state. It is not quite equality, but it is close enough to feel like one. In a region where public life is often tightly structured, this temporary suspension carries weight.
Yet the festival resists easy romanticism. The same exuberance that fuels its appeal can tip into excess. Roads become hazardous, crowds unpredictable, boundaries blurred. The line between play and intrusion is not always clearly drawn. As with many large-scale celebrations, what feels liberating to some can feel overwhelming to others. The state tolerates this looseness, even encourages it, but only within an unspoken limit.
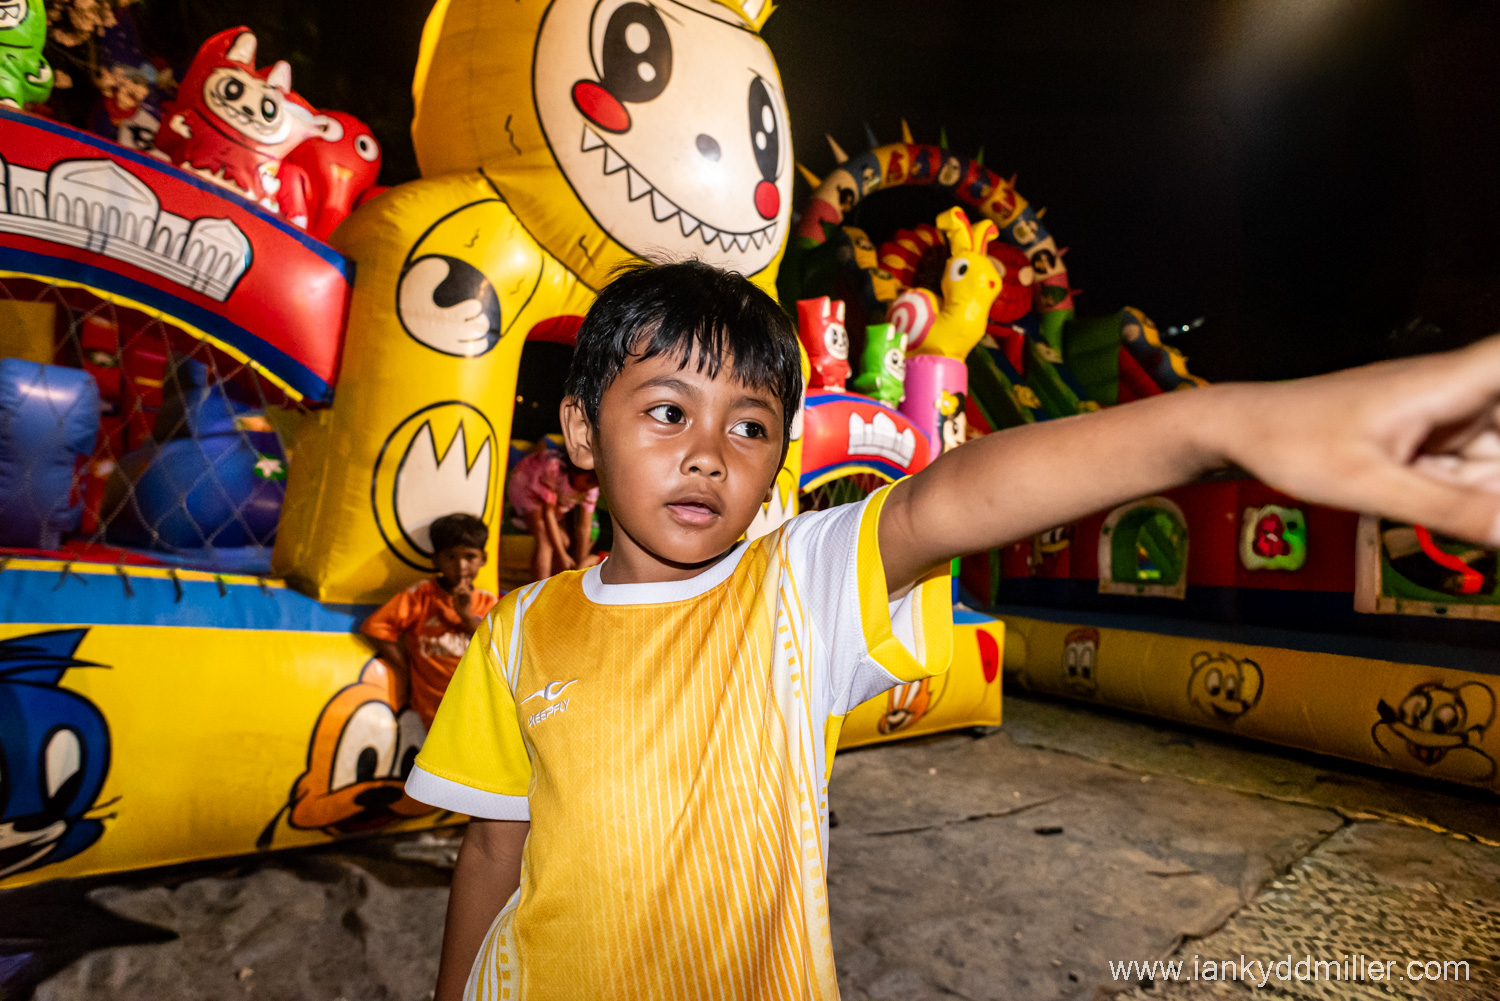
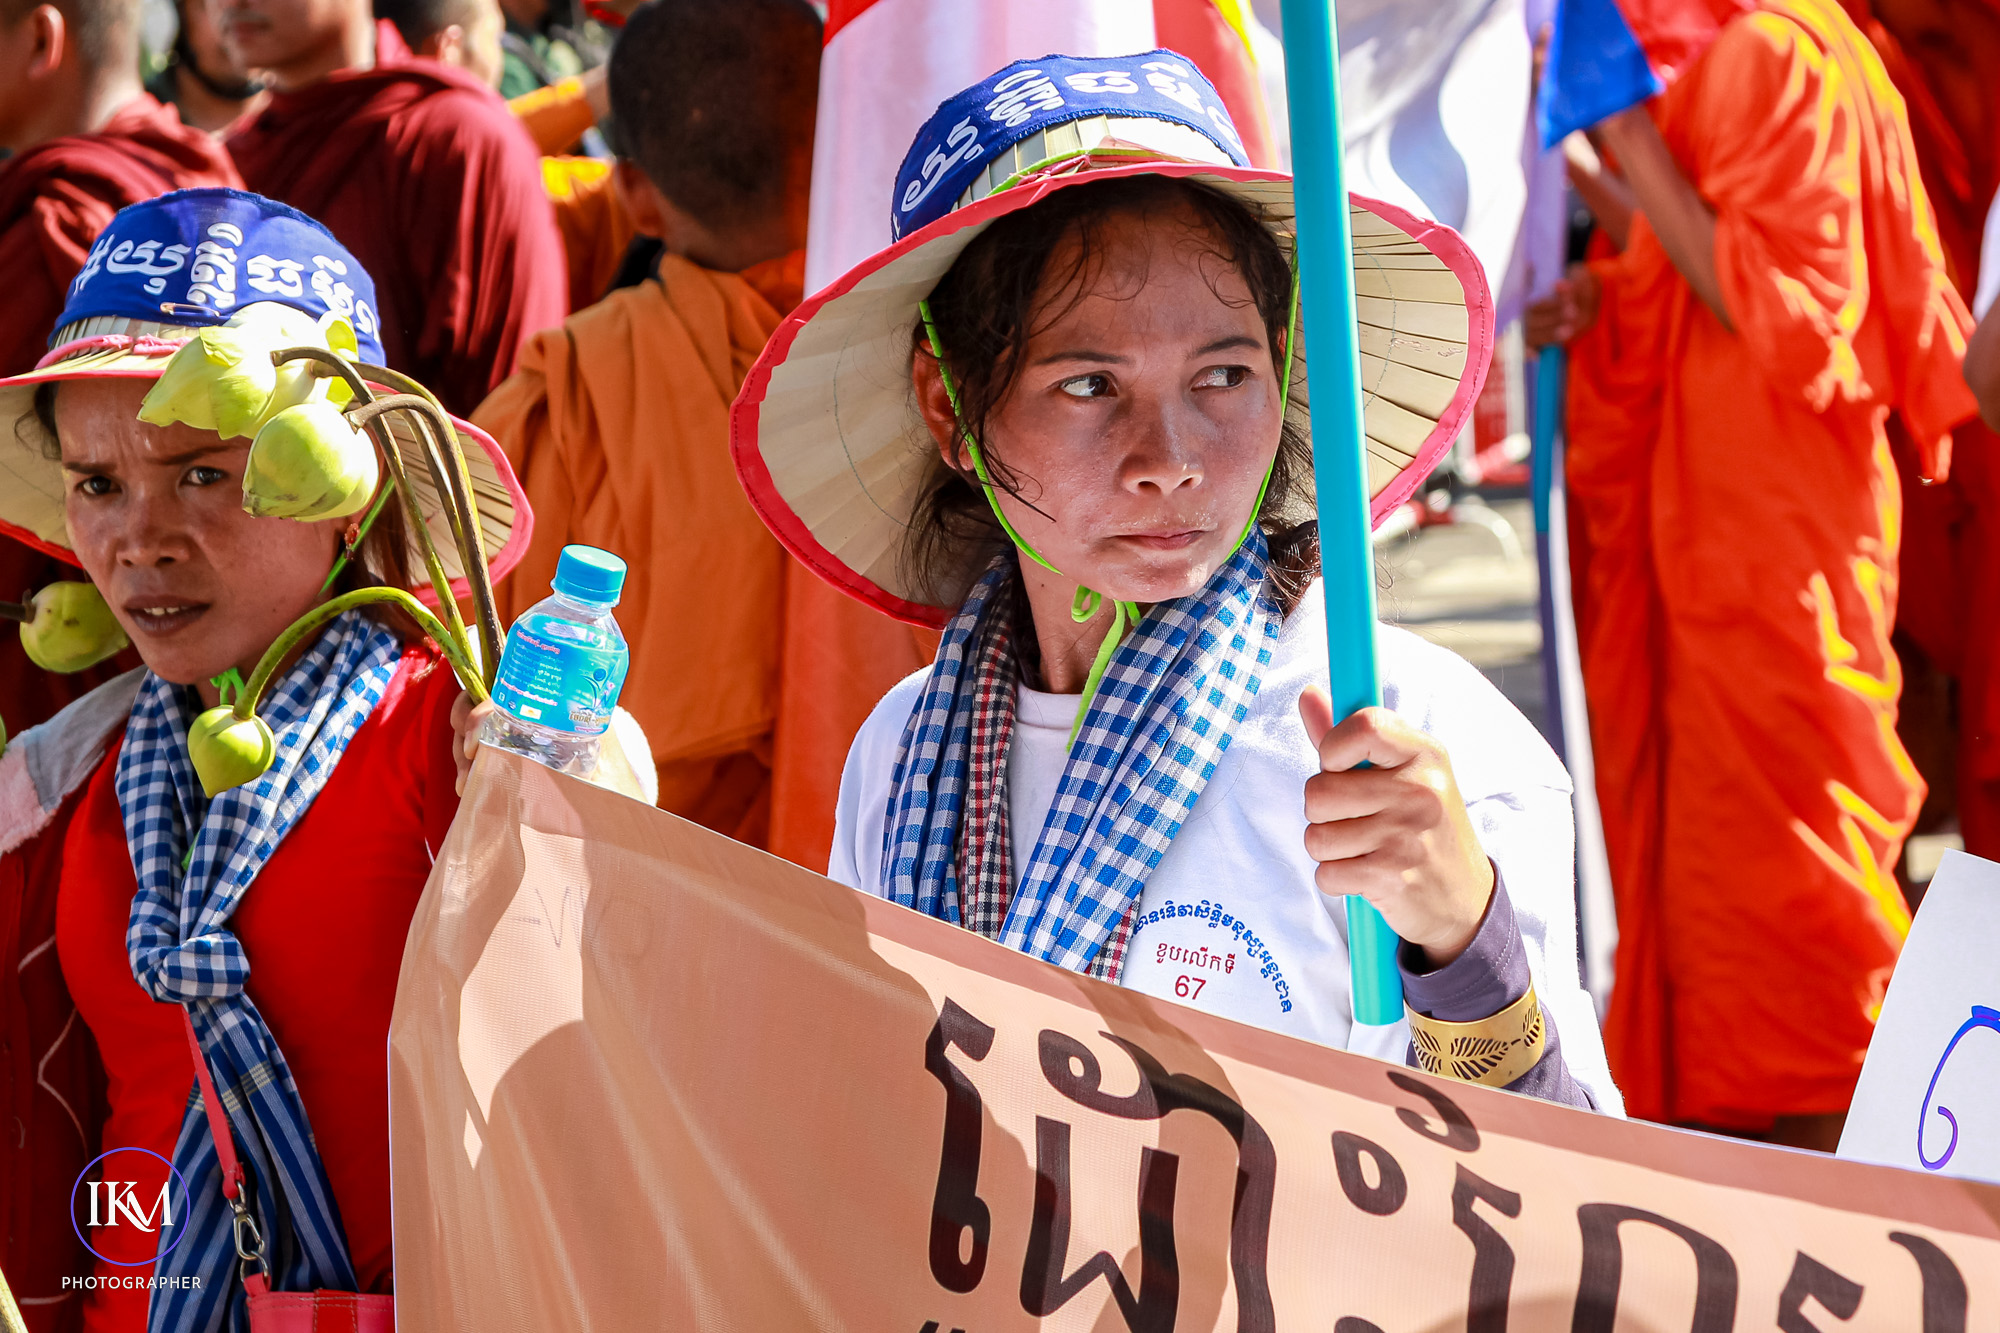
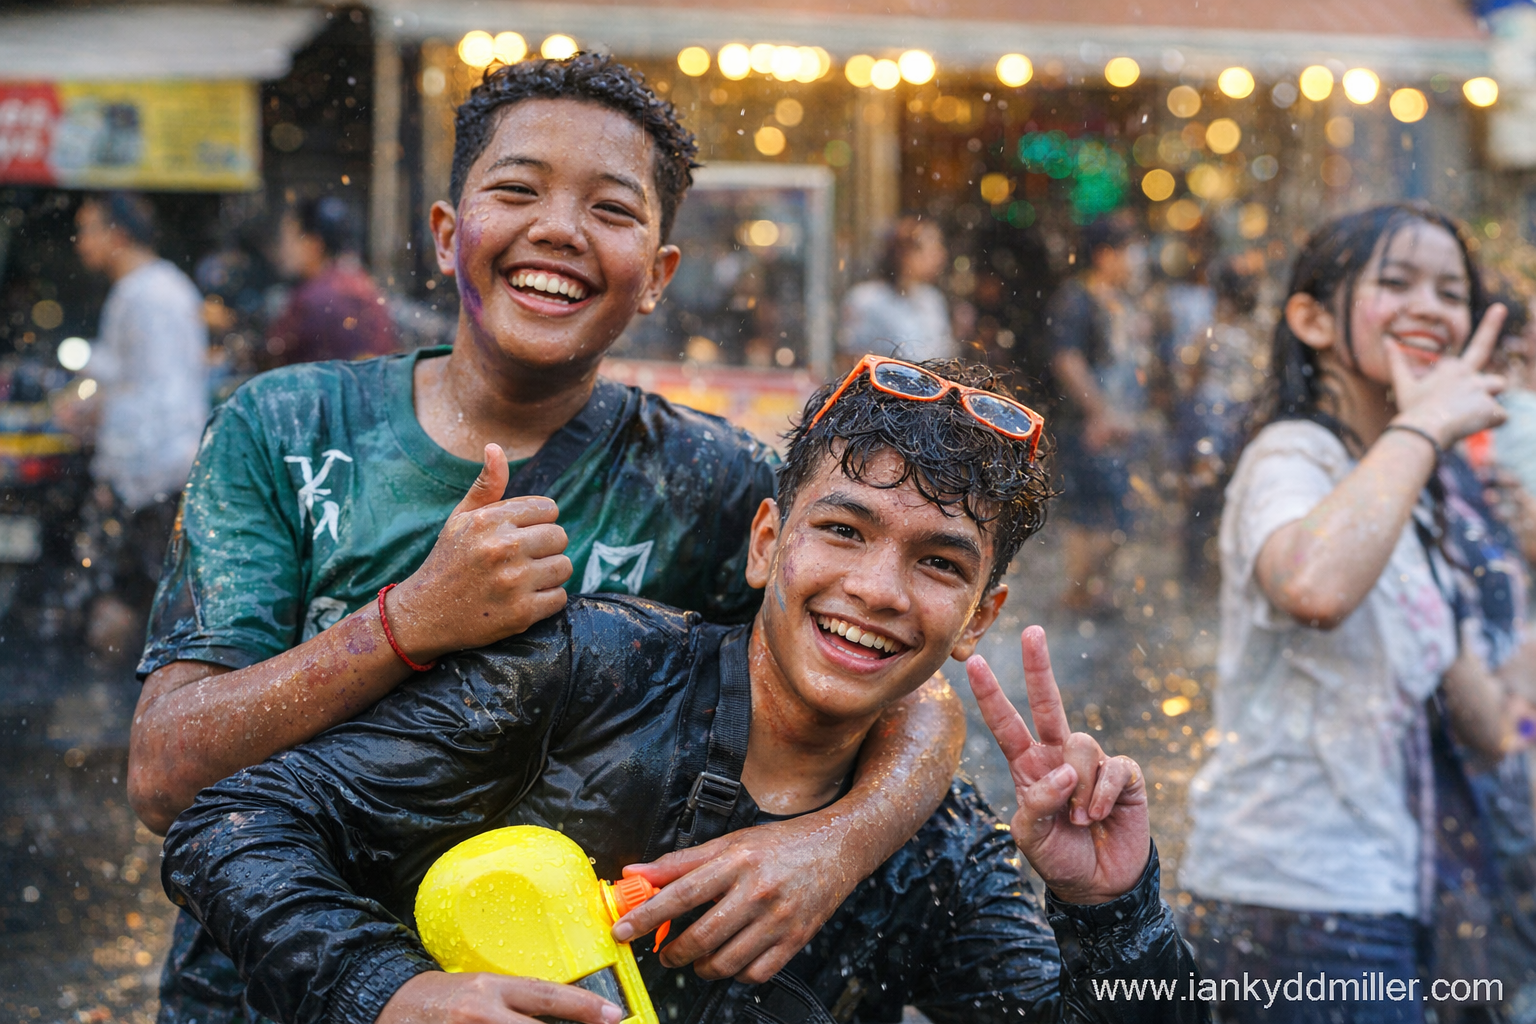
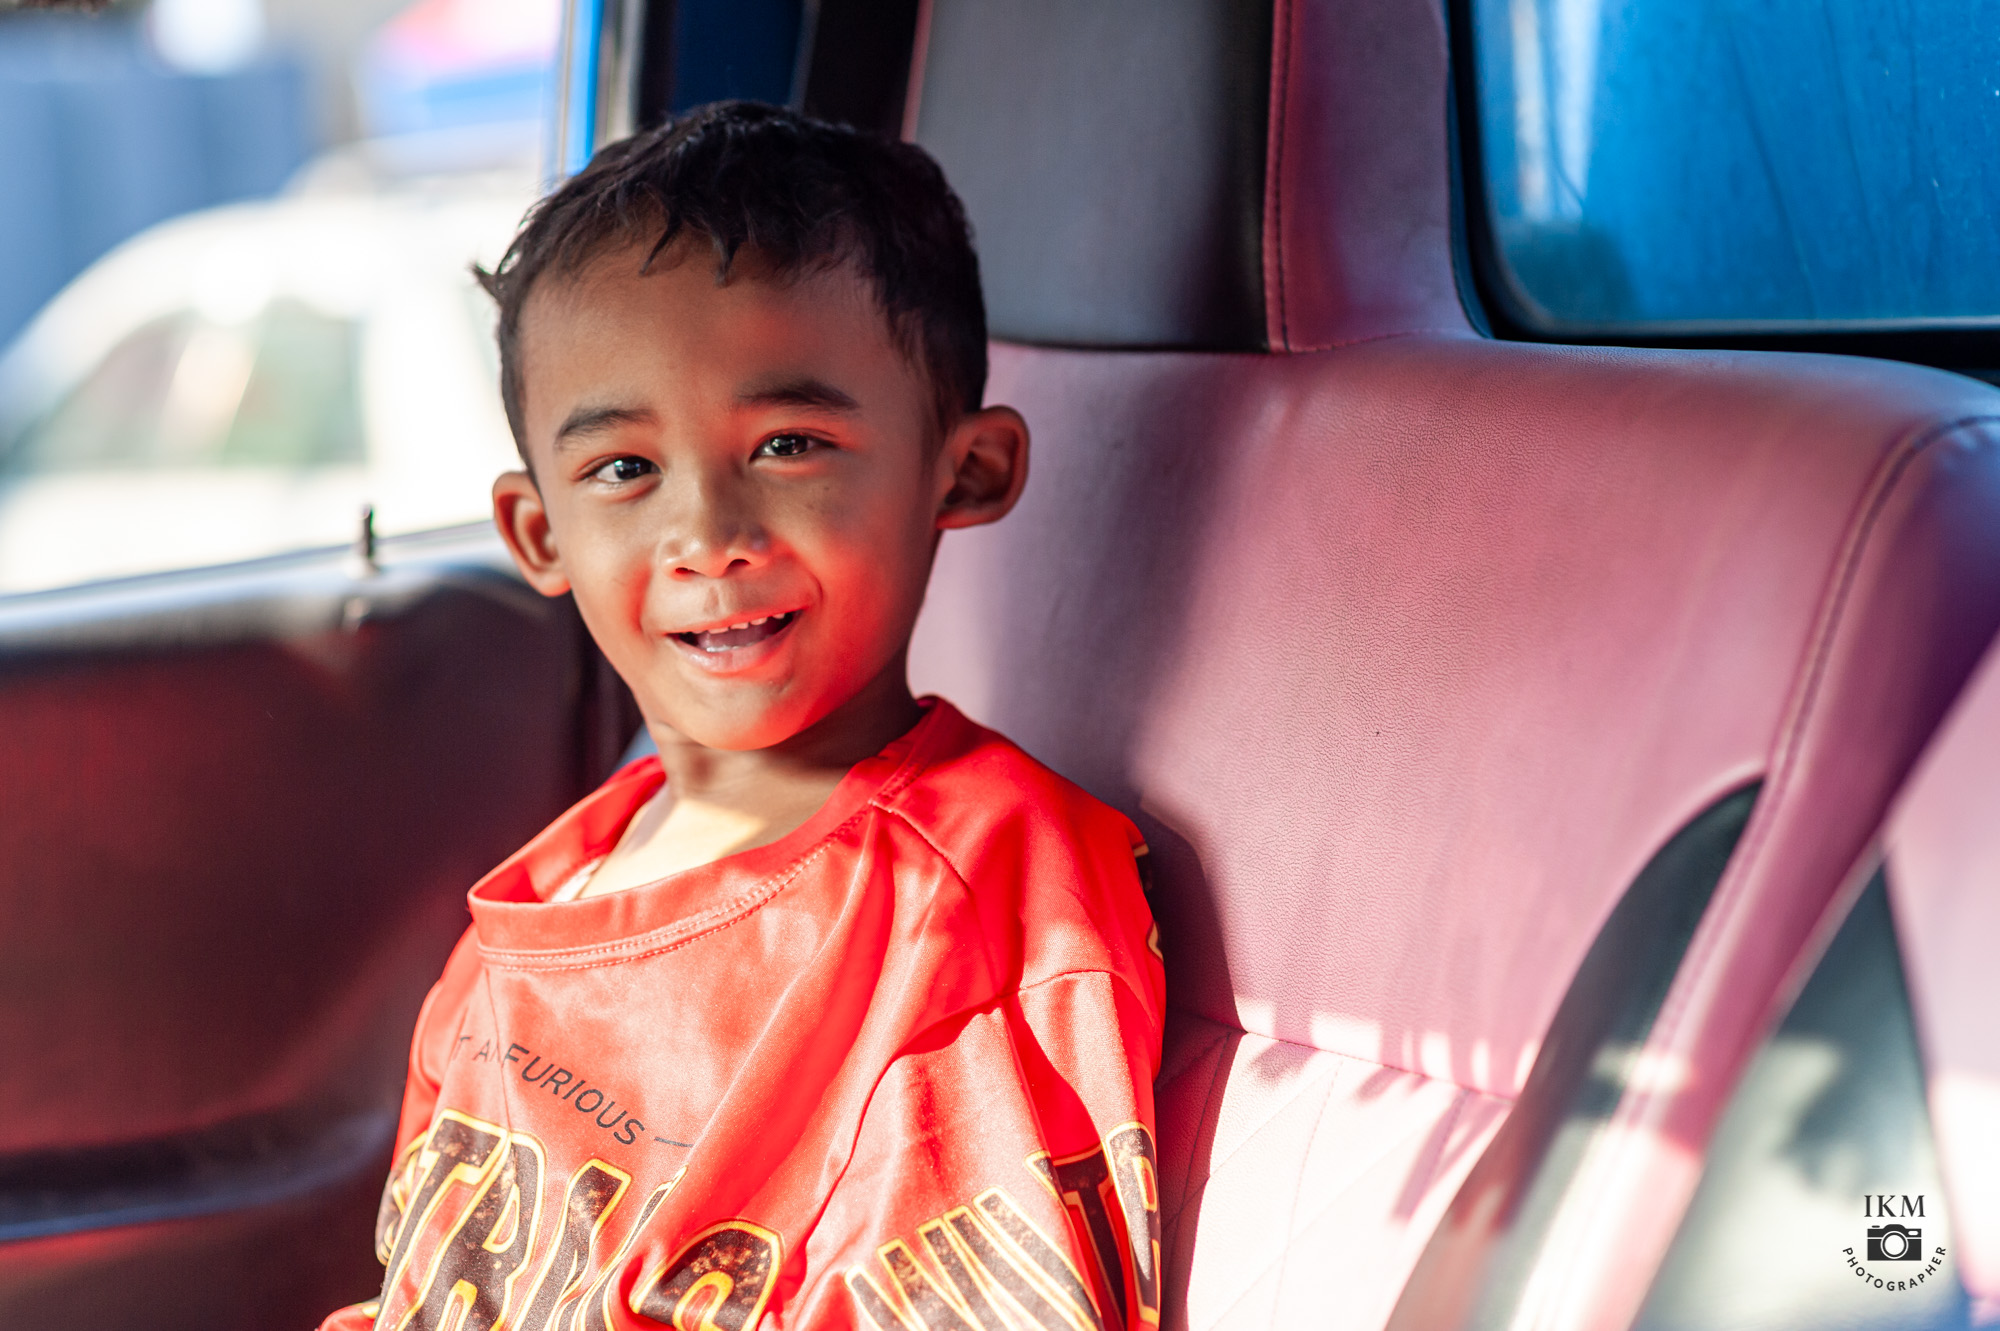
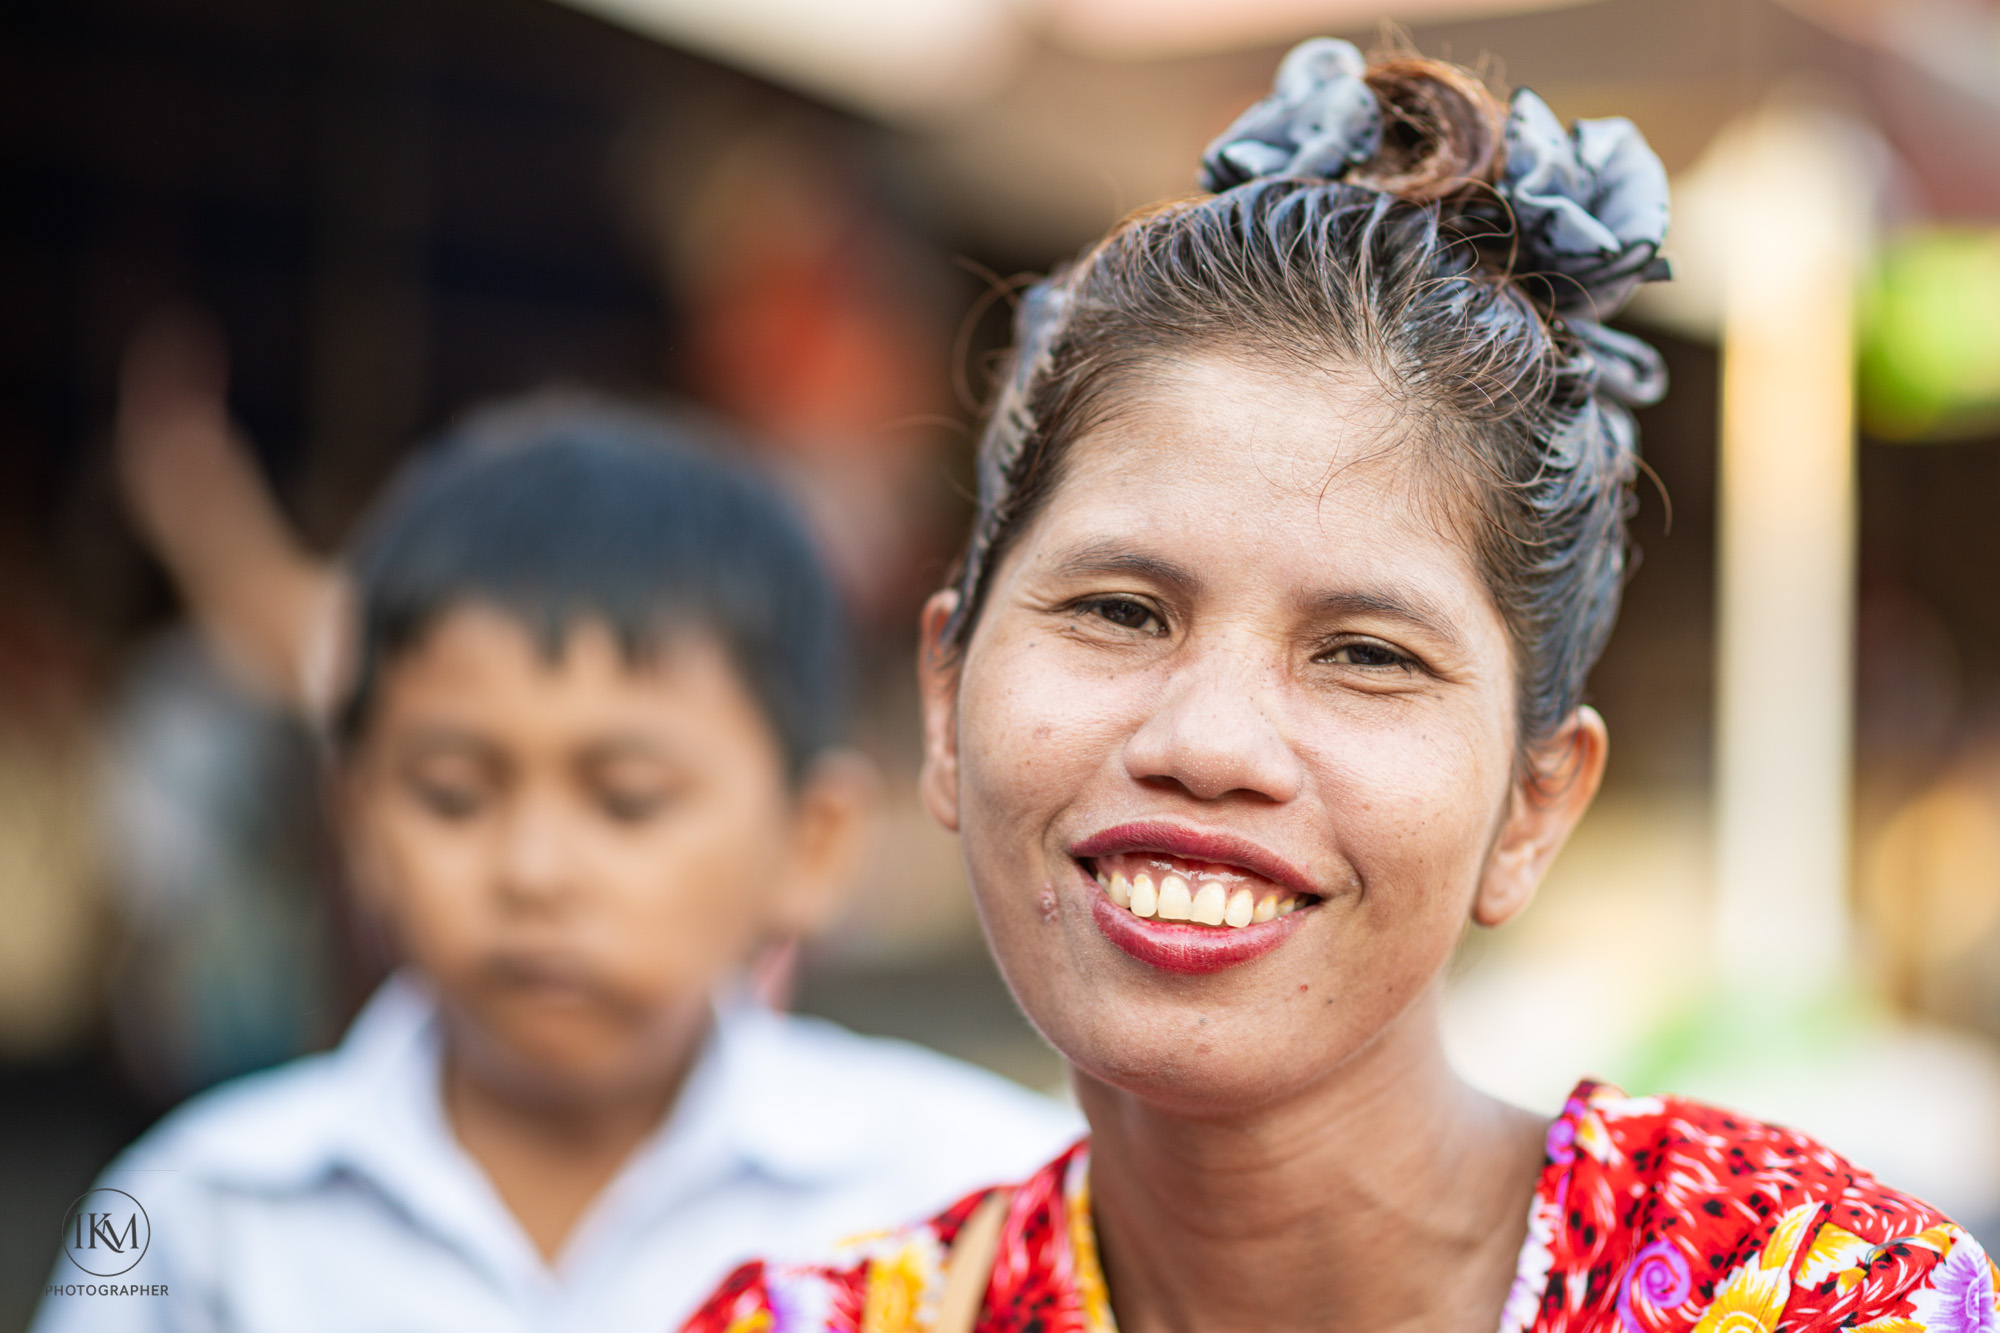
For photographers, the temptation is obvious. This is texture, movement, contradiction—everything that lends itself to an image that feels alive. The midday light is unforgiving, flattening faces, hardening shadows. And yet it works. Water catches the sun mid-air; powder softens expressions; a fleeting glance cuts through the noise. The challenge is not technical but ethical: where to stand, what to take, when to step back. In a festival built on participation, observation can feel like a form of distance.
What endures, long after the streets dry and the music fades, is not the spectacle but the shift. Khmer New Year marks a collective pause—a moment when Cambodia resets itself, not through decree or policy, but through ritual and release. It is imperfect, occasionally chaotic, sometimes contradictory. But it is also, in its own way, honest.
And perhaps that is why it matters. Not because it presents a polished image of national identity, but because it doesn’t. It shows a country as it is: rooted in tradition, restless in the present, and, for a few days each year, entirely willing to let go.
They’re not saying Cambodians are scammers. They’re reacting to the sense that Cambodia has become a permissive environment for scams, especially compared with its neighbors.
The label spread through:
travel forums
expat communities
Chinese & Southeast Asian social media
investigative reporting on cyber-fraud
🏗️ 1. A regional hub for industrial scam operations
Cambodia is now internationally linked to large-scale scam compounds, especially:
romance scams
crypto / “pig-butchering” fraud
fake trading platforms
online gambling
Key locations often mentioned:
Sihanoukville
Poipet
Bavet
Phnom Penh outskirts
These aren’t petty cons—they’re organized, transnational operations, often run by Chinese crime syndicates.
Critically:
many “workers” are trafficked or coerced
passports confiscated
violence used to enforce quotas
So Cambodia appears in UN reports, NGO briefings, and international media again and again.
🏛️ 2. Weak enforcement and selective protection
Cambodia has anti-fraud laws. The issue is enforcement that looks uneven and politicized.
Common perceptions:
some compounds raided, others untouched
owners linked to political or military elites
bribes settling investigations
victims afraid to report crimes
This creates the idea that scams are tolerated as long as powerful people benefit.
That perception—more than raw crime numbers—drives the nickname.
🧳 3. High-visibility scams affecting foreigners
Visitors often encounter:
inflated “foreigner pricing”
fake tickets or permits
bogus police fines
rental and deposit scams
tour or transport bait-and-switch
None are unique to Cambodia—but the frequency and lack of recourse make them memorable.
Travelers warn each other. The term sticks.
🌆 4. Sihanoukville did lasting reputational damage
Sihanoukville became shorthand for:
casino boom chaos
money laundering
human trafficking cases
abandoned mega-projects
violent incidents
For many outsiders:
Cambodia ≈ Sihanoukville ≈ scams
That’s unfair—but reputations don’t wait for nuance.
⚖️ The part people miss
Most Cambodians gain nothing from scams.
Many actively resent them.
The stigma hurts ordinary people and small businesses.
“Scambodia” targets the wrong level of the problem. The real issue is transnational crime + elite protection, not the population.
🧠 Bottom line
Cambodia gets called “Scambodia” because:
it hosts visible, large-scale scam infrastructure
enforcement appears selective
foreigners frequently encounter fraud
one city poisoned the country’s image
The nickname is crude, lazy, and unfair— but it’s rooted in real, systemic failures, not pure prejudice.
Which scams are most common where
How enforcement compares (Cambodia vs Thailand vs Vietnam)
Why the “Scambodia” label spreads
What’s real vs. perception
🔍 1) Common Scam Types — Cambodia vs Thailand vs Vietnam
Scam Type
Cambodia
Thailand
Vietnam
Industrialized cyber-fraud compounds
🔥 Very high (organised, large-scale)
🟡 Rare / small scale
🟡 Rare / small scale
Crypto / “pig butchering” hubs
🔥 Big presence
🟡 Some cases
🟡 Some cases
Online gambling/betting rings
🔥 Large operations
🟡 Smaller
🟡 Smaller
Tourist cons (fake fines, tuk-tuk switching)
🟡 Frequent
🔵 Frequent
🔵 Frequent
Romance / investment scams targeting foreigners
🔥 High
⚪ Mostly offshore, not physically based
⚪ Mostly offshore
Legend: 🔥 Very common / prominent · 🟡 Moderate · 🔵 Common tourist annoyances · ⚪ Less organized locally
👉 Why Cambodia stands out: It isn’t just that scams exist — but that there are factory-style scam operations, often in compounds staffed with dozens or hundreds of people working shifts.
🚔 2) Enforcement & Government Response — Country Comparison
🇰🇭 Cambodia
✔ Has laws against fraud ✘ Enforcement often seen as uneven or slow ✘ Some facilities linked to powerful local interests ✘ Police raids happen — but critics say they’re inconsistent
Perception effect: People see stories of scam hubs operating for months/years with little visible consequence, so it feels like tolerance.
🇹🇭 Thailand
✔ Generally stronger tourism infrastructure ✔ Scam prosecutions more visible ✘ Tourist scams still common (tuk-tuk, tours, fake fees) ✘ Online scam syndicates exist, but less studied
Perception effect: Thailand still gets warnings like “don’t fall for XYZ scam” — but it doesn’t have the same level of organized, compound-style operations on-the-ground.
🇻🇳 Vietnam
✔ Improved enforcement in recent years ✔ Online scam networks exist but are more dispersed ✘ Tourist scams still happen (motorbike rentals, fake fines, overcharging)
Perception effect: Vietnam’s scams are often more “street-level” or digital, rather than big physical compounds.
🧠 3) Why the “Scambodia” Label Spreads
There are a few real social mechanisms behind the nickname:
🧳 A. Travel stories go viral
One traveler gets burned on a tour or tuk-tuk scam, posts it online — others upvote and share.
👉 These stories are memorable, spread fast, and give an emotional impression.
📰 B. International media coverage
News reports and NGO investigations have spotlighted:
large scam compounds
trafficking into scam factories
crypto crime hubs
Even if the crimes aren’t all Cambodian nationals, Cambodia gets named because they physically operate there.
📱 C. Expat & social media echo chambers
Forums focused on scams, crypto fraud, or safety tend to attract negative stories, which can amplify perception.
It becomes:
“I heard about another scam in Cambodia — must be everywhere!”
Repeat that hundreds of times… and the nickname takes hold.
⚠️ 4) What’s Real vs Perception
✔ Real
Organized scam operations really have existed in Cambodia
Enforcement has sometimes been slow or selective
Foreign victims report frequent fraud
❌ Not true
That all Cambodians are scammers
That Cambodia is uniquely “fraud-friendly” compared to every country
That scammers are locals in all cases (many are trafficked workers)
So the nickname is a social perception shortcut, not a fair national label.
🧩 5) Root Causes Behind Cambodia’s Scam Problem
Here’s the deeper context people often miss:
⚙️ Economic drivers
Limited formal jobs
Some young people drawn to online hustles
💰 Demand from abroad
These scams often target victims in other countries — that’s why media buzz is so loud.
🤝 Organized networks
Not individuals operating in markets — but organized groups, sometimes with political or economic protection.
🚨 Law enforcement capacity
The legal framework exists — but resources, training, and political will vary.
🎯 Summary — Why “Scambodia” Caught On
✨ It reflects a perception of lax enforcement + large scam hubs. But…
❌ It’s unfair as a national label — Cambodia is more than that. The scams are symptoms of regional crime networks + governance challenges, not an expression of Cambodian society.
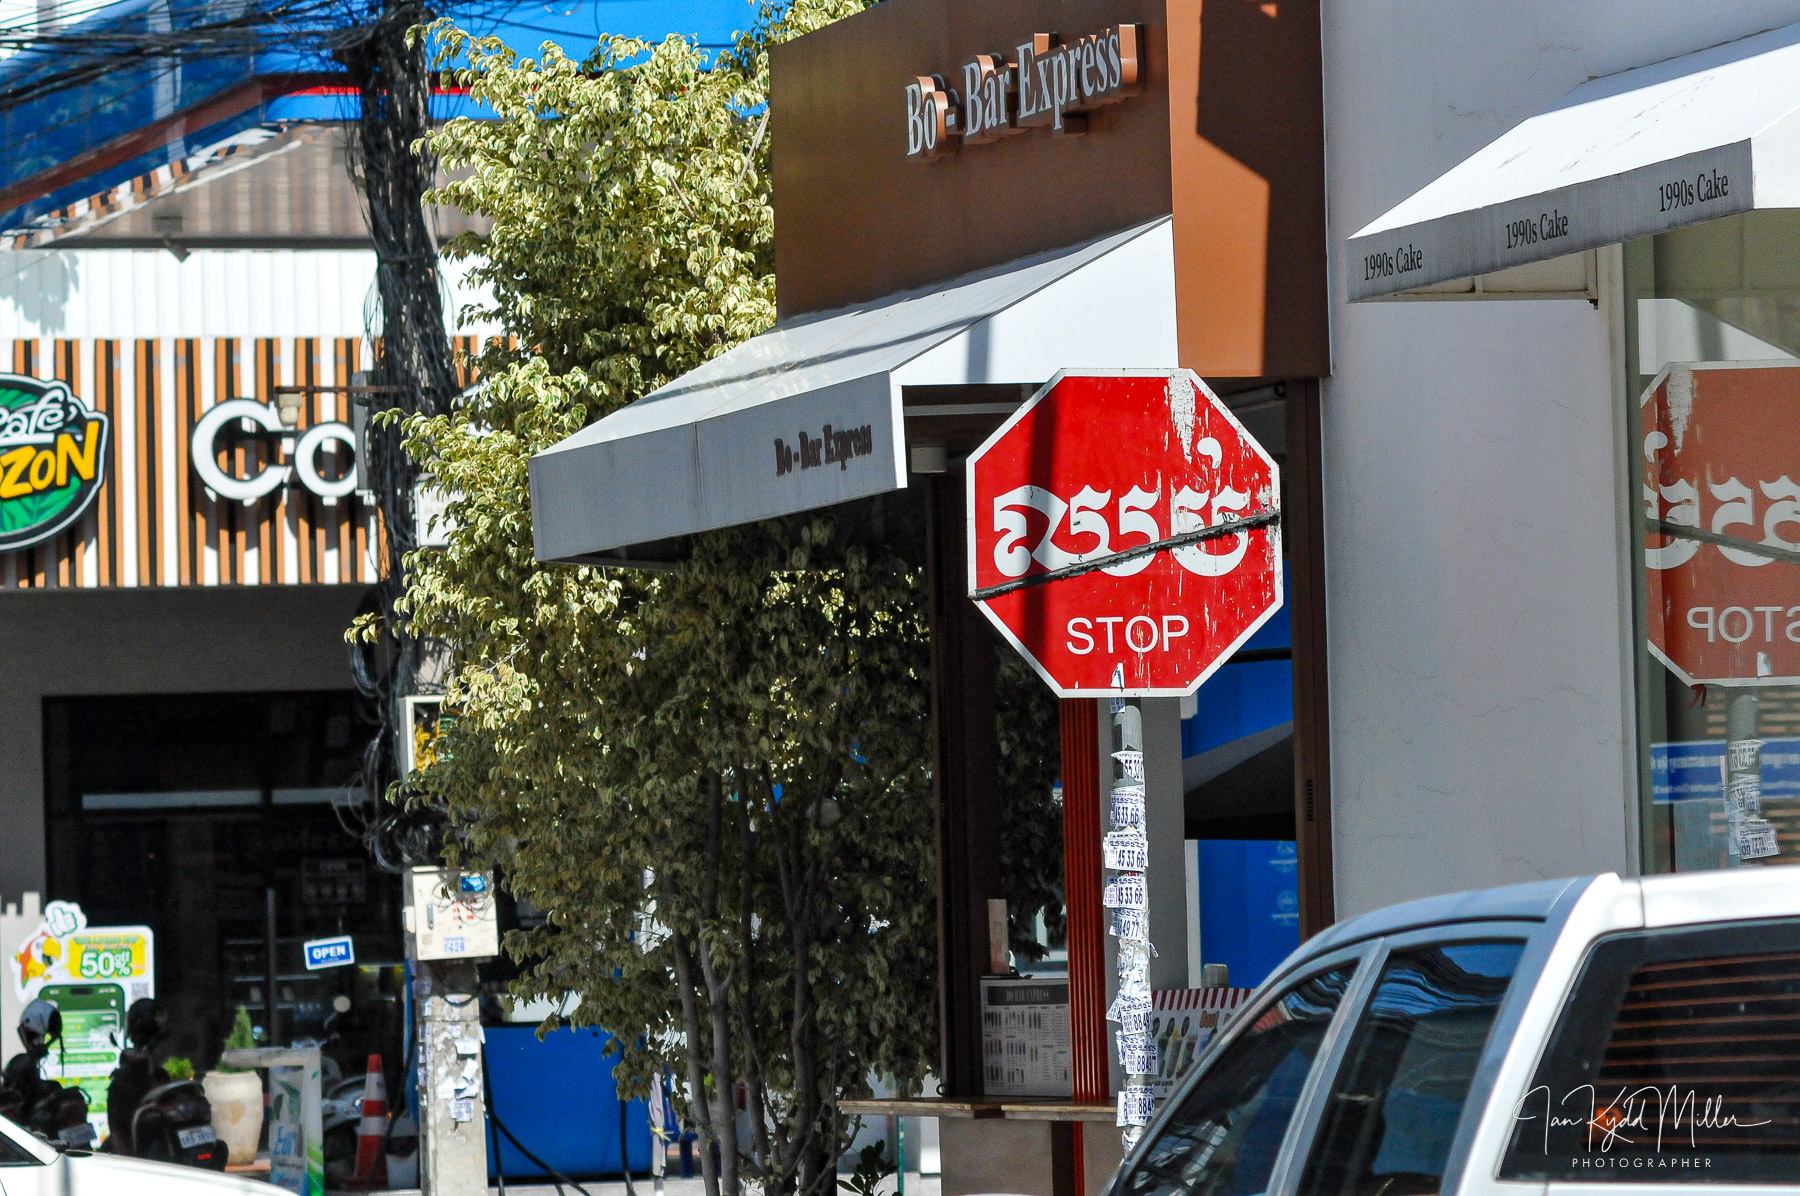
🇰🇭 Cambodia: What Travelers Should Actually Watch Out For
🛂 1. Visa & border nonsense (most common first hit)
⚠️ What happens
“Extra fees” invented at land borders
Claims your visa is “wrong” or “expired”
Pressure to pay to “fix” paperwork
✅ What to do
Use official e-visa sites only
Print everything
Be calm, polite, and boring
Ask for a receipt — magic word
📌 If it’s fake, asking for paperwork often ends it.
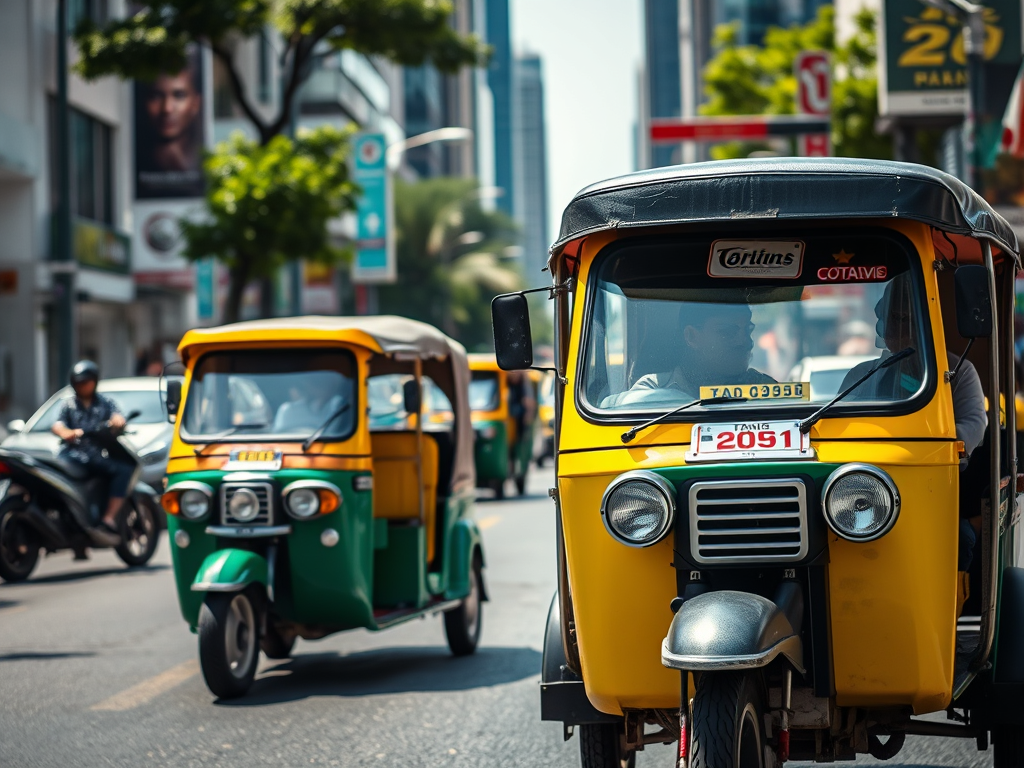
🚕 2. Transport tricks (annoying, not dangerous)
⚠️ What happens
Tuk-tuk driver agrees on price → changes destination
Taxi meter “broken”
Airport ride suddenly doubles
✅ What to do
Use Grab / PassApp whenever possible
Confirm destination + price clearly
Pay after arrival
📌 Most drivers are honest — but don’t rely on vibes.
🏨 3. Accommodation & deposits
⚠️ What happens
Landlord keeps deposit
“Damage” appears at checkout
Different room than advertised
✅ What to do
Take photos on check-in
Use platforms with dispute systems
Avoid paying deposits in cash for short stays
📌 If there’s no paper trail, there’s no leverage.
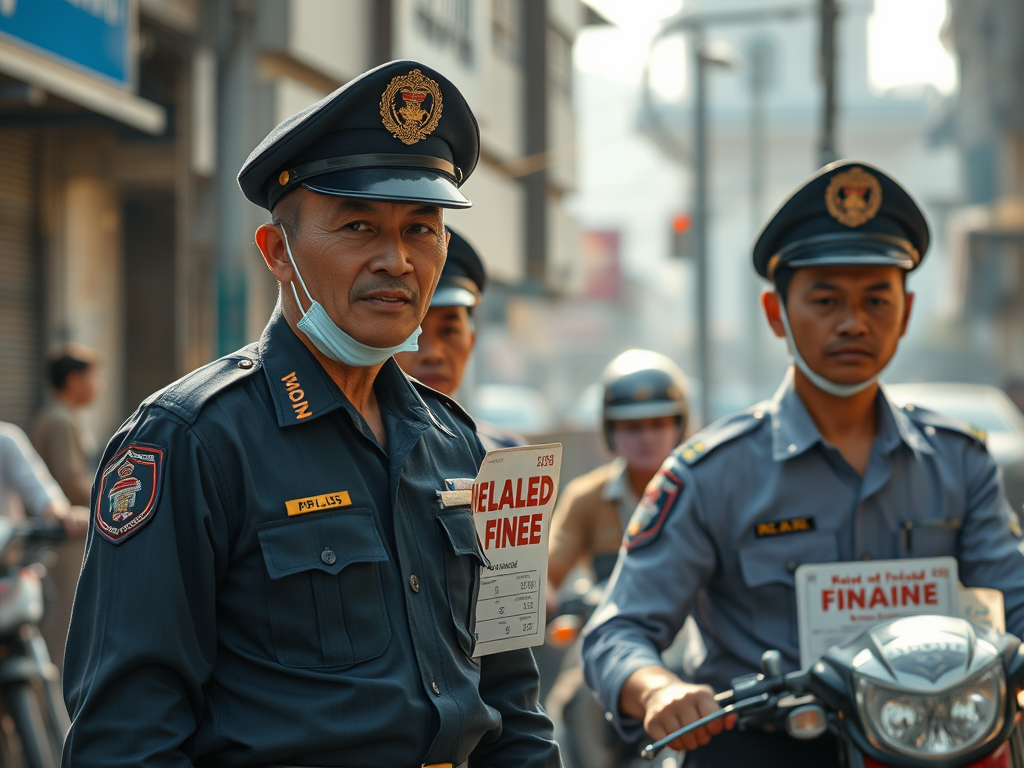
👮 4. Fake or inflated police fines (rare, but real)
⚠️ What happens
Claimed traffic or visa violation
“Pay now or go to station”
No ticket, no ID, no paperwork
✅ What to do
Ask for written citation
Ask to go to the police station
Stay polite and slow
📌 Real police don’t mind paperwork. Fake ones hate it.
🎟️ 5. Tours, tickets & “official” guides
⚠️ What happens
Fake bus or boat tickets
“Closed site — alternative tour”
Extra fees at attractions
✅ What to do
Book through hotels or known operators
Check opening hours online
Avoid on-street “helpers”
📌 If someone approaches you unsolicited — pause.
💱 6. Money, exchange & payment traps
⚠️ What happens
Torn USD bills rejected
Short-changing at exchange
“Wrong change” in busy moments
✅ What to do
Carry clean USD bills
Count change out loud
Use ATMs inside banks
📌 Cambodia runs on USD — but only pristine notes.
📱 7. Digital & online scams (less touristy, but growing)
⚠️ What happens
Tinder / Instagram crypto pitches
“Investment tips” from new friends
Fake job or volunteer offers
✅ What to do
Never invest via WhatsApp/Telegram
Don’t trust “insider” trading apps
Walk away early — no explanations
📌 If it feels like a script, it probably is.
🧠 8. The real danger: politeness pressure
This is the biggest mistake travelers make.
⚠️ What happens
You don’t want to offend
You don’t want to look rude
You hesitate too long
✅ What to remember
Being calm ≠ being compliant
You can say no without drama
Slowing things down protects you
📌 Scams rely on momentum. Kill the momentum.
🟢 What not to worry about (seriously)
❌ Random violence ❌ Being kidnapped ❌ Everyday people targeting you ❌ Walking around cities by day
Cambodia is generally safe, especially compared to the reputation online.
🧭 Traveler’s 5-Rule Cheat Sheet
Paper beats stories
Apps beat street deals
Slow beats fast
Photos beat memory
No receipt = no payment
Final truth 💬
If you travel Cambodia alert but relaxed, you’ll likely have:
warm interactions
incredible food
rich history
zero serious problems
The scams exist — but they’re avoidable, shallow, and rarely dangerous. Generally Cambodians people are friendly and helpful.
Same focal length. Same max aperture. Very different intent.
The 85mm f/1.8GD vs 85mm f/1.8G comparison is way more interesting than people think—this isn’t just “older vs newer,” it’s two different philosophies of portrait lenses.
1. Design Philosophy (This Is the Core Difference)
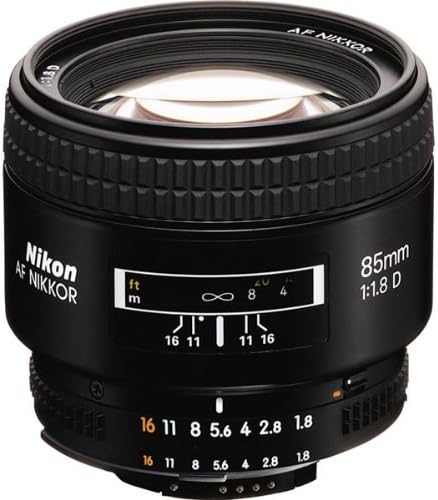
85mm f/1.8D
Designed in the film-era mindset
Optimized for:
Speed
Compactness
High micro-contrast
Assumes the photographer:
Focuses manually with intent
Accepts character over perfection
👉 The D lens does not apologize for optical flaws. It uses them.
85mm f/1.8G
Designed in the digital-era mindset
Optimized for:
Resolution
Smoothness
Consistency across the frame
Assumes:
High-resolution sensors
Autofocus accuracy matters
Images will be scrutinized at 100%
👉 The G lens is corrective and controlled.
2. Optical Performance
Sharpness
Aperture
85mm f/1.8D
85mm f/1.8G
f/1.8
Sharp center, soft edges
Sharper center, cleaner edges
f/2.8
Very sharp
Extremely sharp
f/4–5.6
Excellent
Clinically excellent
The G is objectively sharper, especially wide open and toward the edges.
The D has bite—center sharpness with strong micro-contrast that feels punchy, especially on faces.
📌 On modern high-MP sensors, the G holds together better technically.
Contrast & Rendering
D lens
Higher micro-contrast
Harder transitions
More “snap”
Faces look more sculpted, sometimes harsher
G lens
Smoother tonal roll-off
Lower micro-contrast
More forgiving on skin
Easier to grade in post
👉 This is why some people say the D looks “3D” and the G looks “creamy.”
3. Bokeh & Out-of-Focus Rendering
85mm f/1.8D
Nervous bokeh in busy backgrounds
Cat’s-eye shapes near edges
Double lines in specular highlights
Can feel edgy or distracting
⚠️ Not a “safe” bokeh lens.
85mm f/1.8G
Significantly smoother background blur
More rounded aperture blades
Better correction of spherical aberration
Backgrounds dissolve rather than vibrate
👉 For environmental portraits or street portraits, the G is far more predictable.
4. Autofocus & Handling
Autofocus
D: Screw-drive AF
Fast on pro bodies
Noisy
Inaccurate at f/1.8
G: Silent Wave Motor (AF-S)
Quieter
More accurate
Better for modern DSLRs
If you’re shooting moving subjects or candid portraits, the G wins decisively.
Build & Ergonomics
Aspect
1.8D
1.8G
Size
Smaller
Larger
Weight
Lighter
Heavier
Build
Solid, simple
Modern composite
Focus ring
Better manual feel
Adequate, not special
The D feels mechanical. The G feels engineered.
5. Compatibility & Practical Reality
85mm f/1.8D
❌ No AF on entry-level Nikon bodies
✔️ Excellent on D700, D3, D4, Df
✔️ Gorgeous on film bodies
✔️ Very cheap on the used market
85mm f/1.8G
✔️ Full AF on all Nikon DSLRs
✔️ Designed for high-resolution sensors
✔️ Better resale value
❌ Less character
6. Character vs Control (The Honest Take)
Choose the 85mm f/1.8D if:
You value rendering over perfection
You shoot:
Street portraits
Gritty documentary
Black & white
You like lenses that argue back
You enjoy working around flaws
👉 This lens has teeth.
Choose the 85mm f/1.8G if:
You need:
Reliable AF
Smooth skin tones
Predictable results
You shoot:
Editorial portraits
Commercial work
Color-heavy projects
You want files that are easy to finish in post
👉 This lens is quietly competent.
7. One-Line Verdict (Brutally Honest)
85mm f/1.8D: A portrait lens with attitude and consequences.
85mm f/1.8G: A portrait lens that stays out of the way.
If you’re starting photography, focus first on mastering your camera’s basic settings (aperture, shutter speed, ISO) and composition techniques like the rule of thirds. Begin with natural light, practice often, and don’t worry about expensive gear—skill matters more than equipment.
Learning your camera and reading its manual is one of the most underrated but powerful steps in photography. Here’s how to approach it so it feels less like homework and more like unlocking a secret language:
📖 How to Learn Your Camera (Manual Included)
Treat the Manual as a Map
Don’t read it cover to cover—skim it like a guidebook.
Flag sections on exposure modes, focus systems, and custom settings.
Keep it nearby when practicing; it’s a reference, not a novel.
Break Down Features One at a Time
Day 1: Aperture controls → practice depth of field.
Day 2: Shutter speed → freeze vs blur motion.
Day 3: ISO → noise vs brightness.
Day 4: Autofocus modes → single, continuous, manual.
Day 5: Metering modes → spot, center-weighted, evaluative.
Use the Manual to Decode Symbols
Those cryptic icons (sun, mountain, flower) suddenly make sense when explained.
Learn what each button does—no more guessing mid-shoot.
Practice With Purpose
Pick one feature from the manual, then shoot only with that in mind.
Example: After reading about exposure compensation, spend an hour adjusting ±EV in different light.
Build Muscle Memory
Reading tells you what the button does.
Practice tells you where it is without looking.
The goal: operate your camera like an extension of your hand.
Keep Notes
Jot down quirks: “My camera underexposes in backlight—compensate +1 EV.”
Over time, you’ll build your own personal manual that’s more useful than the factory one.
🧭 Philosophy
Would you like me to design a step‑by‑step “manual study plan” (like a 7‑day routine) so you can systematically learn your camera without overwhelm?
Buying expensive gear too early—skills matter more than equipment.
Would you like me to create a step-by-step 30‑day beginner photography challenge so you can practice these skills systematically?
📸 30-Day Beginner Photography Challenge Week 1: Getting Comfortable with Your Camera
Day 1: Take 10 photos of everyday objects in auto mode.
Day 2: Experiment with aperture—shoot the same subject at f/2.8, f/5.6, and f/11.
Day 3: Practice shutter speed—capture a moving subject at 1/30s, 1/250s, and 1/1000s.
Day 4: Adjust ISO—shoot indoors at ISO 100, 800, and 1600.
Day 5: Learn the rule of thirds—photograph a subject off-center.
Day 6: Try symmetry—find reflections or balanced patterns.
Day 7: Review your week’s shots and note what you liked most.
Week 2: Exploring Light
Day 8: Shoot during golden hour (sunrise or sunset).
Day 9: Capture shadows at midday.
Day 10: Use window light for a portrait.
Day 11: Experiment with backlighting—subject in front of the sun or lamp.
Day 12: Try night photography—streetlights, neon signs, or stars.
Day 13: Use artificial light (lamp, flashlight) creatively.
Day 14: Compare natural vs artificial lighting in similar shots.
Week 3: Composition & Creativity
Day 15: Use leading lines (roads, fences, paths).
Day 16: Frame your subject (shoot through doors, arches, foliage).
Day 17: Capture patterns or textures.
Day 18: Shoot from a low angle.
Day 19: Shoot from a high angle.
Day 20: Try minimalism—one subject against a clean background.
Day 21: Capture candid street photography (respect privacy).
Week 4: Storytelling & Editing
Day 22: Take a series of 3 photos that tell a story.
Day 23: Capture emotion in a portrait.
Day 24: Photograph movement (sports, dancing, traffic).
Day 25: Try black-and-white photography.
Day 26: Edit your photos using free apps (Snapseed, Lightroom Mobile).
Day 27: Re-shoot one of your earlier challenges with improved technique.
Day 28: Create a photo essay of 5 images on a theme (e.g., “Morning Routine”).
Day 29: Share your best photo with friends or online for feedback.
Day 30: Reflect—compare Day 1 vs Day 30 shots and note your progress.
👉 By the end of this challenge, you’ll have practiced technical skills, creative composition, and storytelling—the three pillars of photography.
🎯 Photography Technical Drills (One Setting at a Time) Aperture (Depth of Field)
Drill 1: Place a subject (like a coffee mug) on a table.
Shoot at f/2.8 → background blurry.
Shoot at f/8 → background sharper.
Shoot at f/16 → everything sharp.
Goal: Notice how aperture changes background separation and focus.
Shutter Speed (Motion Control)
Drill 2: Photograph moving water (fountain, sink, or river).
Shoot at 1/1000s → water frozen.
Shoot at 1/60s → slight blur.
Shoot at 1/5s → silky smooth trails.
Goal: See how shutter speed controls motion blur.
ISO (Light Sensitivity)
Drill 3: Shoot indoors with steady lighting.
ISO 100 → clean, dark image.
ISO 800 → brighter, slight grain.
ISO 3200 → very bright, noticeable noise.
Goal: Understand trade-off between brightness and image quality.
Focus Modes
Drill 4: Switch between manual focus and auto focus.
Photograph a subject with cluttered background.
Try locking focus on the subject manually, then let auto focus decide.
Goal: Learn when to trust auto focus vs. manual control.
White Balance
Drill 5: Shoot the same subject under warm indoor light.
Use Auto WB → camera guesses.
Use Tungsten WB → cooler correction.
Use Daylight WB → warmer tones.
Goal: See how WB changes color temperature.
Exposure Compensation
Drill 6: In aperture priority mode, photograph a bright scene.
Set -1 EV → darker image.
Set 0 EV → normal exposure.
Set +1 EV → brighter image.
Goal: Learn how to quickly adjust exposure without full manual mode.
👉 Each drill should be repeated with the same subject and lighting so you can isolate the effect of that one setting.
Photography Technical Drills (One Setting at a Time) Aperture (Depth of Field)
Drill 1: Place a subject (like a coffee mug) on a table.
Shoot at f/2.8 → background blurry.
Shoot at f/8 → background sharper.
Shoot at f/16 → everything sharp.
Goal: Notice how aperture changes background separation and focus.
Shutter Speed (Motion Control)
Drill 2: Photograph moving water (fountain, sink, or river).
Shoot at 1/1000s → water frozen.
Shoot at 1/60s → slight blur.
Shoot at 1/5s → silky smooth trails.
Goal: See how shutter speed controls motion blur.
ISO (Light Sensitivity)
Drill 3: Shoot indoors with steady lighting.
ISO 100 → clean, dark image.
ISO 800 → brighter, slight grain.
ISO 3200 → very bright, noticeable noise.
Goal: Understand trade-off between brightness and image quality.
Focus Modes
Drill 4: Switch between manual focus and auto focus.
Photograph a subject with cluttered background.
Try locking focus on the subject manually, then let auto focus decide.
Goal: Learn when to trust auto focus vs. manual control.
White Balance
Drill 5: Shoot the same subject under warm indoor light.
Use Auto WB → camera guesses.
Use Tungsten WB → cooler correction.
Use Daylight WB → warmer tones.
Goal: See how WB changes color temperature.
Exposure Compensation
Drill 6: In aperture priority mode, photograph a bright scene.
Set -1 EV → darker image.
Set 0 EV → normal exposure.
Set +1 EV → brighter image.
Goal: Learn how to quickly adjust exposure without full manual mode.
👉 Each drill should be repeated with the same subject and lighting so you can isolate the effect of that one setting.
Photographers don’t just “look”—they see differently. Their vision is trained to notice light, shapes, and stories in everyday scenes. Here’s how they develop that way of seeing:
👁️ How Photographers See the World
Light First
They notice how light falls on a subject—soft vs harsh, warm vs cool.
Shadows, highlights, and reflections become part of the composition.
A photographer might walk into a room and immediately think: “That window light is perfect for a portrait.”
Composition Everywhere
They frame scenes instinctively—using the rule of thirds, leading lines, or symmetry.
Even without a camera, they imagine how a moment would look cropped in a rectangle.
Everyday objects (a coffee cup, a street sign) become potential subjects.
Details Others Miss
Textures, patterns, and contrasts stand out.
They notice how colors interact—like a red umbrella against a grey sky.
Small gestures or fleeting expressions become the heart of an image.
Storytelling Mindset
Photographers see beyond objects—they look for meaning.
A single image can suggest mood, emotion, or narrative.
Example: A child’s shoes by the door might tell a story of play, rest, or anticipation.
Constant Awareness
They’re always scanning—anticipating moments before they happen.
Street photographers, for instance, watch body language and predict interactions.
Nature photographers notice subtle changes in clouds, wind, or animal behavior.
🧠 Training Yourself to See Like a Photographer
Slow down: Pause before snapping—ask, “What’s the light doing here?”
Frame with your eyes: Pretend your hands are a viewfinder and crop the world.
Practice mindfulness: Notice colors, shadows, and shapes in daily life.
Shoot intentionally: Don’t just capture—decide why you’re taking the photo.
👉 In short: photographers see light, composition, and story where others just see objects.
For street photography—especially when photographing people—you want settings that balance speed, flexibility, and discretion. Here’s a street‑ready setup most photographers rely on:
🚶 Street-Ready Camera Settings for People
Mode
Aperture Priority (A/Av): Lets you control depth of field while the camera adjusts shutter speed.
Manual Mode: If you’re confident, set both aperture and shutter speed for consistency.
Aperture
f/5.6 – f/8: Keeps subjects sharp while allowing some background context.
Wide apertures (f/2.8) isolate subjects, but risk missing focus in fast-moving scenes.
Shutter Speed
1/250s or faster: Freezes walking motion.
1/500s+: Essential for cyclists, runners, or quick gestures.
ISO
Auto ISO with a cap (e.g., 3200): Keeps exposure balanced as light changes quickly on the street.
Lens Choice: 35mm or 50mm prime lenses are classics—natural perspective, fast aperture, compact size.
⚡ Quick Street Setup (Daylight)
Mode: Aperture Priority
Aperture: f/5.6
Shutter Speed: 1/250s (minimum)
ISO: Auto (cap at 1600–3200)
Focus: AF-C, zone focus
WB: Auto
👉 This setup gives you sharp subjects, contextual backgrounds, and flexibility for unpredictable street moments.
Bokeh is the aesthetic quality of the out‑of‑focus areas in a photo, usually seen as soft, creamy background blur that makes the subject stand out. It comes from the Japanese word “boke,” meaning “blur,” and depends on lens design, aperture, and distance.
🌌 What Bokeh Really Is
Definition: Bokeh refers to how the lens renders out‑of‑focus points of light, not just blur itself.
Origin: From Japanese “boke” (ボケ), meaning “blur” or “haze.”
Appearance: Often seen as round or hexagonal highlights in the background, especially when shooting wide open.
Focal Length: Longer lenses (85mm, 135mm) produce more pronounced bokeh.
✨ Good vs. Bad Bokeh
Good Bokeh: Smooth, creamy, pleasing blur that isolates the subject.
Bad Bokeh: Harsh, distracting shapes or nervous edges that compete with the subject.
Example: A portrait with soft circular highlights behind the subject = good bokeh. Jagged or polygonal highlights = less pleasing.
📷 How to Achieve Bokeh
Use a fast lens (e.g., 50mm f/1.8 or 85mm f/1.4).
Shoot wide open (lowest f‑stop).
Get close to your subject while keeping the background far away.
Include point light sources (fairy lights, street lamps) for visible bokeh balls.
🎨 Creative Uses
Portraits: Isolate faces against dreamy backgrounds.
Street Photography: Neon signs and traffic lights become artistic bokeh.
Nature: Flowers or leaves blurred into soft color washes.
⚠️ Things to Watch Out For
Overdoing bokeh can make images look gimmicky.
Cheap lenses may produce “busy” or distracting bokeh.
Not all situations benefit—sometimes context in the background is important.
👉 In short: bokeh is about the quality of blur, not just the amount. It’s a creative tool to direct attention and add atmosphere.
Exposure mistakes are some of the most common frustrations for beginners—and the good news is, your camera tells you when you’ve made them if you know how to read the signs. Let’s break it down:
❌ Common Exposure Mistakes (and How to Read Them)
Overexposure (Too Bright)
Symptoms in the photo: Washed‑out highlights, white skies with no detail, pale skin tones.
Histogram clue: Graph bunched up on the right side.
Fix: Lower ISO, use faster shutter speed, or stop down aperture (higher f‑number).
Underexposure (Too Dark)
Symptoms in the photo: Loss of shadow detail, muddy blacks, subjects hard to see.
Histogram clue: Graph bunched up on the left side.
Fix: Raise ISO, slow down shutter speed, or open aperture (lower f‑number).
Blown Highlights
Symptoms: Bright areas (like clouds or reflections) turn pure white with no texture.
Histogram clue: Spike at the far right edge.
Fix: Use exposure compensation (-EV), or meter for the highlights.
Crushed Shadows
Symptoms: Dark areas lose detail, becoming solid black.
Histogram clue: Spike at the far left edge.
Fix: Increase exposure slightly (+EV), or use fill light/reflectors.
Mixed Lighting Confusion
Symptoms: Correct exposure in one part, but another part is too bright/dark.
Histogram clue: Spread across both ends, with gaps in the middle.
Fix: Spot meter on your subject, or bracket exposures.
Relying Only on the LCD
Mistake: Judging exposure by how the photo looks on the screen (which can be misleading in bright sunlight).
Better: Always check the histogram—it’s the most reliable exposure reading.
🔎 Quick Reading Drill
Take a photo in bright daylight → check histogram (likely right‑heavy).
Take a photo indoors with no flash → check histogram (likely left‑heavy).
Adjust one setting at a time until the histogram is balanced (spread across the middle without clipping at edges).
👉 Exposure isn’t about “perfect brightness”—it’s about controlling detail in highlights and shadows. Once you learn to read the histogram, you’ll stop guessing and start shooting with confidence.
Exposure mistakes happen when one part of the exposure triangle (aperture, shutter speed, ISO) is set without balancing the others—or when the camera’s meter is misled by tricky lighting. Let’s break down the most common errors and why they occur:
🧪 Exposure Mistakes and Why They Happen
Overexposure (Too Bright)
Why it happens:
Aperture too wide (f/1.8 in bright daylight).
Shutter speed too slow (1/30s outdoors).
ISO too high (ISO 1600 in sunlight).
Meter fooled by dark subjects (camera brightens too much).
Result: Washed‑out highlights, white skies, pale skin tones.
Underexposure (Too Dark)
Why it happens:
Aperture too narrow (f/16 indoors).
Shutter speed too fast (1/1000s at night).
ISO too low (ISO 100 in dim light).
Meter fooled by bright subjects (camera darkens too much).
Result: Muddy shadows, loss of detail, subjects hard to see.
Blown Highlights
Why it happens:
Bright areas (clouds, reflections, neon lights) exceed sensor’s dynamic range.
Camera exposes for shadows, sacrificing highlight detail.
Result: Pure white patches with no texture.
Crushed Shadows
Why it happens:
Dark areas fall below sensor’s dynamic range.
Camera exposes for highlights, sacrificing shadow detail.
Result: Solid black areas with no recoverable detail.
Mixed Lighting Errors
Why it happens:
Scene has extreme contrast (bright window + dark room).
Meter averages exposure, leaving both highlights and shadows compromised.
Result: One part of the image looks fine, the other is unusable.
Trusting the LCD Instead of the Histogram
Why it happens:
LCD brightness varies depending on environment.
In sunlight, photos look darker than they are; indoors, brighter.
Result: Misjudged exposure decisions.
🔎 How to Read Exposure Mistakes
Histogram:
Bunched left = underexposed.
Bunched right = overexposed.
Spikes at edges = clipping (lost detail).
Light Meter:
Needle left = too dark.
Needle right = too bright.
Centered = balanced exposure (though not always “perfect” artistically).
👉 In short: exposure mistakes happen when light, subject, and settings aren’t balanced. The histogram is your best truth‑teller—it shows whether you’re losing detail in highlights or shadows.
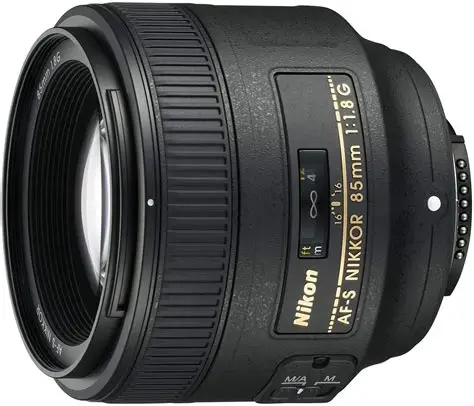
The Nikon 85mm f/1.8G paired with a Nikon D810 is one of the most satisfying lens-body combos you can put together 👌📷. It’s a classic setup that delivers gorgeous images with relative simplicity and a very pleasing shooting experience.
📸 Nikon 85 mm f/1.8G on the Nikon D810 — A Perfect Portrait Pairing
When you mount the Nikon AF-S Nikkor 85mm f/1.8G on a Nikon D810, you’re combining two things:
An outstanding portrait lens with beautiful rendering
One of Nikon’s highest-resolution full-frame bodies
Together, they create images with exceptional clarity, smooth tonality, and a classic portrait aesthetic — without breaking the bank.
🧠 Why This Combo Is So Good
💎 1. Image Quality That Punches Above the Price
The 85mm f/1.8G is often called one of Nikon’s best value lenses because:
Very sharp from wide open
Elegant separation between subject and background
Clean, flattering skin tones
Minimal optical flaws
On the D810’s 36 MP sensor, the results are rich and detailed — capturing texture and nuance that feel “medium-format light.”
🌗 2. Beautiful Background Separation (Bokeh)
At f/1.8, the lens excels at isolating subjects:
✨ Creamy, smooth bokeh ✨ Rounded highlights ✨ Subject pop without being cartoonish
This is exactly why 85 mm is a portrait standard — it flatters faces while keeping distractions soft and unobtrusive.
🧠 3. Focal Length That Just Works
On full-frame, 85 mm sits at a sweet spot for portraits — not too wide, not too telephoto.
It’s far enough from your subject to compress features gently, but close enough to maintain connection.
Great for: ✔️ Headshots ✔ Upper-body portraits ✔ Street portraits ✔ Isolated detail shots
⚡ 4. Fast, Reliable AF on the D810
The D810’s Multi-CAM 3500FX AF system pairs beautifully with the 85 mm f/1.8G:
Accurate focus even at wide aperture
Solid performance in low light
Predictable tracking across frames
This means less missed focus and fewer “soft” portraits at shallow depth of field.
📷 Sample Situations Where It Shines
👩 Portrait Sessions
Natural light or studio — this lens renders skin with smooth tonal transitions and minimal post-processing needed.
🌆 Street Portraiture
You can maintain respectful distance and still get head-and-shoulders frames that feel intimate.
🎉 Events & Candids
Fast aperture lets you shoot in ambient light without flash — great for weddings or indoor environments.
🧠 Practical Tips For Best Results
📍 1. Use f/1.8–f/2.8 for Portaits
f/1.8 — most beautiful background blur
f/2.2–f/2.8 — slightly more depth for group or moving shots
📍 2. Watch your focus point
At f/1.8 on 36 MP, focus placement matters a lot: ✔️ Aim for the nearest eye ✔️ Lock focus, then recompose if needed
📍 3. Consider Distance
85 mm is long-ish — ensure you have enough space
Too close and you compress facial features slightly (often flattering!)
Too far and the background may become a bit too compressed
🔎 Comparison with Similar Lenses
Lens
Strengths
When to Choose
Nikon 85 mm f/1.8G
Sharp, smooth bokeh, affordable
Best all-around portrait lens
Nikon 85 mm f/1.4G
Creamier bokeh, more control
Studio portraits / creamy stylized look
Nikon 105 mm f/1.4E
Ultra-isolated blur
Fine-art / editorial portraits
If you want more extreme bokeh and are OK with size/weight, the f/1.4 options push the aesthetic even further — but the f/1.8G is the sweet spot for value and performance.
🎯 Final Verdict
✅ Image sharpness: Outstanding ✅ Background separation: Gorgeous ✅ Low-light ability: Excellent ✅ Ease of use: Very good ✅ Value: Exceptional
On the Nikon D810, this combo produces images that look rich, dimensional, and expressive — no filters required.