Same focal length. Same max aperture. Very different intent.
The 85mm f/1.8GD vs 85mm f/1.8G comparison is way more interesting than people think—this isn’t just “older vs newer,” it’s two different philosophies of portrait lenses.
1. Design Philosophy (This Is the Core Difference)
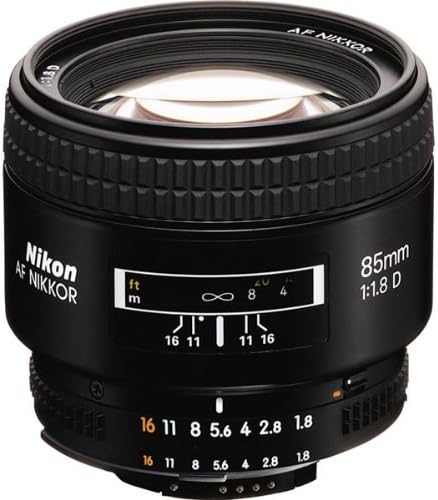
85mm f/1.8D
Designed in the film-era mindset
Optimized for:
Speed
Compactness
High micro-contrast
Assumes the photographer:
Focuses manually with intent
Accepts character over perfection
👉 The D lens does not apologize for optical flaws. It uses them.
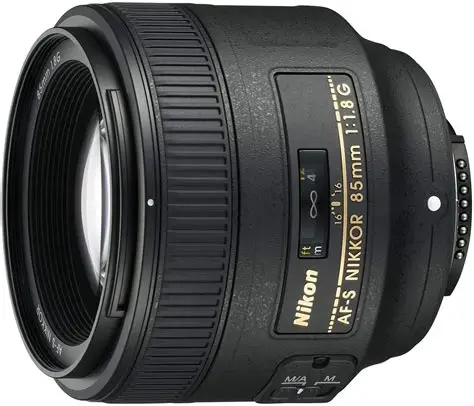
85mm f/1.8G
Designed in the digital-era mindset
Optimized for:
Resolution
Smoothness
Consistency across the frame
Assumes:
High-resolution sensors
Autofocus accuracy matters
Images will be scrutinized at 100%
👉 The G lens is corrective and controlled.
2. Optical Performance
Sharpness
Aperture
85mm f/1.8D
85mm f/1.8G
f/1.8
Sharp center, soft edges
Sharper center, cleaner edges
f/2.8
Very sharp
Extremely sharp
f/4–5.6
Excellent
Clinically excellent
The G is objectively sharper, especially wide open and toward the edges.
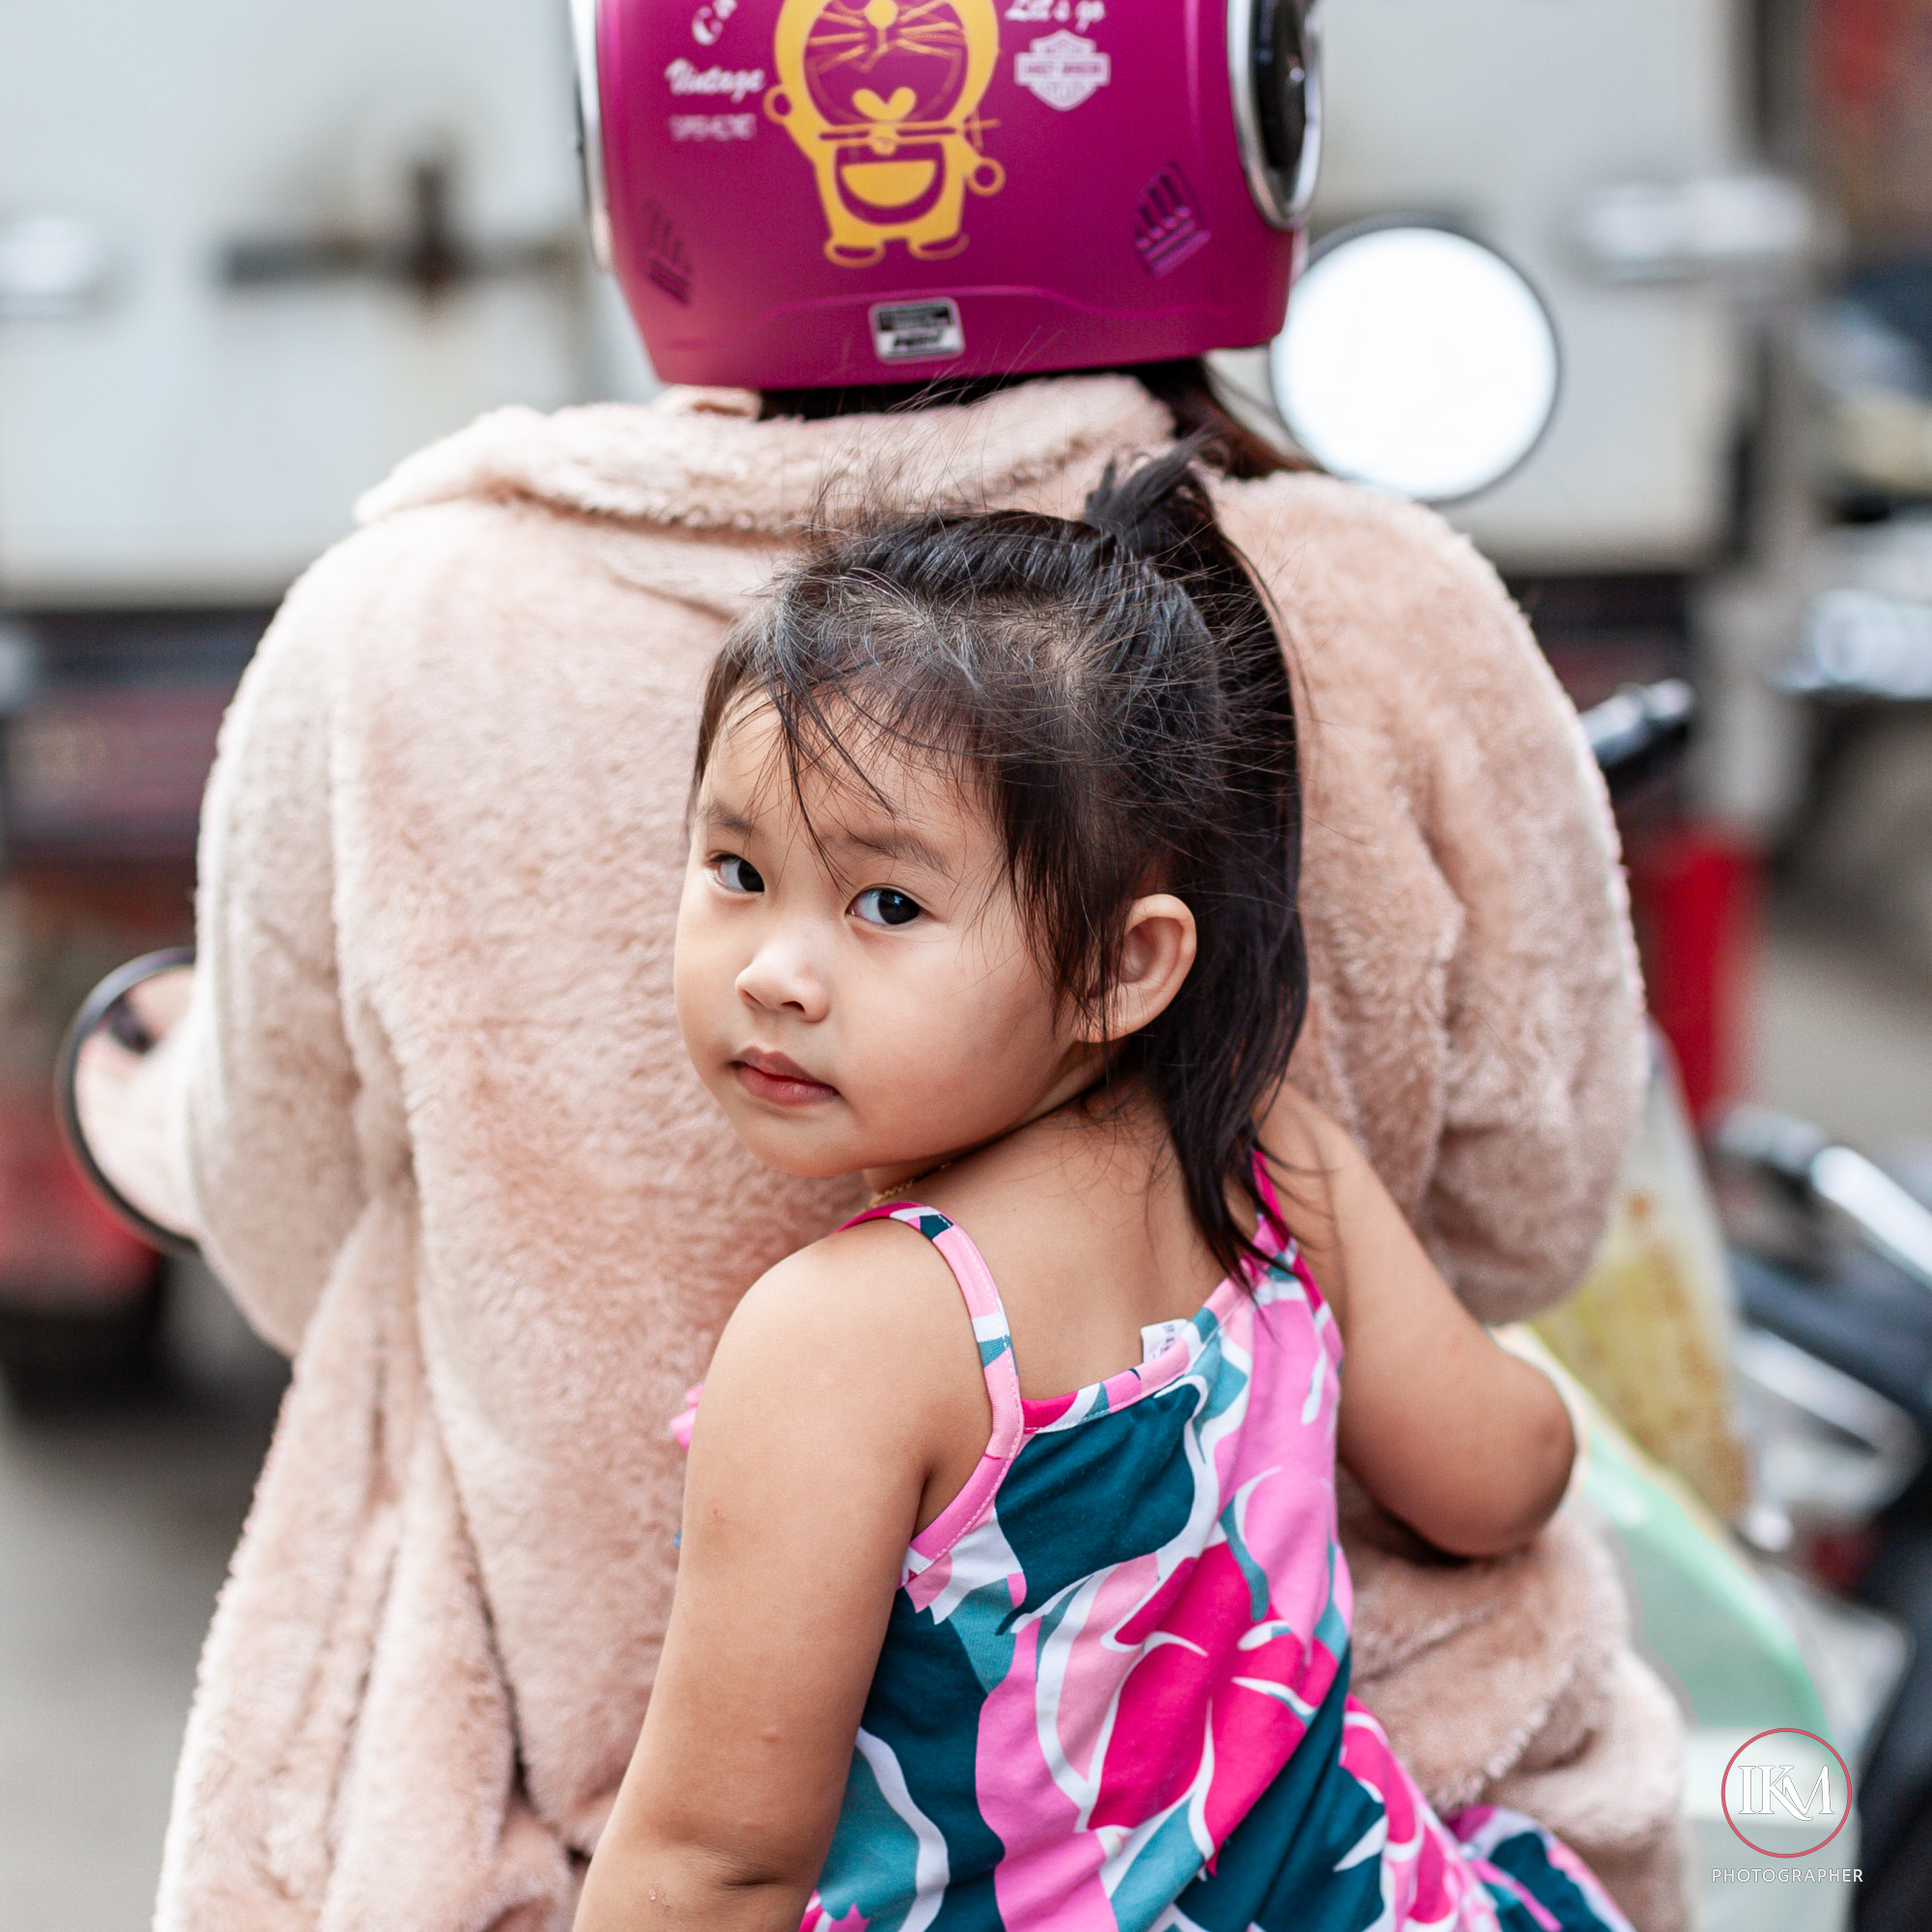
The D has bite—center sharpness with strong micro-contrast that feels punchy, especially on faces.
📌 On modern high-MP sensors, the G holds together better technically.
Contrast & Rendering
D lens
Higher micro-contrast
Harder transitions
More “snap”
Faces look more sculpted, sometimes harsher
G lens
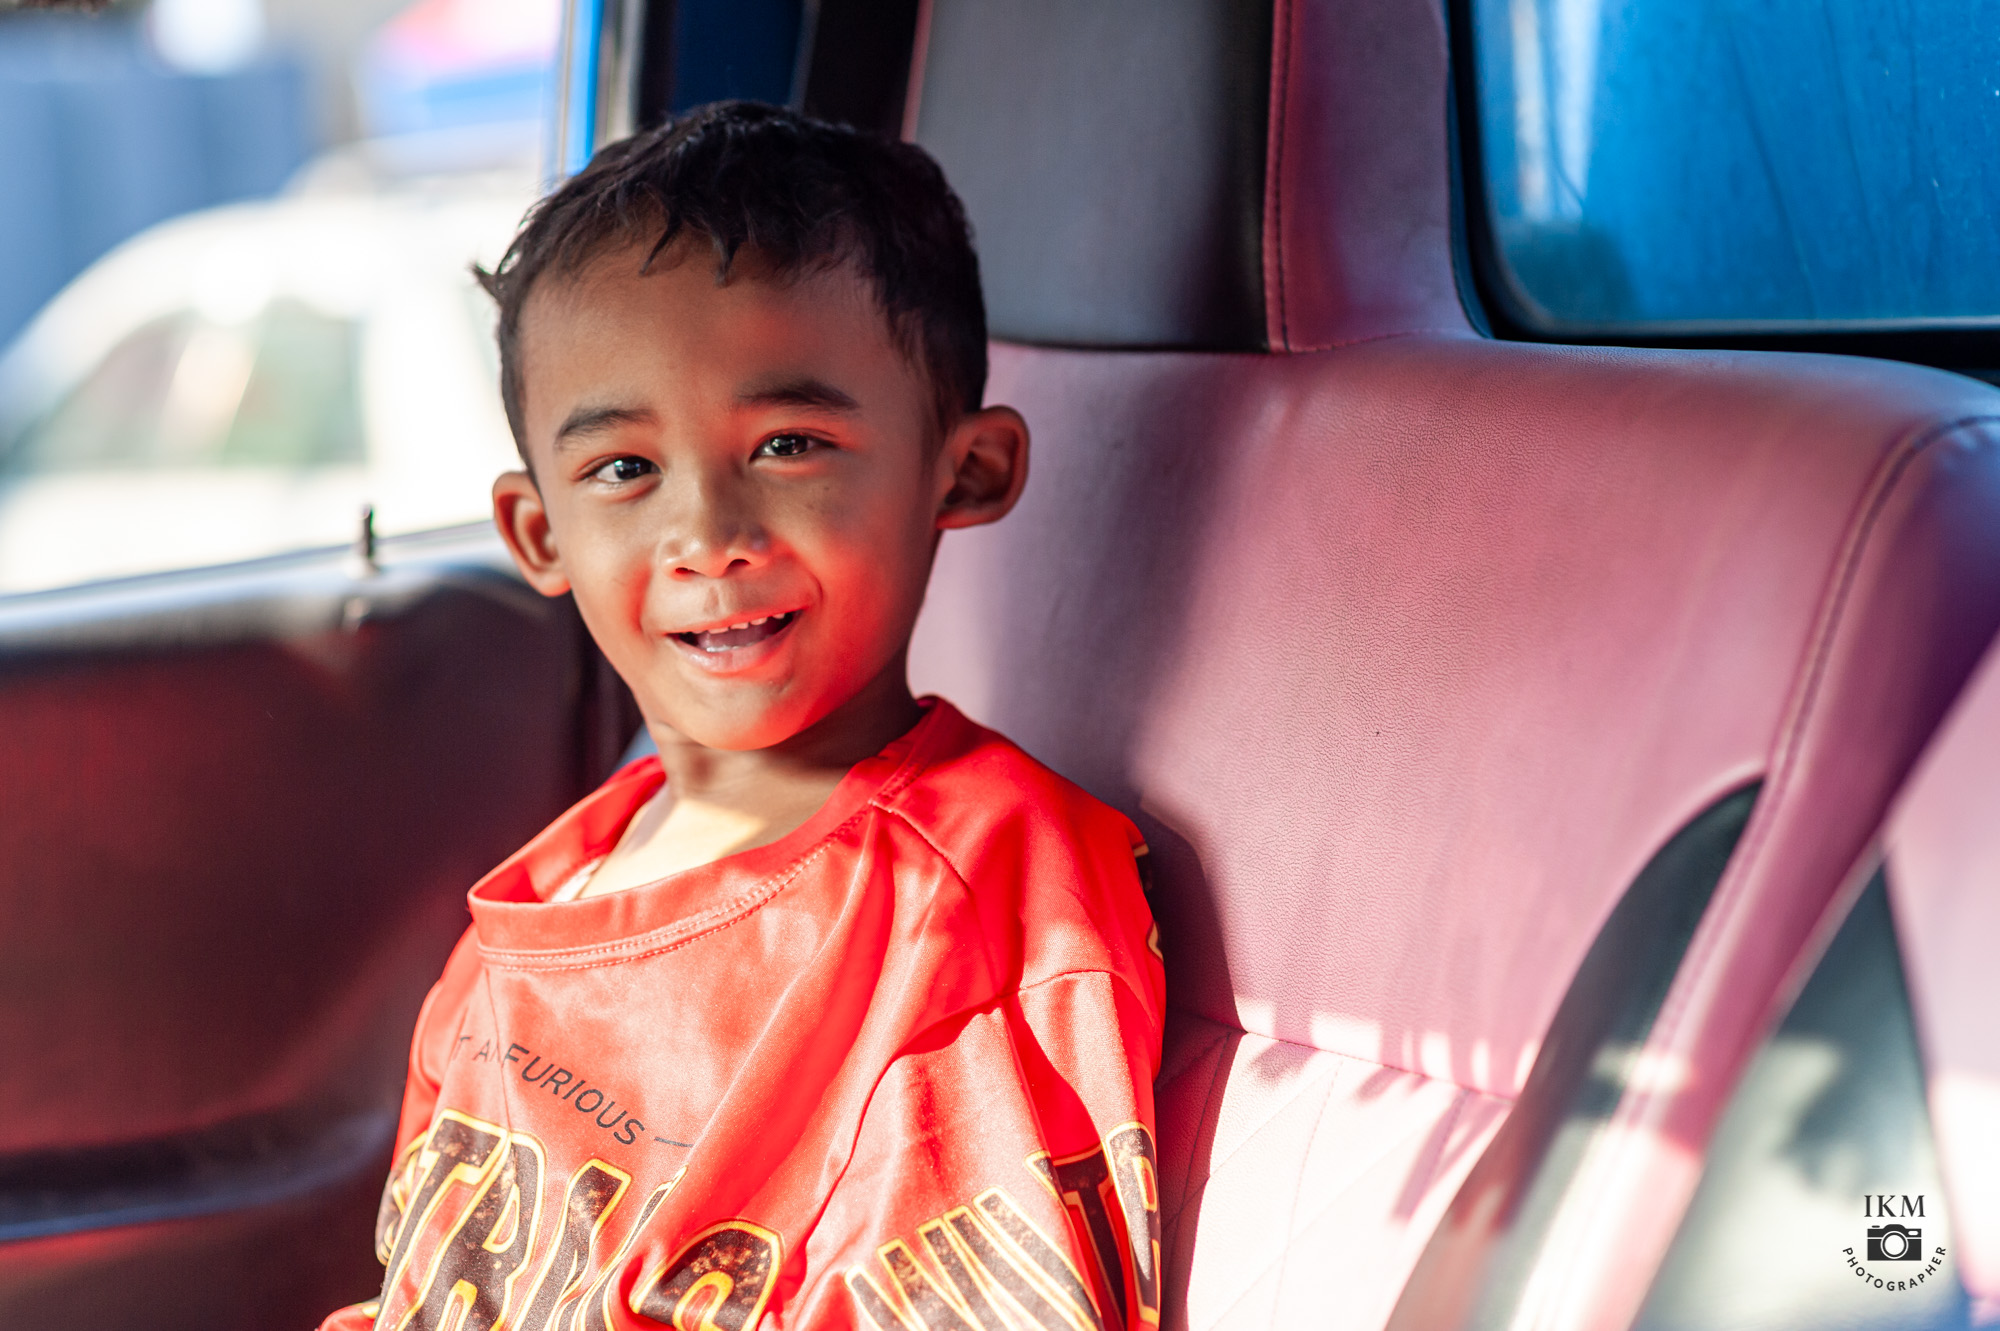
Smoother tonal roll-off
Lower micro-contrast
More forgiving on skin
Easier to grade in post
👉 This is why some people say the D looks “3D” and the G looks “creamy.”
3. Bokeh & Out-of-Focus Rendering
85mm f/1.8D
Nervous bokeh in busy backgrounds
Cat’s-eye shapes near edges
Double lines in specular highlights
Can feel edgy or distracting
⚠️ Not a “safe” bokeh lens.
85mm f/1.8G
Significantly smoother background blur
More rounded aperture blades
Better correction of spherical aberration
Backgrounds dissolve rather than vibrate
👉 For environmental portraits or street portraits, the G is far more predictable.
4. Autofocus & Handling
Autofocus
D: Screw-drive AF
Fast on pro bodies
Noisy
Inaccurate at f/1.8
G: Silent Wave Motor (AF-S)
Quieter
More accurate
Better for modern DSLRs
If you’re shooting moving subjects or candid portraits, the G wins decisively.
Build & Ergonomics
Aspect
1.8D
1.8G
Size
Smaller
Larger
Weight
Lighter
Heavier
Build
Solid, simple
Modern composite
Focus ring
Better manual feel
Adequate, not special
The D feels mechanical. The G feels engineered.
5. Compatibility & Practical Reality
85mm f/1.8D
❌ No AF on entry-level Nikon bodies
✔️ Excellent on D700, D3, D4, Df
✔️ Gorgeous on film bodies
✔️ Very cheap on the used market
85mm f/1.8G
✔️ Full AF on all Nikon DSLRs
✔️ Designed for high-resolution sensors
✔️ Better resale value
❌ Less character
6. Character vs Control (The Honest Take)
Choose the 85mm f/1.8D if:
You value rendering over perfection
You shoot:
Street portraits
Gritty documentary
Black & white
You like lenses that argue back
You enjoy working around flaws
👉 This lens has teeth.
Choose the 85mm f/1.8G if:
You need:
Reliable AF
Smooth skin tones
Predictable results
You shoot:
Editorial portraits
Commercial work
Color-heavy projects
You want files that are easy to finish in post
👉 This lens is quietly competent.
7. One-Line Verdict (Brutally Honest)
85mm f/1.8D: A portrait lens with attitude and consequences.
85mm f/1.8G: A portrait lens that stays out of the way.
If you’re starting photography, focus first on mastering your camera’s basic settings (aperture, shutter speed, ISO) and composition techniques like the rule of thirds. Begin with natural light, practice often, and don’t worry about expensive gear—skill matters more than equipment.
Learning your camera and reading its manual is one of the most underrated but powerful steps in photography. Here’s how to approach it so it feels less like homework and more like unlocking a secret language:
📖 How to Learn Your Camera (Manual Included)
Treat the Manual as a Map
Don’t read it cover to cover—skim it like a guidebook.
Flag sections on exposure modes, focus systems, and custom settings.
Keep it nearby when practicing; it’s a reference, not a novel.
Break Down Features One at a Time
Day 1: Aperture controls → practice depth of field.
Day 2: Shutter speed → freeze vs blur motion.
Day 3: ISO → noise vs brightness.
Day 4: Autofocus modes → single, continuous, manual.
Day 5: Metering modes → spot, center-weighted, evaluative.
Use the Manual to Decode Symbols
Those cryptic icons (sun, mountain, flower) suddenly make sense when explained.
Learn what each button does—no more guessing mid-shoot.
Practice With Purpose
Pick one feature from the manual, then shoot only with that in mind.
Example: After reading about exposure compensation, spend an hour adjusting ±EV in different light.
Build Muscle Memory
Reading tells you what the button does.
Practice tells you where it is without looking.
The goal: operate your camera like an extension of your hand.
Keep Notes
Jot down quirks: “My camera underexposes in backlight—compensate +1 EV.”
Over time, you’ll build your own personal manual that’s more useful than the factory one.
🧭 Philosophy
Would you like me to design a step‑by‑step “manual study plan” (like a 7‑day routine) so you can systematically learn your camera without overwhelm?
Buying expensive gear too early—skills matter more than equipment.
Would you like me to create a step-by-step 30‑day beginner photography challenge so you can practice these skills systematically?
📸 30-Day Beginner Photography Challenge Week 1: Getting Comfortable with Your Camera
Day 1: Take 10 photos of everyday objects in auto mode.
Day 2: Experiment with aperture—shoot the same subject at f/2.8, f/5.6, and f/11.
Day 3: Practice shutter speed—capture a moving subject at 1/30s, 1/250s, and 1/1000s.
Day 4: Adjust ISO—shoot indoors at ISO 100, 800, and 1600.
Day 5: Learn the rule of thirds—photograph a subject off-center.
Day 6: Try symmetry—find reflections or balanced patterns.
Day 7: Review your week’s shots and note what you liked most.
Week 2: Exploring Light
Day 8: Shoot during golden hour (sunrise or sunset).
Day 9: Capture shadows at midday.
Day 10: Use window light for a portrait.
Day 11: Experiment with backlighting—subject in front of the sun or lamp.
Day 12: Try night photography—streetlights, neon signs, or stars.
Day 13: Use artificial light (lamp, flashlight) creatively.
Day 14: Compare natural vs artificial lighting in similar shots.
Week 3: Composition & Creativity
Day 15: Use leading lines (roads, fences, paths).
Day 16: Frame your subject (shoot through doors, arches, foliage).
Day 17: Capture patterns or textures.
Day 18: Shoot from a low angle.
Day 19: Shoot from a high angle.
Day 20: Try minimalism—one subject against a clean background.
Day 21: Capture candid street photography (respect privacy).
Week 4: Storytelling & Editing
Day 22: Take a series of 3 photos that tell a story.
Day 23: Capture emotion in a portrait.
Day 24: Photograph movement (sports, dancing, traffic).
Day 25: Try black-and-white photography.
Day 26: Edit your photos using free apps (Snapseed, Lightroom Mobile).
Day 27: Re-shoot one of your earlier challenges with improved technique.
Day 28: Create a photo essay of 5 images on a theme (e.g., “Morning Routine”).
Day 29: Share your best photo with friends or online for feedback.
Day 30: Reflect—compare Day 1 vs Day 30 shots and note your progress.
👉 By the end of this challenge, you’ll have practiced technical skills, creative composition, and storytelling—the three pillars of photography.
🎯 Photography Technical Drills (One Setting at a Time) Aperture (Depth of Field)
Drill 1: Place a subject (like a coffee mug) on a table.
Shoot at f/2.8 → background blurry.
Shoot at f/8 → background sharper.
Shoot at f/16 → everything sharp.
Goal: Notice how aperture changes background separation and focus.
Shutter Speed (Motion Control)
Drill 2: Photograph moving water (fountain, sink, or river).
Shoot at 1/1000s → water frozen.
Shoot at 1/60s → slight blur.
Shoot at 1/5s → silky smooth trails.
Goal: See how shutter speed controls motion blur.
ISO (Light Sensitivity)
Drill 3: Shoot indoors with steady lighting.
ISO 100 → clean, dark image.
ISO 800 → brighter, slight grain.
ISO 3200 → very bright, noticeable noise.
Goal: Understand trade-off between brightness and image quality.
Focus Modes
Drill 4: Switch between manual focus and auto focus.
Photograph a subject with cluttered background.
Try locking focus on the subject manually, then let auto focus decide.
Goal: Learn when to trust auto focus vs. manual control.
White Balance
Drill 5: Shoot the same subject under warm indoor light.
Use Auto WB → camera guesses.
Use Tungsten WB → cooler correction.
Use Daylight WB → warmer tones.
Goal: See how WB changes color temperature.
Exposure Compensation
Drill 6: In aperture priority mode, photograph a bright scene.
Set -1 EV → darker image.
Set 0 EV → normal exposure.
Set +1 EV → brighter image.
Goal: Learn how to quickly adjust exposure without full manual mode.
👉 Each drill should be repeated with the same subject and lighting so you can isolate the effect of that one setting.
Photography Technical Drills (One Setting at a Time) Aperture (Depth of Field)
Drill 1: Place a subject (like a coffee mug) on a table.
Shoot at f/2.8 → background blurry.
Shoot at f/8 → background sharper.
Shoot at f/16 → everything sharp.
Goal: Notice how aperture changes background separation and focus.
Shutter Speed (Motion Control)
Drill 2: Photograph moving water (fountain, sink, or river).
Shoot at 1/1000s → water frozen.
Shoot at 1/60s → slight blur.
Shoot at 1/5s → silky smooth trails.
Goal: See how shutter speed controls motion blur.
ISO (Light Sensitivity)
Drill 3: Shoot indoors with steady lighting.
ISO 100 → clean, dark image.
ISO 800 → brighter, slight grain.
ISO 3200 → very bright, noticeable noise.
Goal: Understand trade-off between brightness and image quality.
Focus Modes
Drill 4: Switch between manual focus and auto focus.
Photograph a subject with cluttered background.
Try locking focus on the subject manually, then let auto focus decide.
Goal: Learn when to trust auto focus vs. manual control.
White Balance
Drill 5: Shoot the same subject under warm indoor light.
Use Auto WB → camera guesses.
Use Tungsten WB → cooler correction.
Use Daylight WB → warmer tones.
Goal: See how WB changes color temperature.
Exposure Compensation
Drill 6: In aperture priority mode, photograph a bright scene.
Set -1 EV → darker image.
Set 0 EV → normal exposure.
Set +1 EV → brighter image.
Goal: Learn how to quickly adjust exposure without full manual mode.
👉 Each drill should be repeated with the same subject and lighting so you can isolate the effect of that one setting.
Photographers don’t just “look”—they see differently. Their vision is trained to notice light, shapes, and stories in everyday scenes. Here’s how they develop that way of seeing:
👁️ How Photographers See the World
Light First
They notice how light falls on a subject—soft vs harsh, warm vs cool.
Shadows, highlights, and reflections become part of the composition.
A photographer might walk into a room and immediately think: “That window light is perfect for a portrait.”
Composition Everywhere
They frame scenes instinctively—using the rule of thirds, leading lines, or symmetry.
Even without a camera, they imagine how a moment would look cropped in a rectangle.
Everyday objects (a coffee cup, a street sign) become potential subjects.
Details Others Miss
Textures, patterns, and contrasts stand out.
They notice how colors interact—like a red umbrella against a grey sky.
Small gestures or fleeting expressions become the heart of an image.
Storytelling Mindset
Photographers see beyond objects—they look for meaning.
A single image can suggest mood, emotion, or narrative.
Example: A child’s shoes by the door might tell a story of play, rest, or anticipation.
Constant Awareness
They’re always scanning—anticipating moments before they happen.
Street photographers, for instance, watch body language and predict interactions.
Nature photographers notice subtle changes in clouds, wind, or animal behavior.
🧠 Training Yourself to See Like a Photographer
Slow down: Pause before snapping—ask, “What’s the light doing here?”
Frame with your eyes: Pretend your hands are a viewfinder and crop the world.
Practice mindfulness: Notice colors, shadows, and shapes in daily life.
Shoot intentionally: Don’t just capture—decide why you’re taking the photo.
👉 In short: photographers see light, composition, and story where others just see objects.
For street photography—especially when photographing people—you want settings that balance speed, flexibility, and discretion. Here’s a street‑ready setup most photographers rely on:
🚶 Street-Ready Camera Settings for People
Mode
Aperture Priority (A/Av): Lets you control depth of field while the camera adjusts shutter speed.
Manual Mode: If you’re confident, set both aperture and shutter speed for consistency.
Aperture
f/5.6 – f/8: Keeps subjects sharp while allowing some background context.
Wide apertures (f/2.8) isolate subjects, but risk missing focus in fast-moving scenes.
Shutter Speed
1/250s or faster: Freezes walking motion.
1/500s+: Essential for cyclists, runners, or quick gestures.
ISO
Auto ISO with a cap (e.g., 3200): Keeps exposure balanced as light changes quickly on the street.
Lens Choice: 35mm or 50mm prime lenses are classics—natural perspective, fast aperture, compact size.
⚡ Quick Street Setup (Daylight)
Mode: Aperture Priority
Aperture: f/5.6
Shutter Speed: 1/250s (minimum)
ISO: Auto (cap at 1600–3200)
Focus: AF-C, zone focus
WB: Auto
👉 This setup gives you sharp subjects, contextual backgrounds, and flexibility for unpredictable street moments.
Bokeh is the aesthetic quality of the out‑of‑focus areas in a photo, usually seen as soft, creamy background blur that makes the subject stand out. It comes from the Japanese word “boke,” meaning “blur,” and depends on lens design, aperture, and distance.
🌌 What Bokeh Really Is
Definition: Bokeh refers to how the lens renders out‑of‑focus points of light, not just blur itself.
Origin: From Japanese “boke” (ボケ), meaning “blur” or “haze.”
Appearance: Often seen as round or hexagonal highlights in the background, especially when shooting wide open.
Focal Length: Longer lenses (85mm, 135mm) produce more pronounced bokeh.
✨ Good vs. Bad Bokeh
Good Bokeh: Smooth, creamy, pleasing blur that isolates the subject.
Bad Bokeh: Harsh, distracting shapes or nervous edges that compete with the subject.
Example: A portrait with soft circular highlights behind the subject = good bokeh. Jagged or polygonal highlights = less pleasing.
📷 How to Achieve Bokeh
Use a fast lens (e.g., 50mm f/1.8 or 85mm f/1.4).
Shoot wide open (lowest f‑stop).
Get close to your subject while keeping the background far away.
Include point light sources (fairy lights, street lamps) for visible bokeh balls.
🎨 Creative Uses
Portraits: Isolate faces against dreamy backgrounds.
Street Photography: Neon signs and traffic lights become artistic bokeh.
Nature: Flowers or leaves blurred into soft color washes.
⚠️ Things to Watch Out For
Overdoing bokeh can make images look gimmicky.
Cheap lenses may produce “busy” or distracting bokeh.
Not all situations benefit—sometimes context in the background is important.
👉 In short: bokeh is about the quality of blur, not just the amount. It’s a creative tool to direct attention and add atmosphere.
Exposure mistakes are some of the most common frustrations for beginners—and the good news is, your camera tells you when you’ve made them if you know how to read the signs. Let’s break it down:
❌ Common Exposure Mistakes (and How to Read Them)
Overexposure (Too Bright)
Symptoms in the photo: Washed‑out highlights, white skies with no detail, pale skin tones.
Histogram clue: Graph bunched up on the right side.
Fix: Lower ISO, use faster shutter speed, or stop down aperture (higher f‑number).
Underexposure (Too Dark)
Symptoms in the photo: Loss of shadow detail, muddy blacks, subjects hard to see.
Histogram clue: Graph bunched up on the left side.
Fix: Raise ISO, slow down shutter speed, or open aperture (lower f‑number).
Blown Highlights
Symptoms: Bright areas (like clouds or reflections) turn pure white with no texture.
Histogram clue: Spike at the far right edge.
Fix: Use exposure compensation (-EV), or meter for the highlights.
Crushed Shadows
Symptoms: Dark areas lose detail, becoming solid black.
Histogram clue: Spike at the far left edge.
Fix: Increase exposure slightly (+EV), or use fill light/reflectors.
Mixed Lighting Confusion
Symptoms: Correct exposure in one part, but another part is too bright/dark.
Histogram clue: Spread across both ends, with gaps in the middle.
Fix: Spot meter on your subject, or bracket exposures.
Relying Only on the LCD
Mistake: Judging exposure by how the photo looks on the screen (which can be misleading in bright sunlight).
Better: Always check the histogram—it’s the most reliable exposure reading.
🔎 Quick Reading Drill
Take a photo in bright daylight → check histogram (likely right‑heavy).
Take a photo indoors with no flash → check histogram (likely left‑heavy).
Adjust one setting at a time until the histogram is balanced (spread across the middle without clipping at edges).
👉 Exposure isn’t about “perfect brightness”—it’s about controlling detail in highlights and shadows. Once you learn to read the histogram, you’ll stop guessing and start shooting with confidence.
Exposure mistakes happen when one part of the exposure triangle (aperture, shutter speed, ISO) is set without balancing the others—or when the camera’s meter is misled by tricky lighting. Let’s break down the most common errors and why they occur:
🧪 Exposure Mistakes and Why They Happen
Overexposure (Too Bright)
Why it happens:
Aperture too wide (f/1.8 in bright daylight).
Shutter speed too slow (1/30s outdoors).
ISO too high (ISO 1600 in sunlight).
Meter fooled by dark subjects (camera brightens too much).
Result: Washed‑out highlights, white skies, pale skin tones.
Underexposure (Too Dark)
Why it happens:
Aperture too narrow (f/16 indoors).
Shutter speed too fast (1/1000s at night).
ISO too low (ISO 100 in dim light).
Meter fooled by bright subjects (camera darkens too much).
Result: Muddy shadows, loss of detail, subjects hard to see.
Blown Highlights
Why it happens:
Bright areas (clouds, reflections, neon lights) exceed sensor’s dynamic range.
Camera exposes for shadows, sacrificing highlight detail.
Result: Pure white patches with no texture.
Crushed Shadows
Why it happens:
Dark areas fall below sensor’s dynamic range.
Camera exposes for highlights, sacrificing shadow detail.
Result: Solid black areas with no recoverable detail.
Mixed Lighting Errors
Why it happens:
Scene has extreme contrast (bright window + dark room).
Meter averages exposure, leaving both highlights and shadows compromised.
Result: One part of the image looks fine, the other is unusable.
Trusting the LCD Instead of the Histogram
Why it happens:
LCD brightness varies depending on environment.
In sunlight, photos look darker than they are; indoors, brighter.
Result: Misjudged exposure decisions.
🔎 How to Read Exposure Mistakes
Histogram:
Bunched left = underexposed.
Bunched right = overexposed.
Spikes at edges = clipping (lost detail).
Light Meter:
Needle left = too dark.
Needle right = too bright.
Centered = balanced exposure (though not always “perfect” artistically).
👉 In short: exposure mistakes happen when light, subject, and settings aren’t balanced. The histogram is your best truth‑teller—it shows whether you’re losing detail in highlights or shadows.
The Nikon 85mm f/1.8G paired with a Nikon D810 is one of the most satisfying lens-body combos you can put together 👌📷. It’s a classic setup that delivers gorgeous images with relative simplicity and a very pleasing shooting experience.
📸 Nikon 85 mm f/1.8G on the Nikon D810 — A Perfect Portrait Pairing
When you mount the Nikon AF-S Nikkor 85mm f/1.8G on a Nikon D810, you’re combining two things:
An outstanding portrait lens with beautiful rendering
One of Nikon’s highest-resolution full-frame bodies
Together, they create images with exceptional clarity, smooth tonality, and a classic portrait aesthetic — without breaking the bank.
🧠 Why This Combo Is So Good
💎 1. Image Quality That Punches Above the Price
The 85mm f/1.8G is often called one of Nikon’s best value lenses because:
Very sharp from wide open
Elegant separation between subject and background
Clean, flattering skin tones
Minimal optical flaws
On the D810’s 36 MP sensor, the results are rich and detailed — capturing texture and nuance that feel “medium-format light.”
🌗 2. Beautiful Background Separation (Bokeh)
At f/1.8, the lens excels at isolating subjects:
✨ Creamy, smooth bokeh ✨ Rounded highlights ✨ Subject pop without being cartoonish
This is exactly why 85 mm is a portrait standard — it flatters faces while keeping distractions soft and unobtrusive.
🧠 3. Focal Length That Just Works
On full-frame, 85 mm sits at a sweet spot for portraits — not too wide, not too telephoto.
It’s far enough from your subject to compress features gently, but close enough to maintain connection.
Great for: ✔️ Headshots ✔ Upper-body portraits ✔ Street portraits ✔ Isolated detail shots
⚡ 4. Fast, Reliable AF on the D810
The D810’s Multi-CAM 3500FX AF system pairs beautifully with the 85 mm f/1.8G:
Accurate focus even at wide aperture
Solid performance in low light
Predictable tracking across frames
This means less missed focus and fewer “soft” portraits at shallow depth of field.
📷 Sample Situations Where It Shines
👩 Portrait Sessions
Natural light or studio — this lens renders skin with smooth tonal transitions and minimal post-processing needed.
🌆 Street Portraiture
You can maintain respectful distance and still get head-and-shoulders frames that feel intimate.
🎉 Events & Candids
Fast aperture lets you shoot in ambient light without flash — great for weddings or indoor environments.
🧠 Practical Tips For Best Results
📍 1. Use f/1.8–f/2.8 for Portaits
f/1.8 — most beautiful background blur
f/2.2–f/2.8 — slightly more depth for group or moving shots
📍 2. Watch your focus point
At f/1.8 on 36 MP, focus placement matters a lot: ✔️ Aim for the nearest eye ✔️ Lock focus, then recompose if needed
📍 3. Consider Distance
85 mm is long-ish — ensure you have enough space
Too close and you compress facial features slightly (often flattering!)
Too far and the background may become a bit too compressed
🔎 Comparison with Similar Lenses
Lens
Strengths
When to Choose
Nikon 85 mm f/1.8G
Sharp, smooth bokeh, affordable
Best all-around portrait lens
Nikon 85 mm f/1.4G
Creamier bokeh, more control
Studio portraits / creamy stylized look
Nikon 105 mm f/1.4E
Ultra-isolated blur
Fine-art / editorial portraits
If you want more extreme bokeh and are OK with size/weight, the f/1.4 options push the aesthetic even further — but the f/1.8G is the sweet spot for value and performance.
🎯 Final Verdict
✅ Image sharpness: Outstanding ✅ Background separation: Gorgeous ✅ Low-light ability: Excellent ✅ Ease of use: Very good ✅ Value: Exceptional
On the Nikon D810, this combo produces images that look rich, dimensional, and expressive — no filters required.
Pairing the Nikon D700 with the right lens is one of the reasons this body still shines.
📸 It’s a full-frame (FX) camera with great low-light ability and rugged handling, so certain lenses really unlock its potential for street, portrait, travel, and everyday shooting.
Here’s a practical guide to the best lenses you can use with a D700 — ranked by use case and value, including price/quality balance.
🎯 1. Street & Everyday — All-Around Winners
Nikon 35mm f/1.8G AF-S
📌 Best overall everyday lens
Field of view: Classic documentary/street framing
Fast in low light, great subject isolation
Compact and quiet AF
💡 Why it works 35mm on full-frame gives context with subject focus, perfect for street scenes and daily shooting.
📍 Great for:
Street photography
Urban context + people
Travel
Nikon 50mm f/1.8G AF-S
📌 Best all-purpose normal lens
Natural perspective (very “filmic”)
Sharp for portraits and general use
Affordable pro-quality option
💡 Why it’s great If you want one lens that does portraits and everyday shoots, this is a classic. On the D700 it feels perfect.
📍 Great for:
Portraits (tight but not zoomed)
Everyday street photos
Low-light environments
👤 2. Portraits — Beautiful Compression & Bokeh
Nikon 85mm f/1.8G AF-S
📌 Best portrait lens for the D700
Flattering focal length for heads/shoulders
Superb subject separation
Fast, sharp, and great contrast
💡 Why you’ll love it Rich, creamy bokeh and excellent sharpness make this a staple for portraits and even street portraiture from a modest distance.
📍 Great for:
Portraits
Street portraits
Events
🌆 3. Wide Angles — Environment & Context
Nikon 24mm f/1.8G AF-S
📌 Best wide angle prime
Great for environmental street and documentary work
Very usable in low light
Minimal distortion compared to zooms
💡 Why choose 24mm You get immersive perspective without serious barrel distortion. Great indoors or on crowded streets.
📍 Great for:
Architecture + documentary
Wider street scenes
Travel landscapes
📷 4. Zoom Lenses — Flexibility Without Sacrifice
Nikon 24-70mm f/2.8G ED AF-S
📌 Verified pro zoom workhorse
Excellent range for all-around shooting
Strong low-light capability
Classic pro build
💡 Consider this if you want one lens to rule many situations — from wide stories to portraits.
📍 Great for:
Events
Run-and-gun photojournalism
Travel where you can’t change lenses often
Nikon 70-200mm f/2.8G ED VR II
📌 Best telephoto zoom for portraits/sports/isolated subjects
Tight framing without cropping in
Beautiful compression
Fast and tack-sharp
💡 A D700 + 70-200 f/2.8 is a workhorse combo if you shoot concerts, sports, or candid portraits.
📍 Great for:
Tight portraits
Sports or action
Wildlife at moderate distance
💸 5. Best Budget (& Used) Options That Punch Above Their Price
If you want great glass without spending a fortune:
🔹 Nikon 50mm f/1.8D – older normal lens; excellent sharpness and cheap 🔹 Nikon 85mm f/1.8D – gorgeous portrait lens at used prices 🔹 Nikon 24mm f/2.8D – a little slower but very sharp and compact 🔹 Tokina 17-35mm f/4 AT-X – great wide option on a budget
TIP: D-series lenses can still autofocus on the D700 and are often dramatically cheaper used.
🧠 How to Choose Based on What You Shoot
📸 Street + Walkaround
35mm f/1.8G
50mm f/1.8G
🪩 Low-Light & Night
35mm f/1.8G
50mm f/1.8G
85mm f/1.8G
👤 Portraiture
85mm f/1.8G
🌍 Travel & Landscapes
24mm f/1.8G
24-70mm f/2.8G
🏃 Sports/Action
70-200mm f/2.8G
🧠 Why These Lenses Still Rock With the D700
✅ FX (full-frame) coverage — they use the sensor’s best area ✅ Fast apertures — perfect for the D700’s excellent low-light strength ✅ Sharp optics that match the sensor’s output ✅ Built for durability — like the D700 itself
Older is not dated when the glass is this good.
💡 Final Thoughts
If you want one lens that defines the D700 experience: 👉 35mm f/1.8G
If you want one that’s the most versatile and satisfying overall: 👉 50mm f/1.8G
If you want beautiful subject isolation: 👉 85mm f/1.8G
And if you want one lens that does everything: 👉 24-70mm f/2.8G
Born: June 15, 1933, in East London, to Irish immigrant parents.
World War II: Evacuated twice as a child — first to Kings Langley, where he lived briefly with actors Roger Livesey and Ursula Jeans, and later to Wales.
Education: Initially studied painting at St. Martin’s School of Art, but switched to dress design. His design background gave him a sharp eye for form and style, which later influenced his photography.
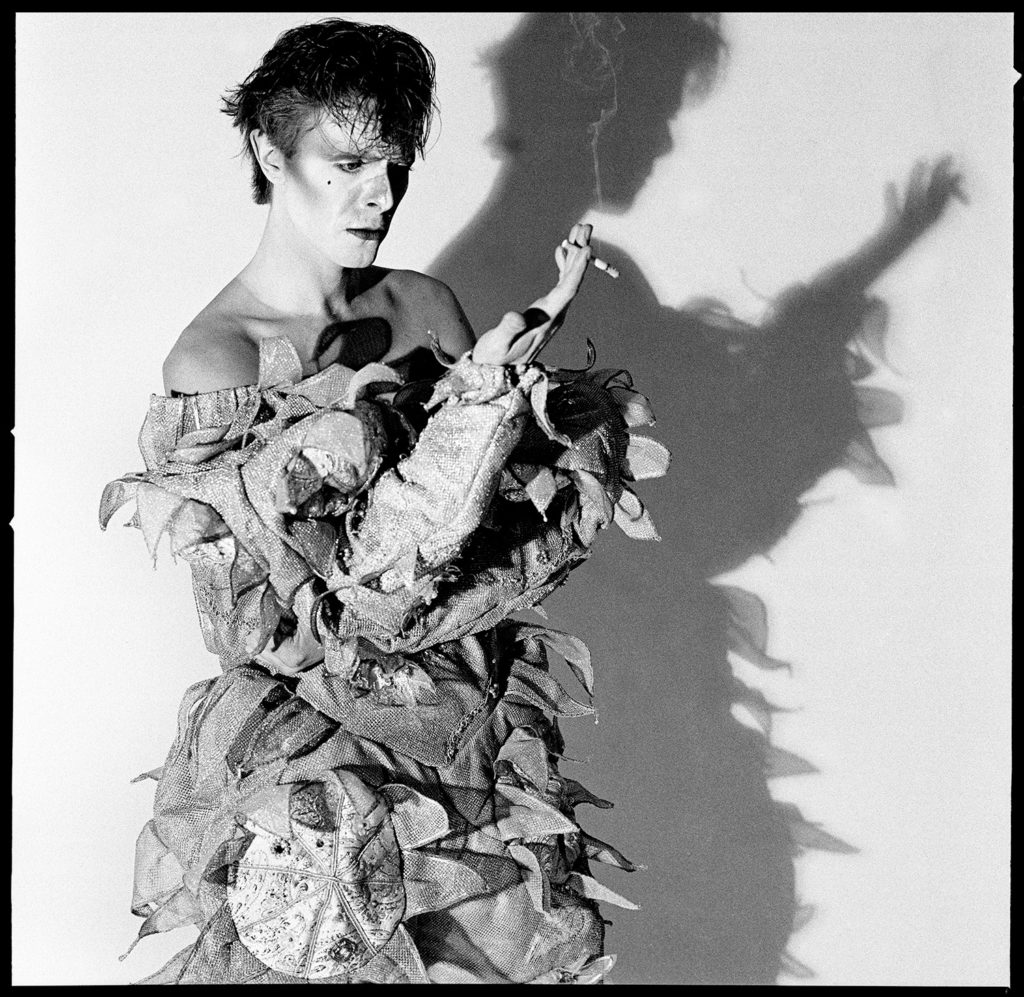
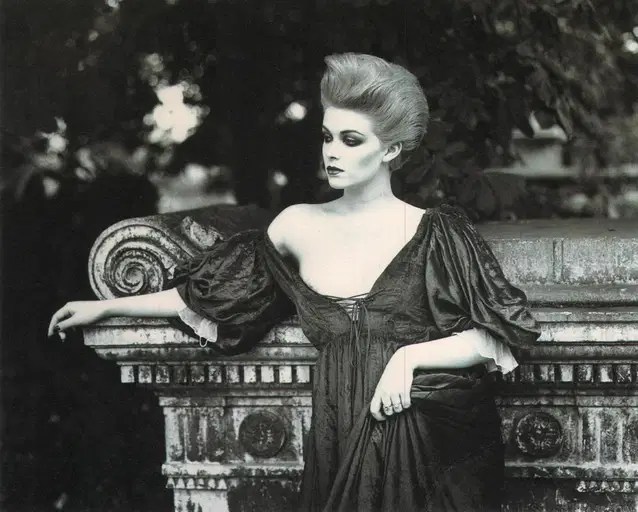
Brian Duffy (1933–2010) was a groundbreaking British photographer and film producer, best known for his fashion and portrait work during the 1960s and 1970s. Alongside David Bailey and Terence Donovan, he formed the “Black Trinity” of photographers who revolutionized fashion imagery, bringing a raw, street‑wise energy that defined Swinging London.
📷 Career Beginnings
Started as a fashion illustrator for Harper’s Bazaar.
Transitioned to photography in the late 1950s, securing a position at British Vogue in 1959.
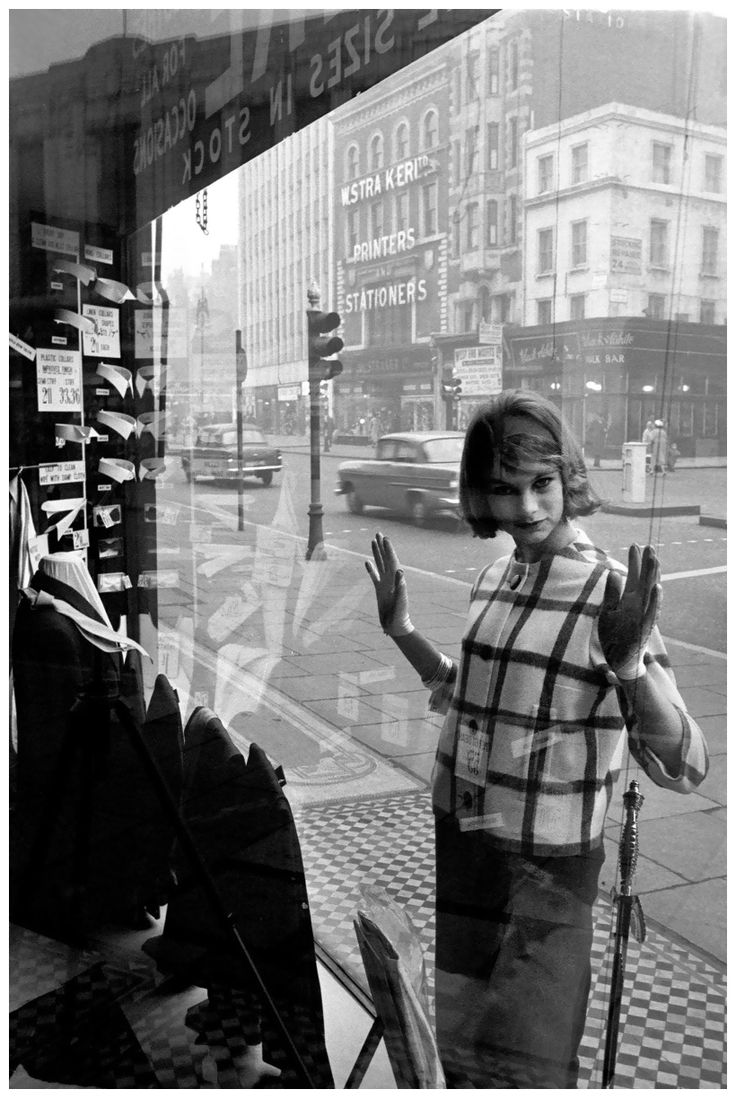
His unconventional approach — using natural light, dynamic poses, and urban settings — broke away from the stiff, aristocratic fashion imagery of the time.
🌟 The “Black Trinity”
Alongside David Bailey and Terence Donovan, Duffy formed the so‑called “Black Trinity.”
Together, they democratized fashion photography, capturing the energy of Swinging London and making models look like cultural icons rather than distant aristocrats.
Their work mirrored the youth revolution of the 1960s, blending fashion with street culture.
🎭 Iconic Work
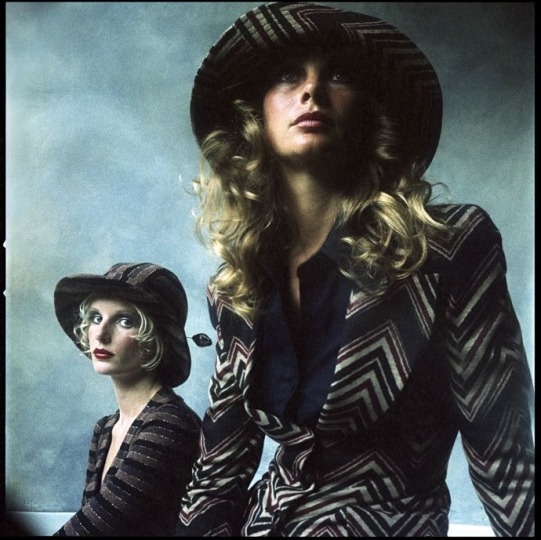
Pirelli Calendars: Shot three editions (1973, 1974, 1977), known for their bold and sensual imagery.
David Bowie Collaboration: Created the legendary Aladdin Sane album cover (1973), featuring Bowie with the lightning bolt makeup — one of the most iconic images in music history.
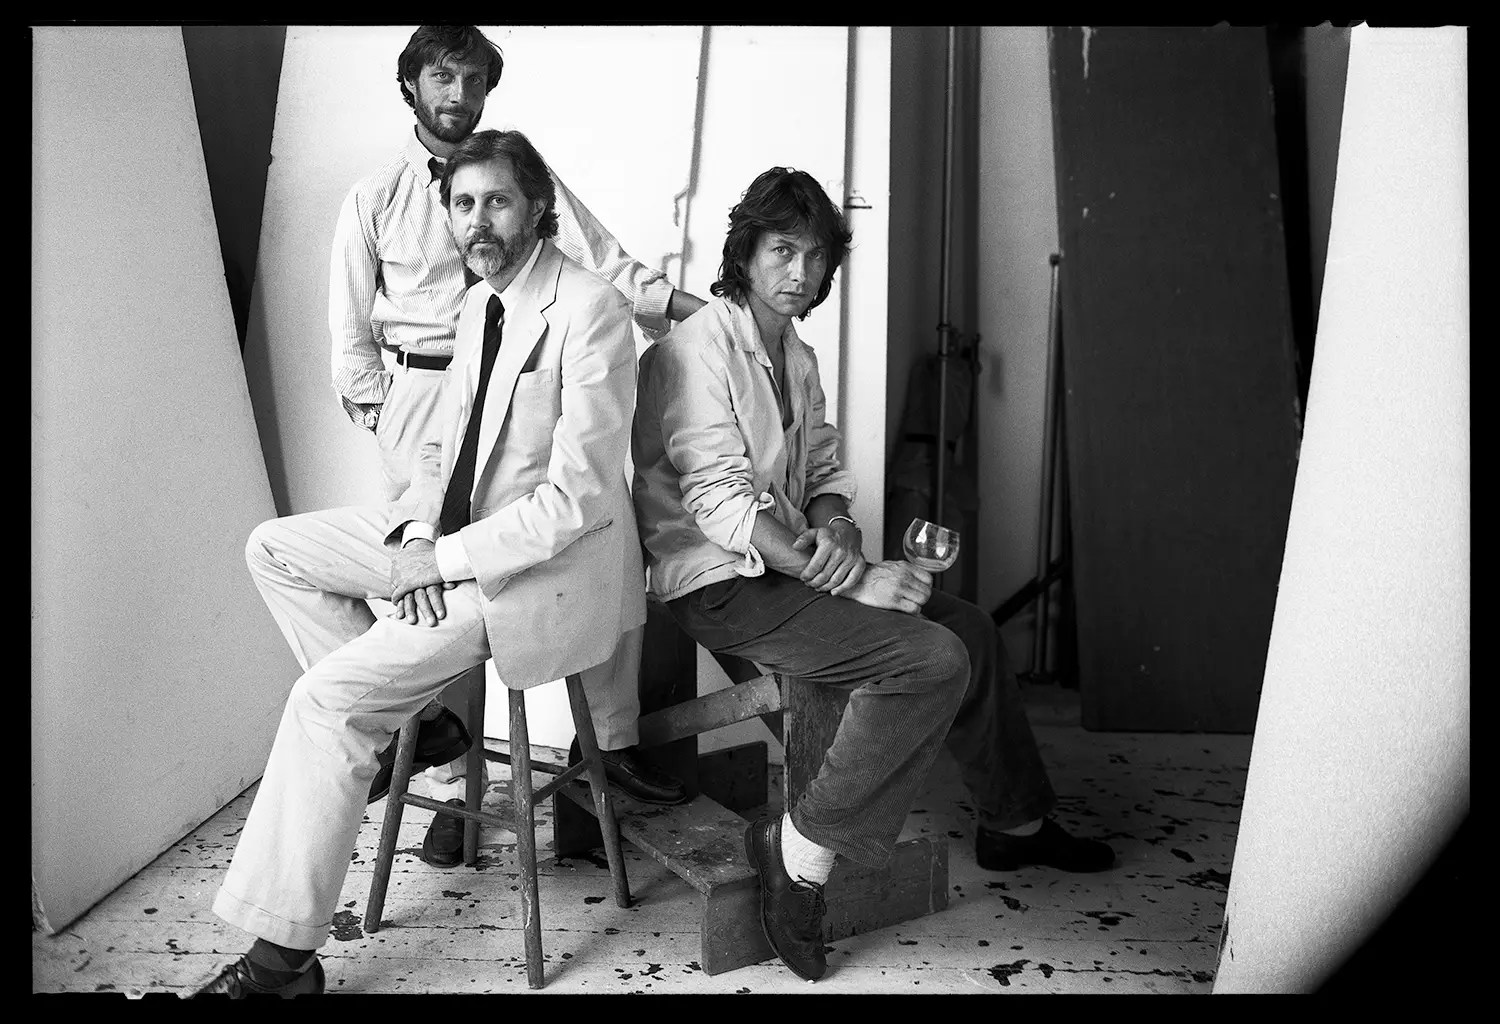
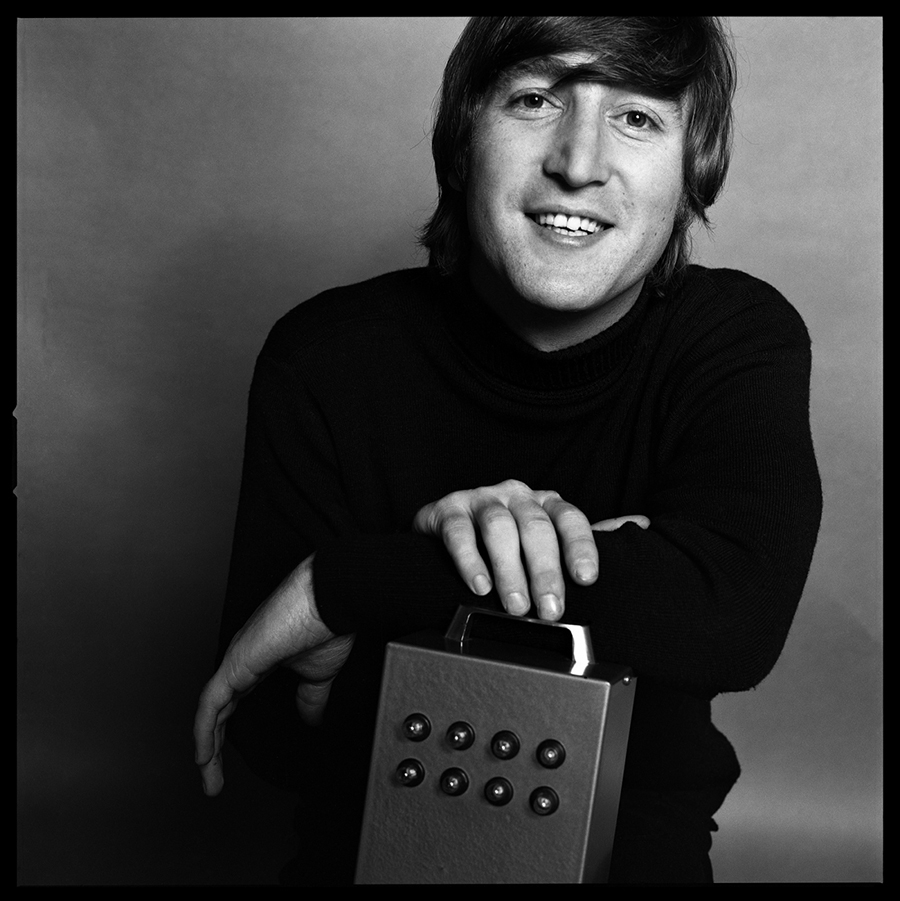
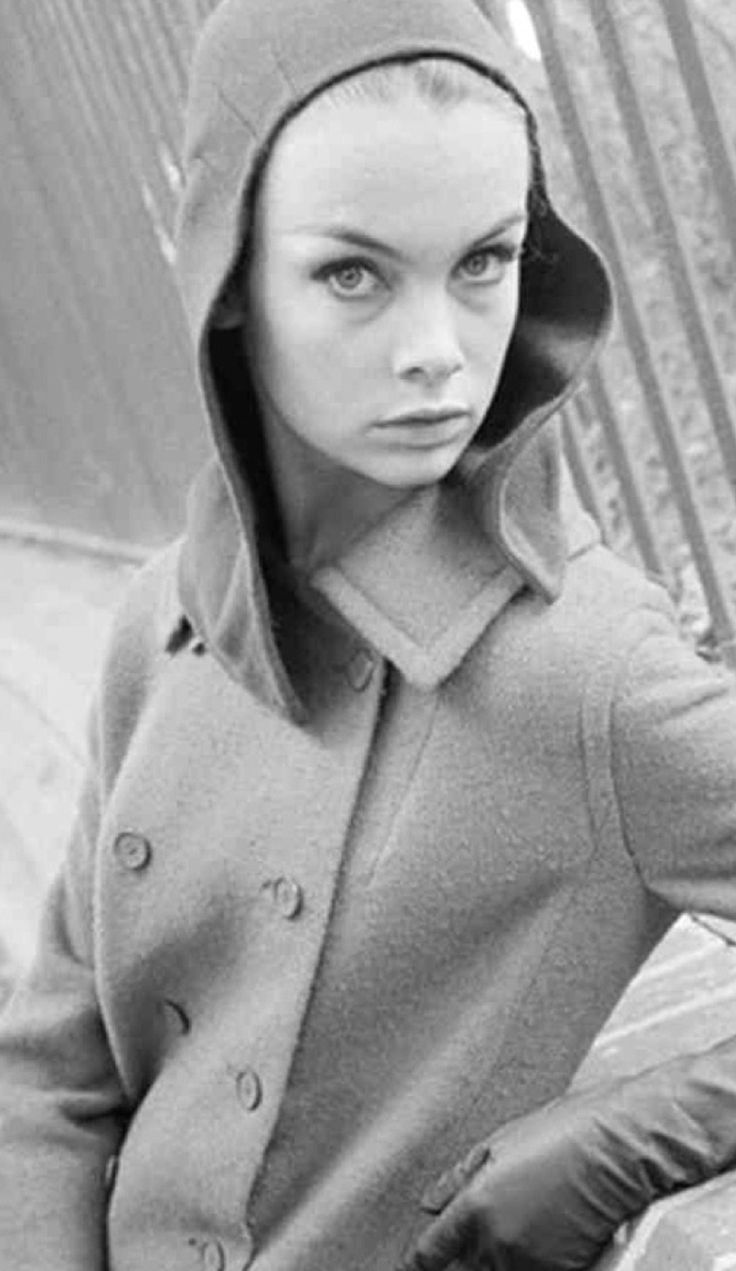
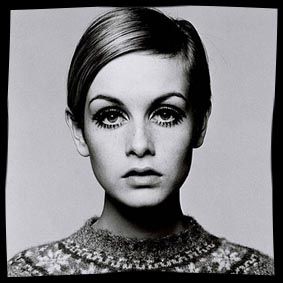
Celebrity Portraits: Photographed John Lennon, Michael Caine, and Jean Shrimpton, among others.
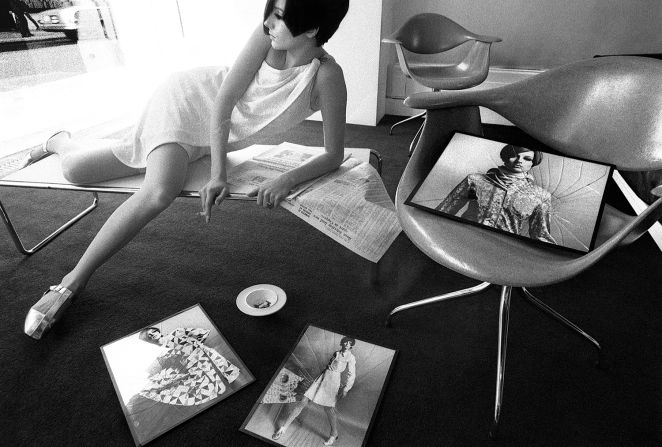
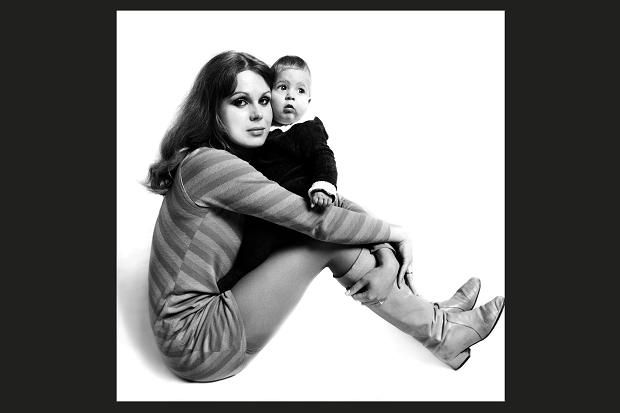
His fashion spreads blurred the line between documentary and glamour, emphasizing realism and attitude.
🎬 Other Ventures
In the 1980s, Duffy stepped back from photography, moving into film production and commercials.
Later pursued antique furniture restoration, showing his versatility and interest in craftsmanship.
⚰️ Death
Died: May 31, 2010, at age 76 in London.
Survived by his children: Christopher, Charlotte, Samantha, and Carey.
🌍 Legacy
Remembered as one of the most influential photographers of the 20th century.
His rediscovered archive has been exhibited widely, ensuring his work continues to inspire.
The “Black Trinity” (Bailey, Donovan, Duffy) are credited with transforming fashion photography into a vibrant, youthful, and culturally relevant art form.
✨ In Summary
Brian Duffy was a revolutionary figure in fashion photography, blending design sensibility with raw energy. His work defined the look of 1960s London, immortalized cultural icons, and left a legacy that continues to shape visual culture today.
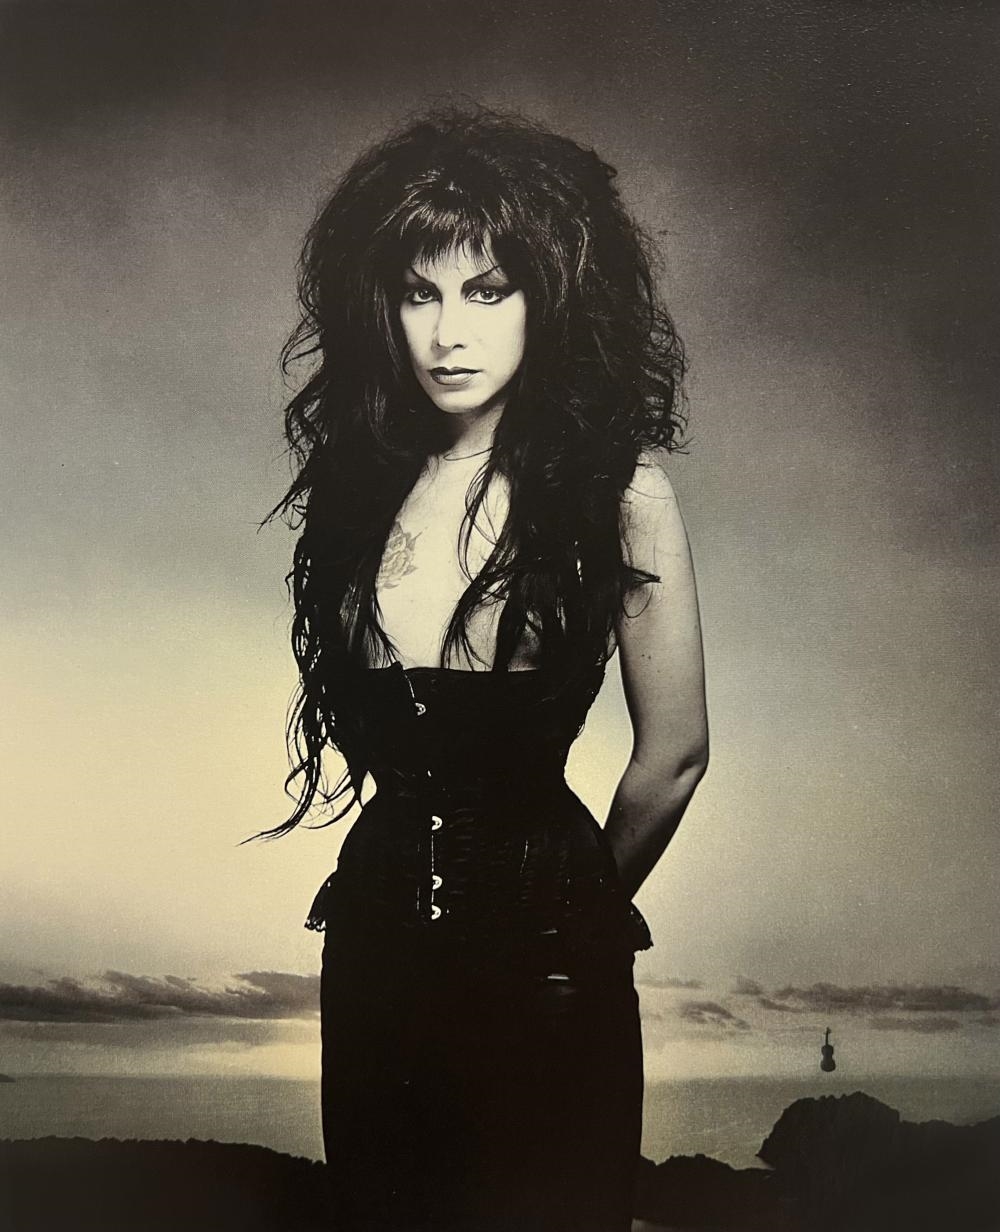
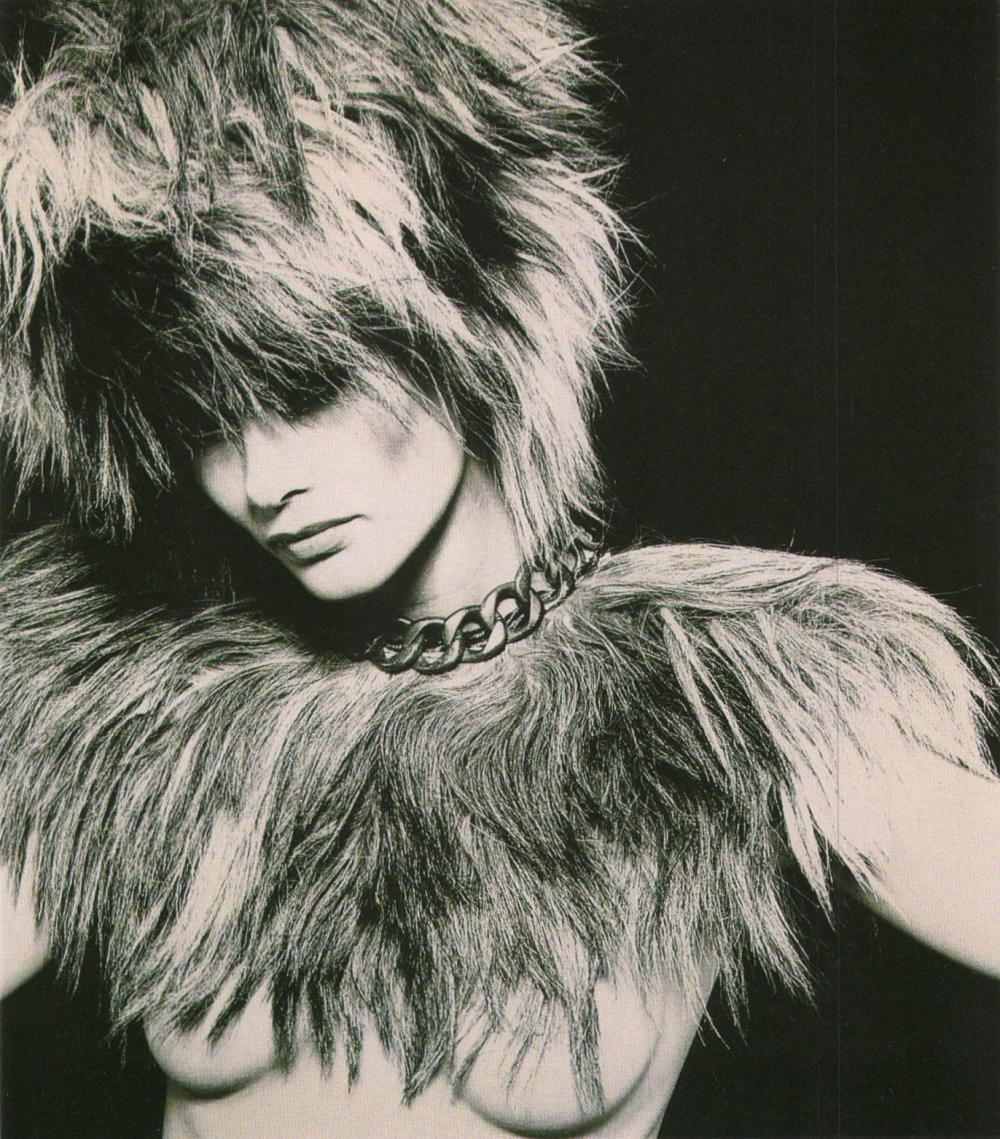
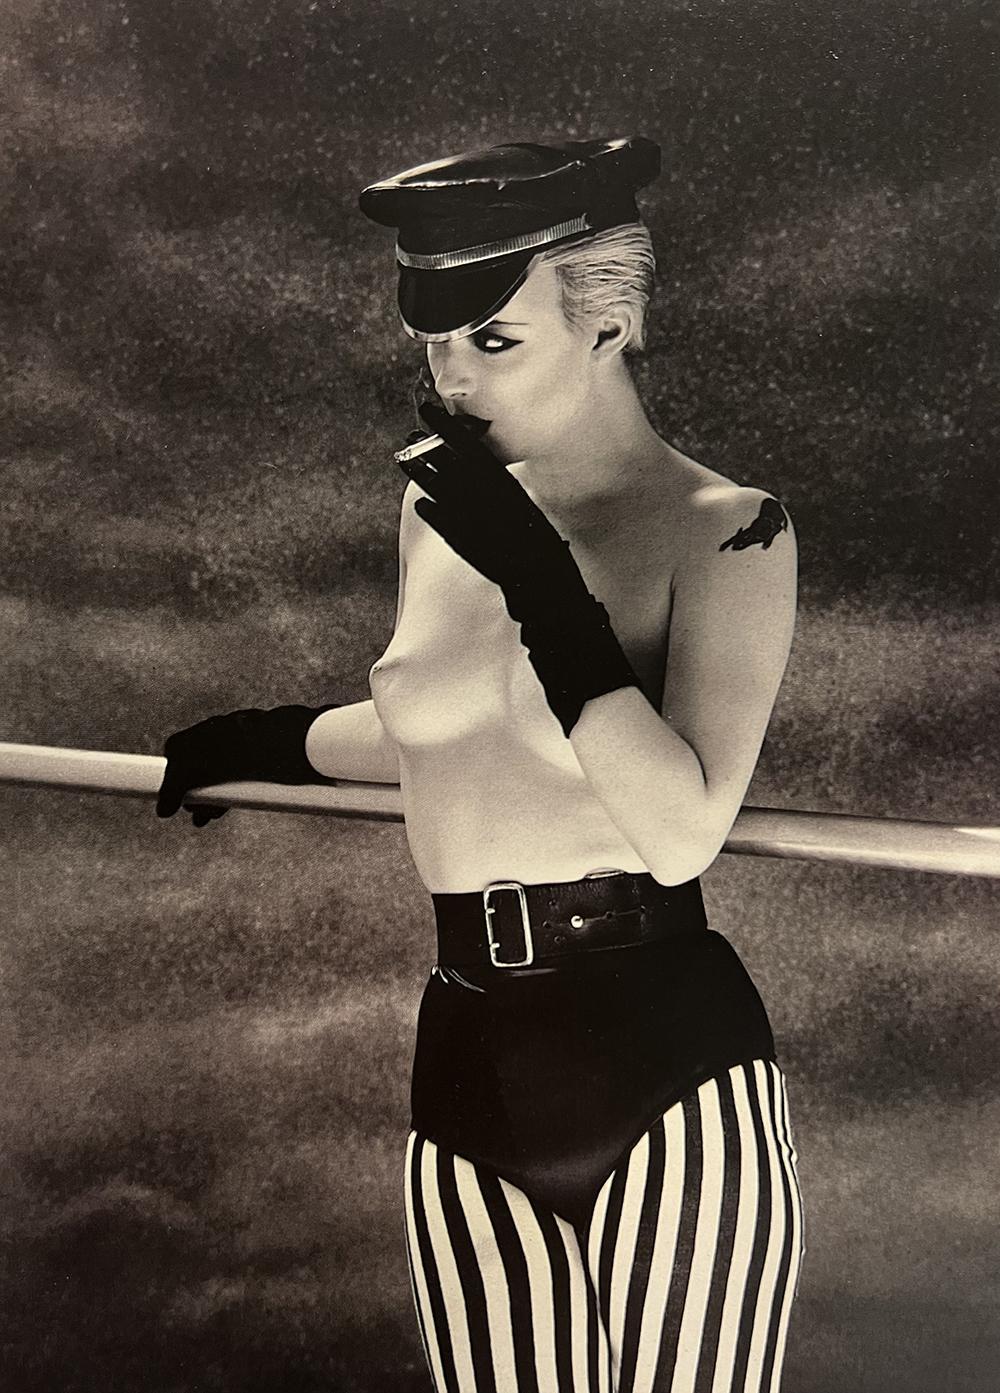
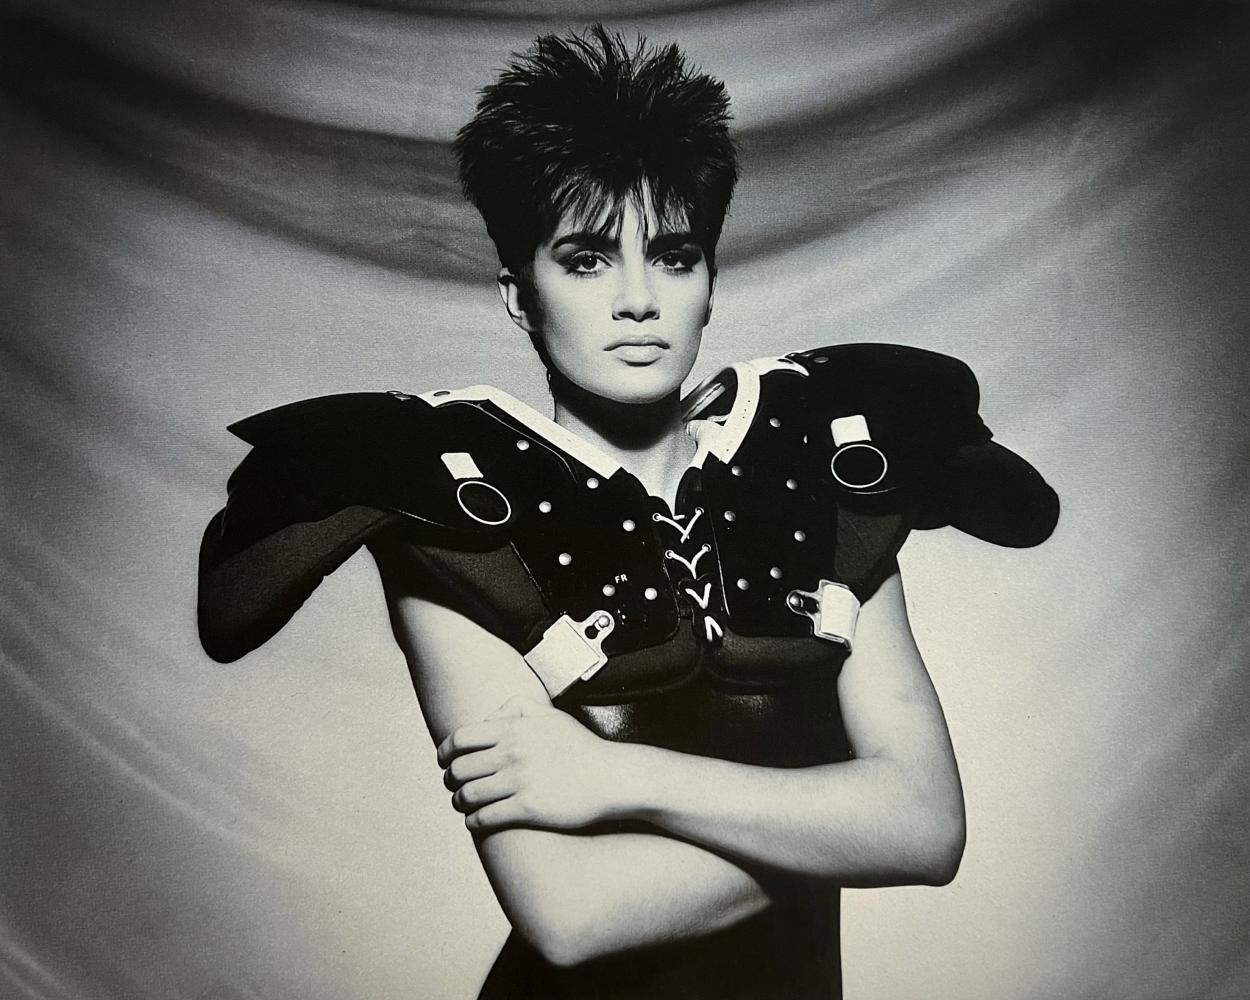
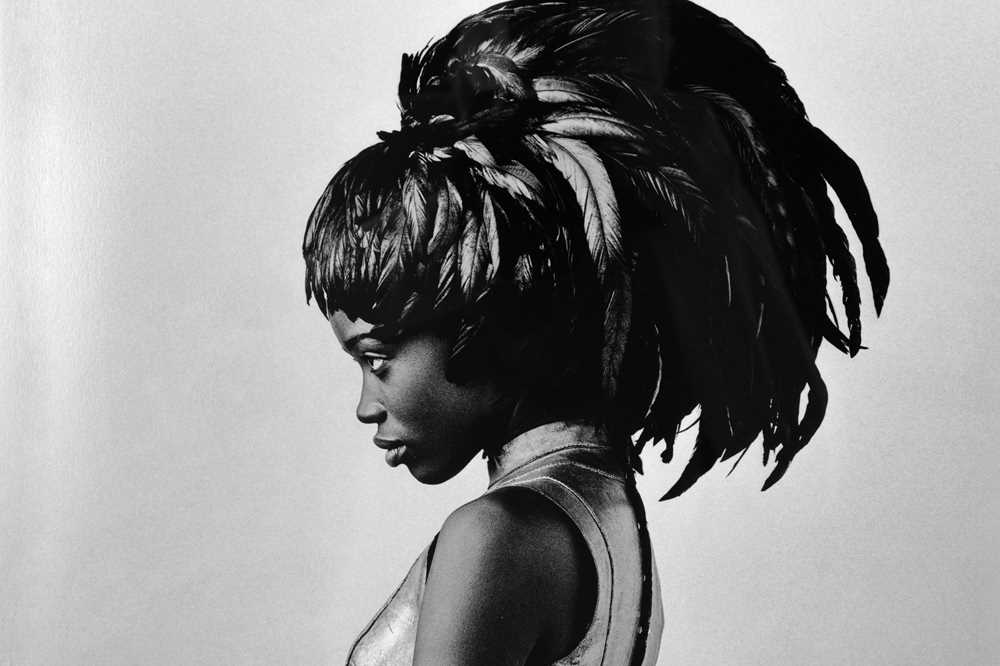
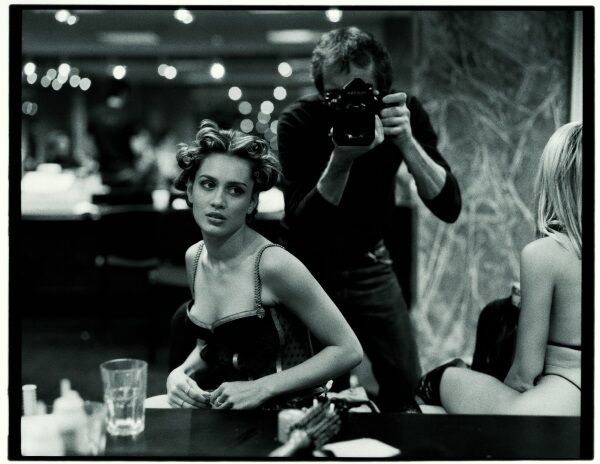
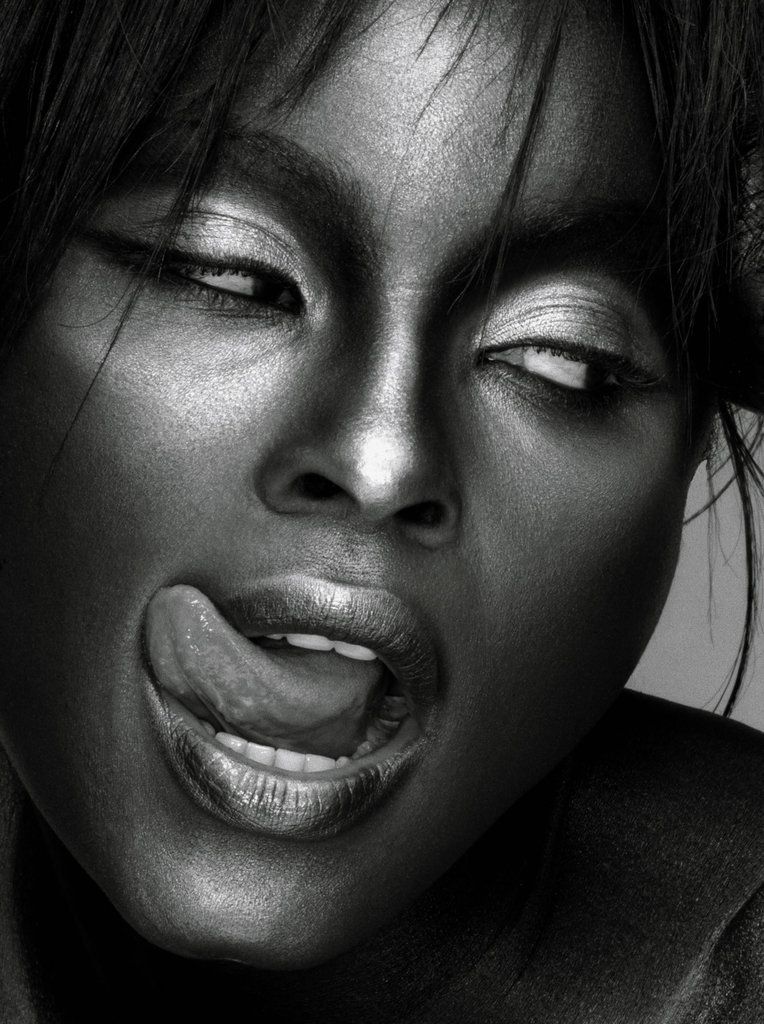
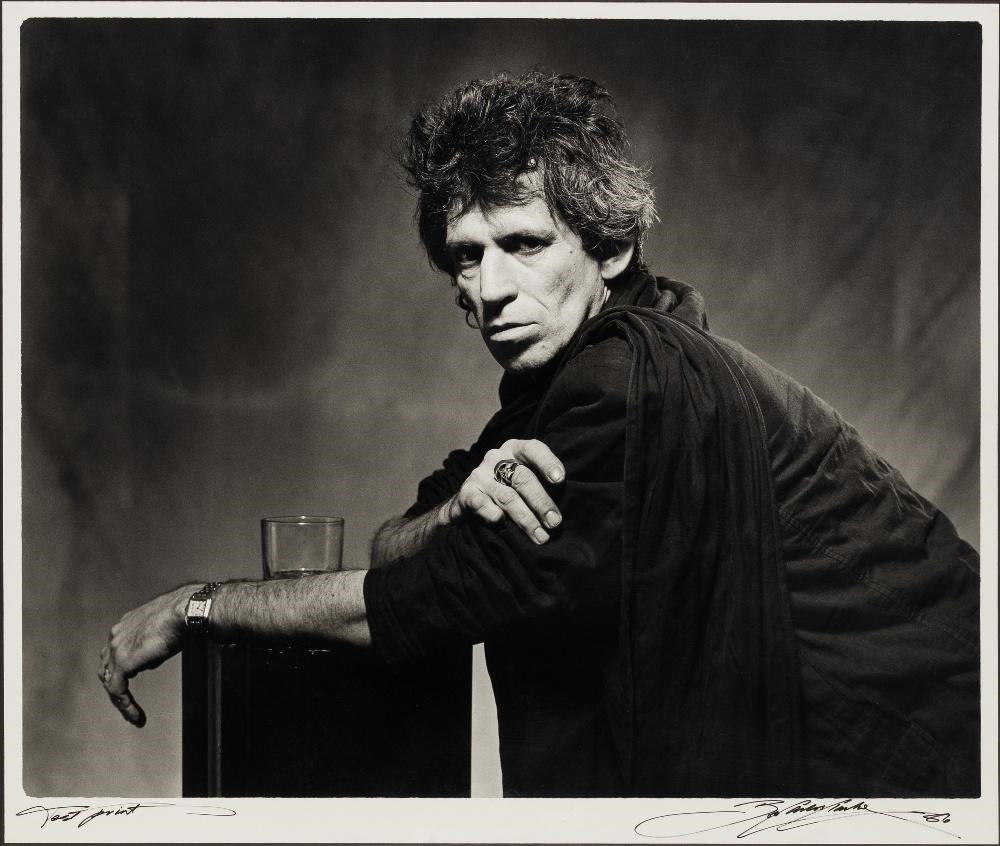
Bob Carlos Clarke (1950–2006) was a British‑Irish photographer renowned for his provocative erotic imagery, striking portraits, and commercial work. Often described as “Britain’s answer to Helmut Newton,” his career blended fine art, fashion, and documentary photography, leaving a lasting influence on late 20th‑century visual culture.
Born: June 24, 1950, in County Cork, Ireland.
Sent to boarding school in England at a young age, an experience that shaped his later fascination with themes of discipline, eroticism, and authority.
Studied at Wellington College, then Worthing College of Art in West Sussex.
Completed a Master’s degree in photography at the Royal College of Art in 1975, after training at the London College of Printing.
📷 Career Development
Began photographing nudes in the mid‑1970s, initially for adult magazines like Men Only and Club International.
Quickly moved beyond commercial erotica, developing a distinctive style that combined glamour, surrealism, and psychological tension.
His work often explored power dynamics, fetishism, and fantasy, drawing comparisons to Helmut Newton.
Produced six major books, including:
The Illustrated Delta of Venus (1980)
Obsession (1981)
The Dark Summer (1985)
White Heat (1990, with chef Marco Pierre White)
Shooting Sex (2002)
Love Dolls Never Die (2004)
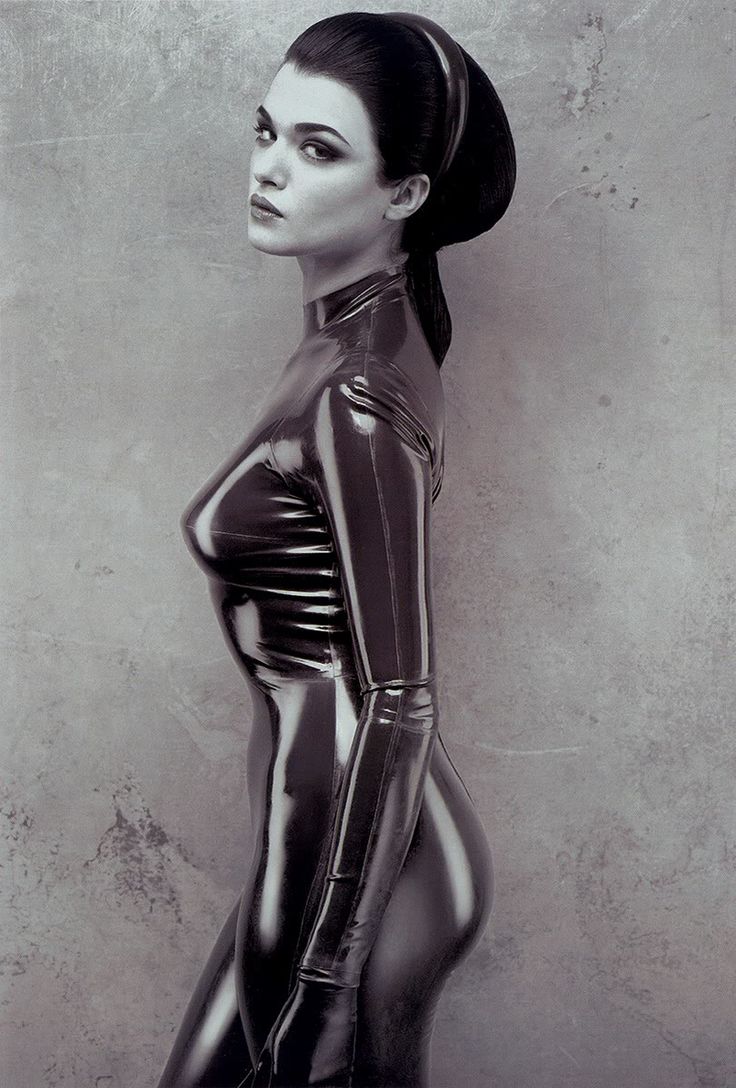
🎭 Style and Themes
Known for erotic photography of women, but also produced documentary, portrait, and commercial work.
His images often juxtaposed beauty with danger, intimacy with voyeurism.
Experimented with digital manipulation in later years, pushing boundaries of photographic realism.
Described as provocative, theatrical, and psychologically charged.
👥 Personal Life
Married Lindsey Carlos Clarke; they had one daughter, Scarlett Carlos Clarke, who later became a photographer.
Lived and worked in London, particularly in Brixton during his early career.
⚰️ Death
Tragically died on March 25, 2006, at age 55 in London. His death was ruled a suicide.
Left behind a complex legacy — celebrated for his artistry but also remembered for the controversies surrounding his erotic subject matter.
🌟 Legacy
Nicknamed “Britain’s answer to Helmut Newton”, he influenced generations of photographers exploring eroticism and fashion.
His books and exhibitions remain highly collectible, and his work continues to be studied for its bold exploration of sexuality, power, and aesthetics.
Daughter Scarlett Carlos Clarke has carried forward his photographic legacy, focusing on contemporary themes.
✨ In Summary
Bob Carlos Clarke was a boundary‑pushing photographer whose work fused eroticism, glamour, and psychological depth. His career spanned fine art, commercial commissions, and collaborations with cultural figures, leaving a provocative and enduring mark on modern photography.
The Tokina AT‑X 24–70mm f/2.8 PRO FX is a lens built for real work: fast aperture, pro‑grade construction, and optical performance designed to compete with Nikon’s own 24–70mm f/2.8 offerings. Reviews describe it as a “top performer” with solid build quality, ultrasonic autofocus, and a design aimed squarely at professional photographers.
Pairing this modern, heavy‑duty zoom with the Nikon D2Hs — a rugged 2004 flagship with a 4.1‑megapixel APS‑H sensor — creates a fascinating hybrid: old‑school speed and ergonomics combined with contemporary optical muscle.
This article explores how the two work together, what to expect, and why this pairing still makes sense today.
🔍 1. The Lens: Tokina AT‑X 24–70mm f/2.8 PRO FX
A Pro‑Grade Workhorse
Tokina designed this lens to compete directly with Nikon’s 24–70mm f/2.8. According to DXOMARK, it offers:
Fast f/2.8 constant aperture
Ultrasonic autofocus motor
Solid, pro‑level build quality
A versatile focal range ideal for weddings, events, portraits, and press work
This is not a budget lens pretending to be pro. It’s a serious optic built for demanding shooters.
Optical Performance
Reviews highlight:
Excellent sharpness across the zoom range
Strong contrast
Good control of chromatic aberration
A rendering style similar to older Nikon pro zooms
The Tokina has a slightly punchy, high‑contrast look that pairs well with Nikon’s colour science.
🔍 2. The Camera: Nikon D2Hs
The D2Hs is a camera built for speed and reliability:
4.1 MP APS‑H (1.5× crop) sensor
8 fps continuous shooting
Pro‑grade AF module
Legendary Nikon ergonomics
Tank‑like build
While the resolution is low by modern standards, the files are clean, fast, and have a distinctive “Nikon pro DSLR” look — crisp, film‑like, and extremely responsive.
The D2Hs was designed for photojournalists who needed speed and accuracy above all else.
🔍 3. How the Tokina 24–70mm Performs on the D2Hs
Field of View
Because the D2Hs uses a 1.5× crop sensor:
24mm → ~36mm
70mm → ~105mm
This turns the Tokina into a 36–105mm equivalent, which is a superb range for:
Street
Portraits
Events
Documentary work
You lose some width, but gain a tighter, more intimate mid‑telephoto end.
Autofocus
The Tokina’s ultrasonic motor pairs well with the D2Hs’s pro AF module:
Fast acquisition
Confident tracking
Good low‑light performance
The D2Hs was built for speed, and the Tokina keeps up.
Sharpness & Rendering
The Tokina’s modern optics help the D2Hs punch above its resolution:
Images look crisp and clean
Strong contrast complements the D2Hs’s colour output
The f/2.8 aperture helps isolate subjects even on a 4MP sensor
The combination produces files with a classic, photojournalistic feel — sharp where it counts, with smooth tonal transitions.
Low‑Light Performance
The D2Hs is not a high‑ISO monster, but the Tokina’s f/2.8 aperture helps keep ISO down. Expect:
ISO 800: clean
ISO 1600: usable
ISO 3200: gritty but atmospheric
The lens helps the camera stay in its comfort zone.
🔍 4. Practical Use Cases
Street Photography
The 36–105mm equivalent range is perfect for:
Candid portraits
Environmental scenes
Urban details
The D2Hs’s fast AF and responsive shutter make it ideal for decisive‑moment shooting.
Portraits
At the long end, the Tokina behaves like a 105mm lens:
Flattering compression
Smooth background blur
Strong subject separation
The D2Hs’s colour and tonal rendering give portraits a timeless look.
Events & Documentary
This is where the combo shines:
Fast AF
Rugged build
Reliable exposure
Clean files at low ISO
The Tokina’s versatility matches the D2Hs’s speed.
🔍 5. Strengths & Limitations of the Combo
Strengths
Pro‑grade build on both lens and body
Fast, reliable autofocus
Excellent contrast and sharpness from the Tokina
Classic Nikon colour from the D2Hs
Great handling balance
Affordable used prices
Limitations
D2Hs resolution limits cropping
High‑ISO performance is dated
Tokina is heavy — the combo is substantial
No VR (but the D2Hs shutter is very stable)
📝 Conclusion: Old‑School Speed Meets Modern Optics
The Tokina 24–70mm f/2.8 PRO FX on the Nikon D2Hs is a pairing that defies expectations. On paper, it’s a modern pro zoom mounted to a 2004 flagship with a 4MP sensor. In practice, it’s a fast, responsive, character‑rich setup that feels built for real‑world photography.
The Tokina brings:
modern sharpness
strong contrast
fast AF
pro‑grade construction
The D2Hs brings:
unmatched handling
a beautiful, film‑like sensor
speed and reliability
a shooting experience that feels alive
Together, they create images with a look that’s both classic and contemporary — crisp, clean, and full of presence.
If you enjoy the tactile, intentional feel of older Nikon pro bodies but want the optical performance of a modern f/2.8 zoom, this combination is not just usable — it’s inspiring.
It’s a combination that rewards intentional shooting. You can’t rely on cropping or high‑ISO rescue; you have to frame carefully, expose thoughtfully, and embrace the distinctive look that results. That’s why it demands thought — and why it can be so satisfying.
In an era dominated by mirrorless systems and ever‑increasing megapixel counts, it’s easy to forget that some older DSLRs still hold their ground with surprising authority. The Canon EOS‑1D Mark IV, released in 2009, is one of those cameras — a machine built for speed, reliability, and professional endurance. Though more than a decade old, it remains a compelling choice for photographers who value ruggedness, responsiveness, and the unmistakable feel of a flagship DSLR.
Pair it with classic Canon primes like the EF 50mm f/1.4 USM and EF 85mm f/1.8 USM, and you have a kit that still delivers beautiful, character‑rich images in 2026.
This is a look at why the 1D Mark IV still matters — and why these two primes complement it so well.
🧱 1. The Canon 1D Mark IV: A Flagship Built to Last
The 1D Mark IV was Canon’s answer to the demands of sports, wildlife, and photojournalism in the late 2000s. It arrived with a clear mission: speed, accuracy, and reliability above all else.
Key Specs
16.1 MP APS‑H sensor (1.3x crop)
10 frames per second continuous shooting
45‑point AF system with 39 cross‑type points
ISO 100–12,800 (expandable to 102,400)
Weather‑sealed magnesium alloy body
300,000‑shot shutter rating
Dual DIGIC 4 processors
Even today, these specs hold up surprisingly well. The APS‑H sensor — a format Canon no longer uses — offers a unique balance between full‑frame depth and APS‑C reach. The result is a distinctive look: crisp detail, excellent colour, and a slightly tighter field of view that works beautifully with telephoto and portrait lenses.
⚙️ 2. Handling & Build: The Feel of a True Flagship
The 1D Mark IV is unapologetically substantial. It’s heavy, solid, and built like a tool meant for war zones, stadium sidelines, and harsh environments. The integrated grip gives it perfect balance with larger lenses, and the ergonomics are classic Canon: intuitive, tactile, and designed for operation without taking your eye from the viewfinder.
The shutter sound is authoritative — a mechanical confidence that modern mirrorless cameras simply don’t replicate.
This is a camera that feels alive in the hands.
🎯 3. Autofocus & Performance
The 45‑point AF system was cutting‑edge at release and remains highly capable today. Tracking is fast, sticky, and reliable, especially with centre‑point and expansion modes. For action, wildlife, and reportage, the 1D Mark IV still performs at a professional level.
The 10 fps burst rate is another reminder of its pedigree. Even by modern standards, it’s fast.
🌙 4. Image Quality: The APS‑H Look
The 16‑megapixel APS‑H sensor produces files with:
excellent colour reproduction
strong dynamic range for its era
pleasing noise characteristics
a crisp, film‑like rendering
At low ISO, images are clean and detailed. At high ISO, the grain is organic and surprisingly usable. The sensor’s 1.3x crop gives lenses a slightly tighter field of view, which can be an advantage for portraits and street work.
🔍 5. The Canon EF 50mm f/1.4 USM — A Classic Standard Prime
The EF 50mm f/1.4 is one of Canon’s most enduring primes. Lightweight, compact, and optically pleasing, it pairs beautifully with the 1D Mark IV.
Why it works so well on the 1D Mark IV
On APS‑H, it behaves like a 65mm equivalent — a perfect “normal‑plus” focal length.
The f/1.4 aperture gives excellent low‑light performance.
The rendering is classic Canon: warm, smooth, and flattering.
Bokeh is soft and pleasing, especially for portraits and environmental scenes.
Strengths
Fast aperture
Good sharpness from f/2 onward
Lightweight balance on a heavy body
Affordable and widely available
Character
The 50mm f/1.4 has a slightly dreamy wide‑open look that becomes crisp and modern when stopped down. On the 1D Mark IV, it’s a versatile everyday lens — perfect for street, documentary, and general photography.
🔍 6. The Canon EF 85mm f/1.8 USM — The Unsung Portrait Hero
The EF 85mm f/1.8 is one of Canon’s most beloved portrait lenses. Fast, sharp, and beautifully rendered, it’s a lens that consistently punches above its price.
Why it shines on the 1D Mark IV
On APS‑H, it becomes a 110mm equivalent — ideal for headshots and tight portraits.
The f/1.8 aperture delivers creamy background separation.
Autofocus is fast and accurate, perfect for candid portraiture.
The lens is lightweight, balancing well with the 1D body.
Strengths
Excellent sharpness
Smooth, natural bokeh
Fast AF
Great for low light
Professional portrait results without the cost of an L‑series lens
Character
The 85mm f/1.8 has a clean, neutral rendering with just a touch of warmth. It’s flattering for skin tones and produces images with a classic portrait look — crisp subject, soft background, and beautiful falloff.
🎨 7. The 1D Mark IV + 50mm + 85mm: A Timeless Trio
Together, these three pieces form a kit that is:
fast
reliable
optically strong
professionally capable
surprisingly affordable today
The 50mm gives you versatility and everyday usability. The 85mm gives you portrait power and compression. The 1D Mark IV gives you speed, durability, and a distinctive rendering.
This combination is ideal for:
portrait photographers
street/documentary shooters
event and wedding photographers
anyone who appreciates the feel of a flagship DSLR
✨ Conclusion: Old, Not Obsolete
The Canon 1D Mark IV may be from another era, but it remains a formidable camera. Its build quality, autofocus performance, and image rendering still hold up in a world of mirrorless bodies and computational photography.
Paired with the EF 50mm f/1.4 and EF 85mm f/1.8, it becomes a powerful, character‑rich system capable of producing beautiful images with a timeless look.
Some cameras fade into history. The 1D Mark IV endures — not as a relic, but as a reminder of what a true photographic tool feels like.
The Nikkor 85mm f/1.8G is one of those rare lenses that punches far above its weight. Lightweight, sharp, affordable, and optically refined, it has become a favourite among portrait photographers, wedding shooters, and anyone who appreciates the clean, modern rendering of Nikon’s G‑series primes.
Despite being overshadowed by the more expensive f/1.4G, the 85mm f/1.8G has quietly built a reputation as one of Nikon’s smartest buys — a lens that delivers professional‑grade results without the professional‑grade price tag.
Let’s break down what makes it so compelling.
🔍 1. Build & Handling
The 85mm f/1.8G follows Nikon’s modern G‑series design philosophy:
Lightweight polycarbonate body
Metal mount
Weather sealing gasket
Large, smooth focus ring
Compact profile
At just 350g, it’s significantly lighter than the 85mm f/1.4G, making it ideal for long portrait sessions or travel. Mounted on a DSLR like the D750, D610, or D850, it feels balanced and nimble.
This is a lens you can carry all day without fatigue.
🔍 2. Autofocus Performance
The Silent Wave Motor (SWM) delivers:
Fast focusing
Quiet operation
Accurate subject acquisition
It’s not as blisteringly fast as Nikon’s pro telephotos, but for portraits, events, and general shooting, it’s more than capable. On bodies with strong AF modules (D750, D810, D500), it locks on confidently even in low light.
For video shooters, the AF is smooth and unobtrusive.
🔍 3. Optical Performance
This is where the 85mm f/1.8G truly shines.
Sharpness
Wide open at f/1.8: impressively sharp in the centre
Stopped down to f/2.8–f/4: razor‑sharp across the frame
On high‑resolution bodies (D810, D850): holds up extremely well
Many photographers note that it rivals — and sometimes surpasses — the f/1.4G in real‑world sharpness.
Bokeh
The 85mm focal length is naturally flattering for portraits, and the f/1.8G delivers:
Smooth, creamy background blur
Soft transitions
Minimal nervousness
While the f/1.4G has slightly creamier bokeh, the difference is subtle unless you’re pixel‑peeping.
Colour & Contrast
The lens produces:
Clean, neutral colour
Strong micro‑contrast
Excellent clarity
It has that modern Nikon “pop” that works beautifully for skin tones.
Chromatic Aberration
Wide open, you may see some longitudinal CA (green/purple fringing), especially in high‑contrast scenes. Stopped down slightly, it improves dramatically.
Distortion & Vignetting
Distortion: negligible
Vignetting: visible at f/1.8, mostly gone by f/2.8
Both are easily corrected in‑camera or in post.
🔍 4. Real‑World Use Cases
Portraits
This is the lens’s natural habitat. It excels at:
Headshots
Half‑body portraits
Environmental portraits
Candid moments
The compression and bokeh create flattering, dimensional images.
Events & Weddings
Lightweight, fast, and sharp — perfect for:
Speeches
Reactions
Low‑light ceremony shots
Candid guest portraits
Street & Documentary
Though 85mm is long for street, it’s excellent for:
Isolating subjects
Capturing moments from a respectful distance
Creating cinematic, layered compositions
Video
The smooth focus ring and clean rendering make it a solid choice for interviews and controlled setups.
🔍 5. 85mm f/1.8G vs 85mm f/1.4G
The f/1.4G is:
Heavier
More expensive
Slightly creamier bokeh
Better built
But the f/1.8G is:
Sharper in many situations
Faster to focus
Much lighter
Far more affordable
Better value for most photographers
Unless you specifically need the f/1.4 look, the f/1.8G is the smarter buy.
🔍 6. Who Is This Lens For?
Ideal for:
Portrait photographers
Wedding shooters
DSLR users wanting a lightweight telephoto prime
Anyone building a prime‑based kit
Photographers who value sharpness and clean rendering
Less ideal for:
Sports/action (AF is good, but not pro‑telephoto fast)
Tight indoor spaces (85mm can feel long)
✨ Conclusion: A Modern Nikon Classic
The Nikkor 85mm f/1.8G is one of Nikon’s most capable and best‑value primes. It offers:
Professional‑grade sharpness
Beautiful bokeh
Lightweight handling
Reliable autofocus
Excellent performance on both FX and DX bodies
It’s the kind of lens that quietly becomes a favourite — not because it’s flashy, but because it delivers consistently beautiful images with minimal fuss.
Verdict: A must‑have prime for Nikon DSLR shooters who want portrait‑grade performance without the portrait‑grade price.