For me, printing has never been an optional extra. It has always been part of the act of making a photograph.
The camera is only the beginning. The file sitting on a hard drive is not the finished work any more than a manuscript saved on a computer is a finished book. A photograph does not fully exist until it leaves the screen and becomes a physical object.
Printing forces a different kind of honesty. On a monitor, images can look impressive simply because they are backlit. Bright colours glow. Shadows appear rich. Sharpness can seem exaggerated. A print strips away some of those illusions. Suddenly you are confronted with the photograph itself. Does the composition work? Is the moment strong enough? Does the image still hold your attention when it is nothing more than ink on paper?
A print also slows the viewing process. We live in a world where photographs are flicked past in fractions of a second. Social media encourages endless scrolling, endless consumption, endless forgetting. A print asks something different of the viewer. It occupies physical space. It can be held, framed, pinned to a wall, placed in a portfolio, revisited years later. It has a permanence that digital images often lack.
As a photographer, I have learned more from looking at my own prints than I ever have from looking at thumbnails on a screen. Weak photographs reveal themselves quickly. Images I once thought were successful suddenly appear shallow or cluttered. Conversely, some photographs that seemed ordinary on a monitor come alive in print, revealing subtleties of tone, texture and emotion that I had overlooked.
Printing also creates a tangible connection to photography’s history. Every great photographer from Henri Cartier-Bresson to Dorothea Lange ultimately worked toward the print. Their photographs existed as objects that could be held, exhibited, archived and passed between generations. There is something deeply satisfying about participating in that tradition.
Perhaps most importantly, prints survive. Hard drives fail. Websites disappear. Social media platforms rise and fall. Algorithms bury yesterday’s work beneath today’s noise. Yet a well-made print sitting in a box, portfolio or frame can still be discovered decades from now. It can outlast the technology used to create it.
That is why printing has always been part of the process for me. The photograph is not complete when I press the shutter. It is not complete when I edit the file. It becomes complete when it exists in the real world as something I can hold in my hands and live with over time. The print is not a by-product of photography. It is, and always has been, one of its final destinations. 📷🖨️
Why ethics matter more than ever in a visual-first world
In today’s media landscape, photojournalism is one of the most powerful tools for shaping public perception. A single image can evoke empathy, outrage, or action. But with that power comes responsibility—and risk. The goal is not just to capture what’s visible, but to honour what’s real.
🧠 The Nature of Truth in Photography
Photography is not neutral: Every image is filtered through the photographer’s lens—literally and metaphorically.
Truth is contextual: A photo without background can mislead, even if it’s technically accurate.
Editing shapes meaning: Cropping, colour grading, and sequencing all influence how viewers interpret a scene.
“Photojournalism fundamentally aims to document reality, yet it is not an objective mirror of the world”.
⚠️ Where Manipulation Begins
Staging or reenactment: Asking subjects to pose or recreate events crosses into fiction.
Selective framing: Omitting key elements to steer narrative perception is ethically suspect.
Caption distortion: Misleading or emotionally charged captions can twist meaning even when the image is accurate.
Digital alteration: Retouching, compositing, or removing elements undermines credibility.
These practices erode public trust and violate journalistic codes of ethics.
🧭 Minimalism with Integrity
Minimalist style avoids manipulation by focusing on presence, restraint, and ethical framing.
Intentional composition: Framing that respects subjects’ dignity and avoids sensationalism.
Contextual honesty: Captions and layouts that inform without editorialising.
Emotional resonance without distortion: Provocative images that stir reflection, not exploitation.
This approach aligns with the ethical imperative to “represent the truth without distortion, even as technological innovation complicates the lines”.
✅ How to Navigate the Line Ethically
Ask before you shoot: Consent builds trust and deepens narrative authenticity.
Caption with clarity: Include who, what, when, where, and why—avoid emotional spin.
Disclose edits: If you crop, tone, or adjust, say so. Transparency matters.
Peer review sensitive work: Run controversial images past editors or colleagues before publishing.
Reflect before release: Ask yourself: Does this image inform or manipulate?
📚 Final Thought
Photojournalism’s power lies in its ability to reveal. But revelation without responsibility becomes exploitation. Navigating truth and manipulation isn’t just about avoiding ethical missteps—it’s about building a practice rooted in trust, clarity, and care.
The exposure triangle is a fundamental concept in photography that helps photographers understand how to control the exposure of their images. It consists of three elements: aperture, shutter speed, and ISO. Here’s a breakdown of each component and how they interact:
1. Aperture
Definition: The aperture is the opening in a lens through which light passes to enter the camera.
Measured in: f-stops (e.g., f/2.8, f/4, f/5.6).
Effect on Exposure: A larger aperture (smaller f-stop number) allows more light to hit the sensor, resulting in a brighter image. A smaller aperture (larger f-stop number) allows less light, resulting in a darker image.
Effect on Depth of Field: A larger aperture creates a shallow depth of field, blurring the background and isolating the subject. A smaller aperture increases the depth of field, keeping more of the scene in focus.
2. Shutter Speed
Definition: Shutter speed is the amount of time the camera’s shutter is open, allowing light to hit the sensor.
Measured in: Seconds or fractions of a second (e.g., 1/1000s, 1/250s, 1/30s).
Effect on Exposure: A faster shutter speed allows less light to hit the sensor, resulting in a darker image. A slower shutter speed allows more light, resulting in a brighter image.
Effect on Motion: A faster shutter speed freezes motion, making it ideal for action shots. A slower shutter speed can create motion blur, which can be used creatively to convey movement.
3. ISO
Definition: ISO measures the sensitivity of the camera’s sensor to light.
Measured in: ISO values (e.g., ISO 100, ISO 400, ISO 1600).
Effect on Exposure: A lower ISO value makes the sensor less sensitive to light, resulting in a darker image. A higher ISO value increases sensitivity, resulting in a brighter image.
Effect on Image Quality: Higher ISO values can introduce noise or grain into the image, reducing overall quality. Lower ISO values produce cleaner images with less noise.
Balancing the Triangle
Interdependence: Changing one element of the exposure triangle affects the others. For example, if you increase the aperture size (lower f-stop), you might need to increase the shutter speed or lower the ISO to maintain the correct exposure.
Creative Control: Understanding the exposure triangle allows photographers to make creative decisions about how their images look. For instance, they can choose to blur the background with a wide aperture or capture motion with a slower shutter speed.
Mastering the exposure triangle is essential for achieving the desired exposure and creative effects in your photography.
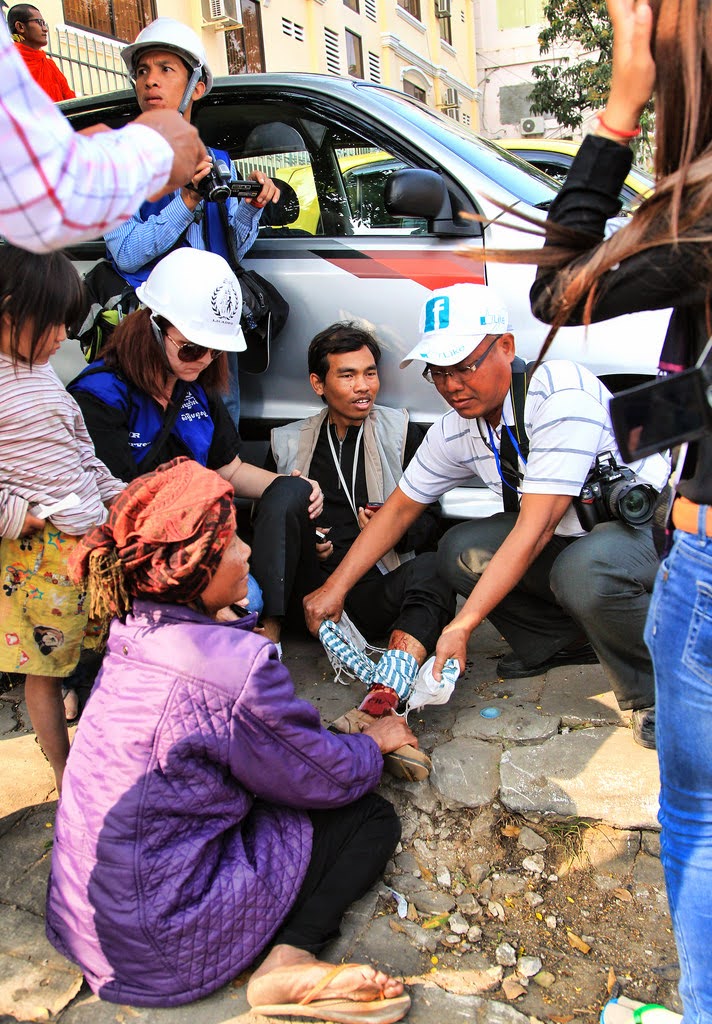
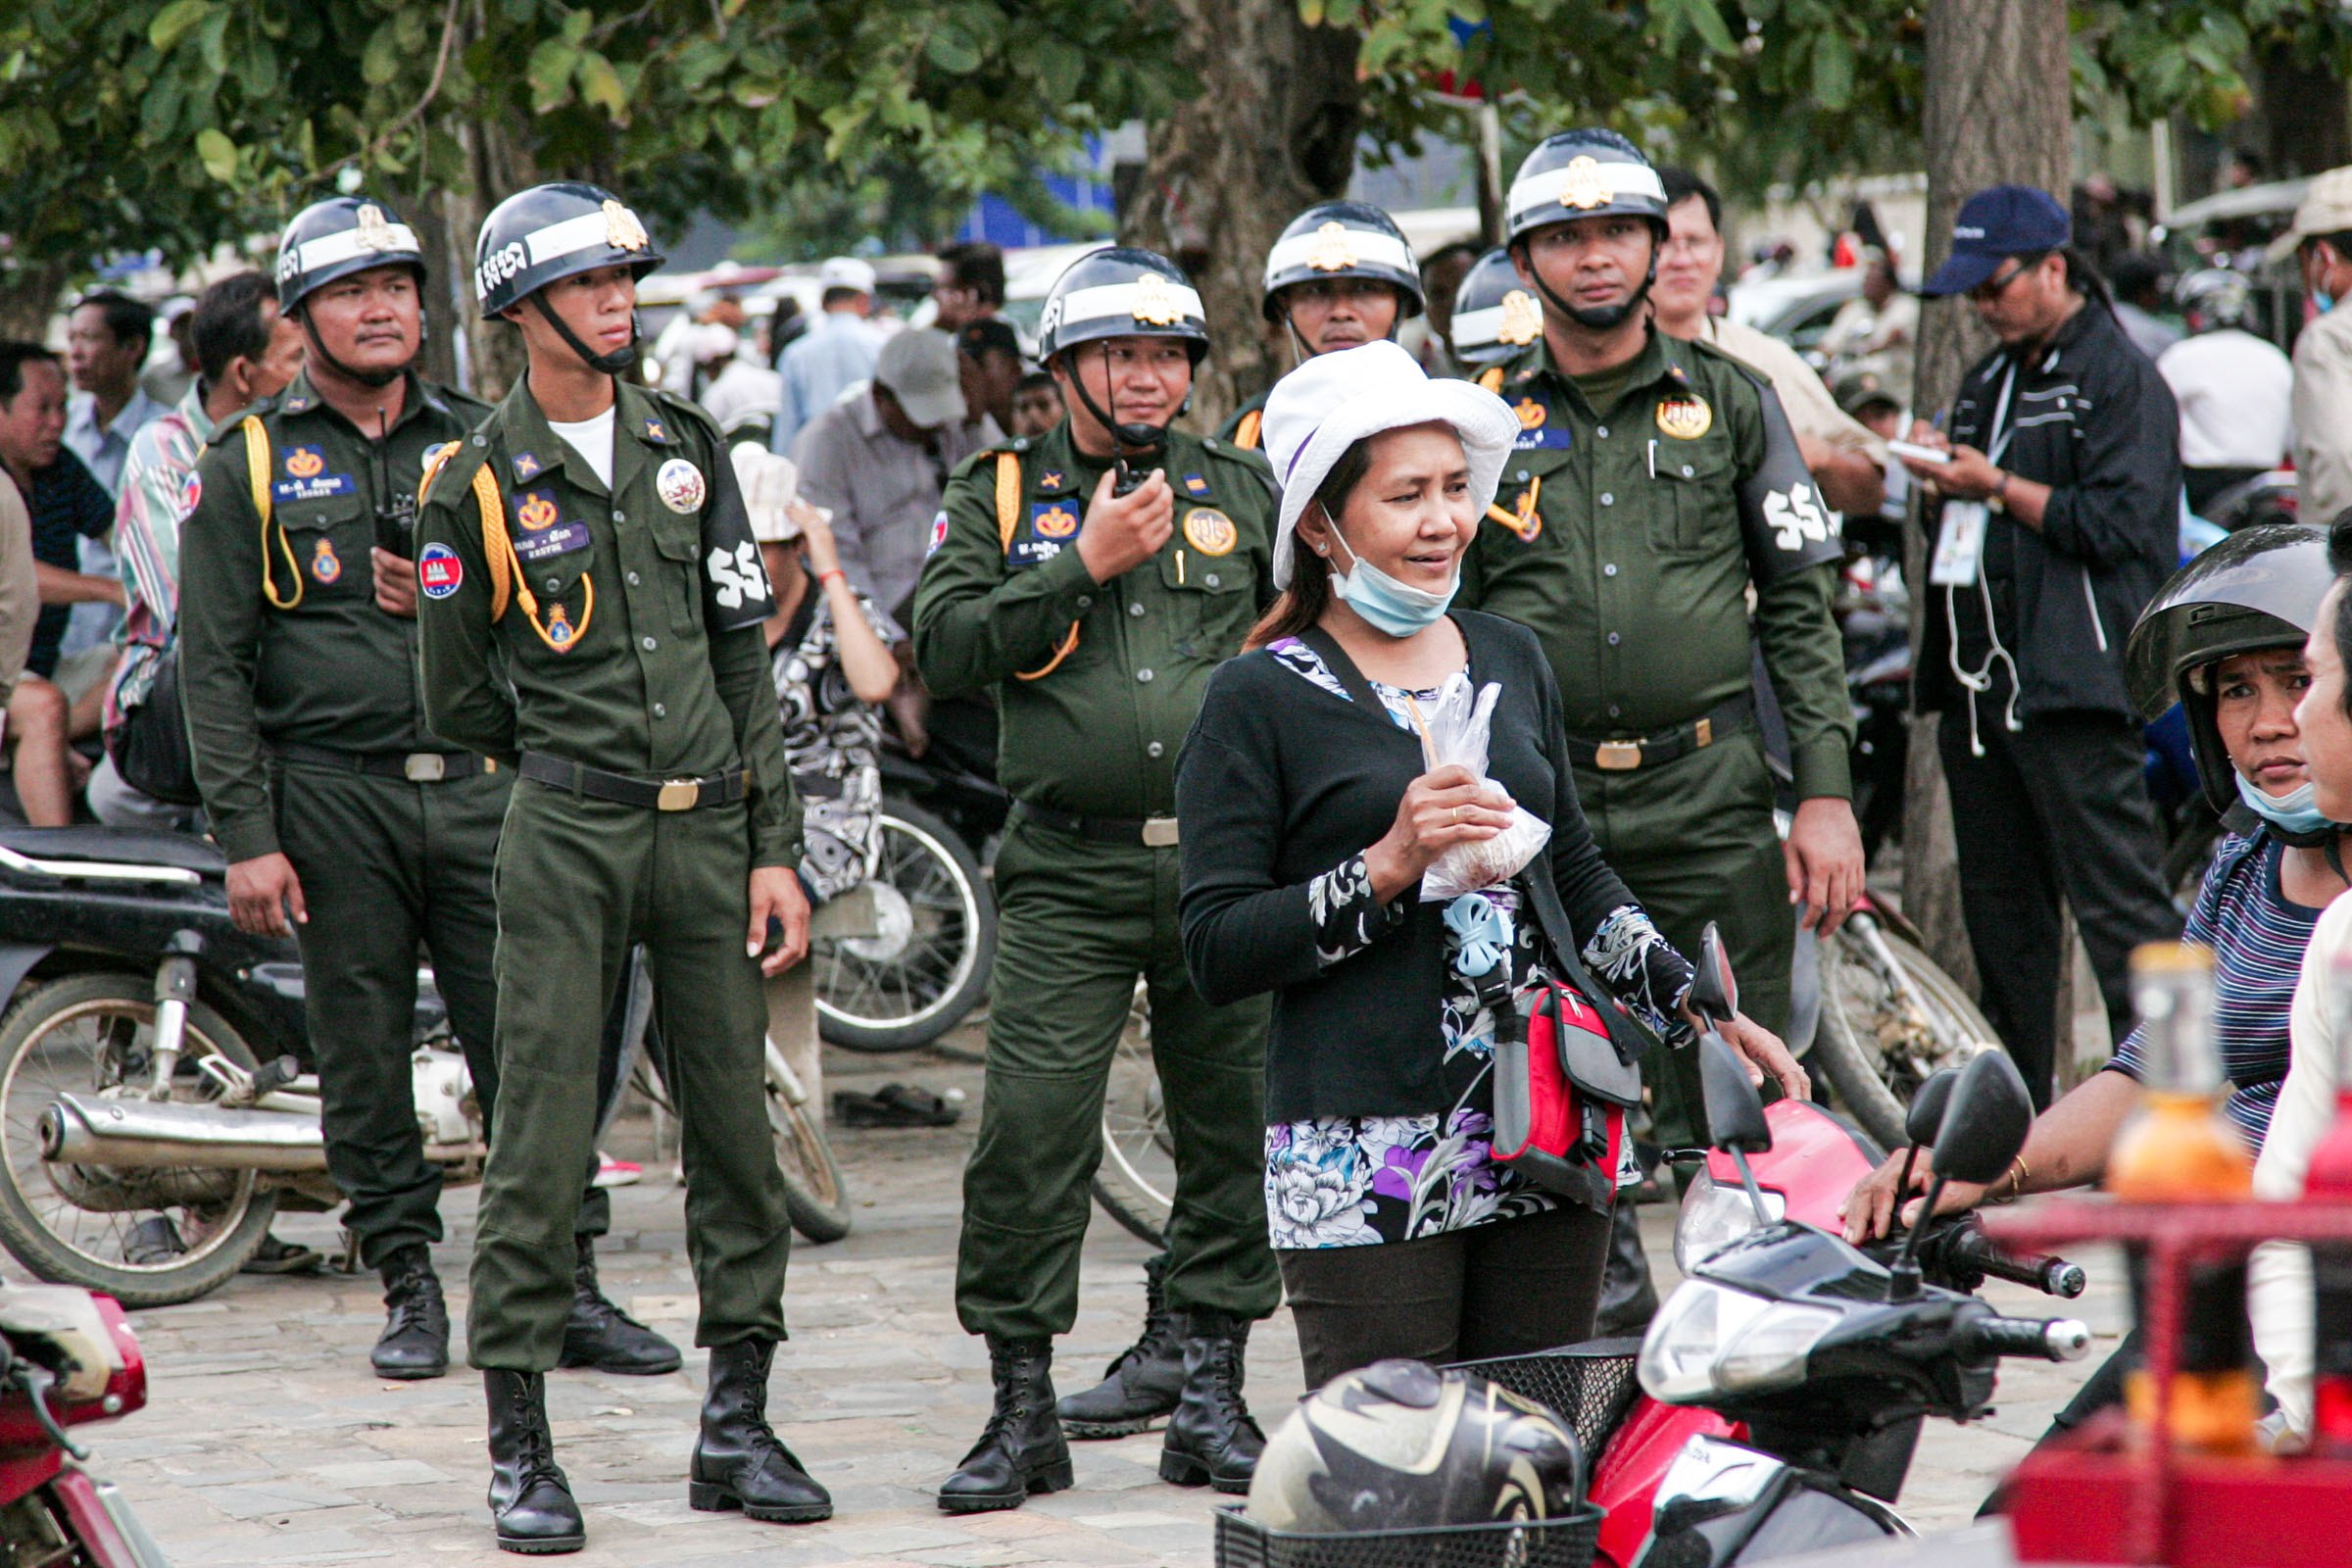
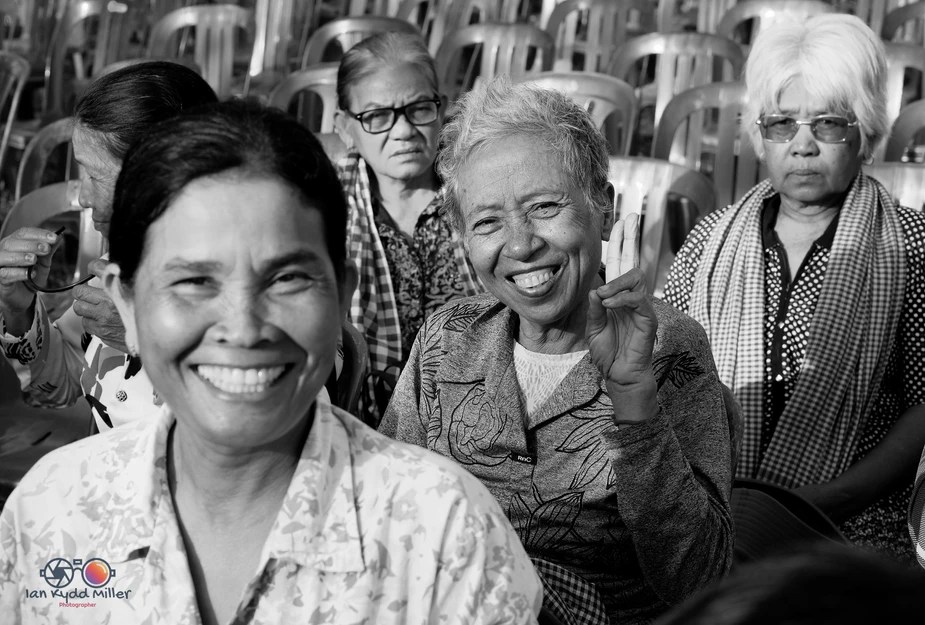
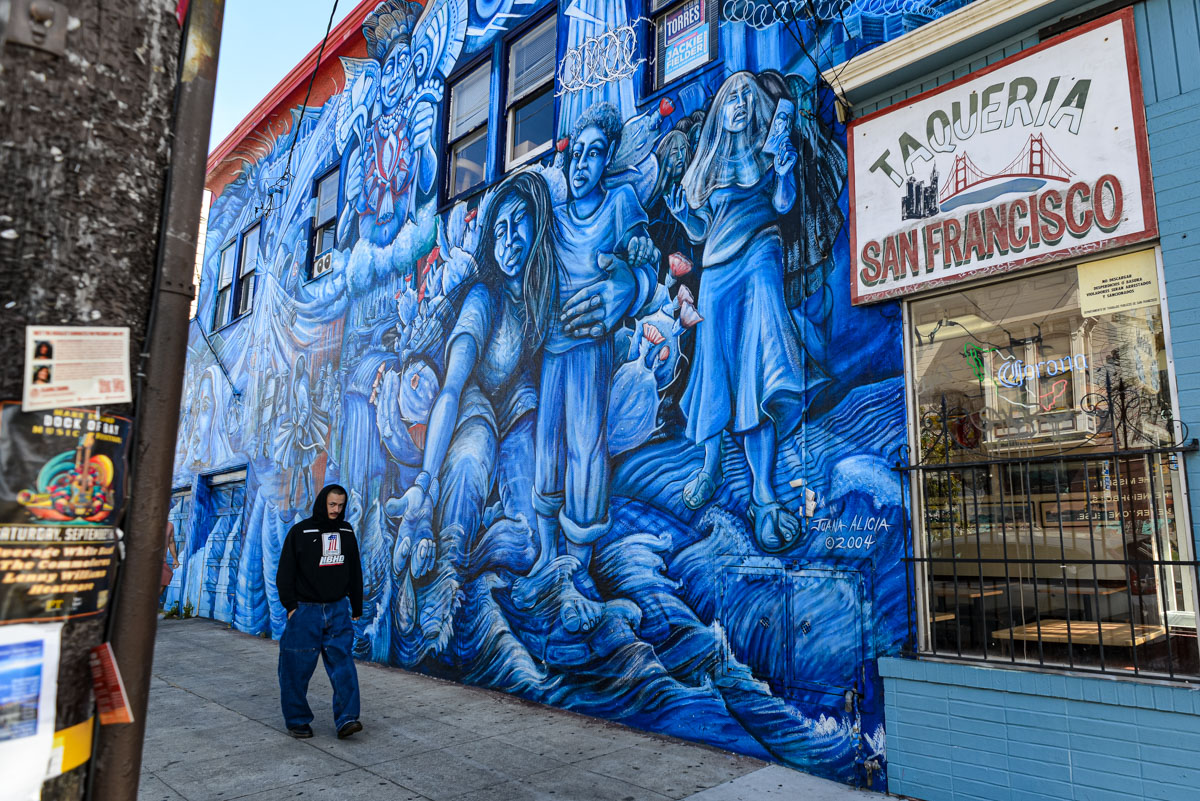
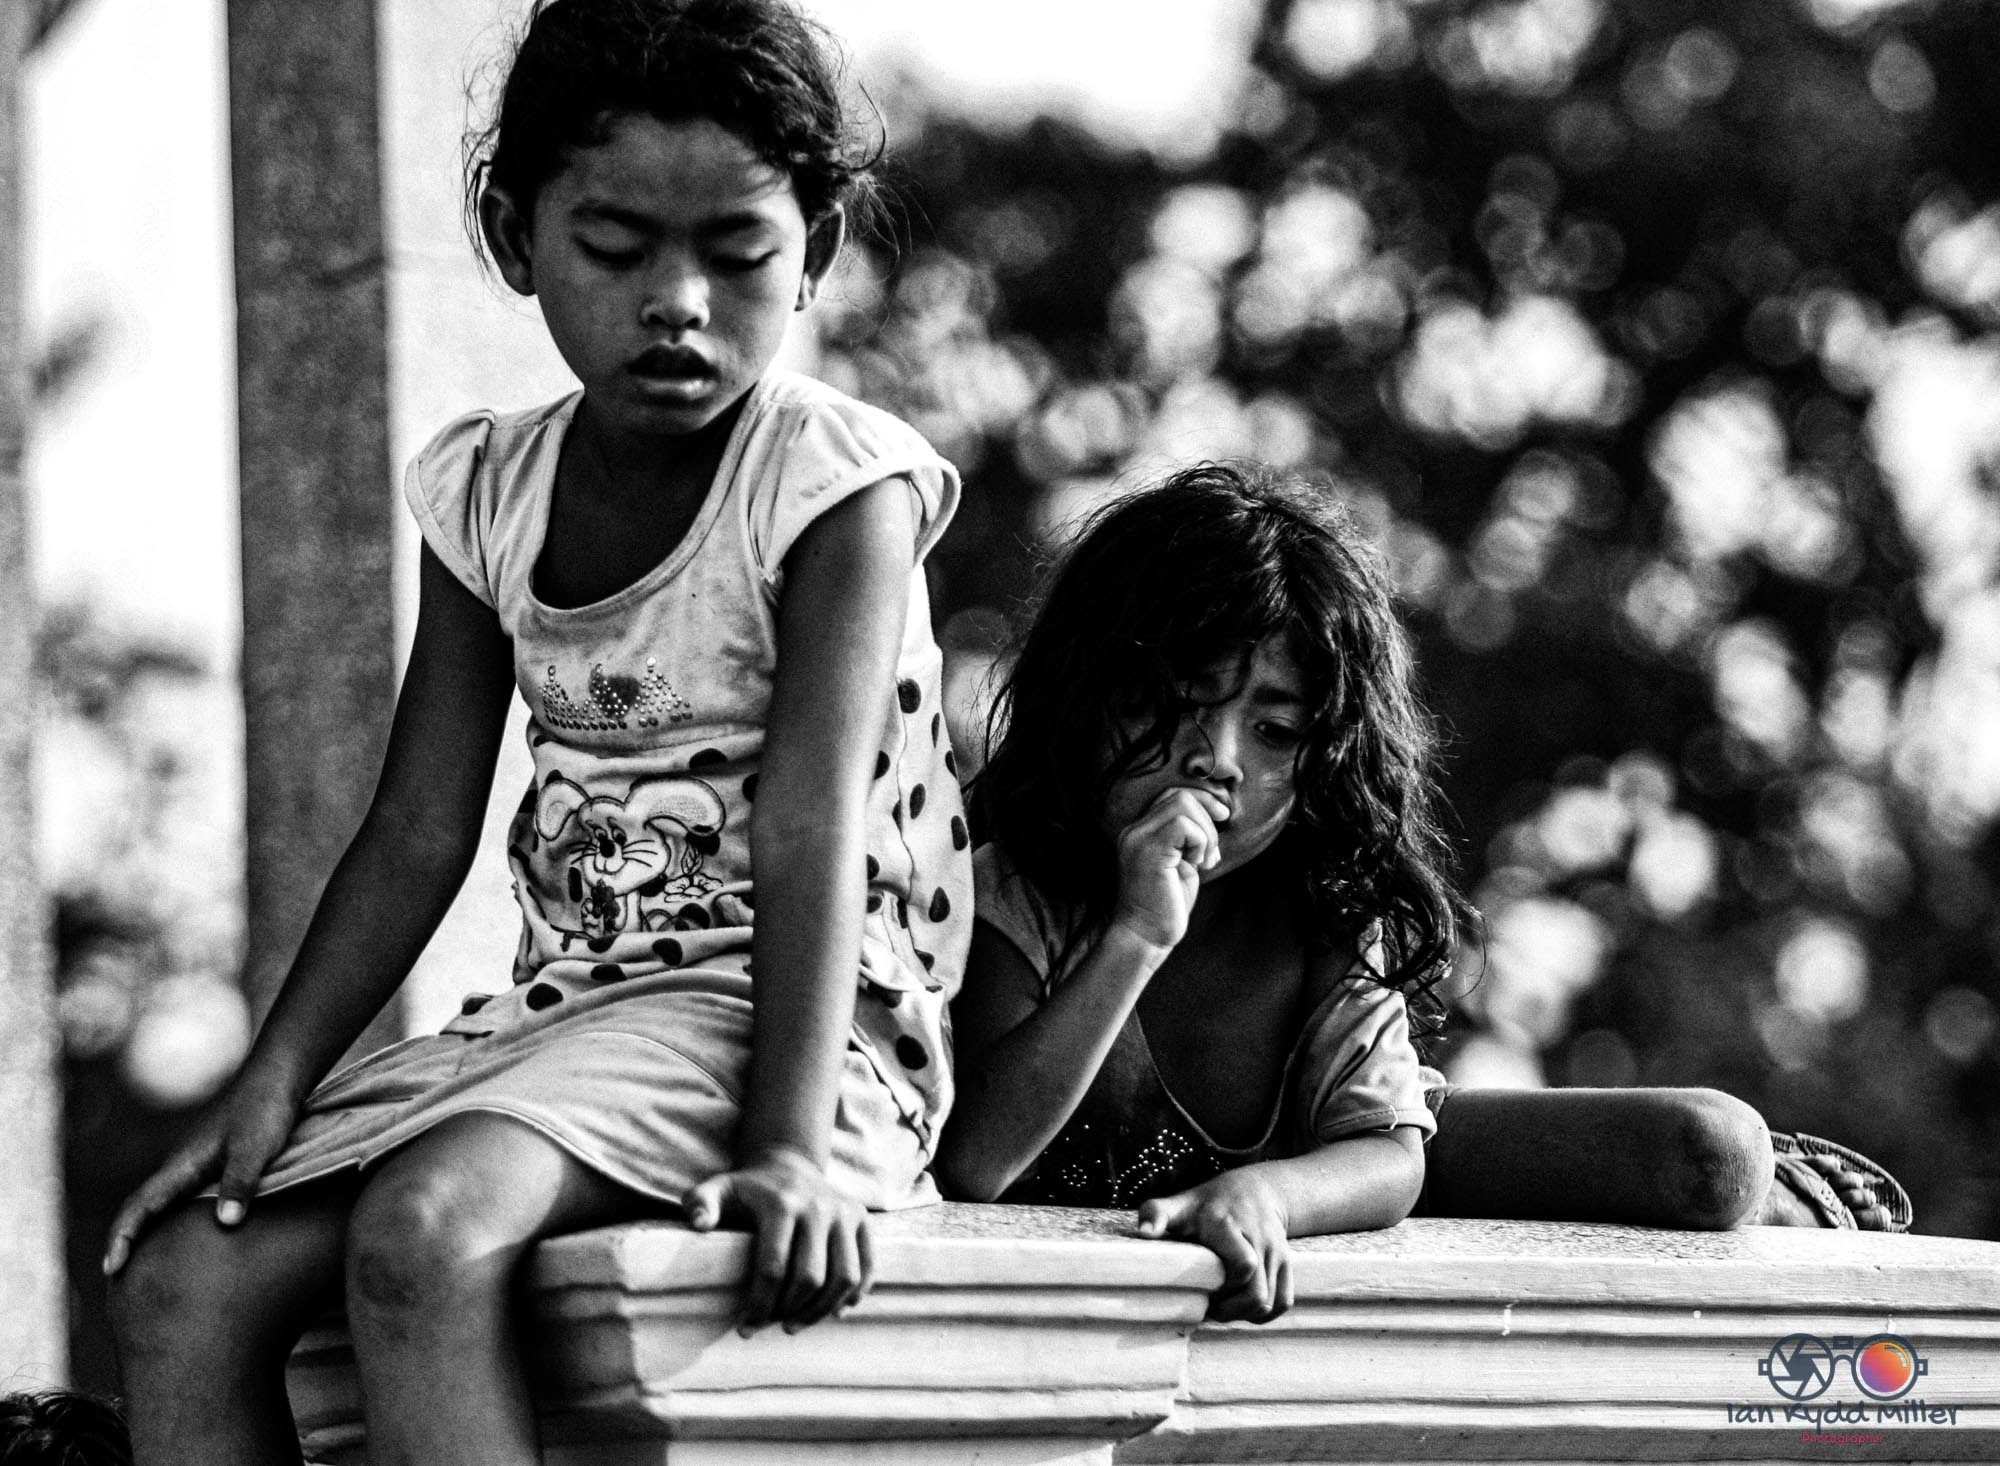
Street photography is a genre of photography that captures everyday life and human activity in public places. It often focuses on candid moments, spontaneous interactions, and the essence of urban environments. Here are some key aspects of street photography:
Candid Moments: Street photographers aim to capture unposed, natural moments that reflect the true essence of life in public spaces.
Urban Environments: This genre typically takes place in cities and towns, highlighting the architecture, streets, and the hustle and bustle of urban life.
Human Element: People are often the main subjects in street photography, showcasing their emotions, interactions, and daily routines.
Storytelling: Street photography tells stories through images, offering a glimpse into the lives of strangers and the dynamics of public spaces.
Spontaneity: The best street photographs are often those that capture unexpected or fleeting moments, requiring the photographer to be quick and observant.
Street photography can be a powerful way to document the world around us and share unique perspectives on everyday life. If you’re interested in exploring this genre, it’s all about being observant, patient, and respectful of your subjects.
Magnum Photos is a renowned international photographic cooperative founded in 1947 by legendary photographers, including Robert Capa, Henri Cartier-Bresson, David “Chim” Seymour, and George Rodger. The cooperative aims to give photographers the freedom to document the world as they see it without being constrained by the agendas of magazines and newspapers.
Key Highlights of Magnum Photos:
Historical Significance: Magnum Photos has documented many of the world’s major events and personalities since its inception, covering a wide range of subjects including society, politics, conflict, and culture.
Global Presence: The cooperative has offices in major cities like New York, Paris, London, and Tokyo, and its photographers work worldwide.
Photographer-Owned: Magnum is unique in that it is owned and run by its member photographers, who retain all copyrights to their work. This model allows for a high degree of creative freedom and independence.
Iconic Images: Magnum photographers have produced some of the most iconic images in the history of photography, capturing moments that have defined eras and movements.
Educational Initiatives: Magnum also offers workshops, on-demand courses, and other educational resources to help aspiring photographers learn from some of the best in the field.
Magnum Photos continues to be a significant force in the world of photography, known for its commitment to authentic visual storytelling and its ability to capture the human condition in all its complexity.
If you have any specific questions about Magnum Photos or its photographers, feel free to ask!
To make your photos pop, consider the following ideas:
Lighting: Good lighting can make a huge difference in the quality of your photos. Natural light is often the best choice.
Composition: Pay attention to the composition of your photos. Consider the rule of thirds, leading lines, and framing to create visually interesting images.
Editing: Use photo editing software or apps to enhance your photos. Adjusting the brightness, contrast, saturation, and sharpness can make a big difference.
Colours: Bold, vibrant colours can make your photos stand out. Look for colourful backgrounds or subjects to make your photos pop.
Contrast: Contrast can add depth and visual interest to your photos. Experiment with high contrast or black-and-white photography for a striking effect. Pay attention to these elements and experiment with different techniques to make your photos pop and stand out.
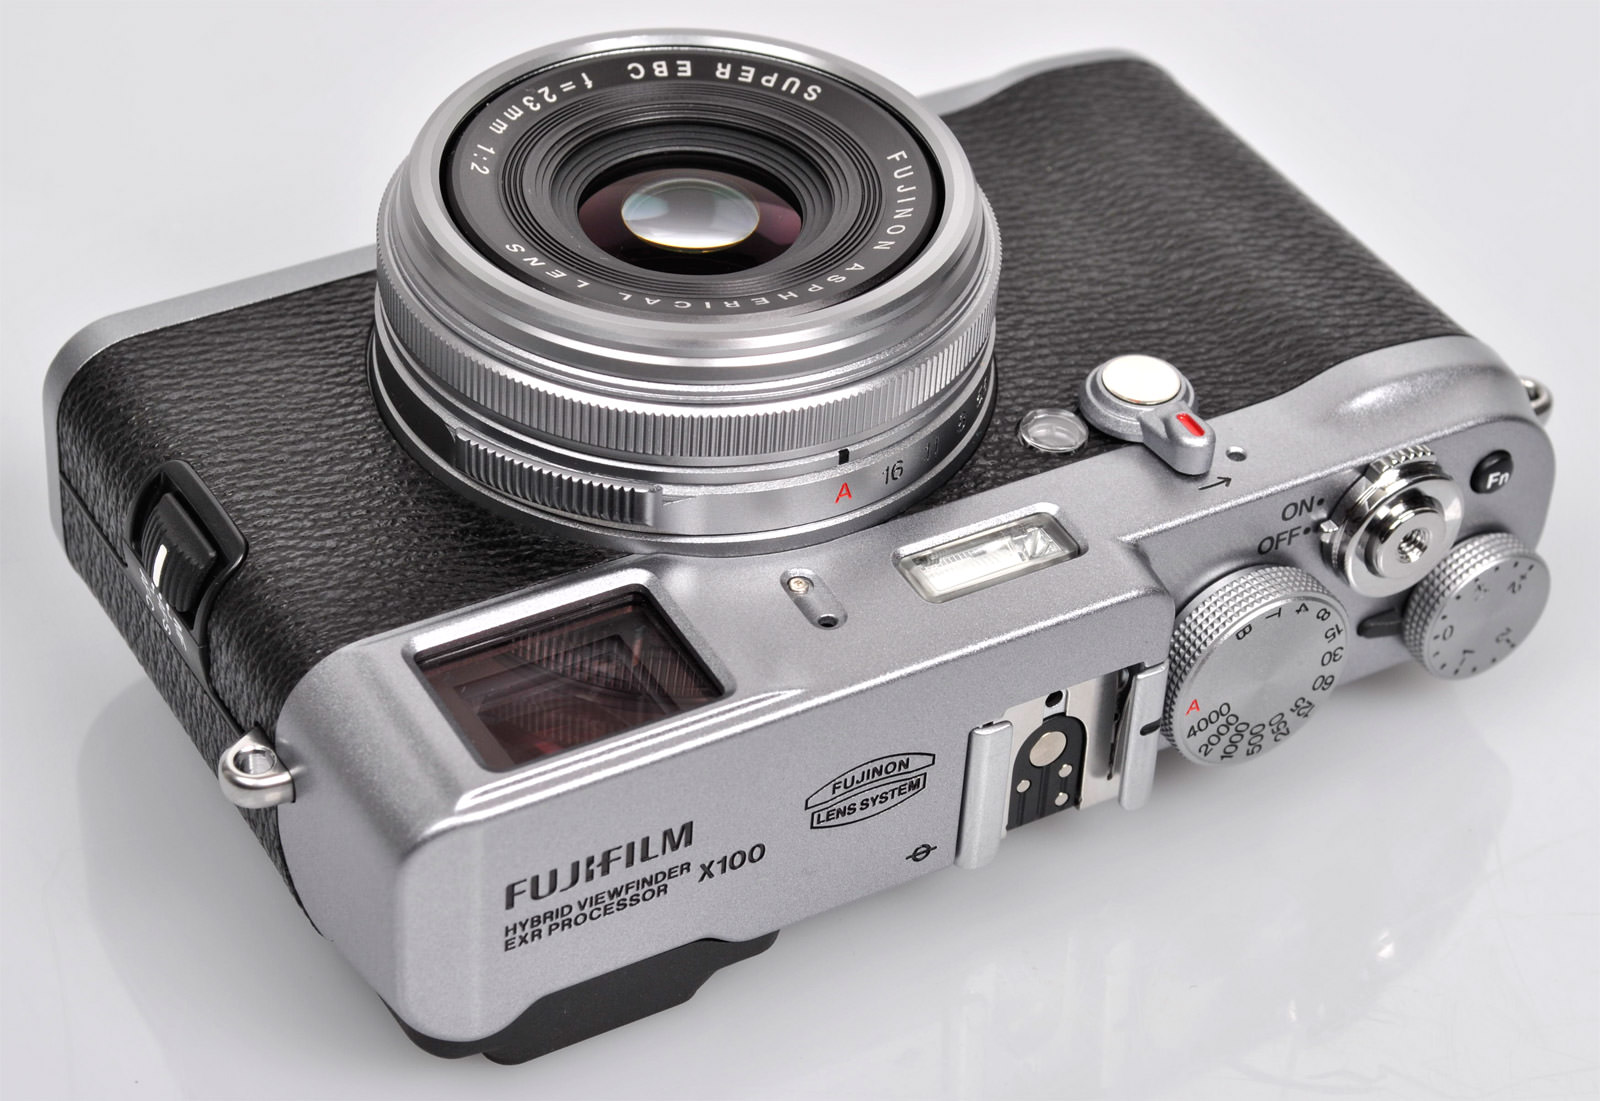
Photography is an art form that captures the essence of a moment, telling stories without words and leaving a lasting impression on the viewer. It’s a craft that combines technical skill with creative vision, and at the heart of this craft is the camera—the photographer’s most trusted tool.
Understanding the intricacies of your camera and lenses is akin to a painter knowing their brushes and paints; it’s essential for creating a masterpiece. It’s not merely about owning the latest high-end equipment; it’s about the intimate knowledge of every button, dial, and setting. Mastering these elements allows photographers to manipulate light and composition, to bring their creative vision to life.
Adapting to different lighting conditions is one of the most critical skills in a photographer’s arsenal. Light is the language of photography, and learning to speak this language fluently can transform an ordinary scene into a breathtaking image. Whether it’s the golden hour’s warm glow or the harsh midday sun, understanding how to work with light ensures that it always works in your favour.
Anticipating how your gear will respond in various scenarios is what separates good photographers from great ones. It’s about predicting the play of shadows in a dimly lit room or the way a lens will render the bokeh in a busy street scene. This foresight is crucial for capturing those fleeting, once-in-a-lifetime moments with precision and clarity.
The journey of a photographer is one of constant learning and exploration. It’s about pushing the boundaries of creativity, experimenting with new techniques, and not being afraid to fail. Because in those failures lie the seeds of growth and innovation.
For the seasoned professional, this deep knowledge results in a signature style, a unique way of seeing the world that sets their work apart. For the enthusiastic amateur, it’s the thrill of discovery, the joy of capturing a moment exactly as they envisioned.
In a world where everyone has a camera in their pocket, standing out requires more than just a good eye. It demands dedication to the craft, an unyielding curiosity, and a willingness to invest time in understanding the tools of the trade.
So, whether you’re capturing the delicate details of a flower or the grandeur of a mountain landscape, remember that your camera is more than just a piece of technology. It’s an extension of your creative self, and mastering it is a journey worth taking.
Invest in that journey, embrace the learning curve, and watch as your photography transcends from mere pictures to compelling stories frozen in time. Because in the end, the quality of your work is not defined by the gear you own, but by the knowledge you hold and the creativity you unleash. Happy shooting!
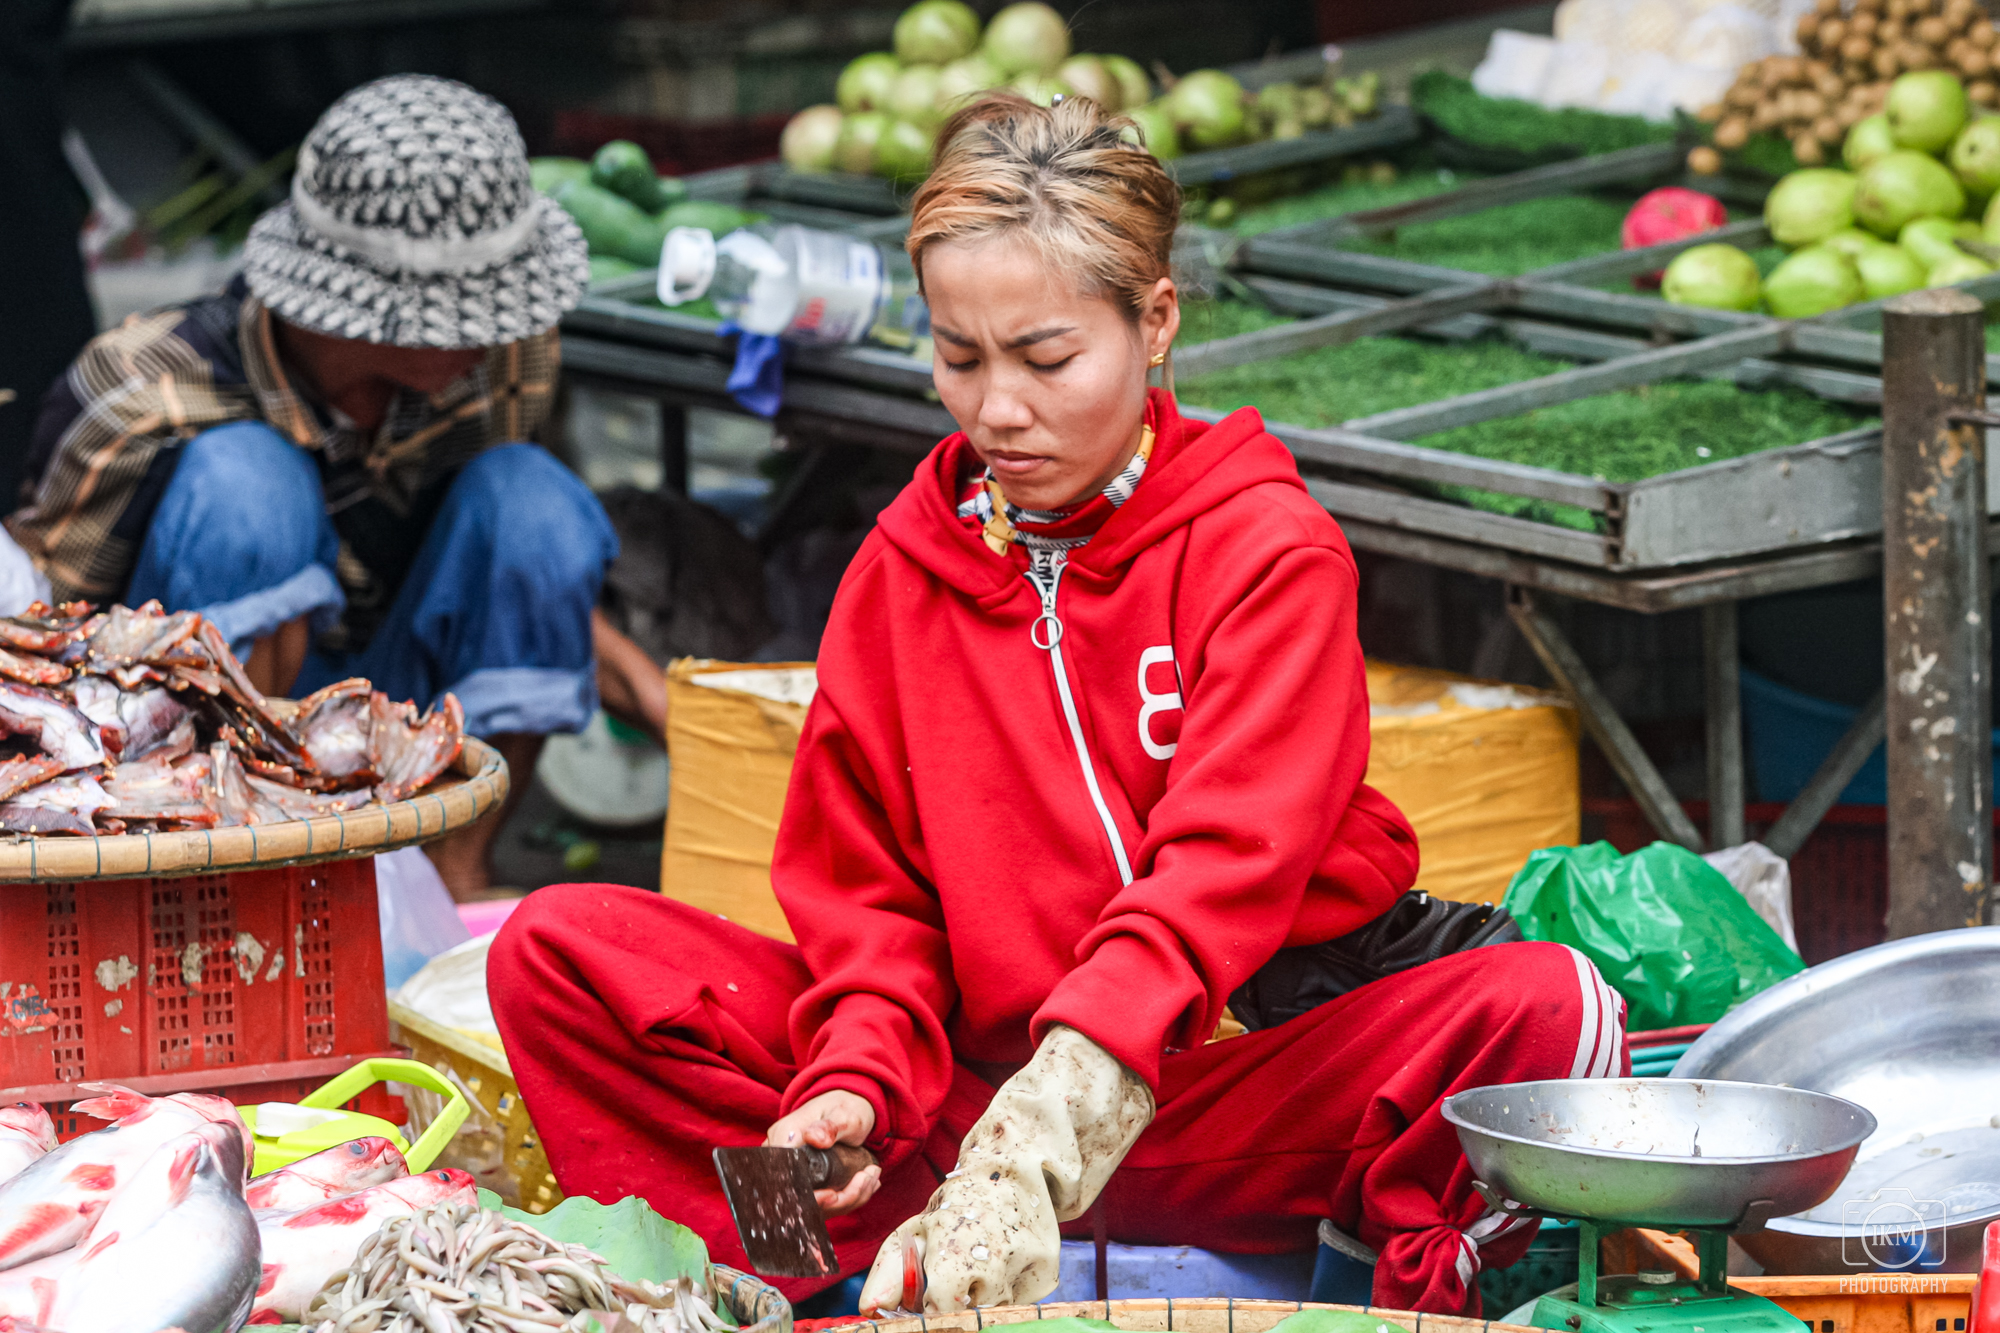
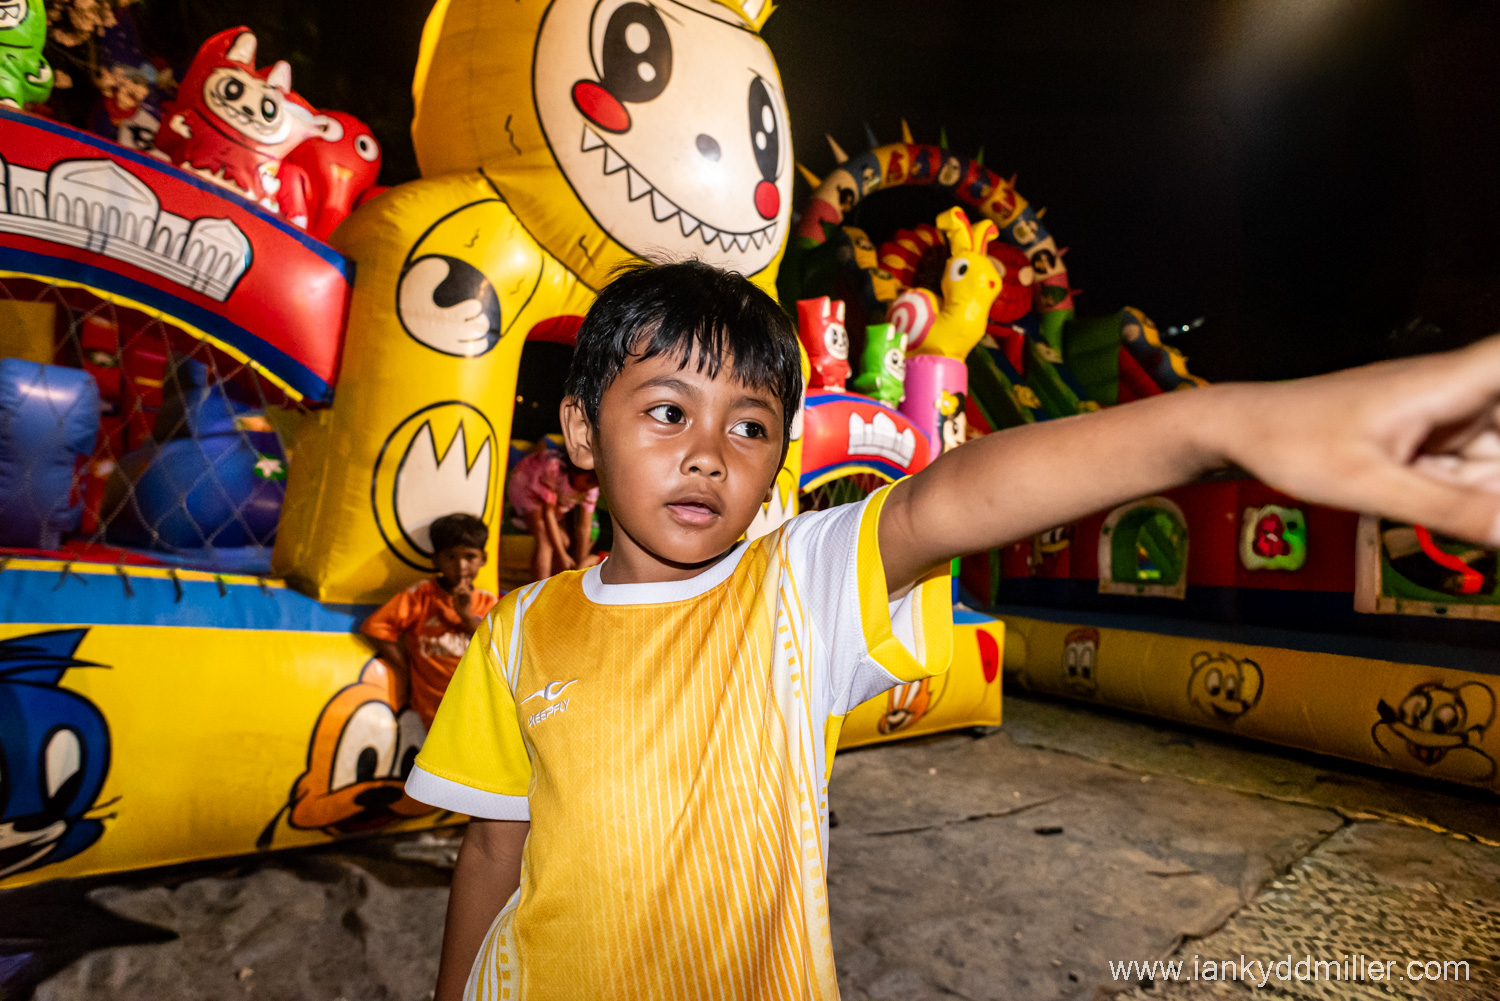
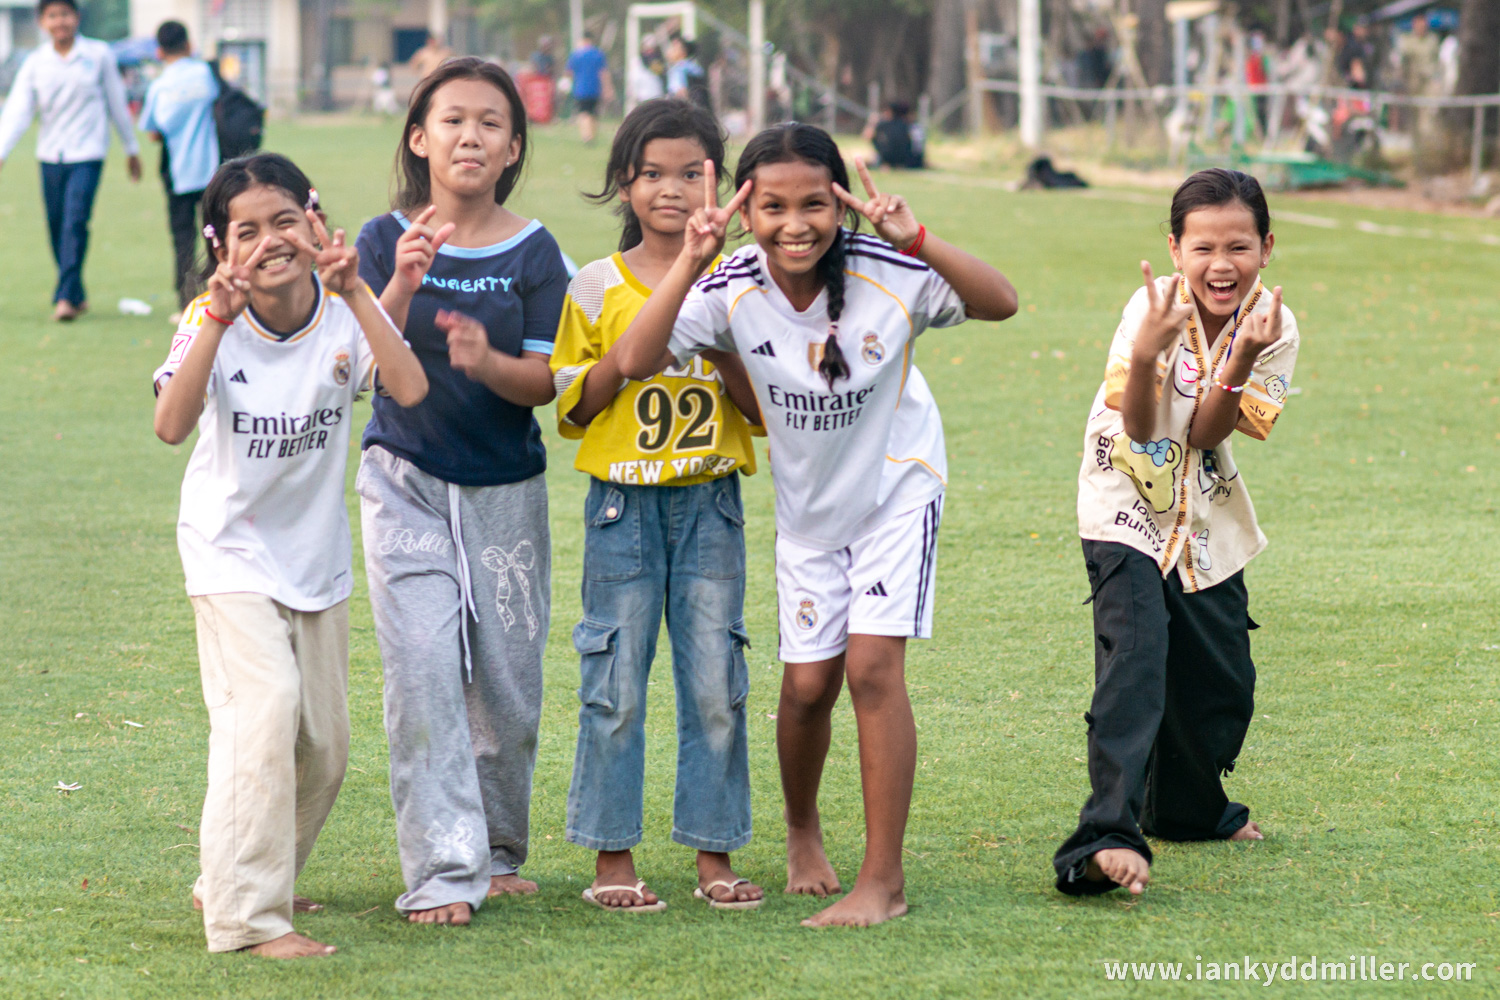
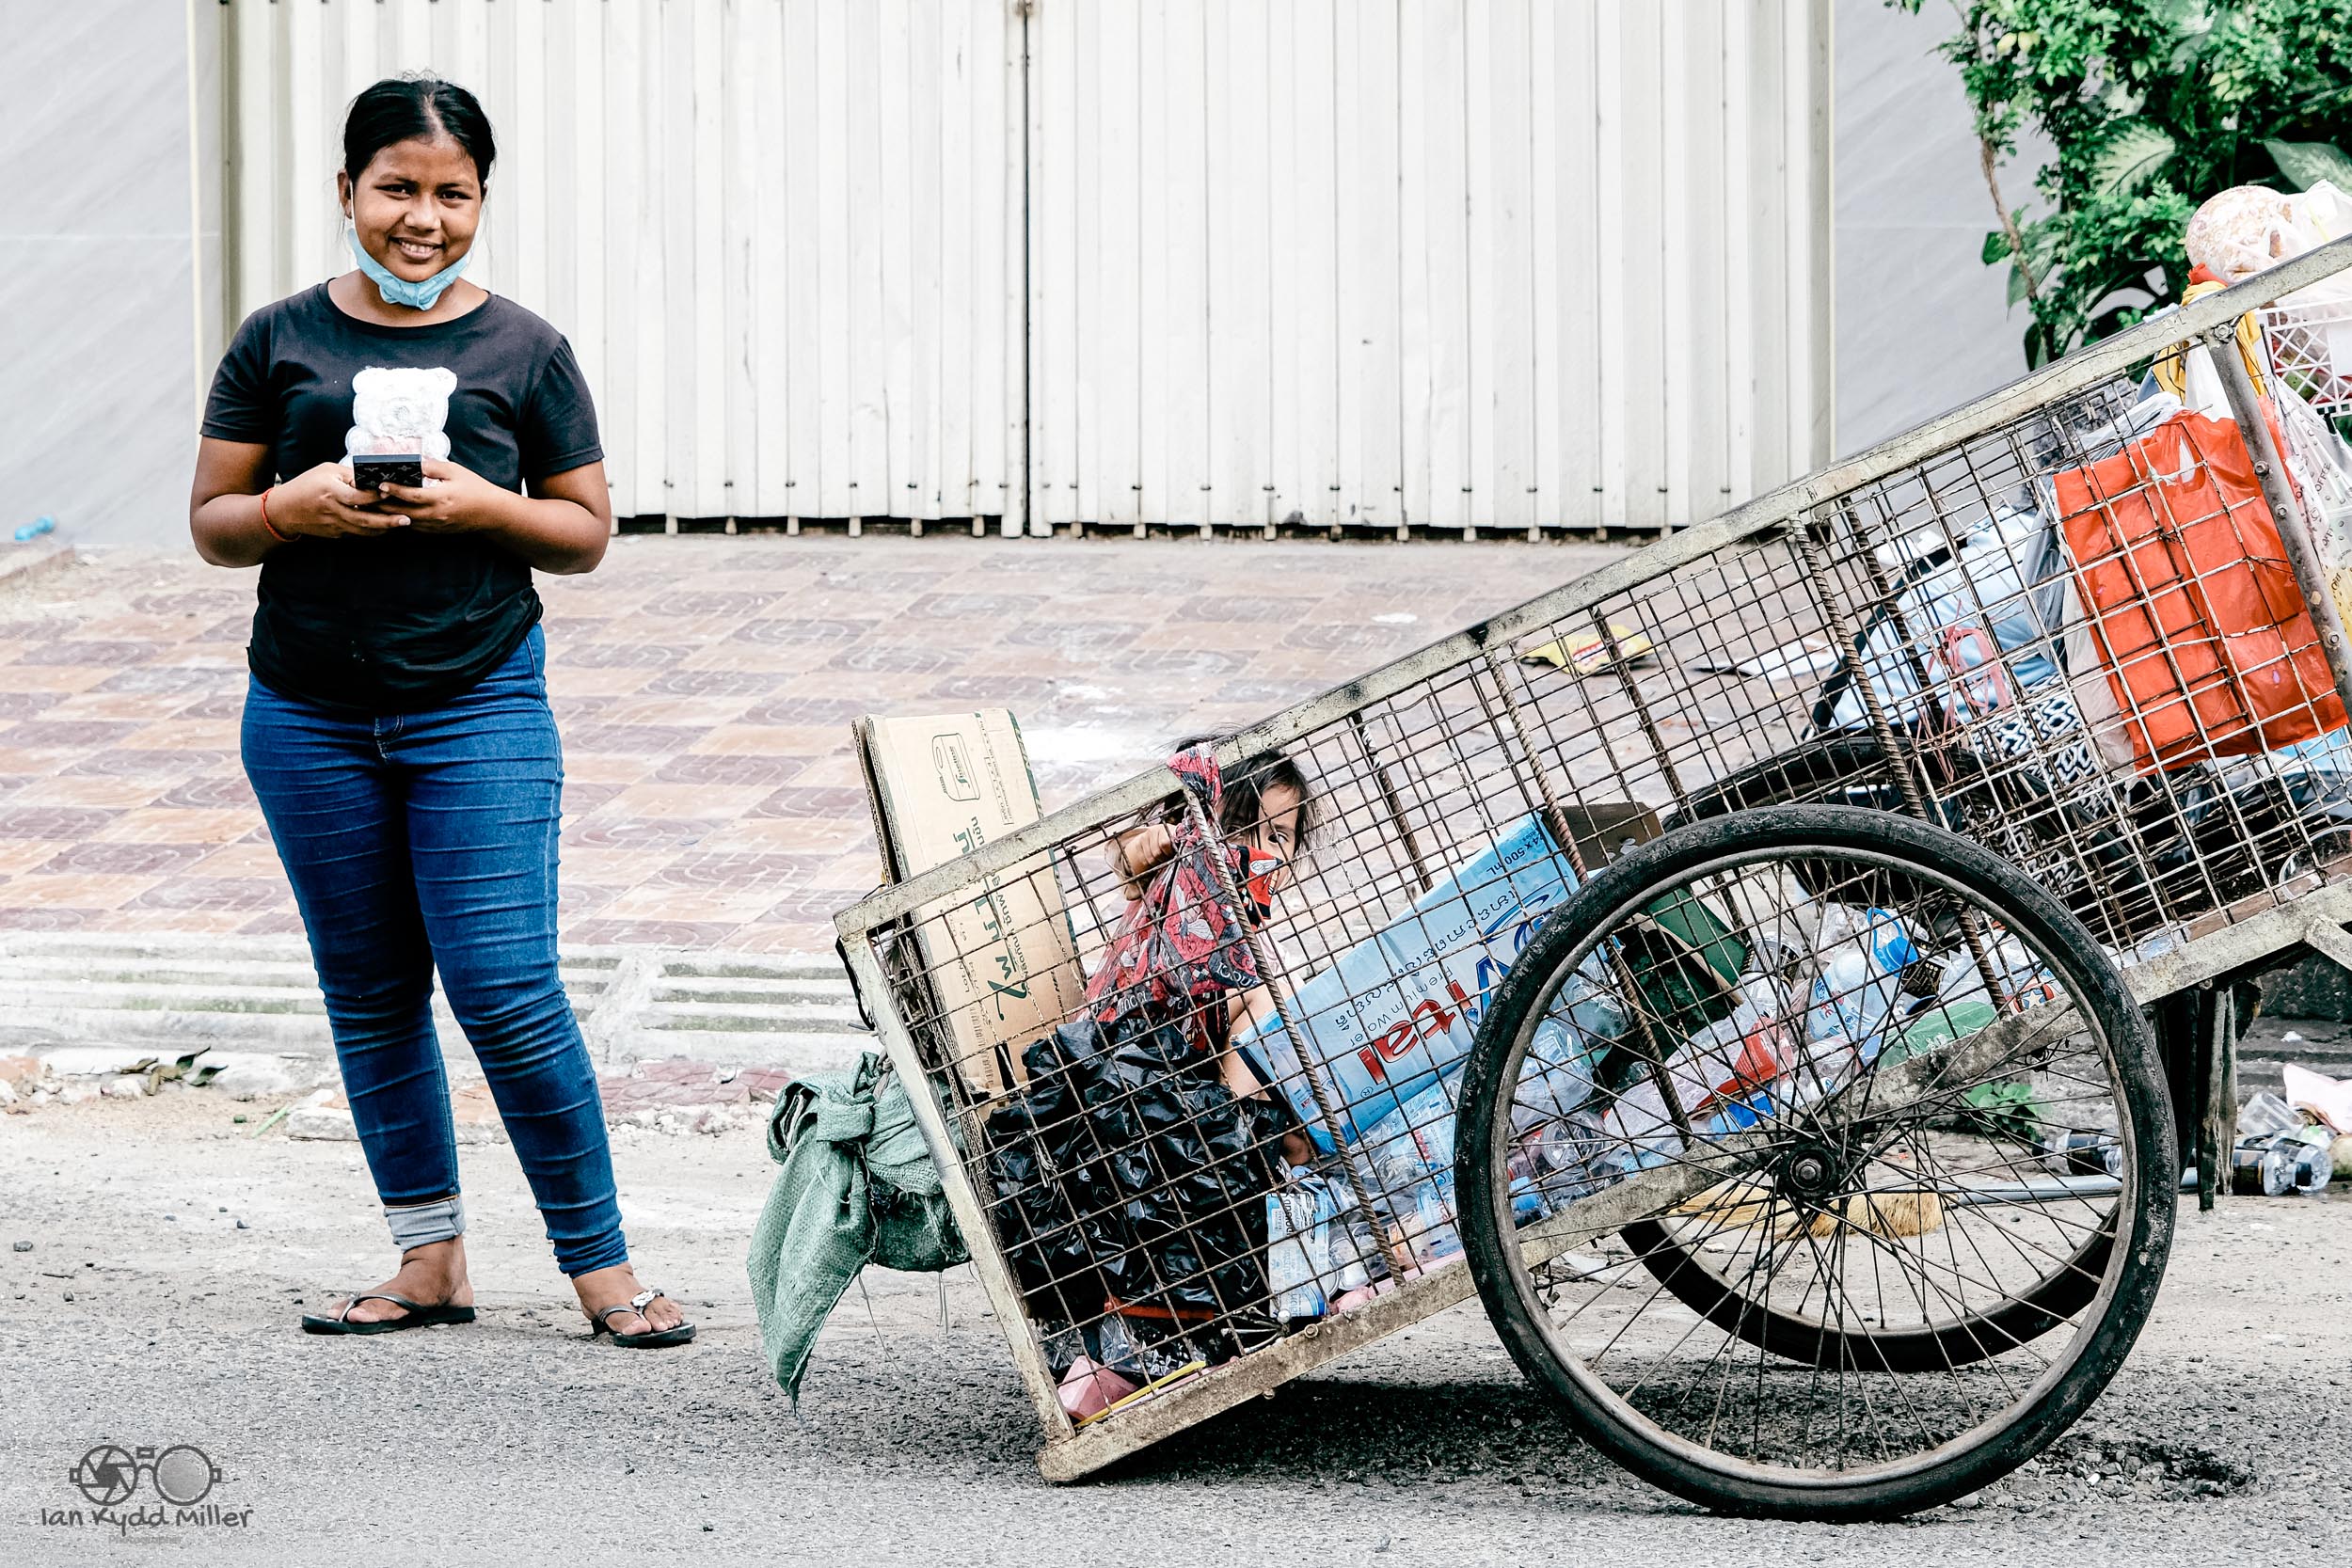
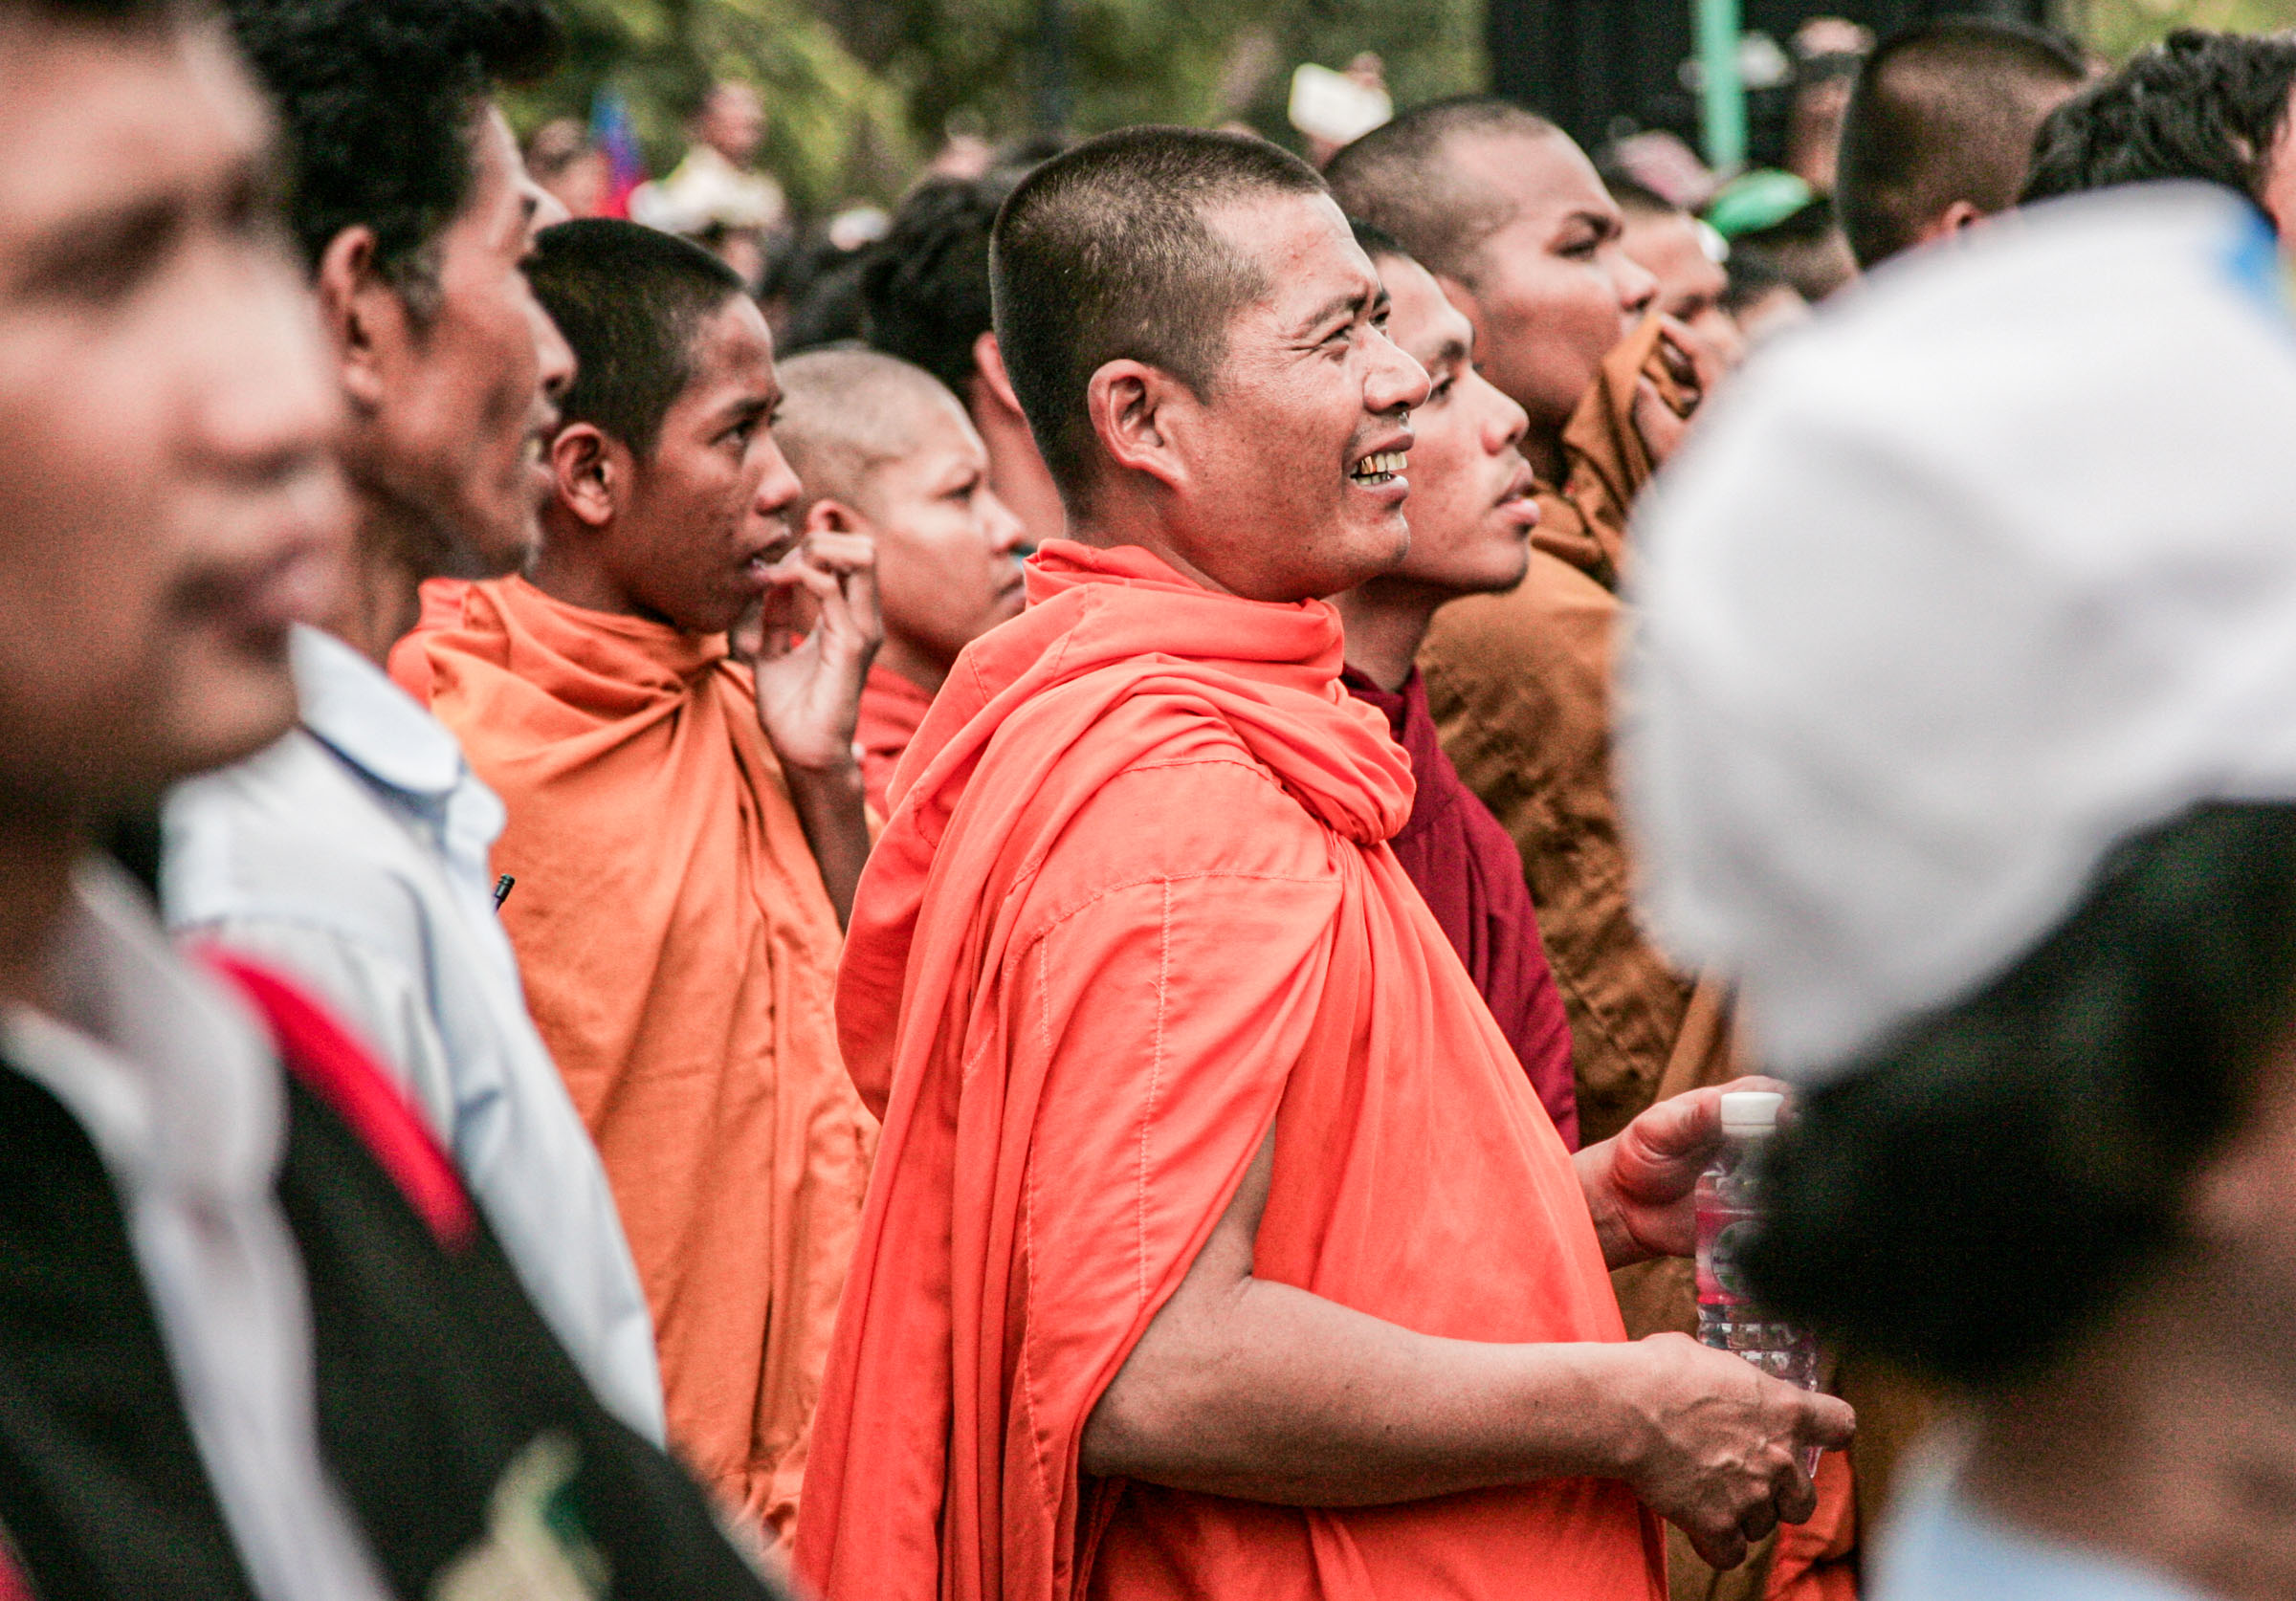
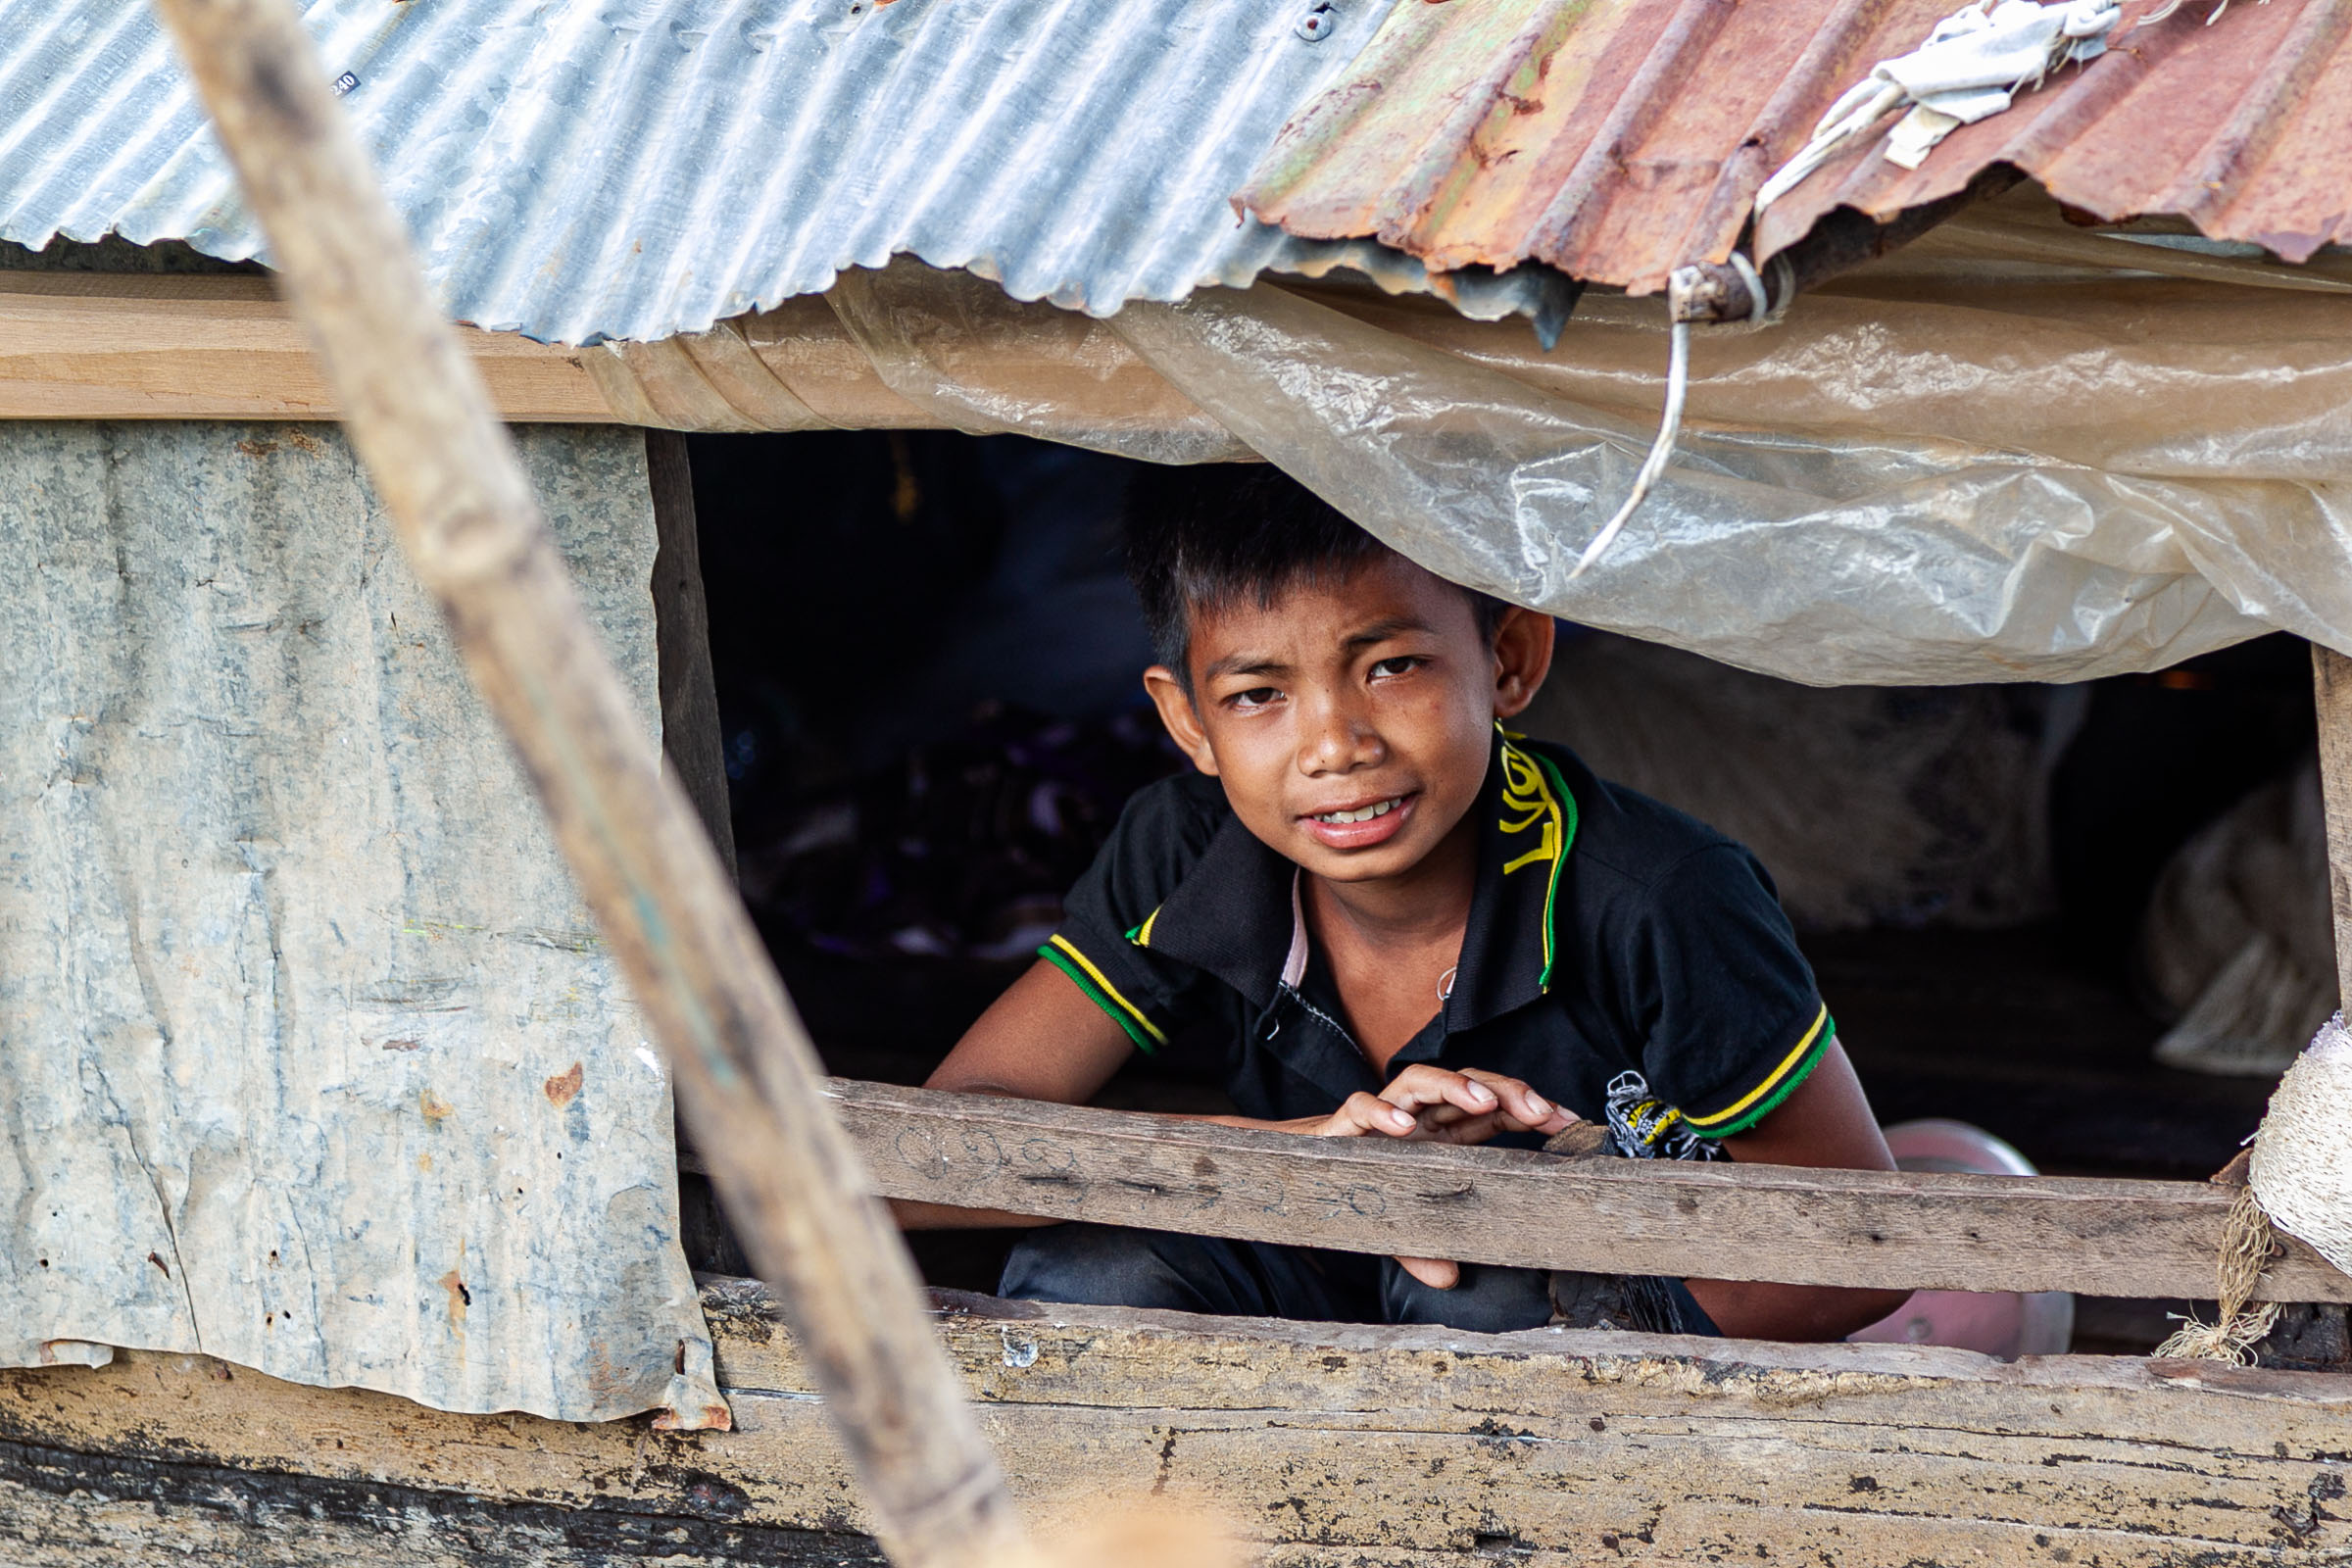
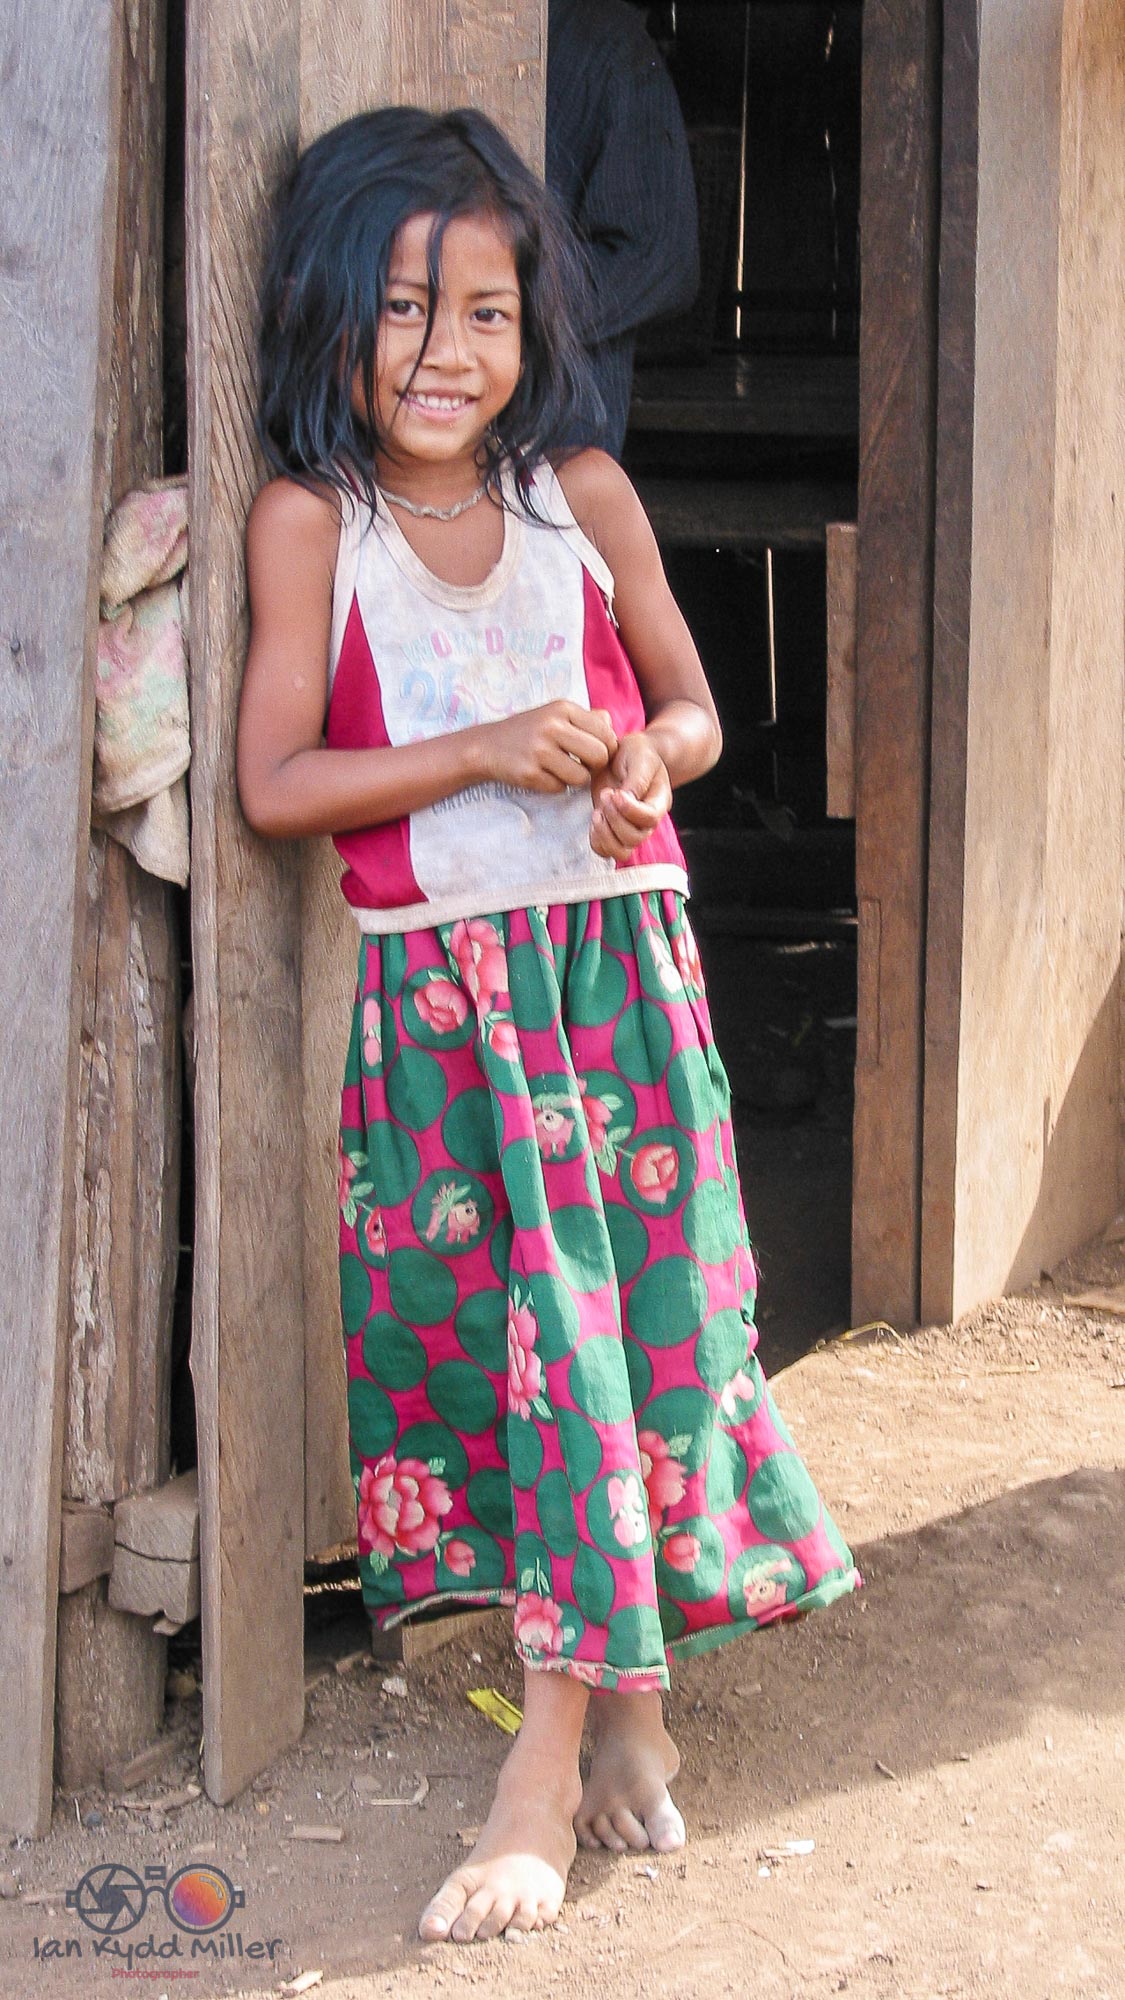
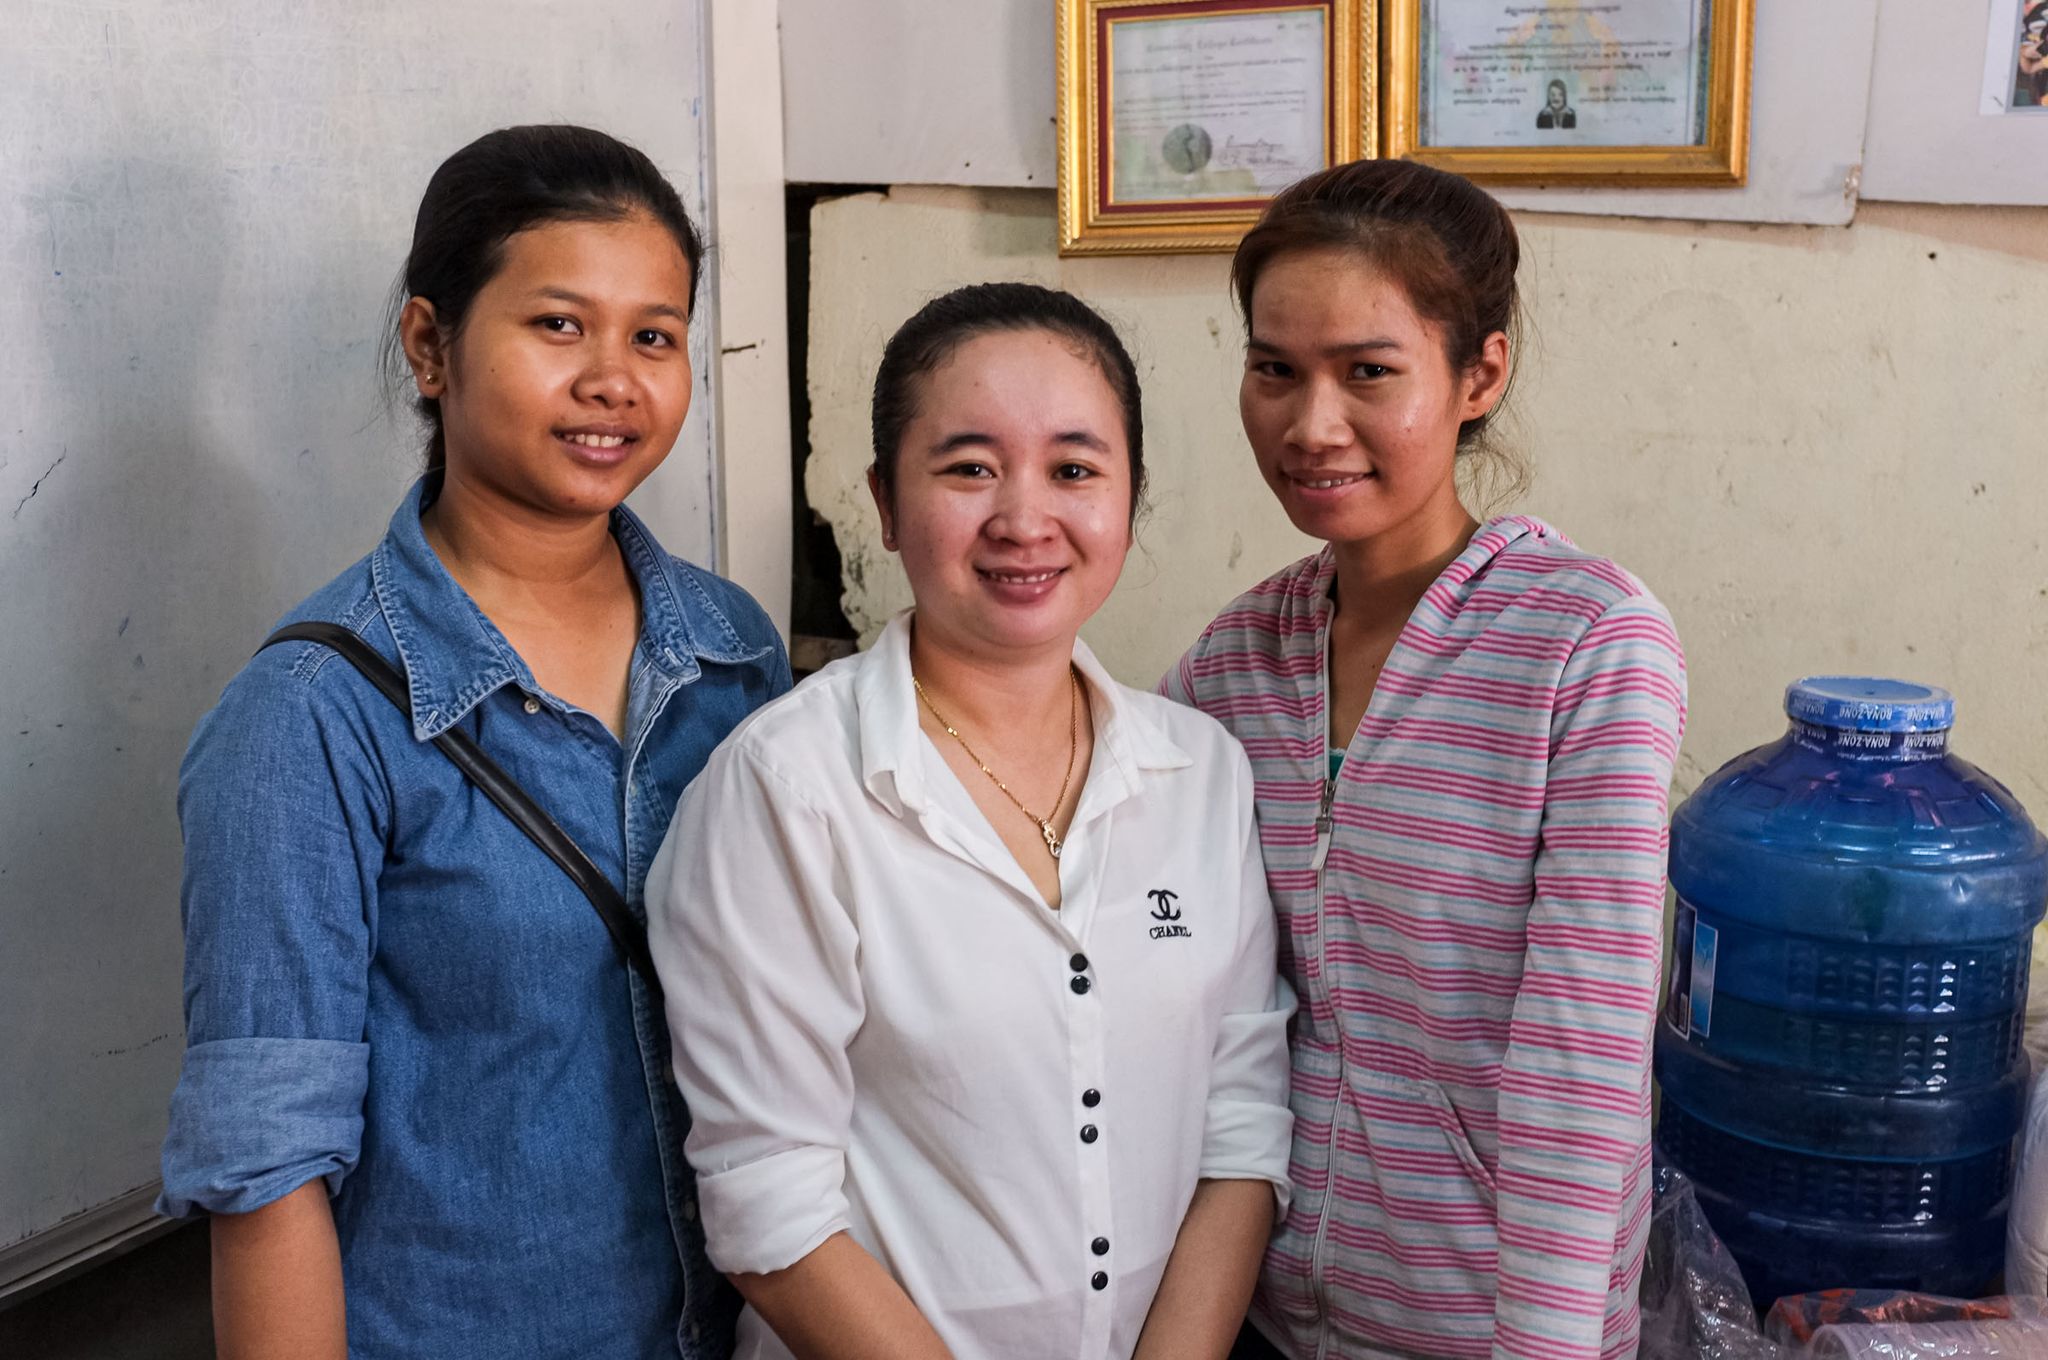
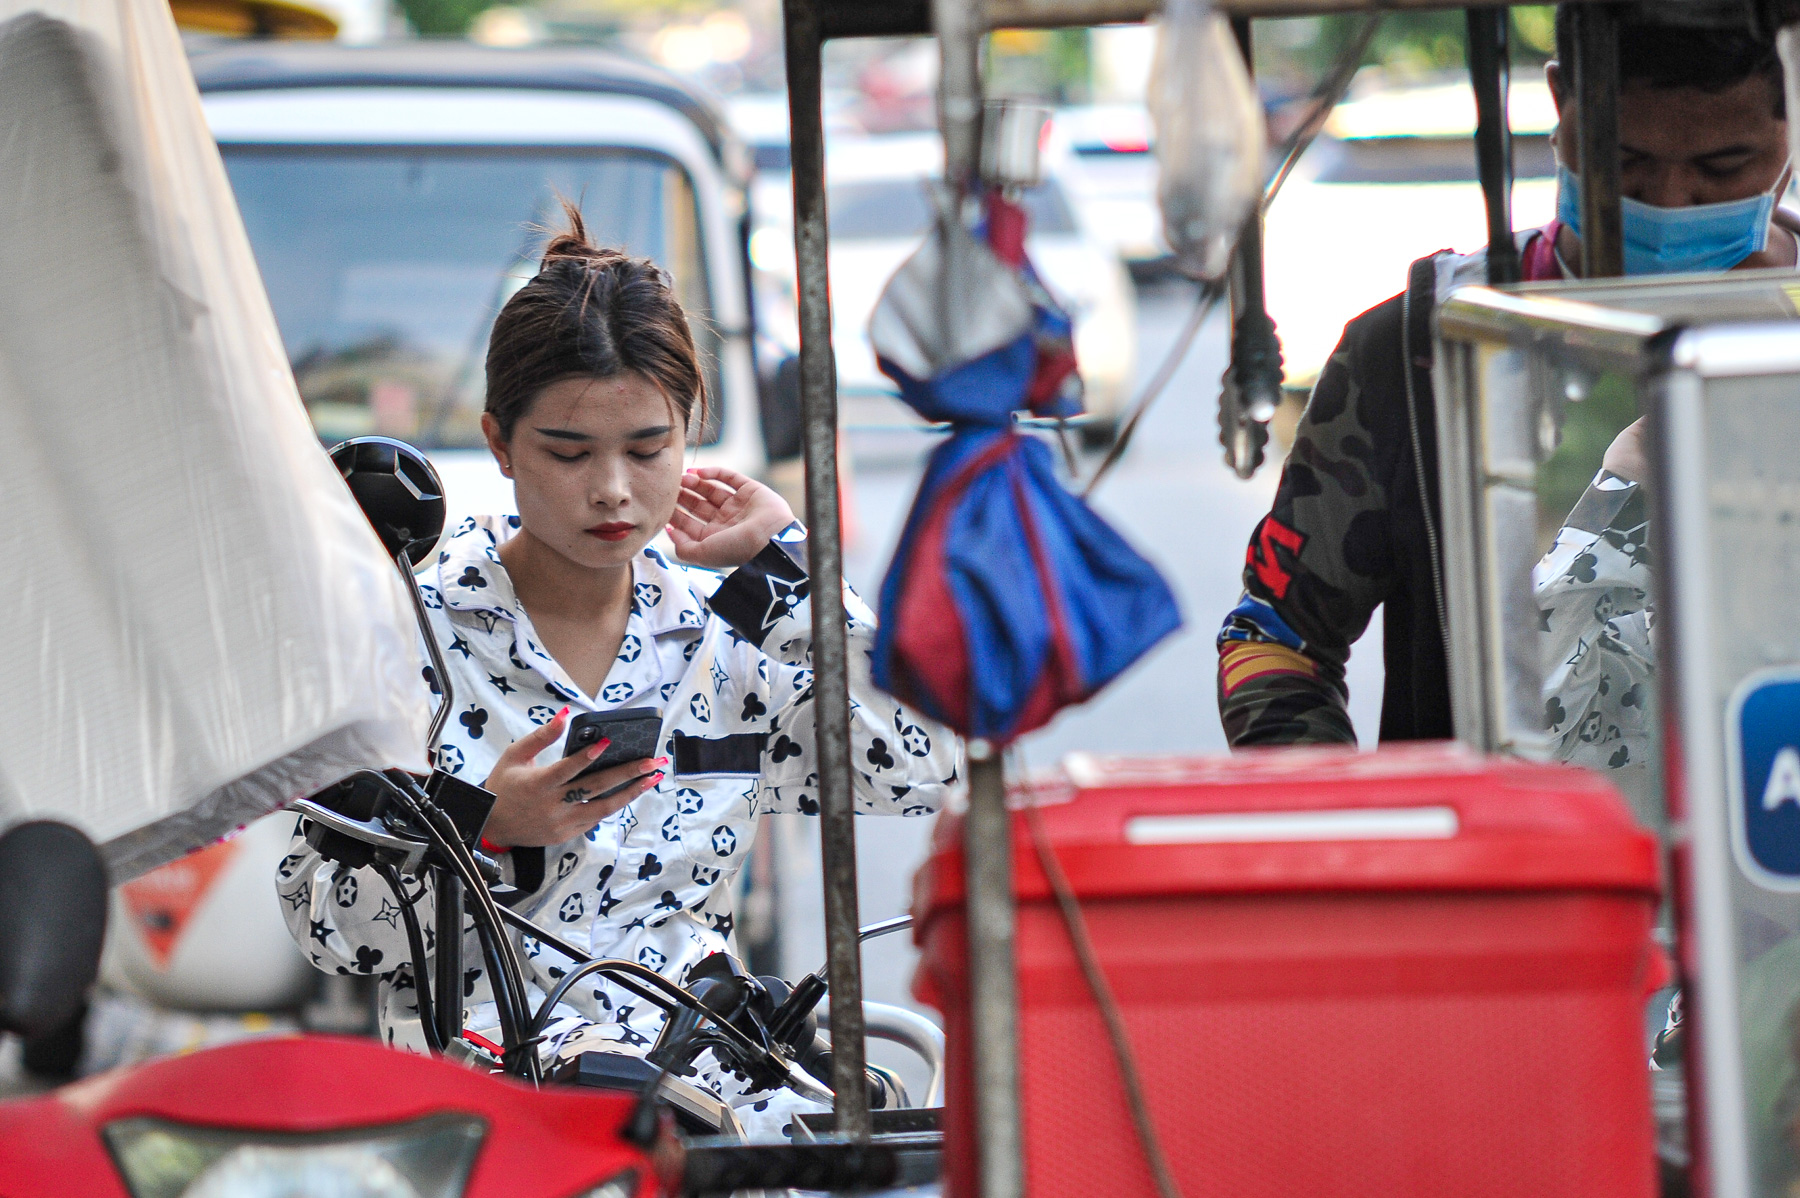
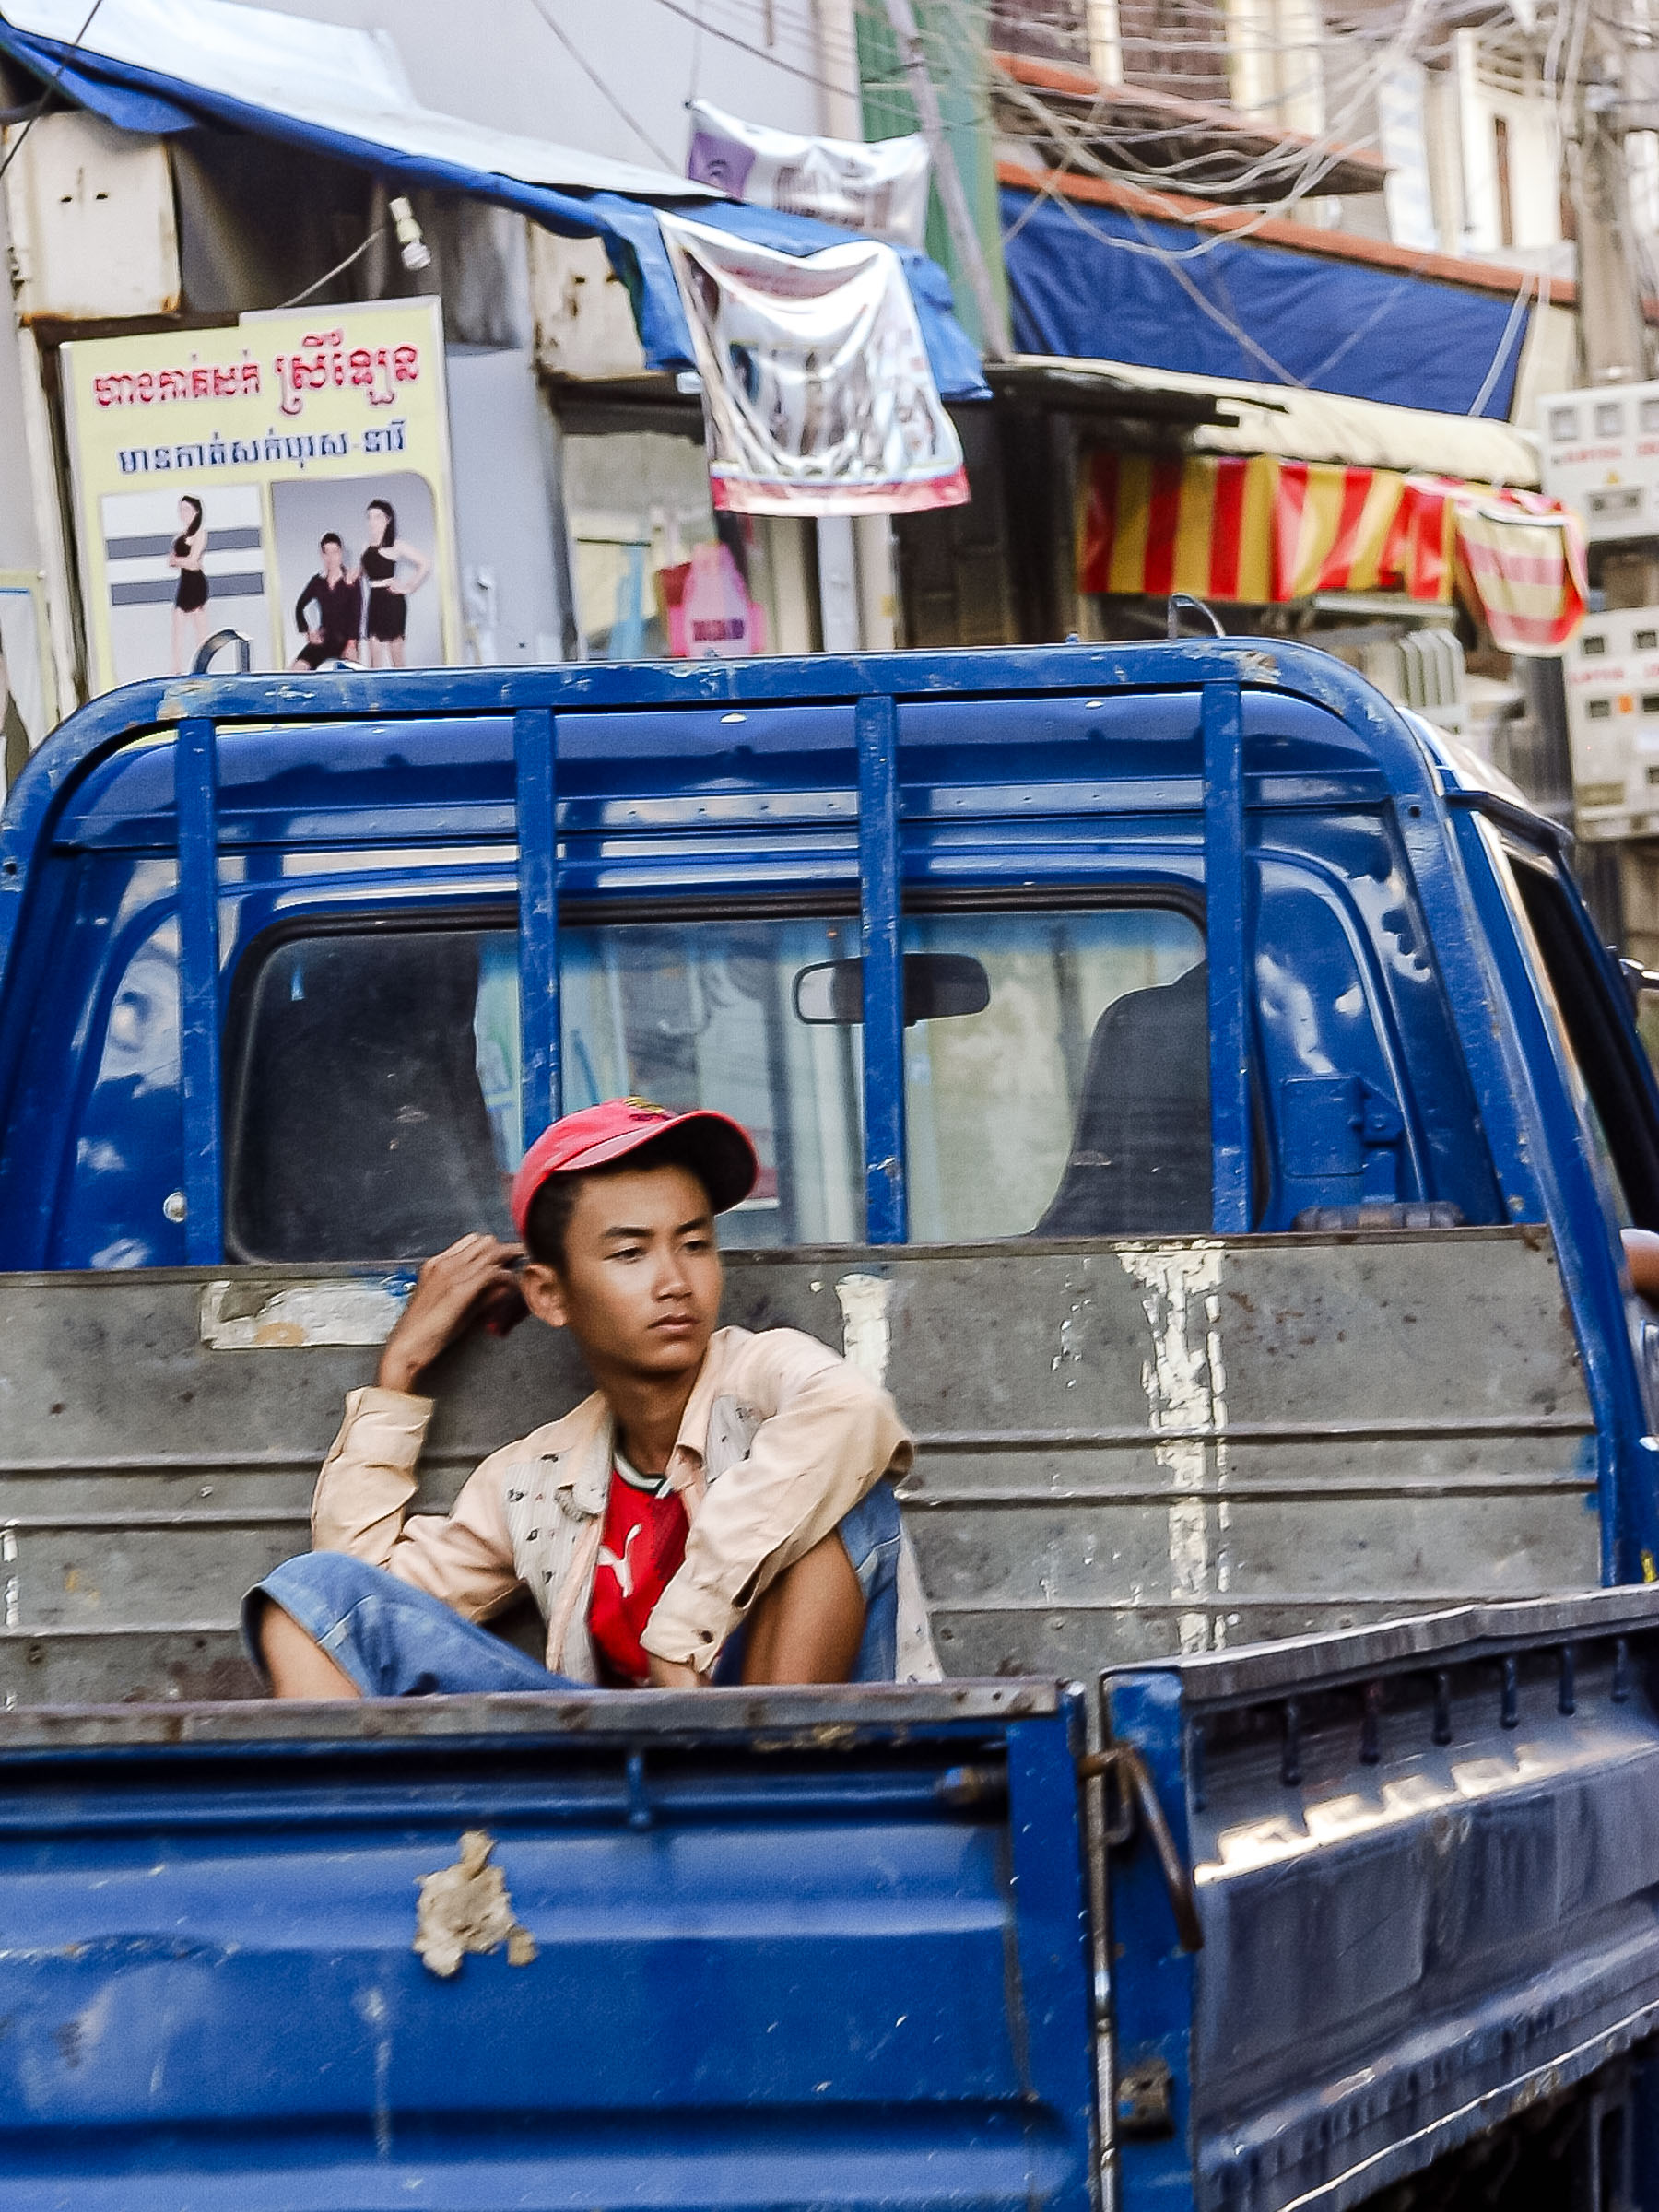
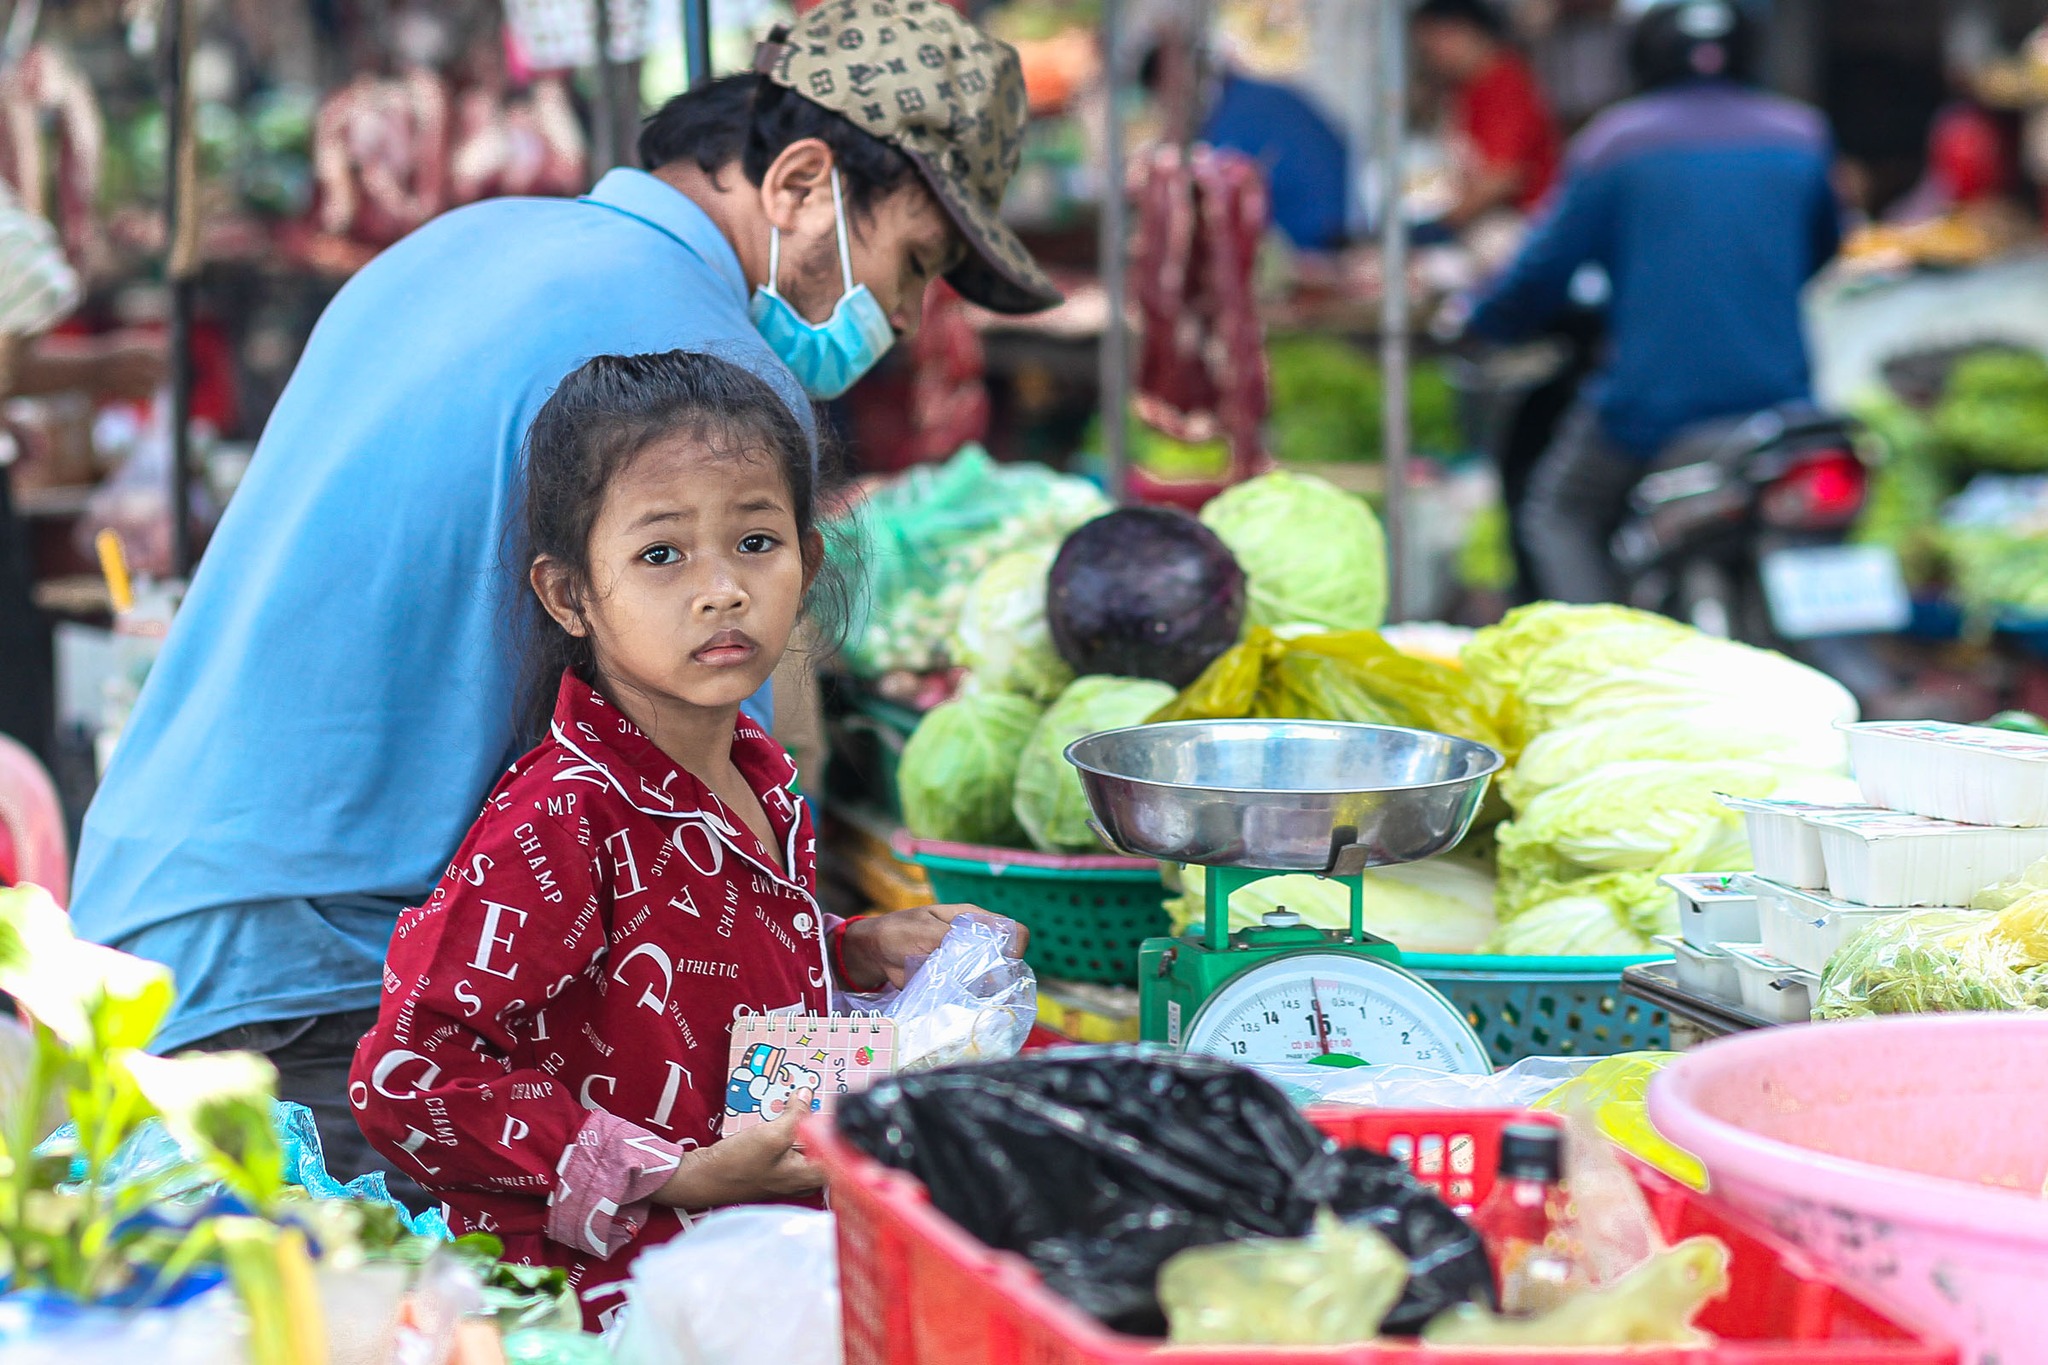
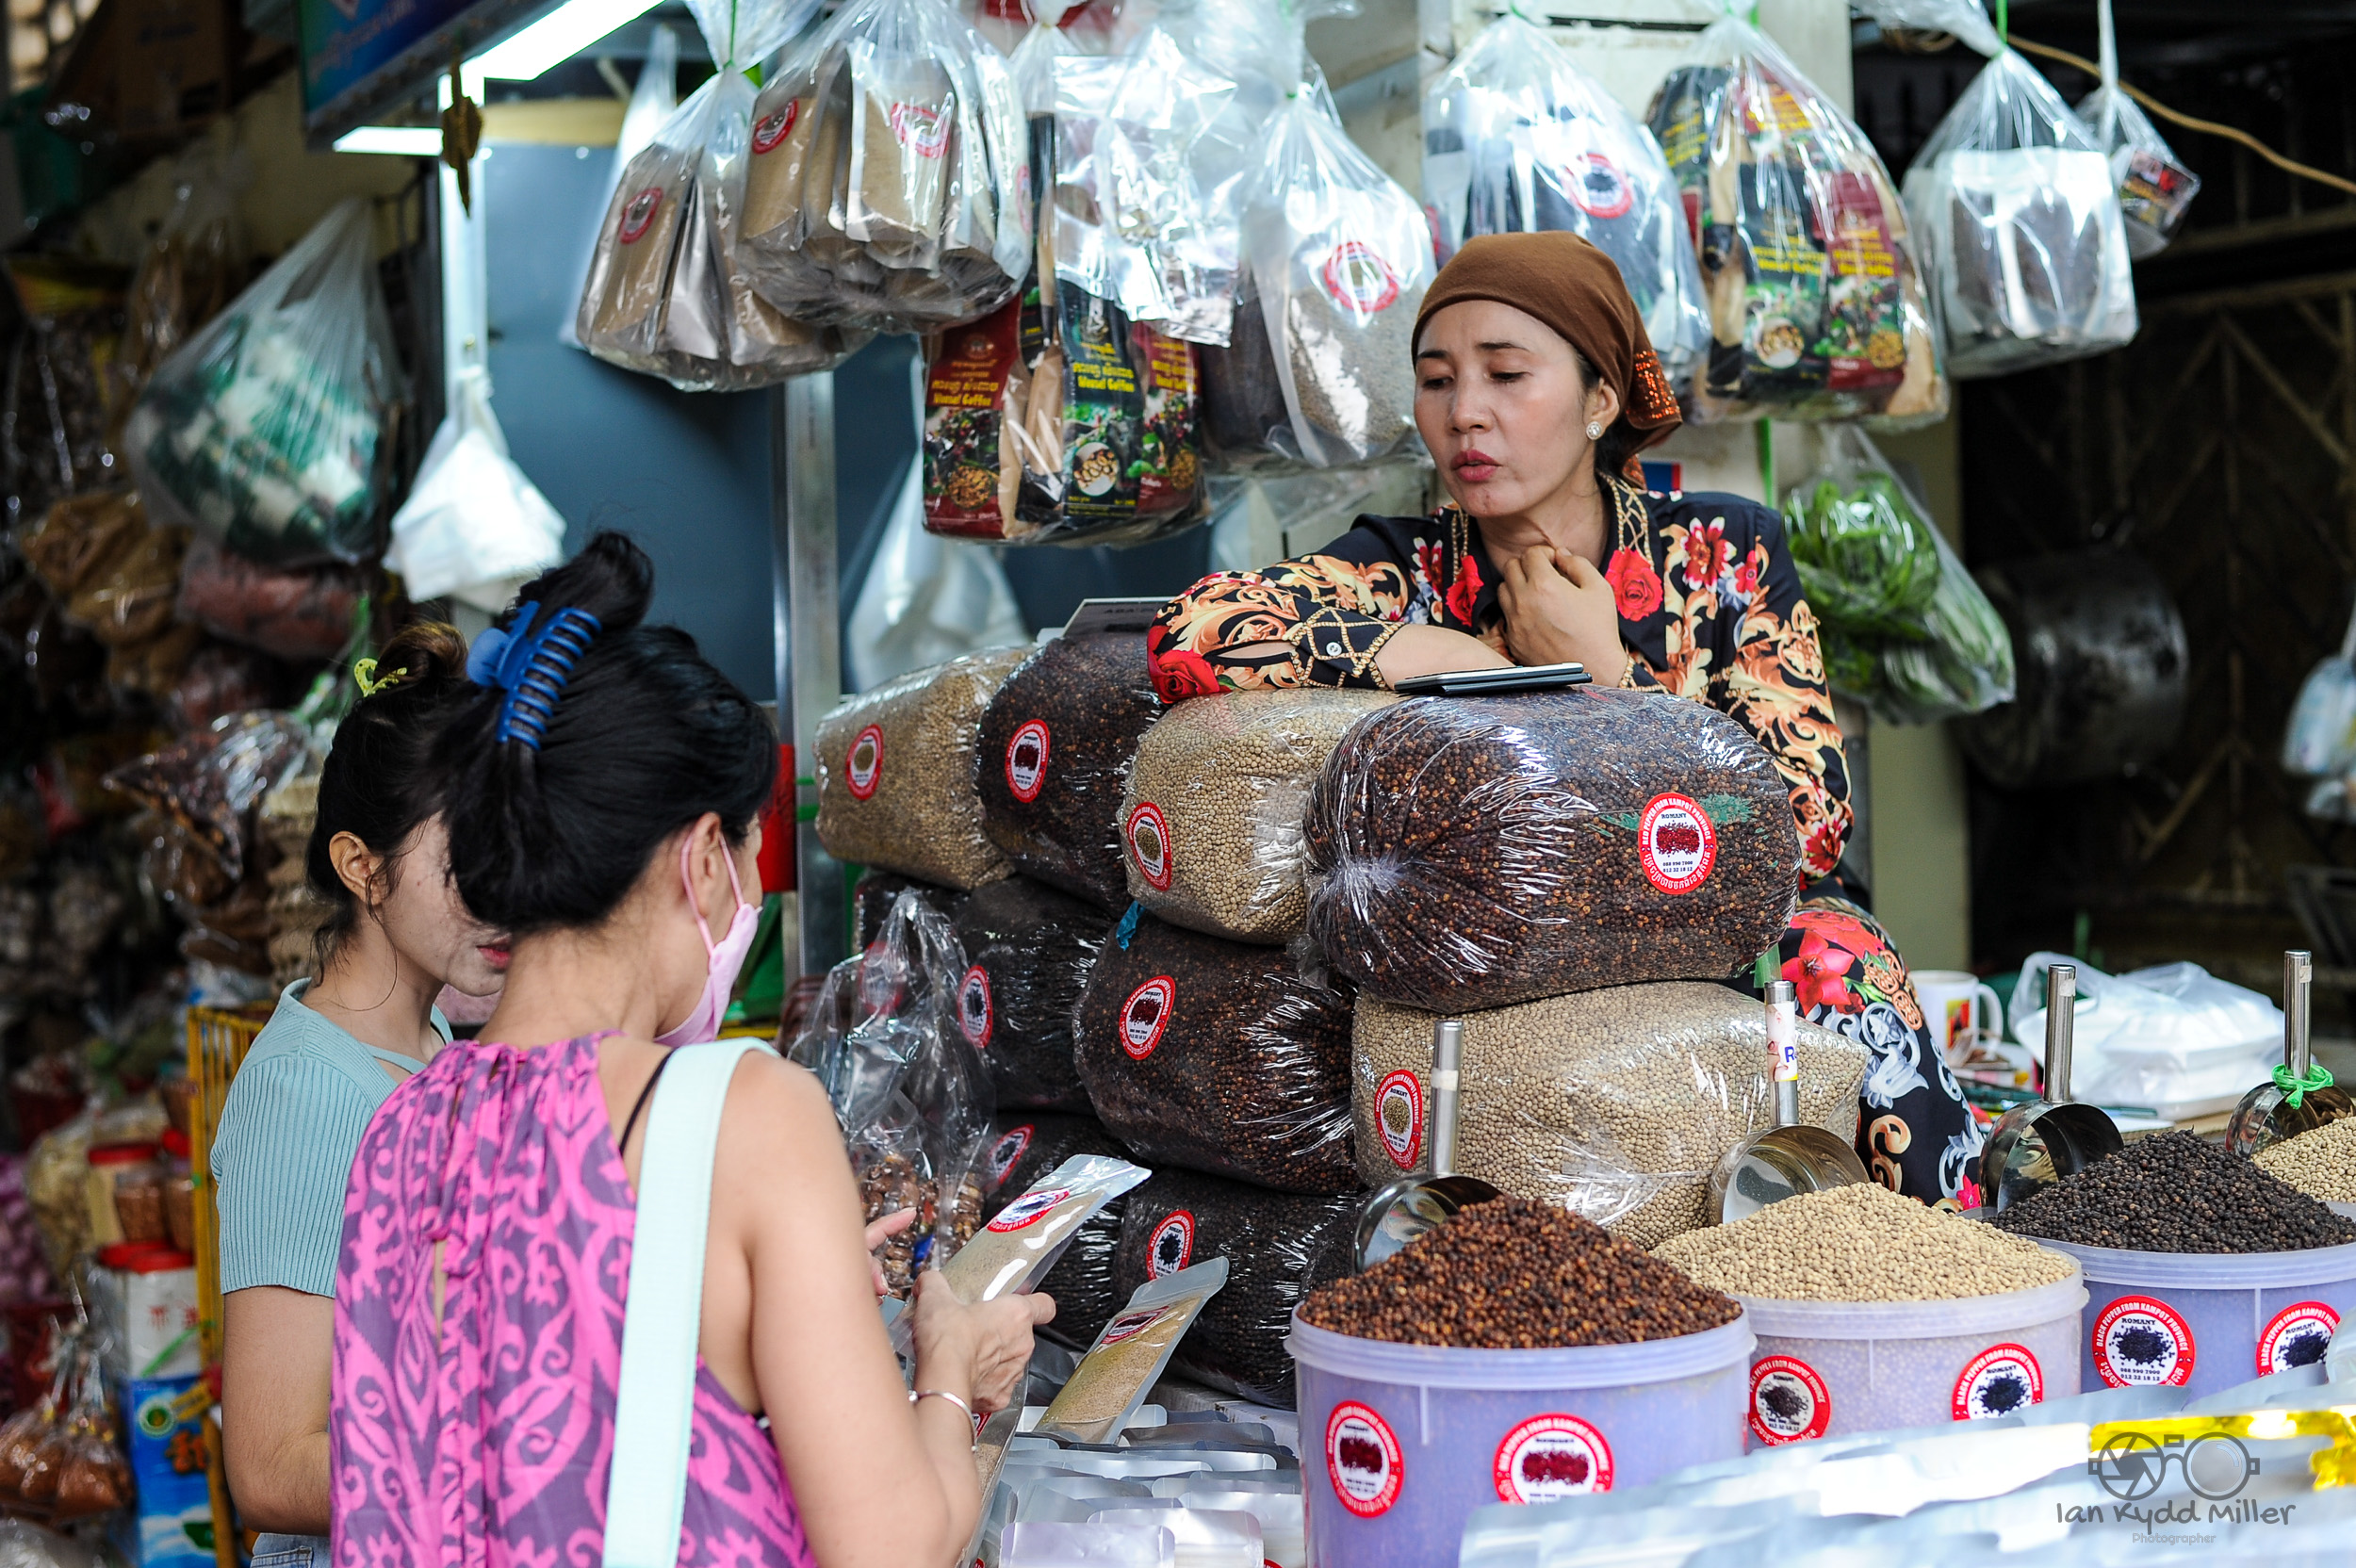
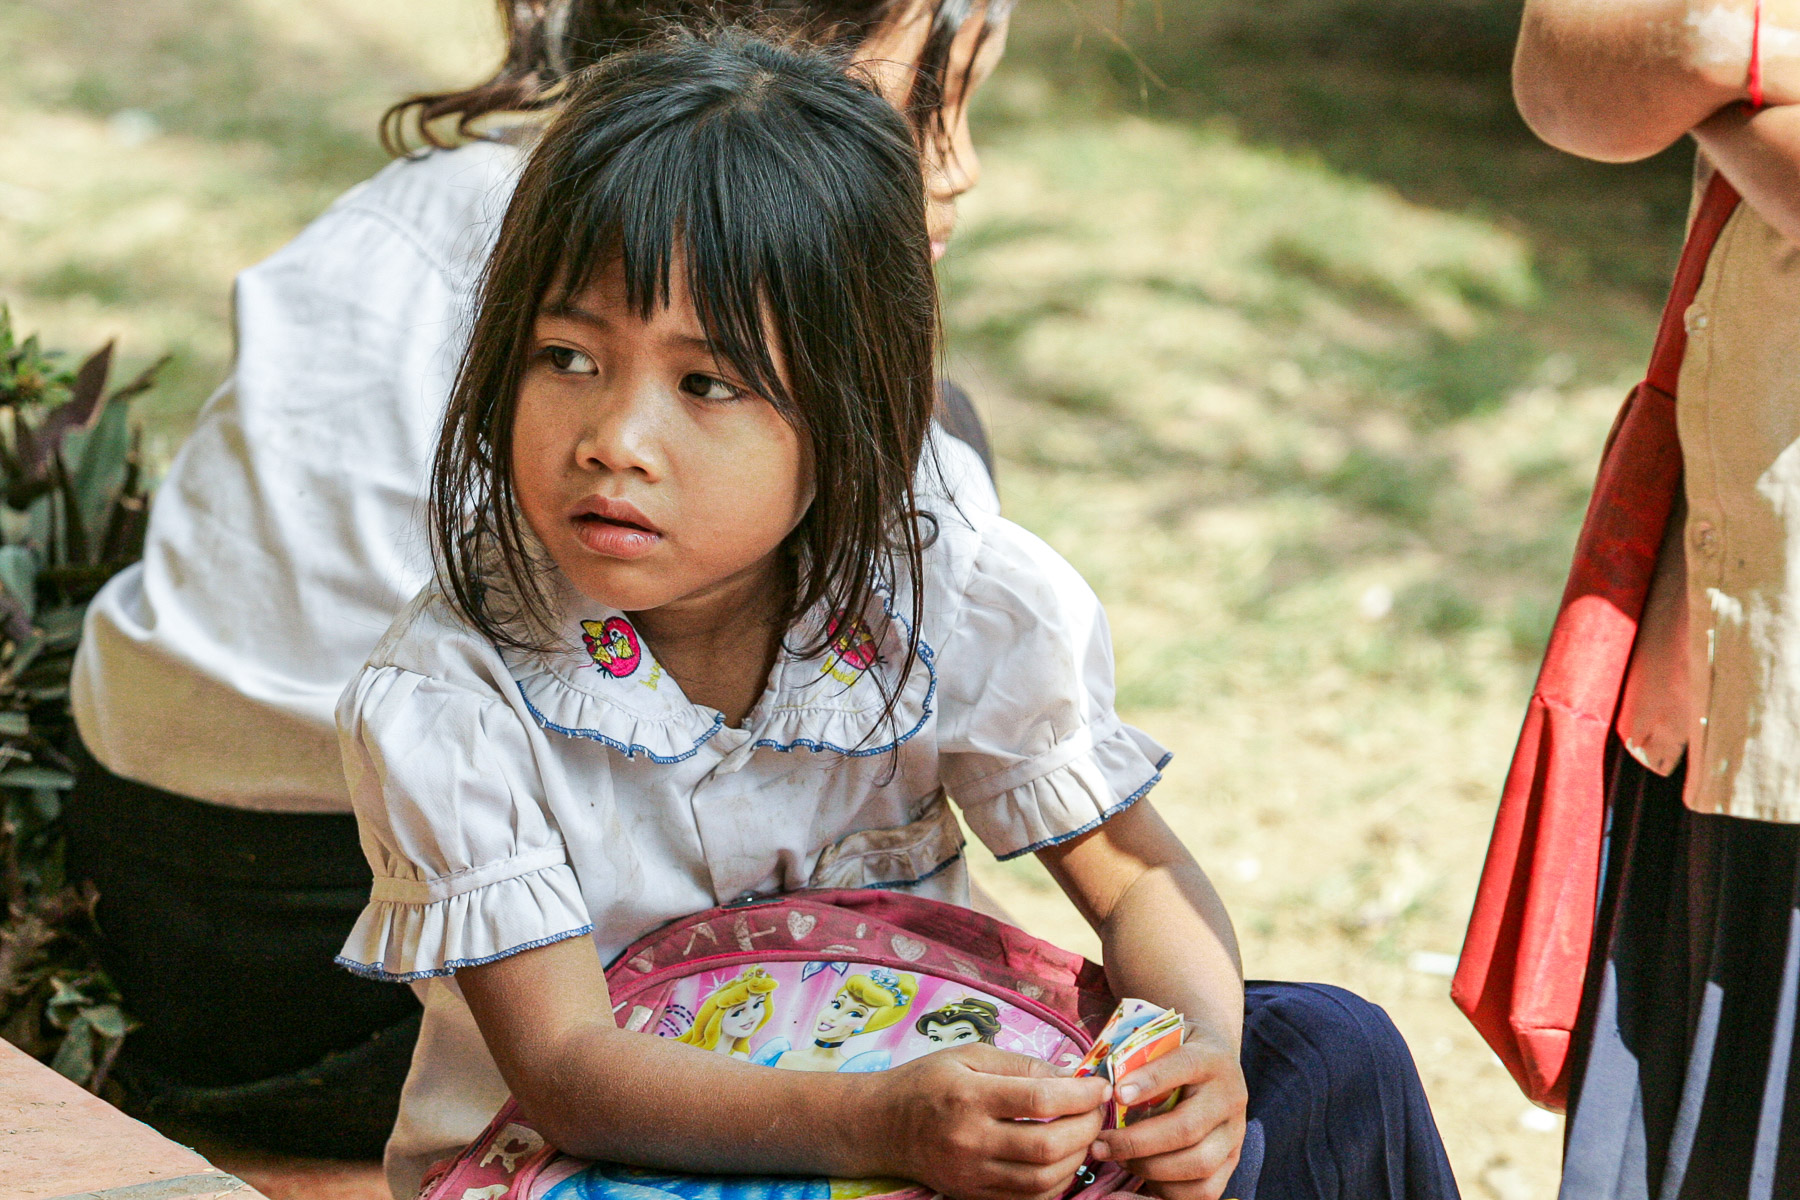
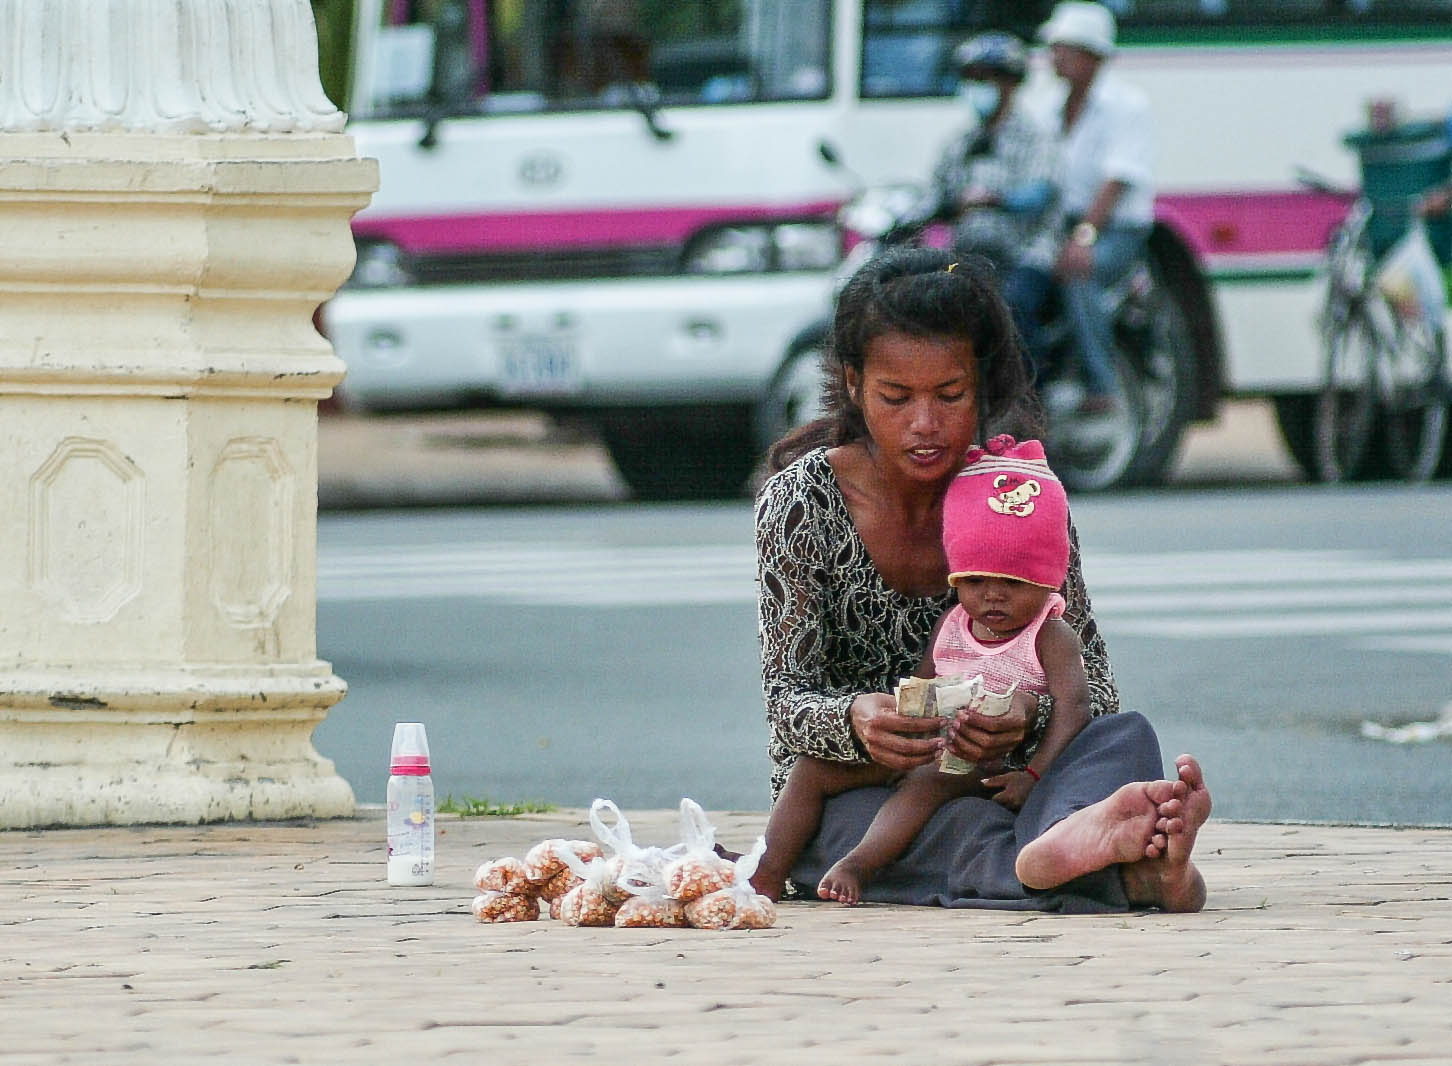
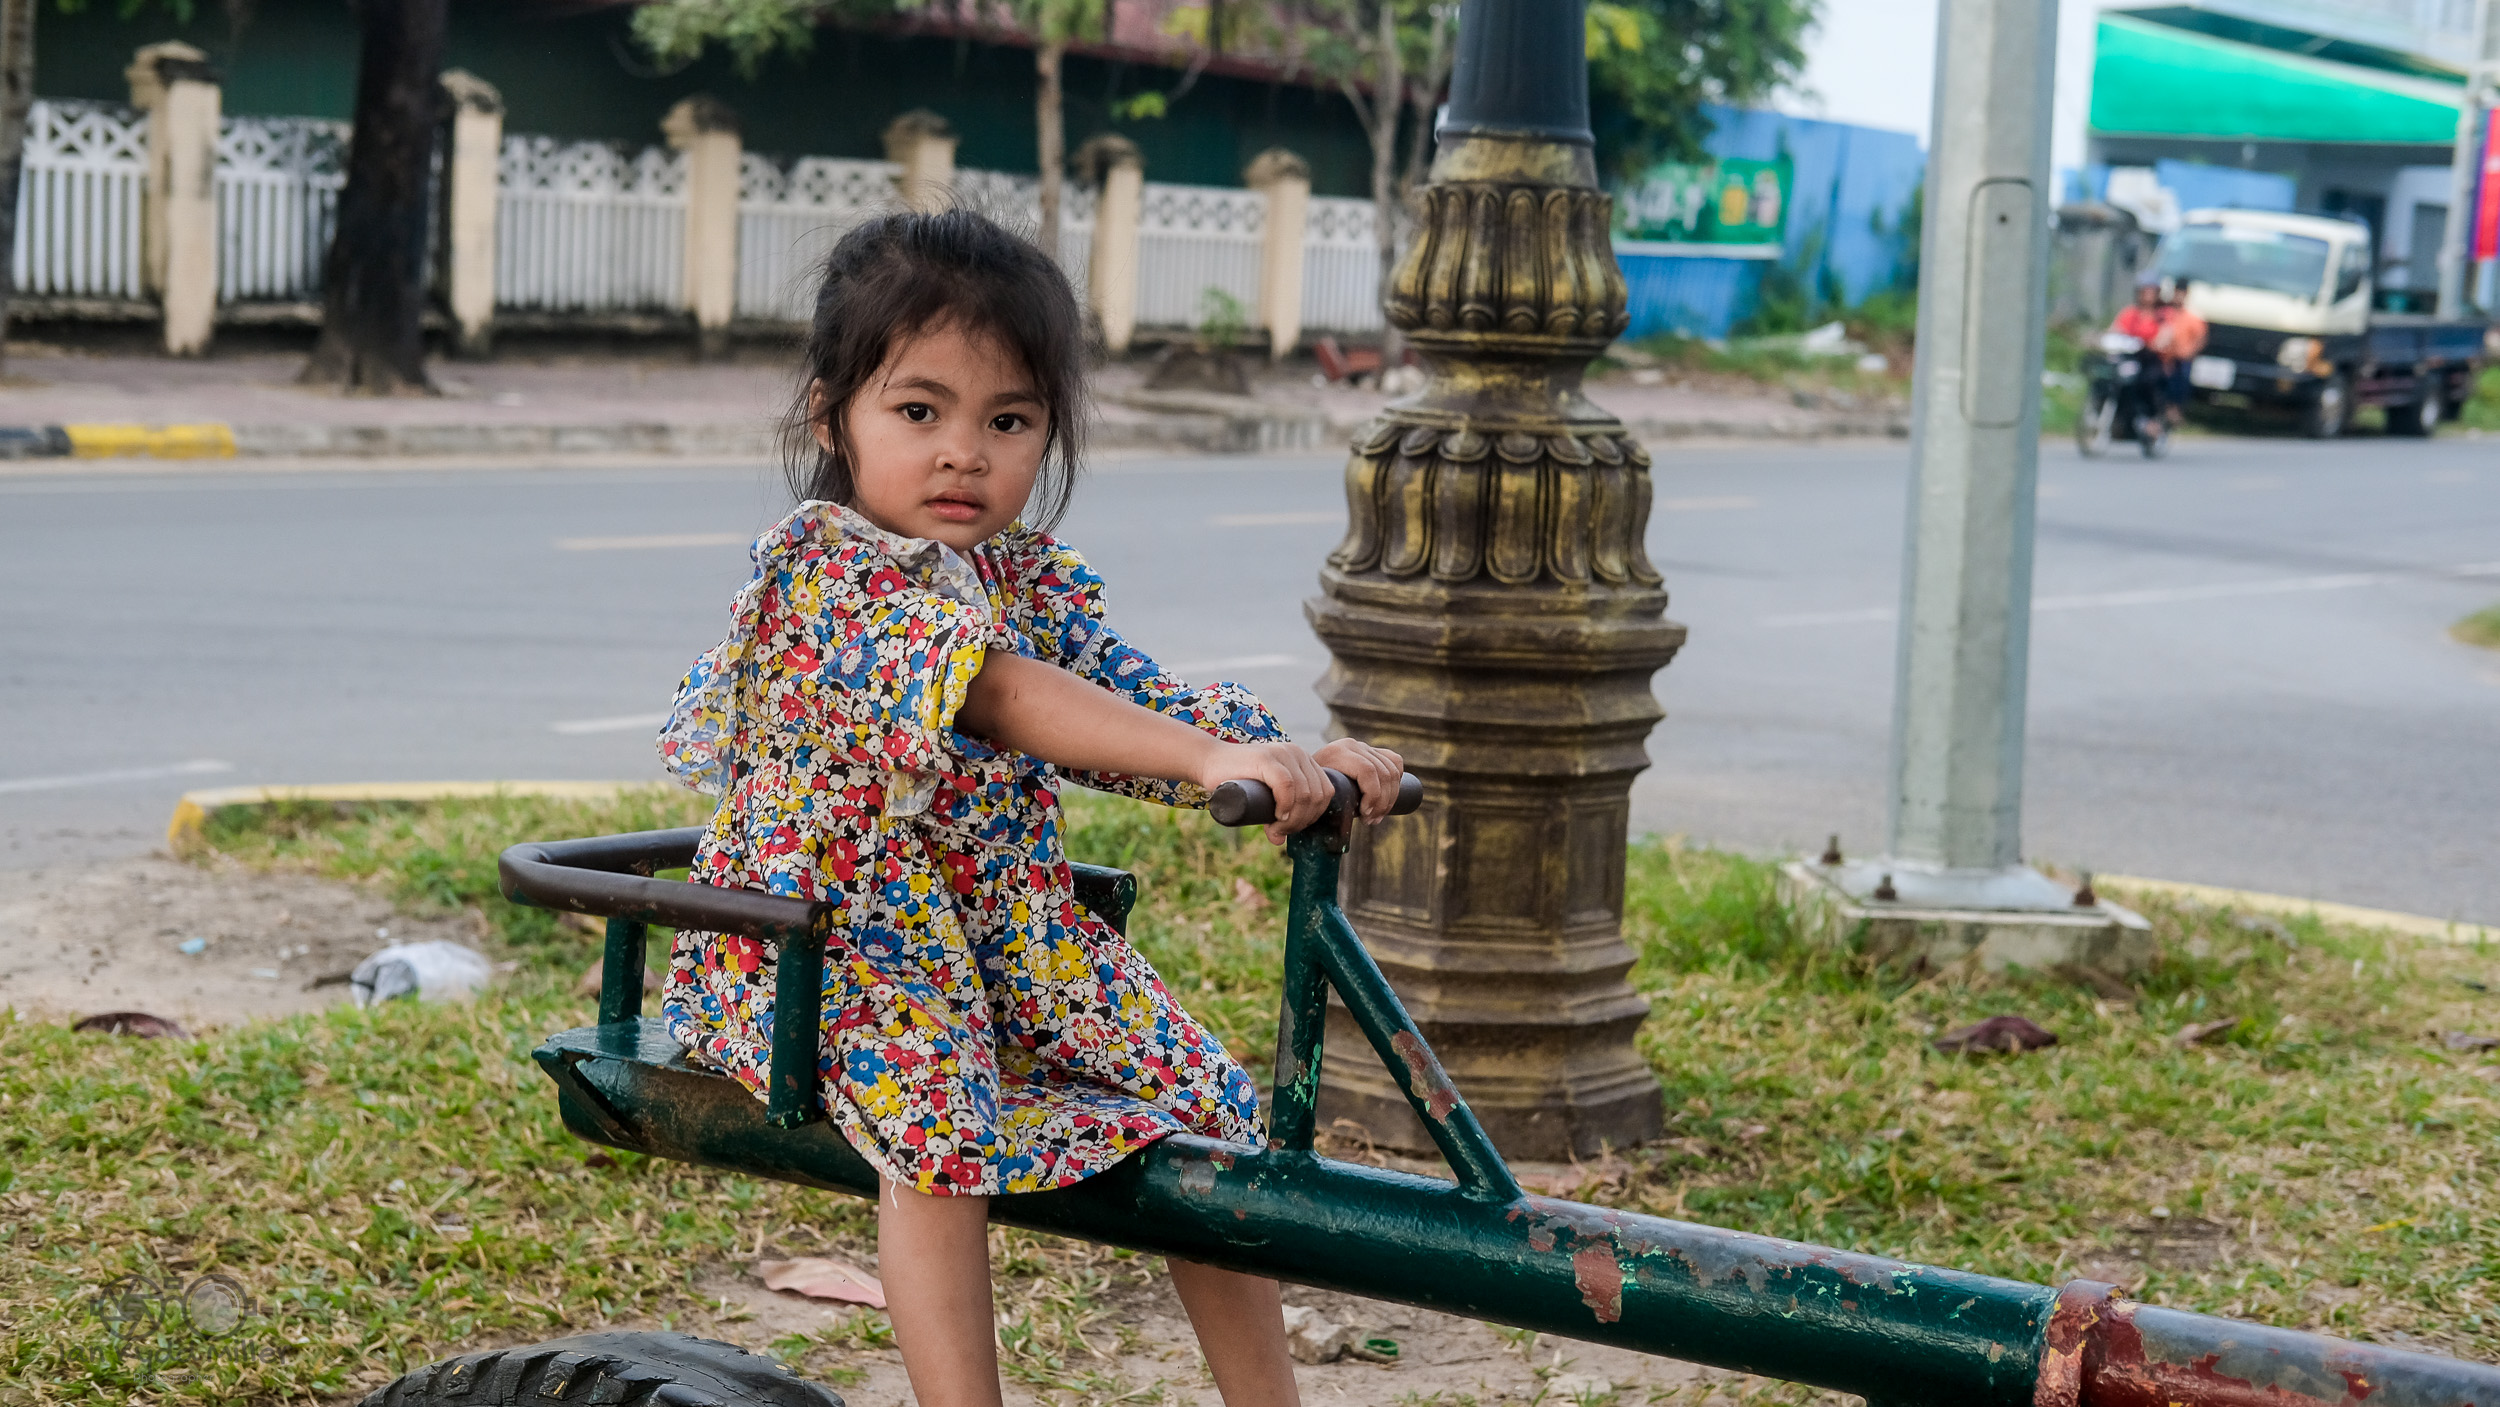
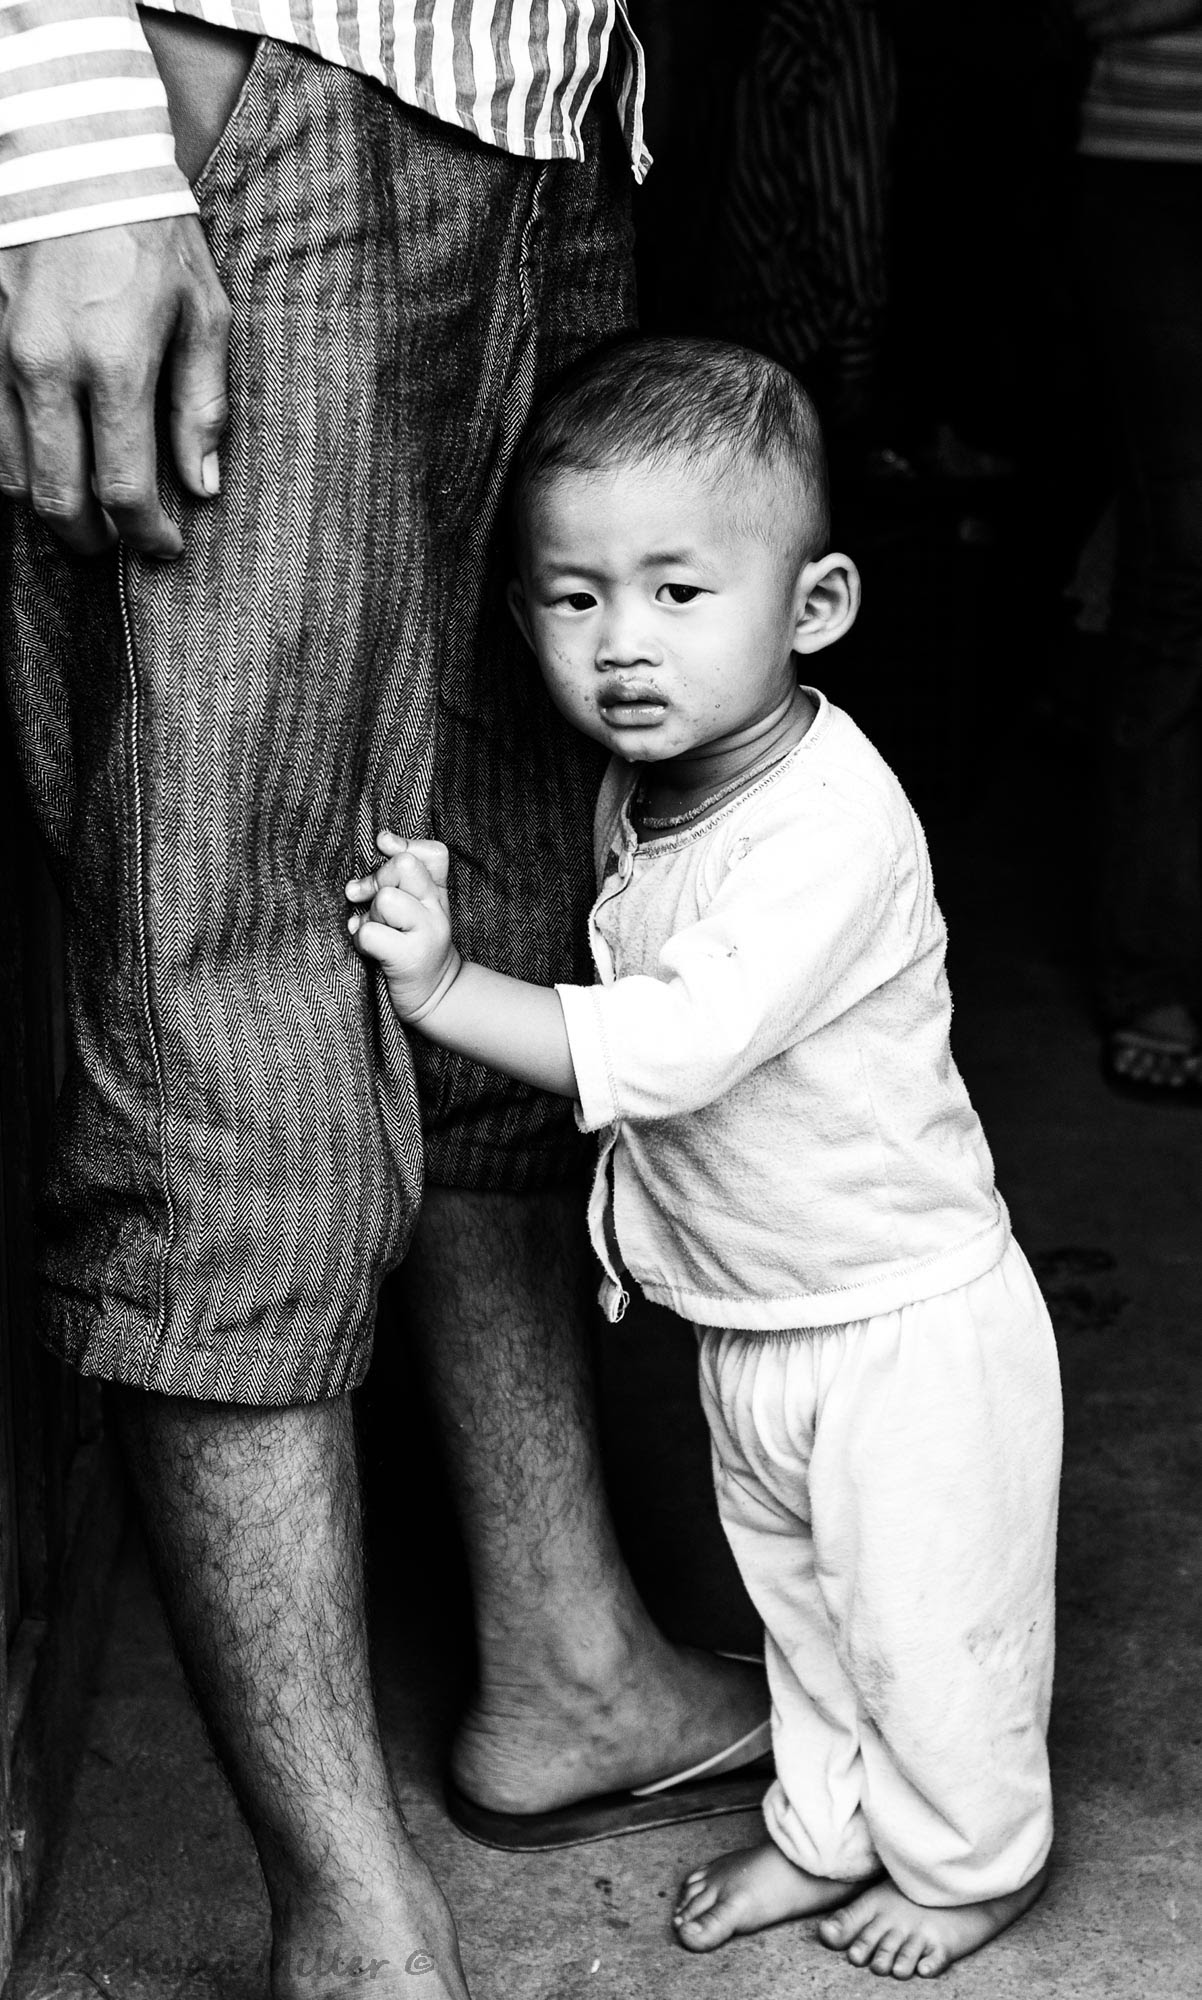
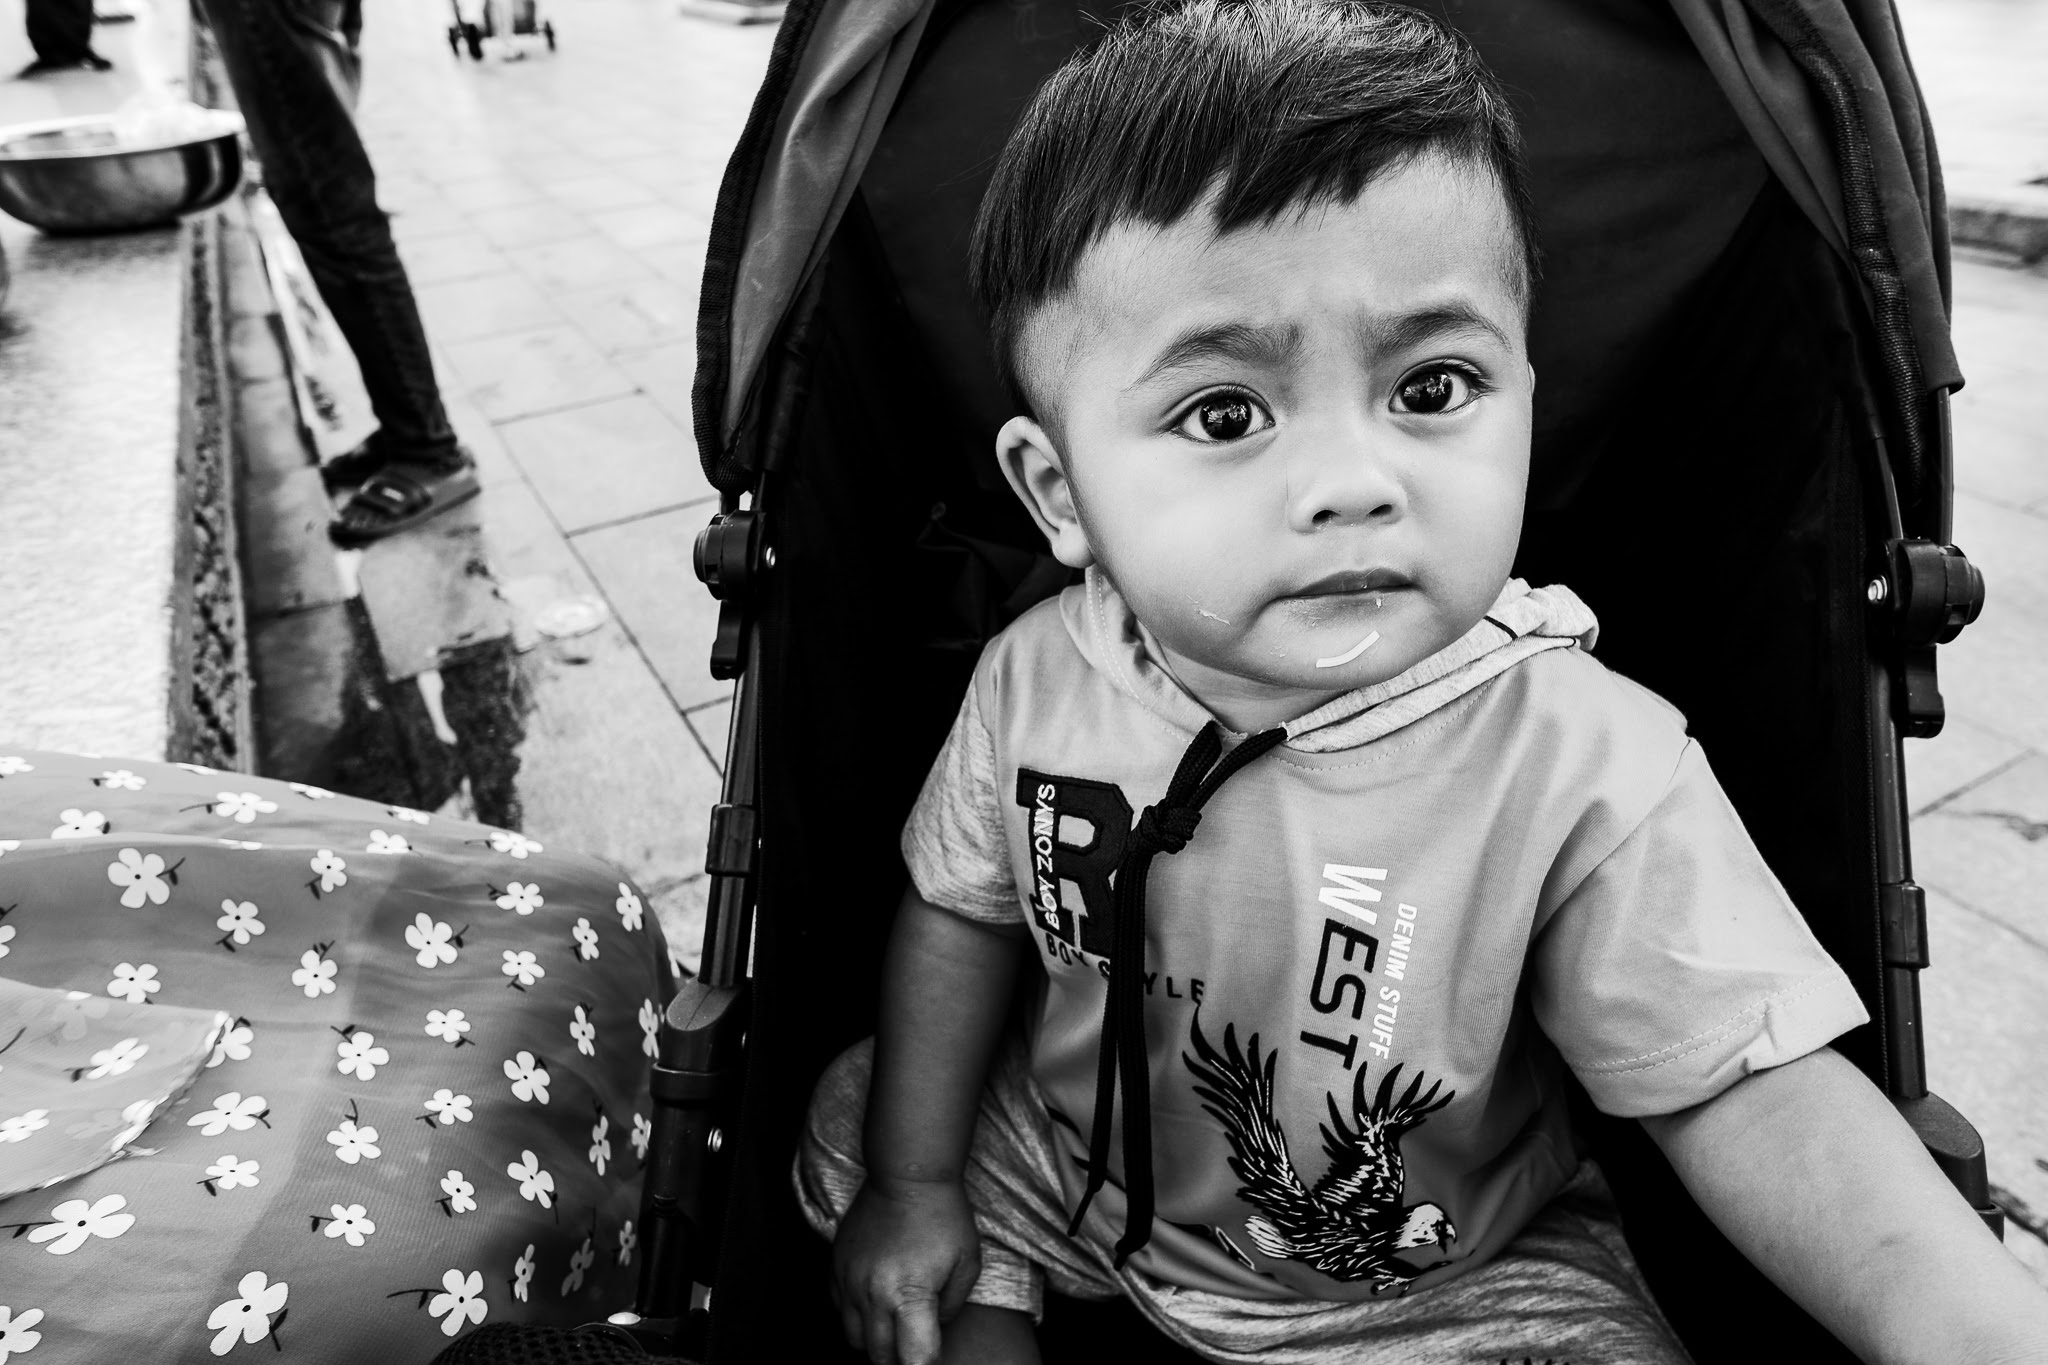
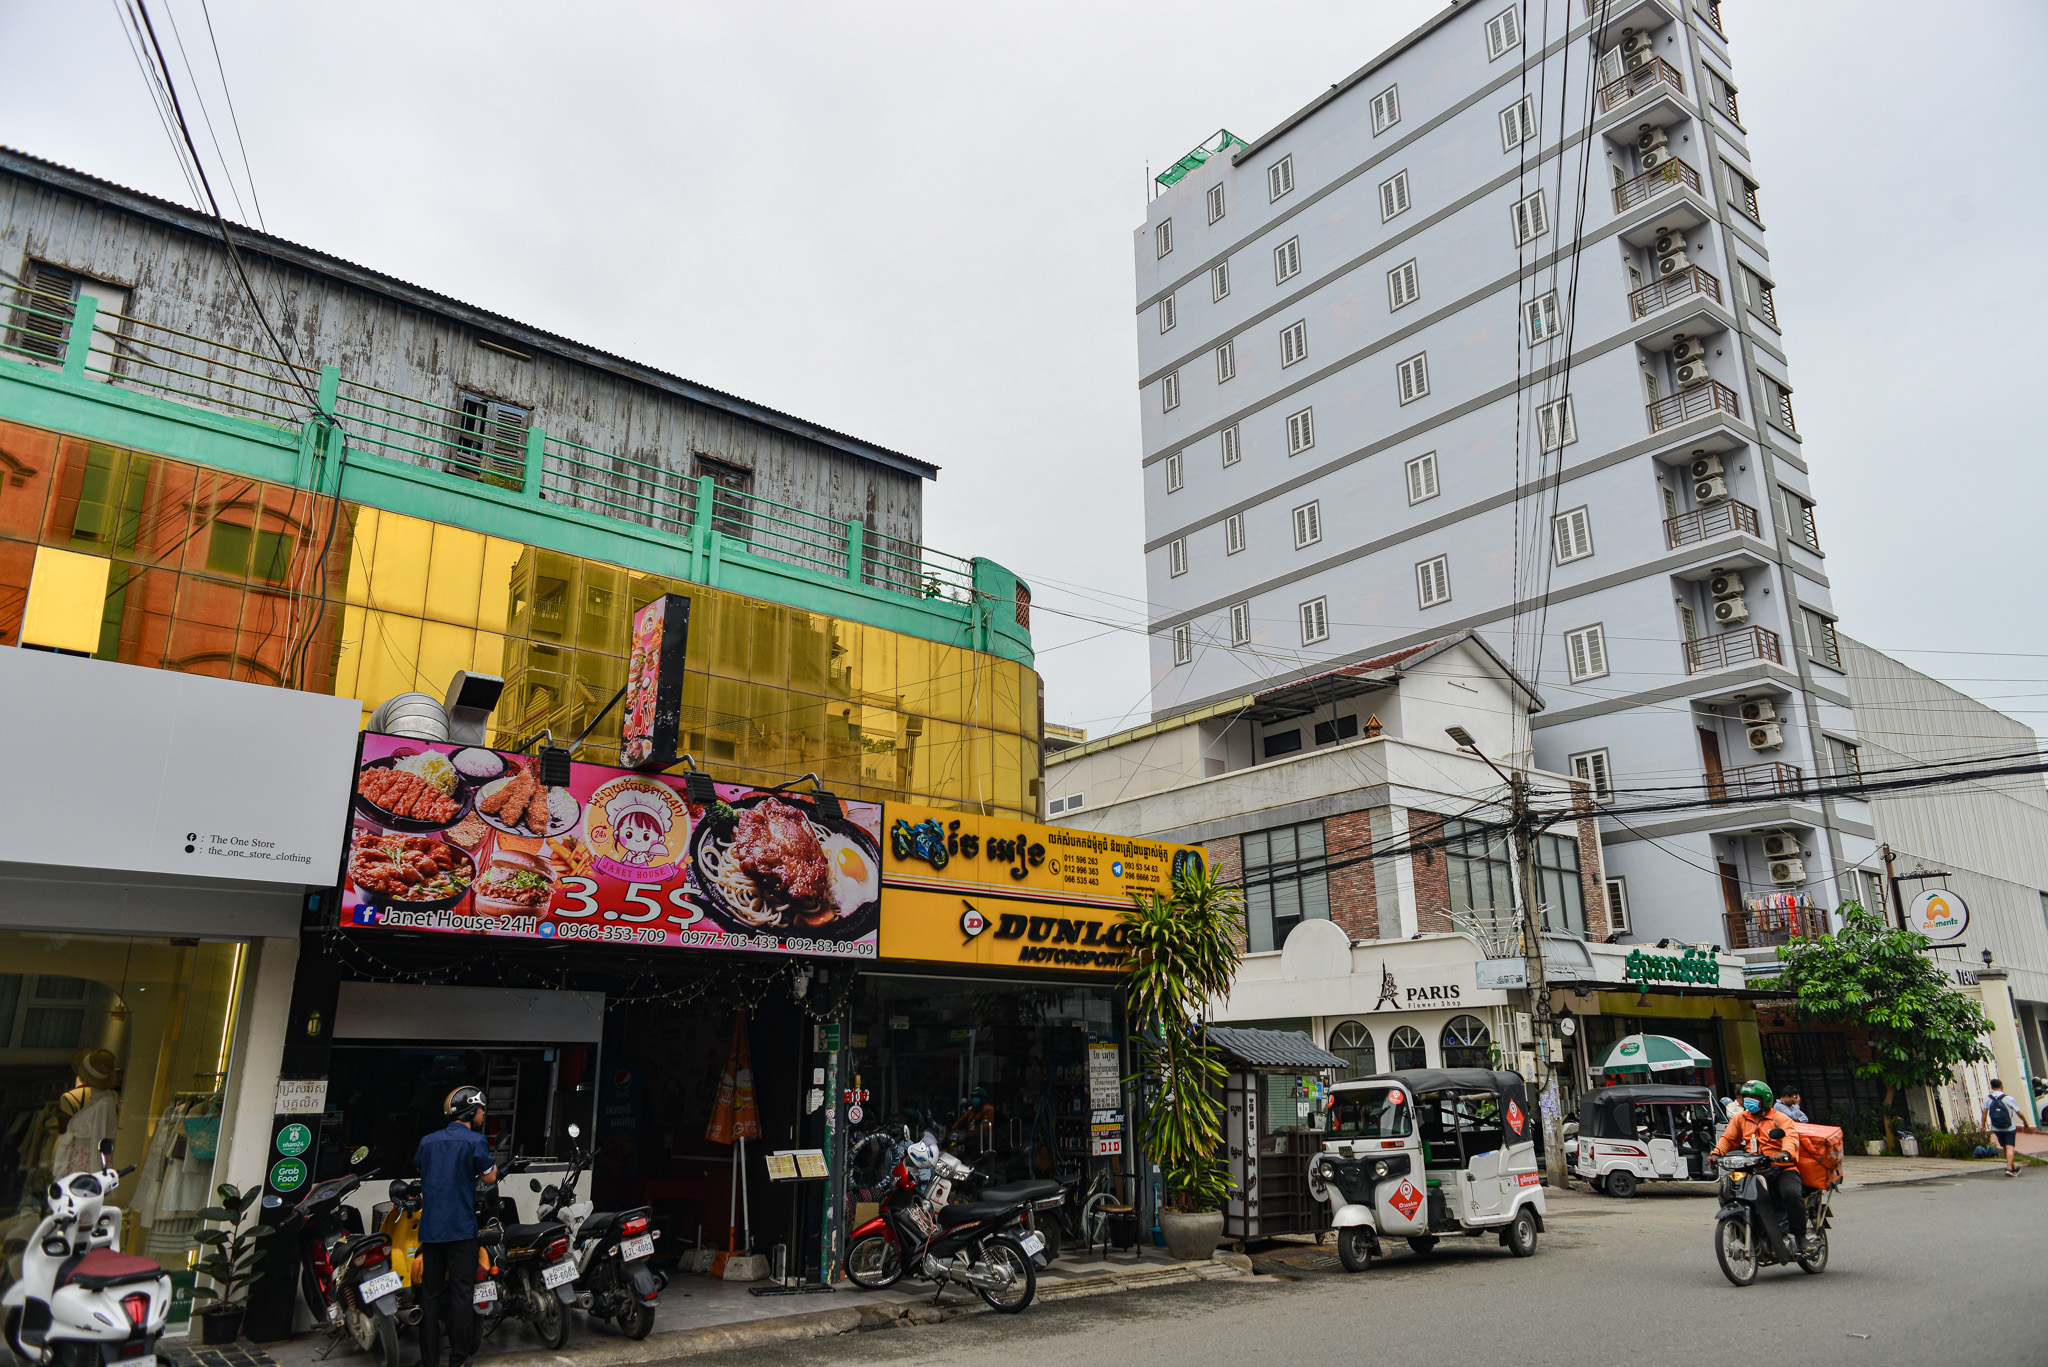
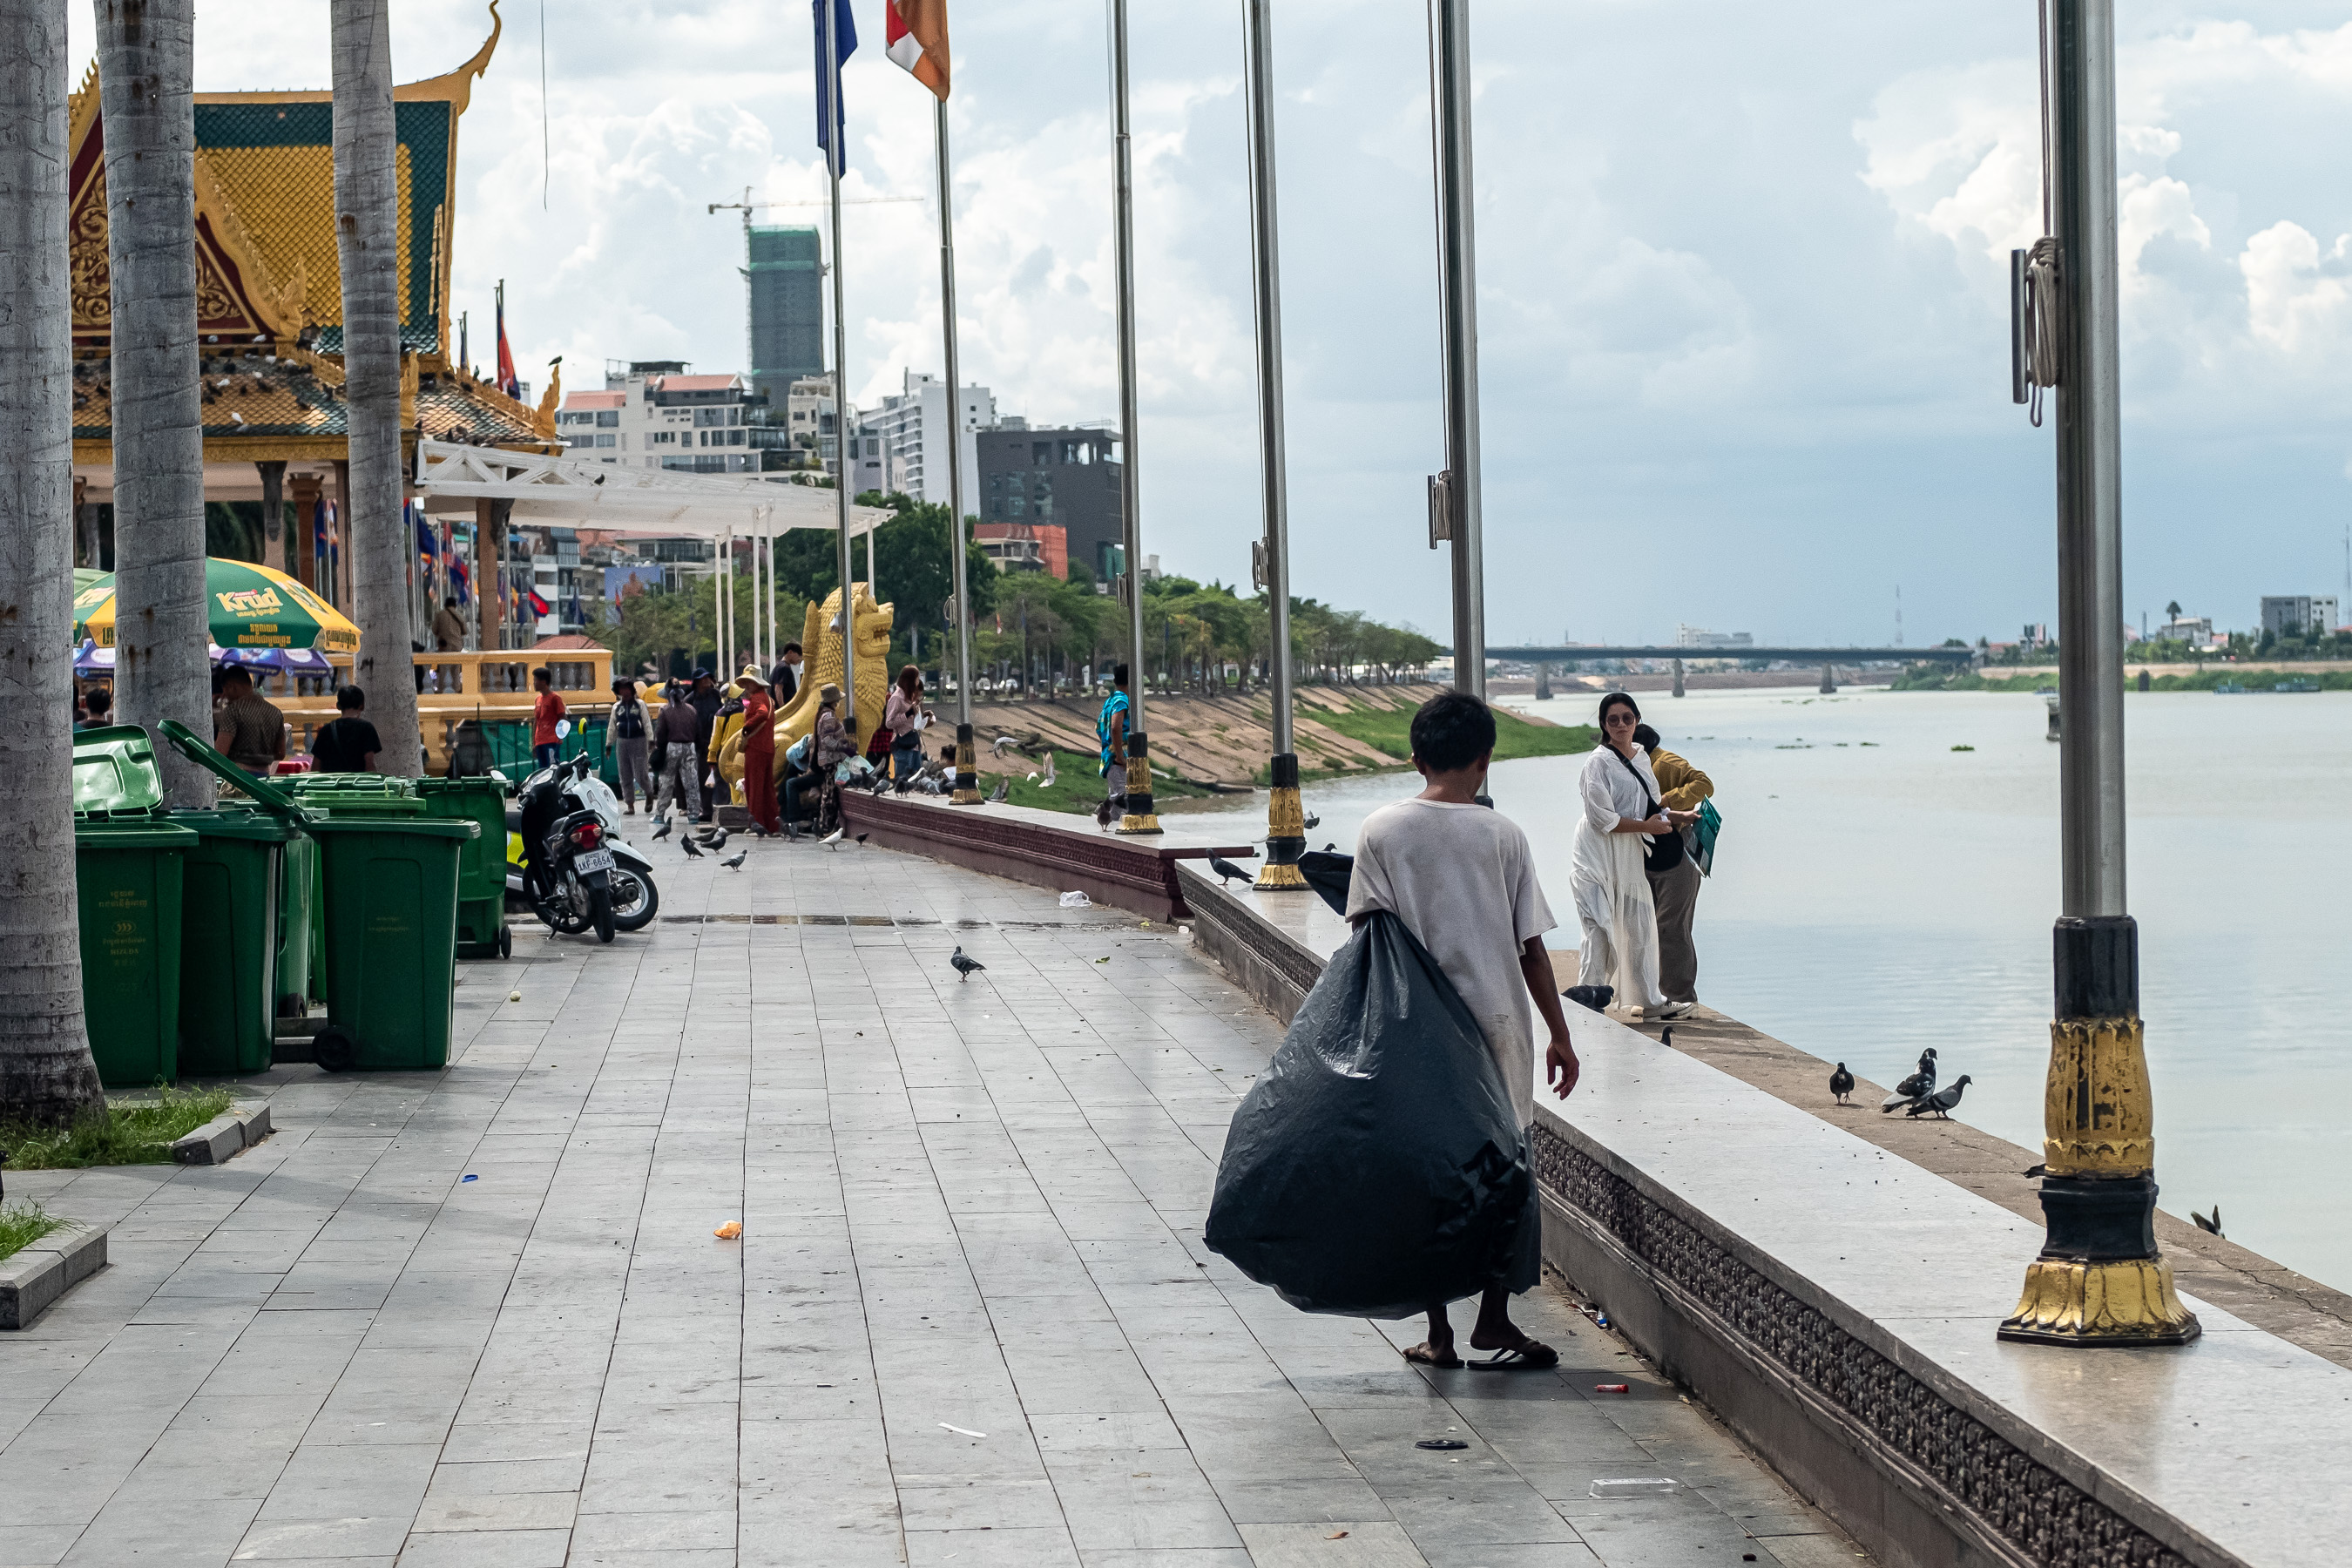
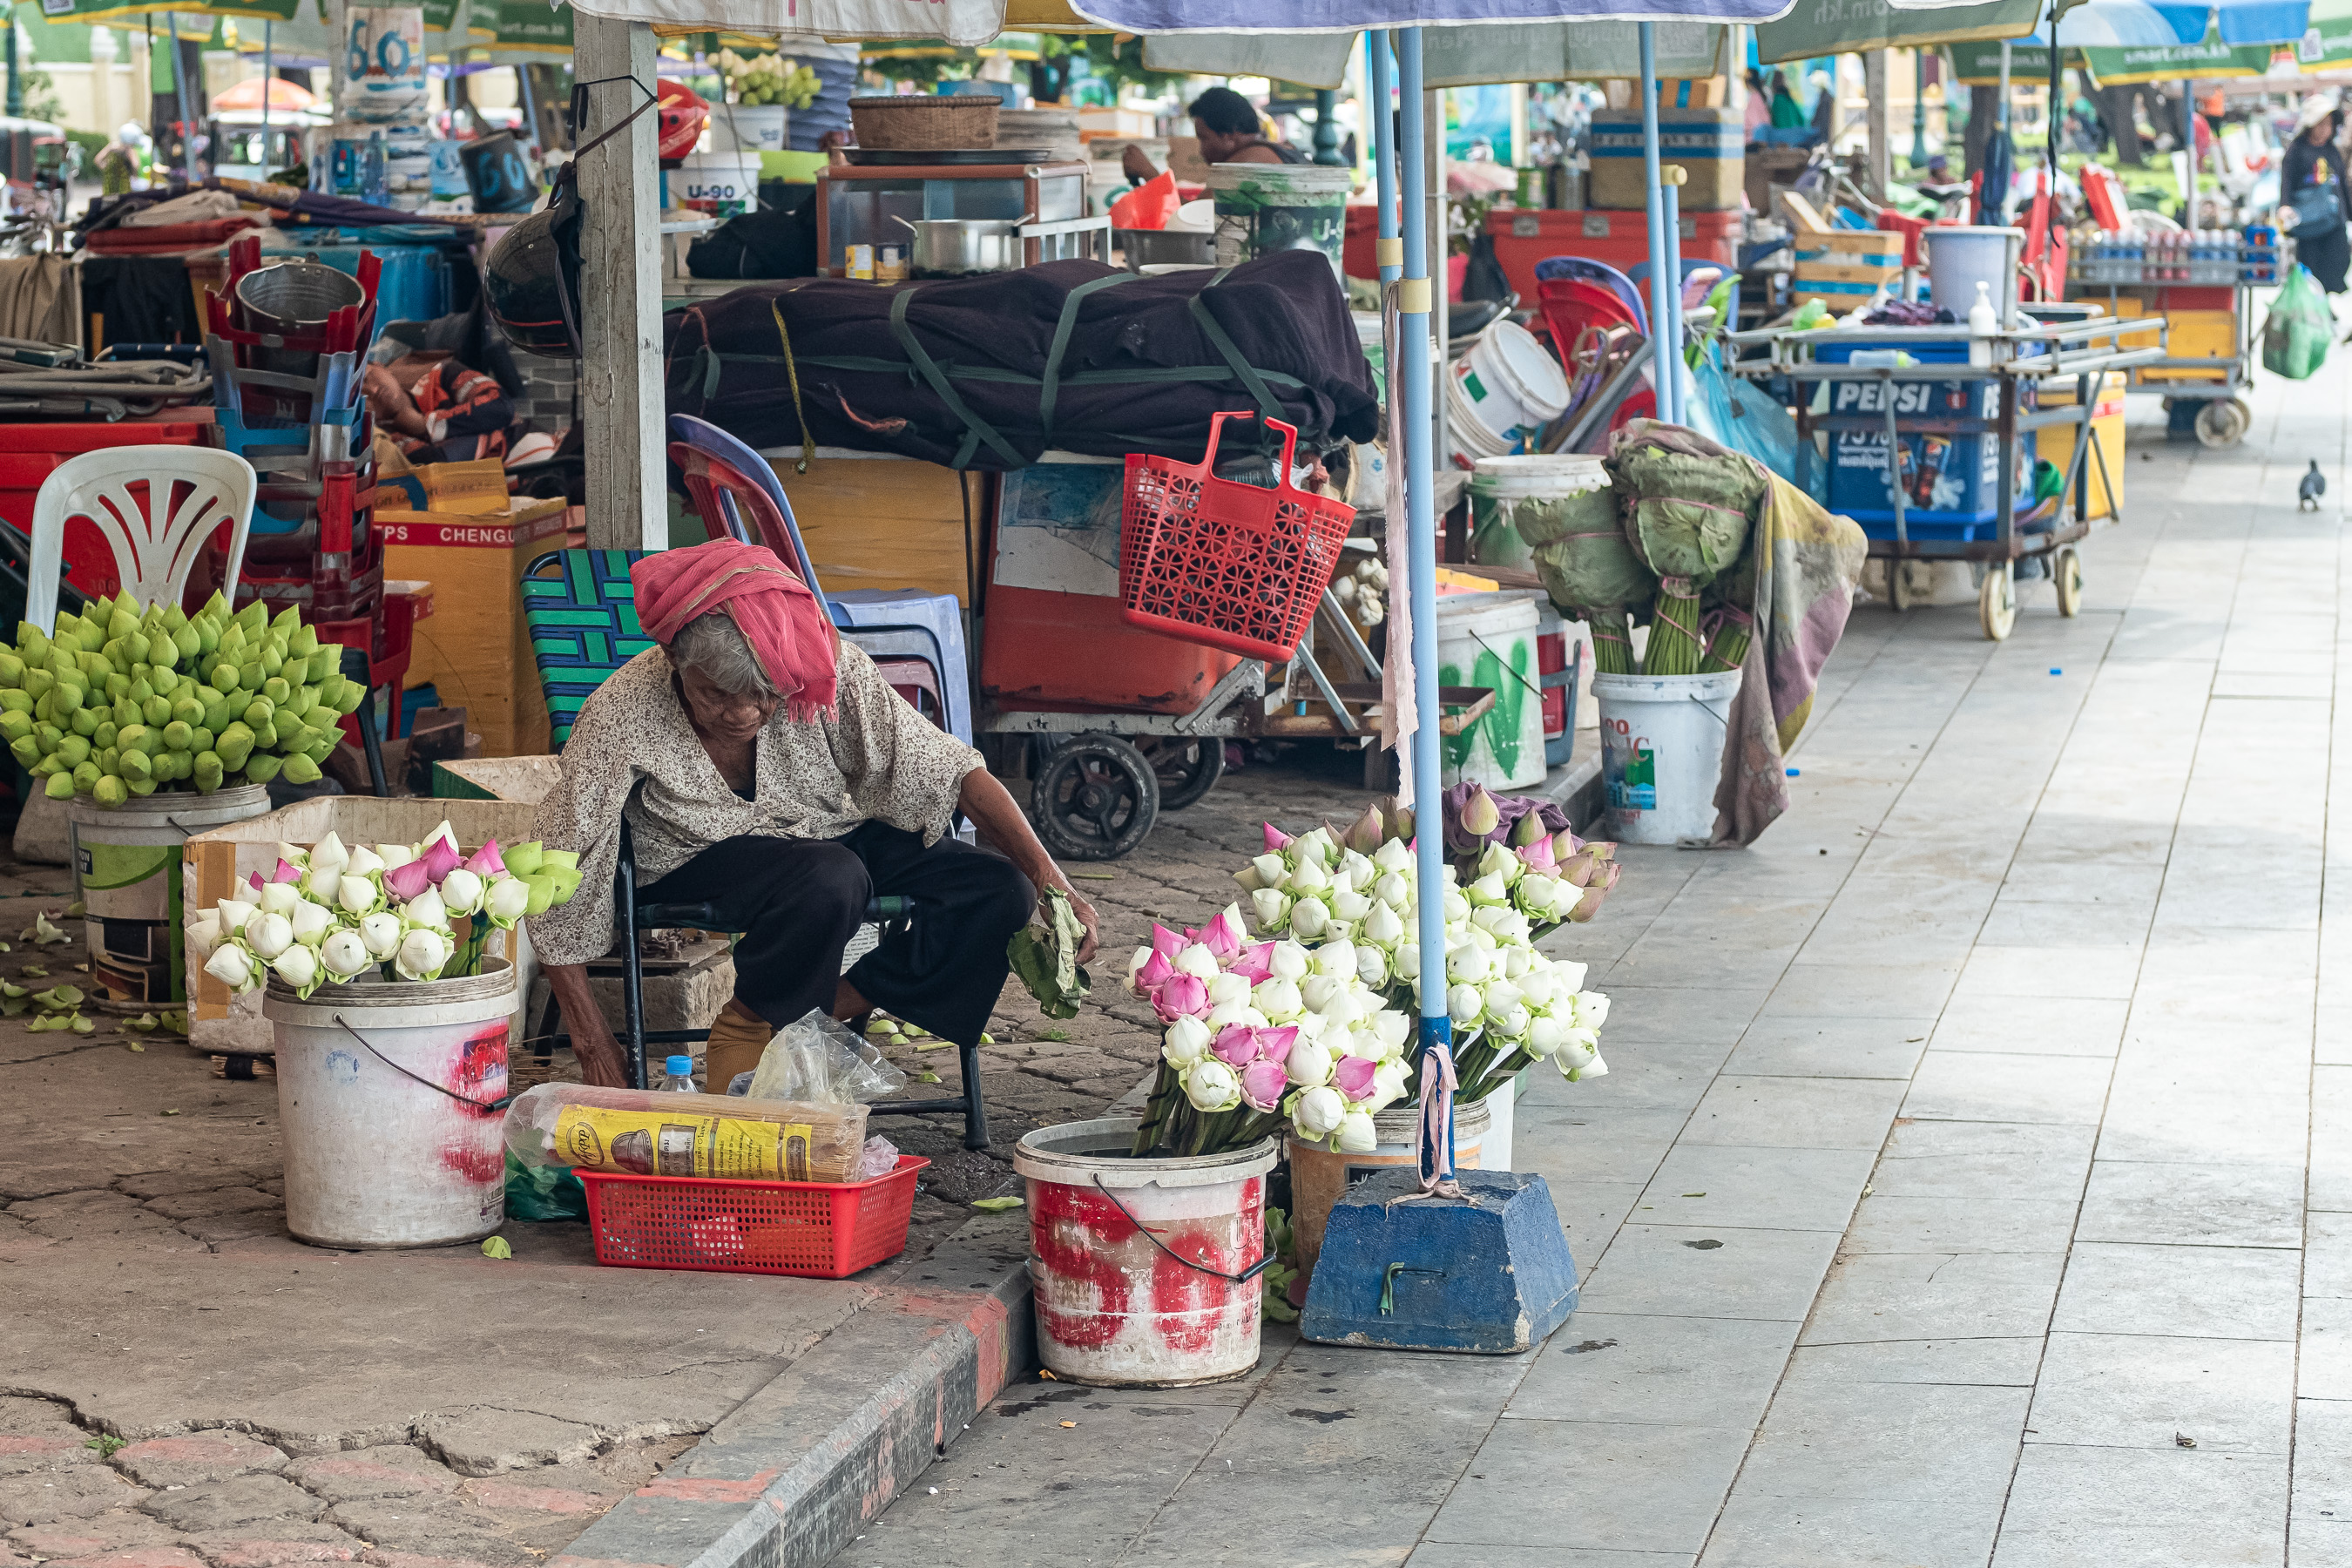
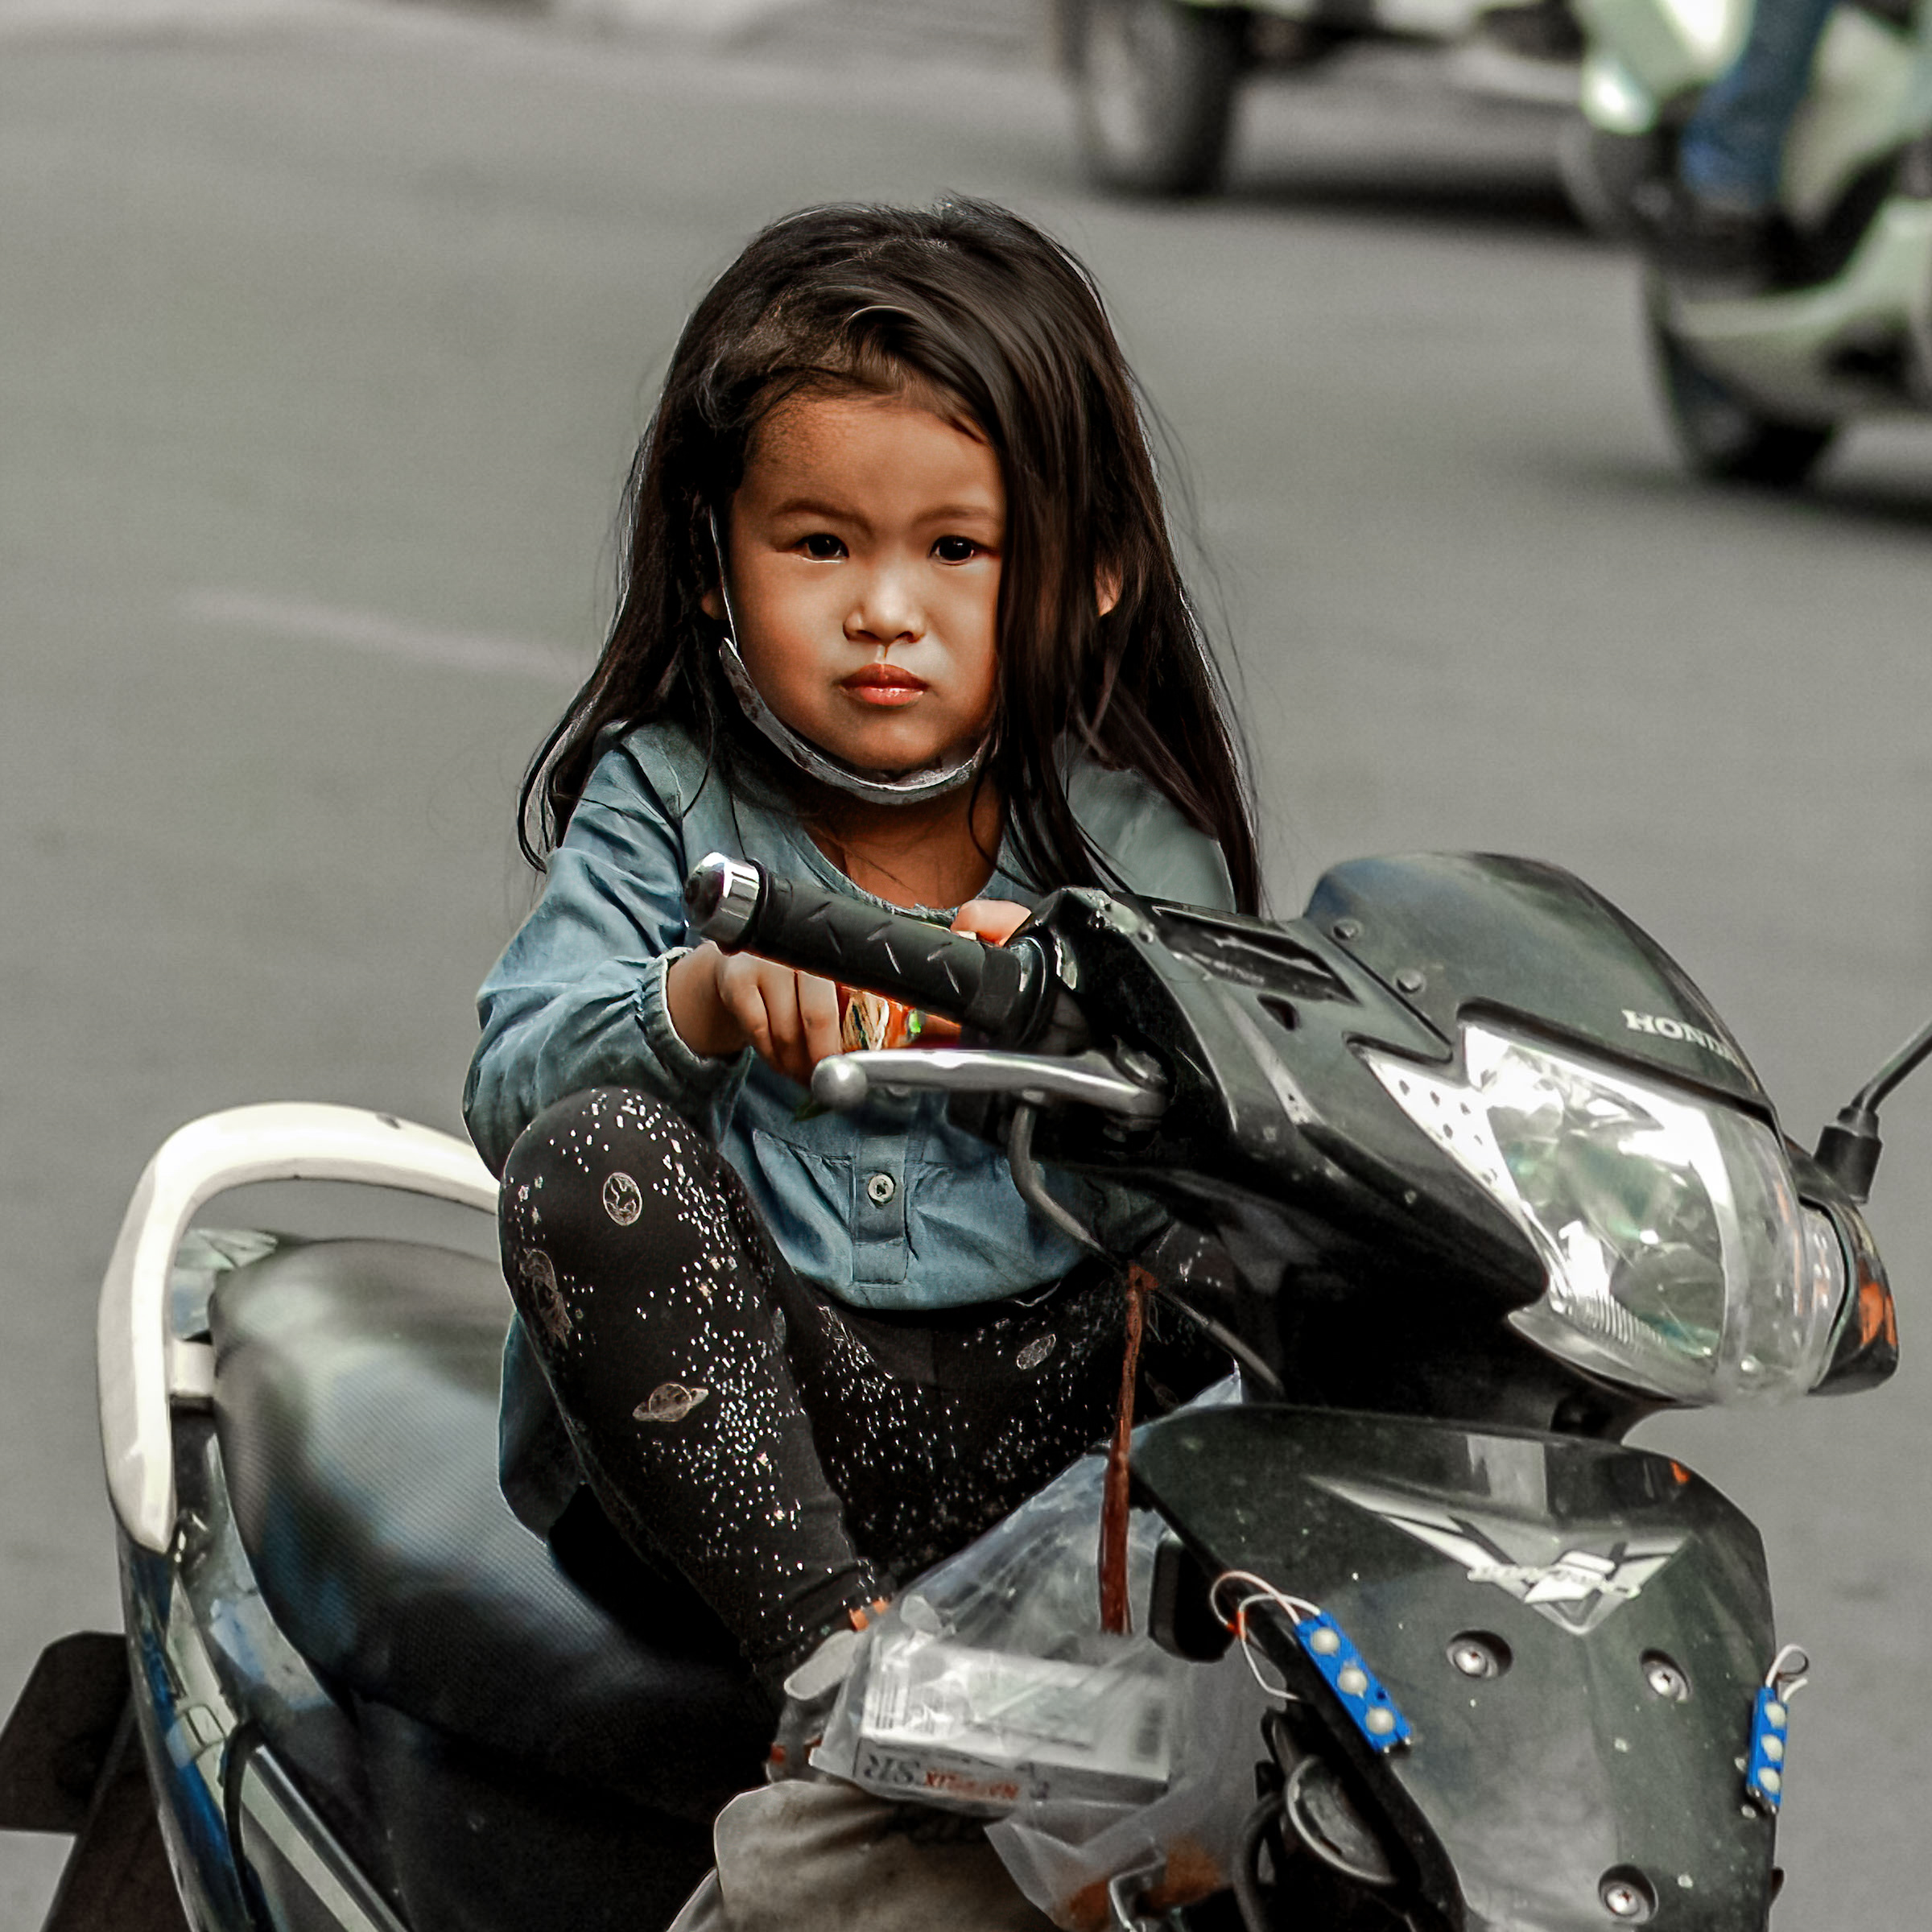
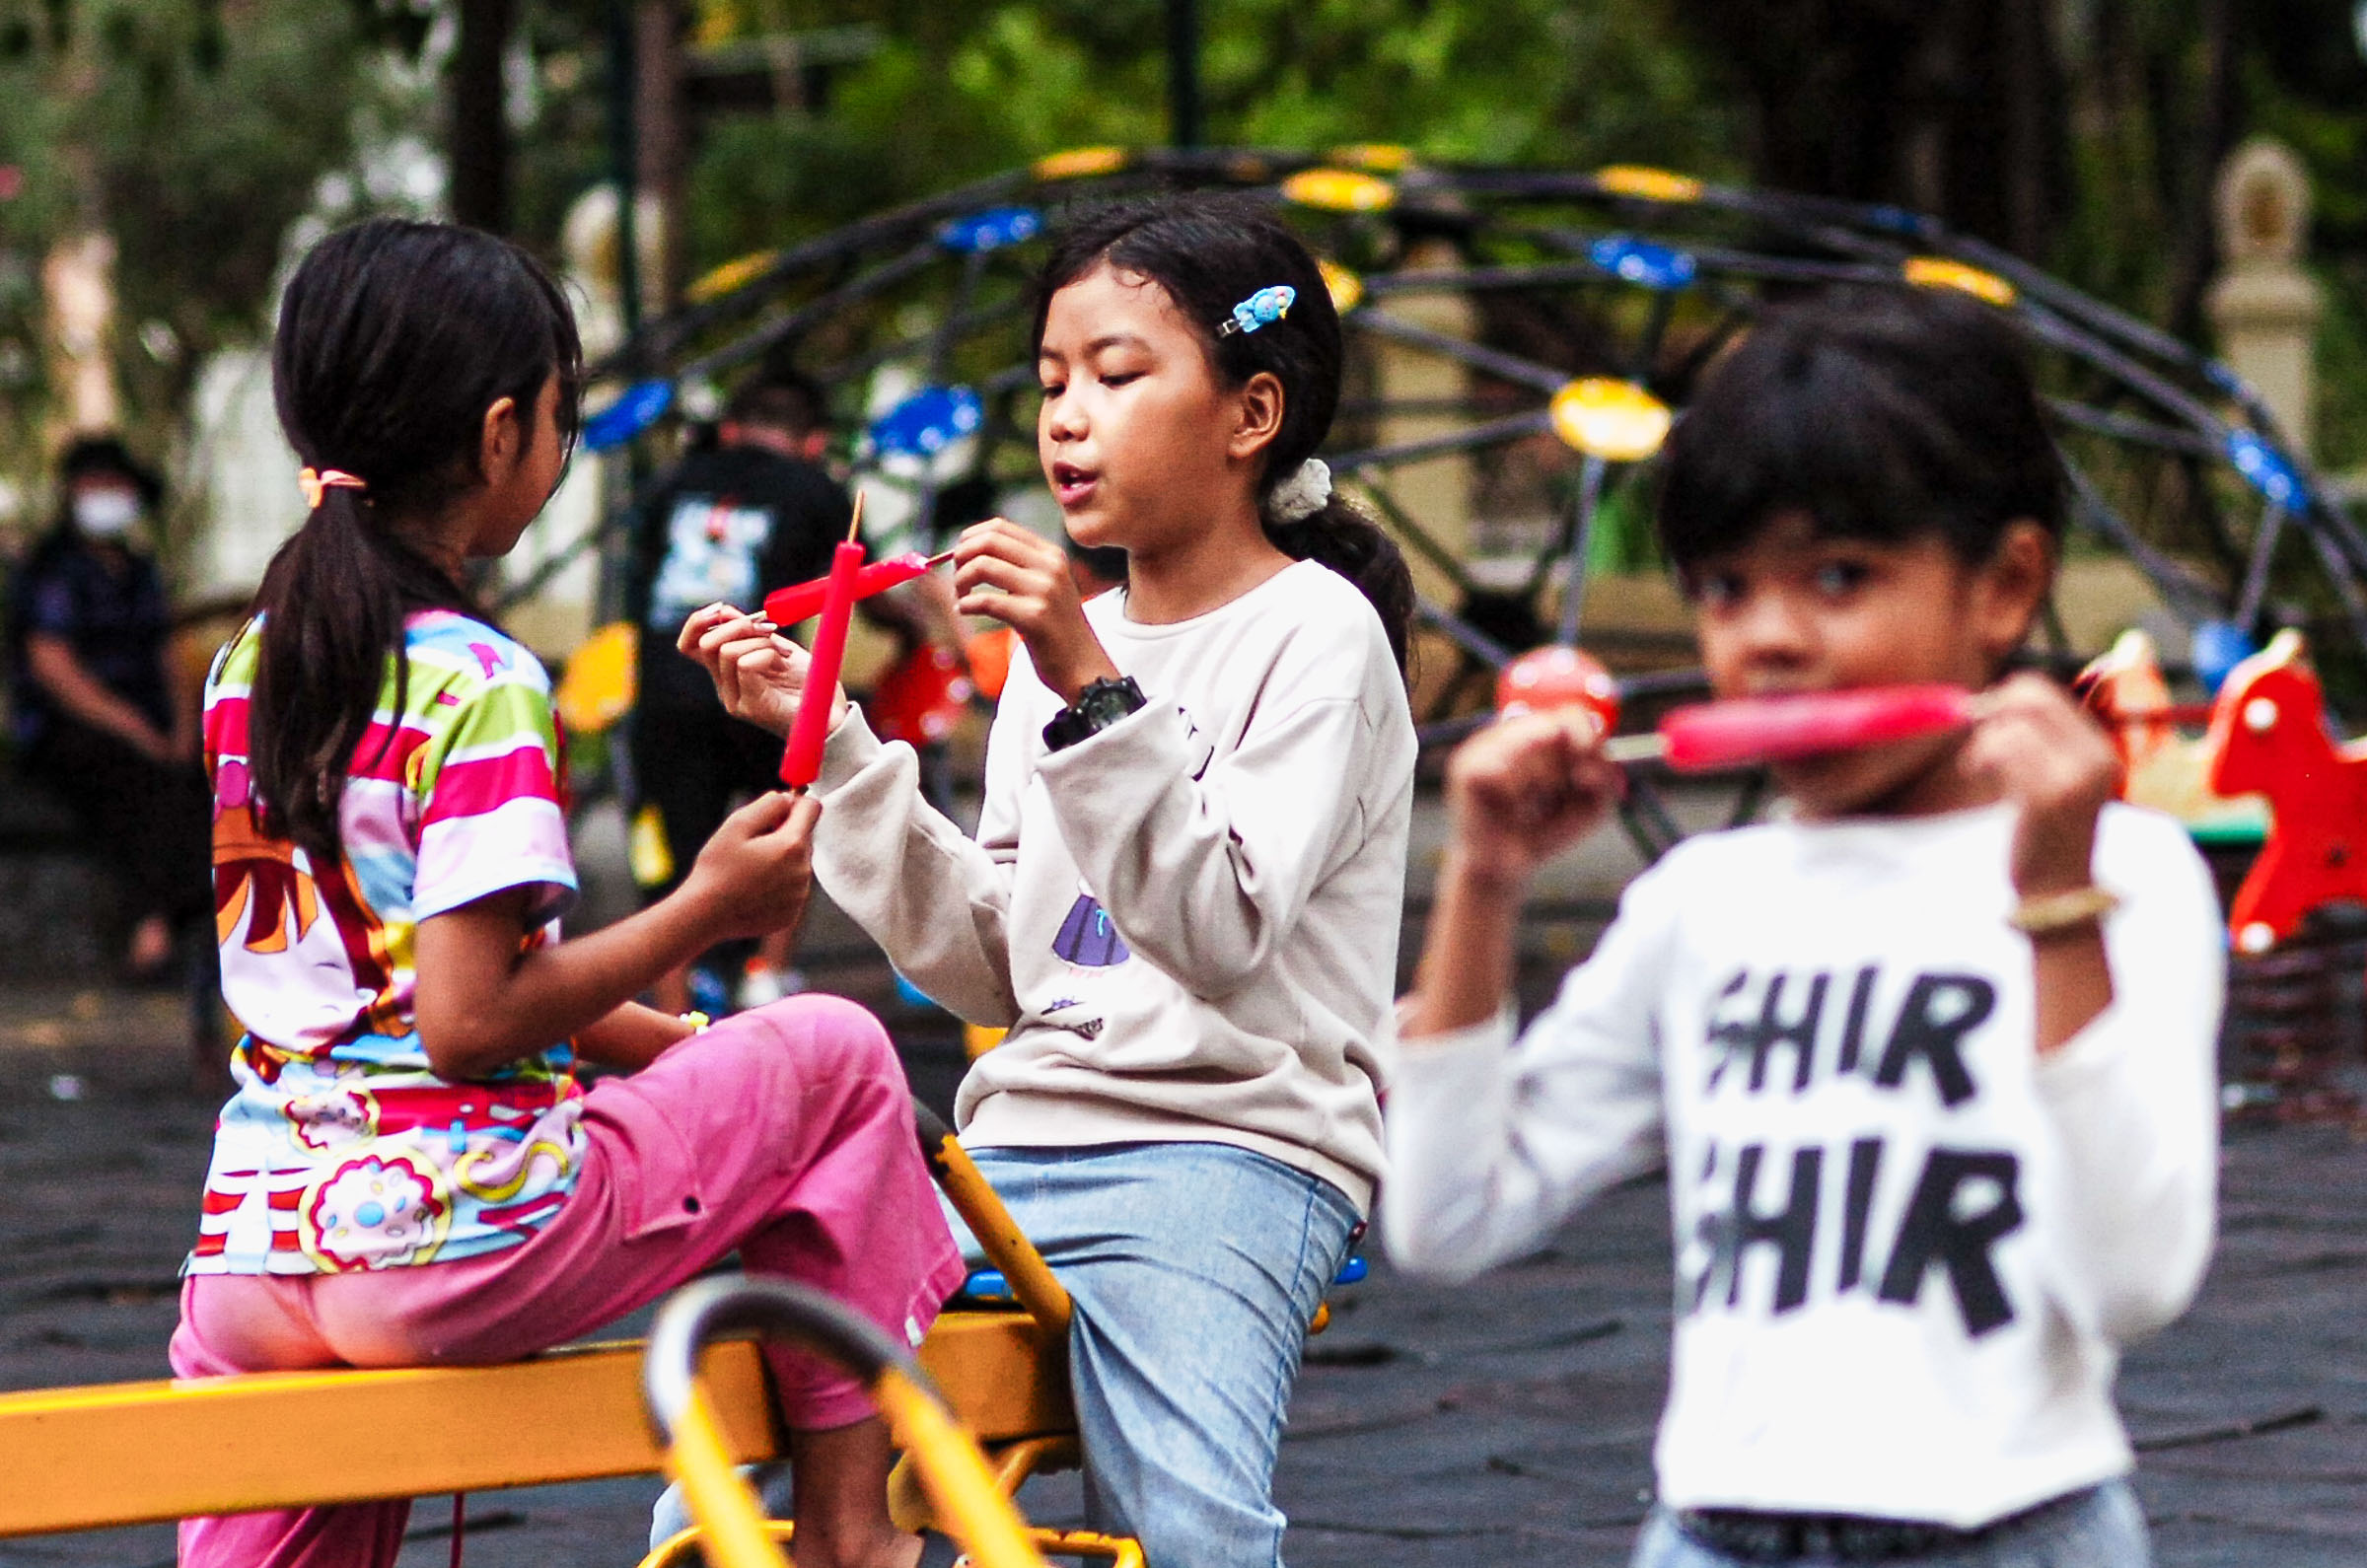
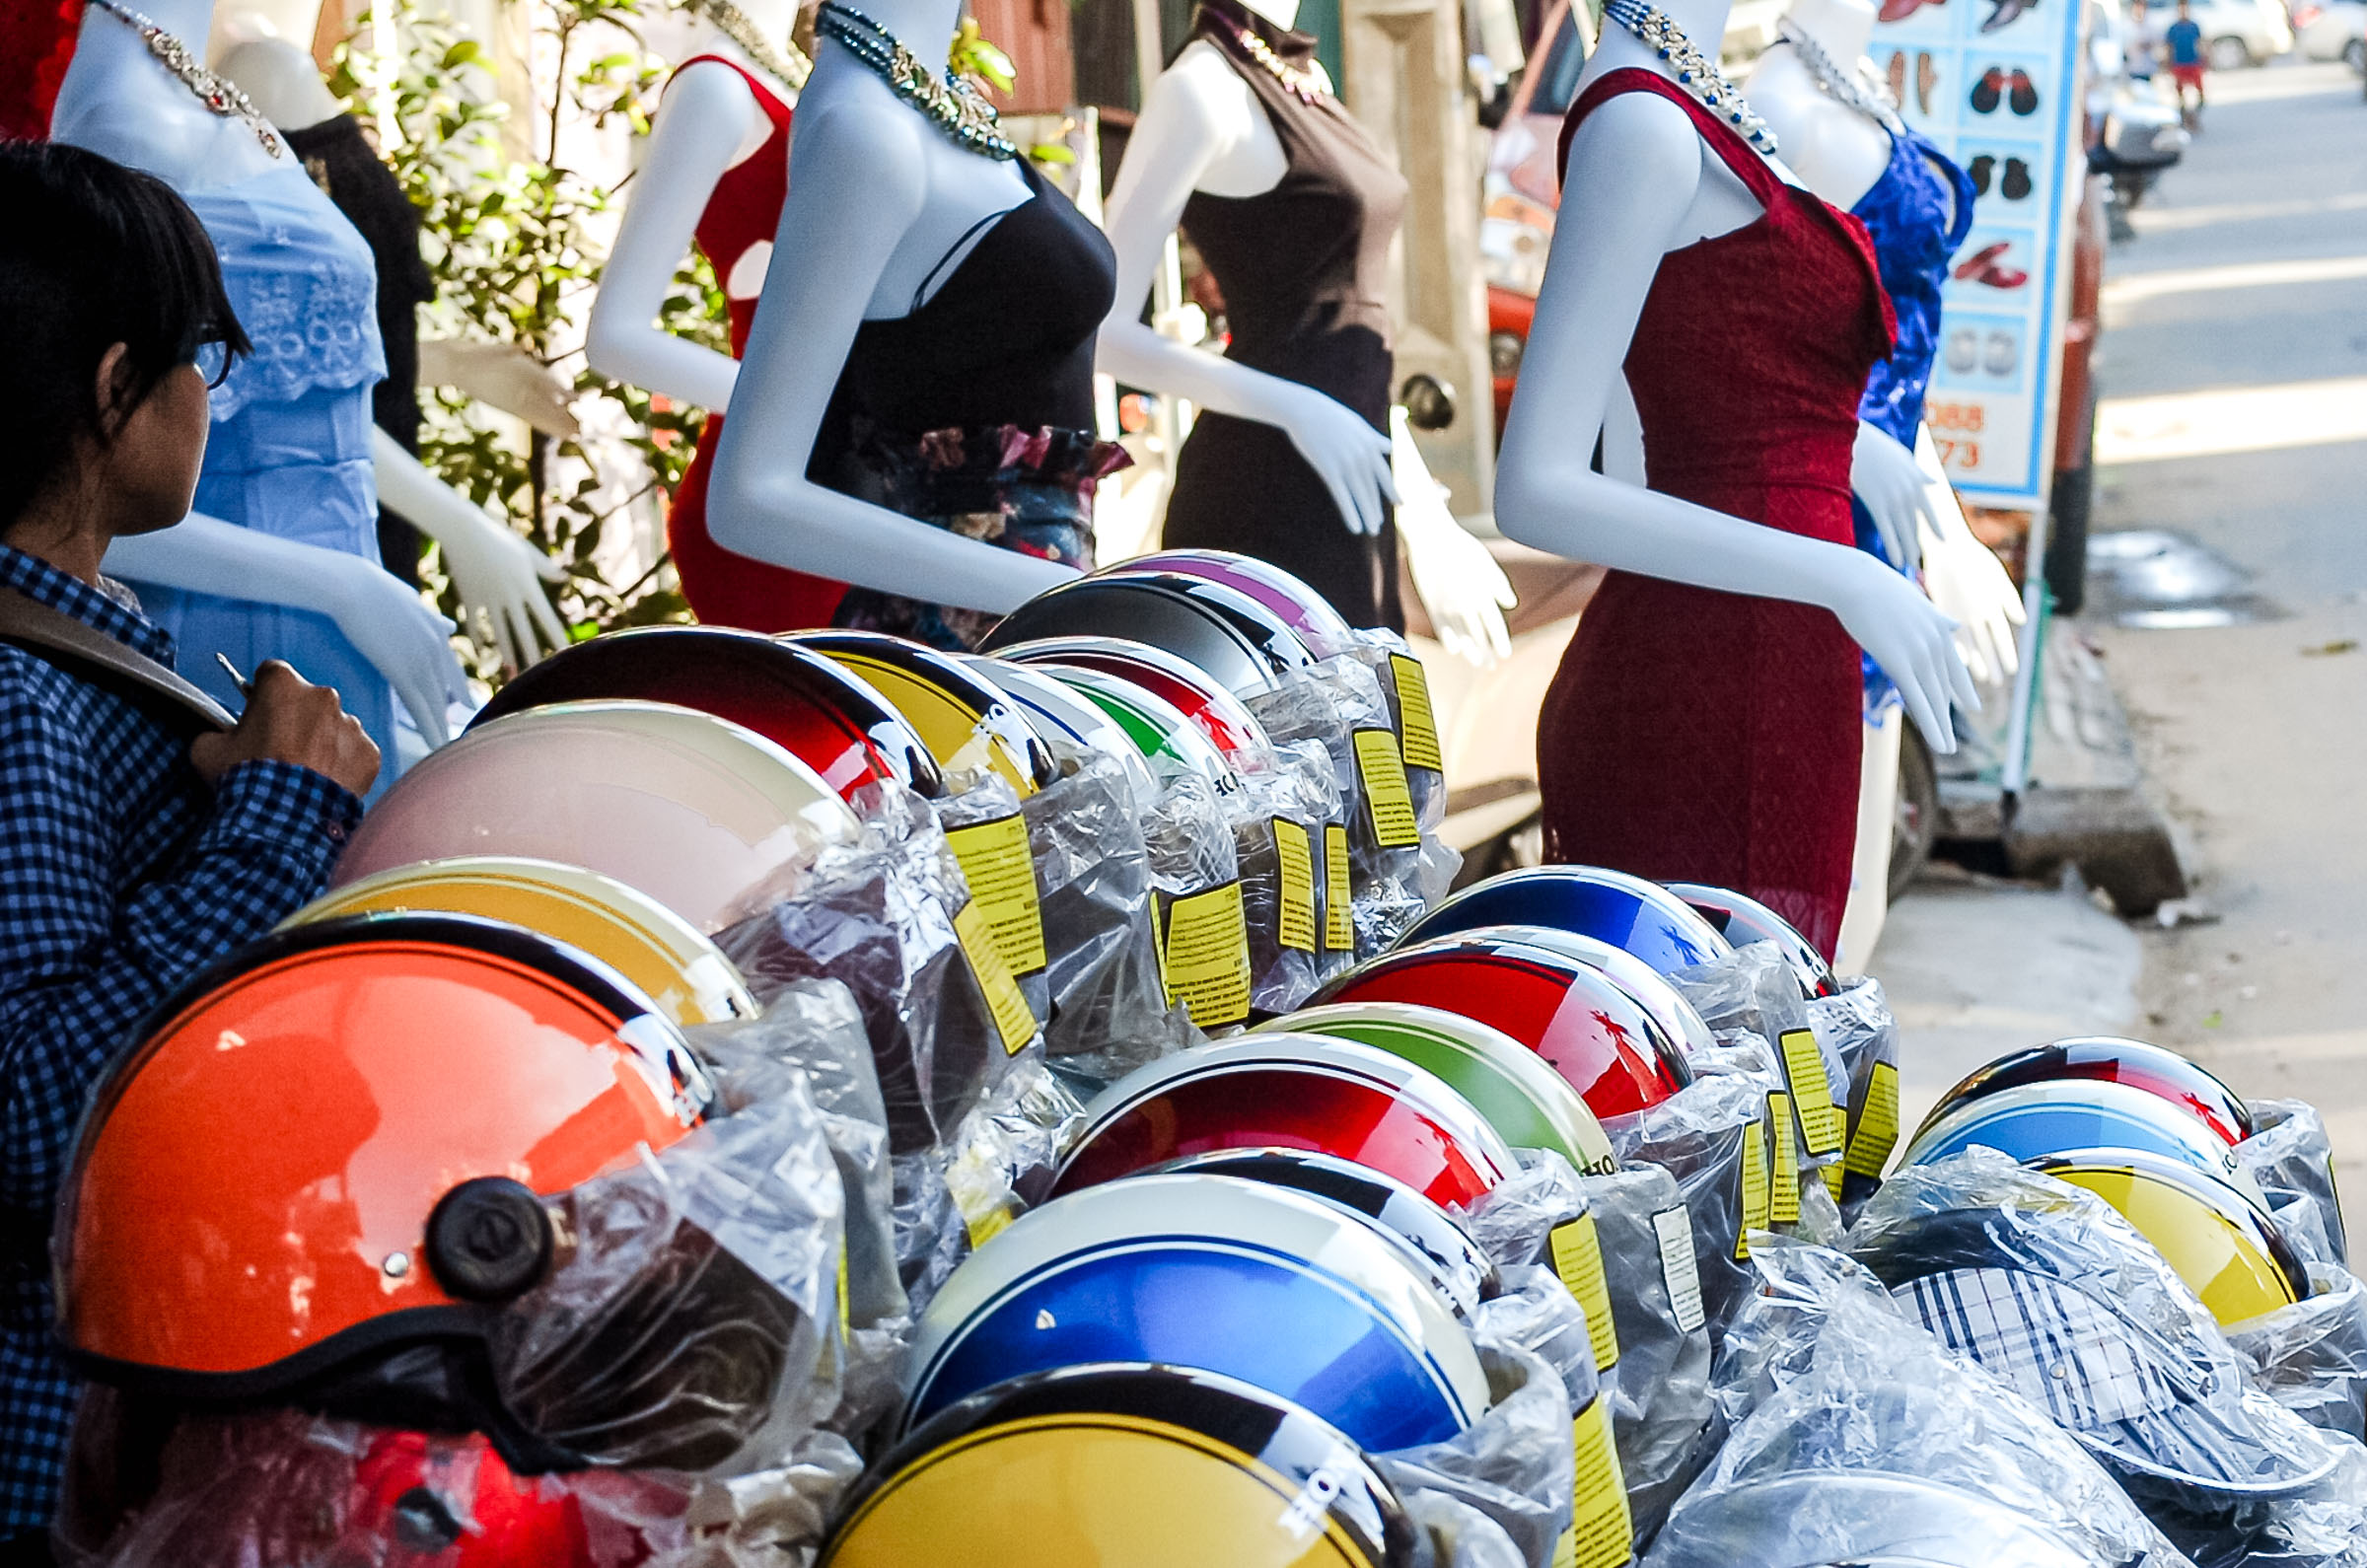
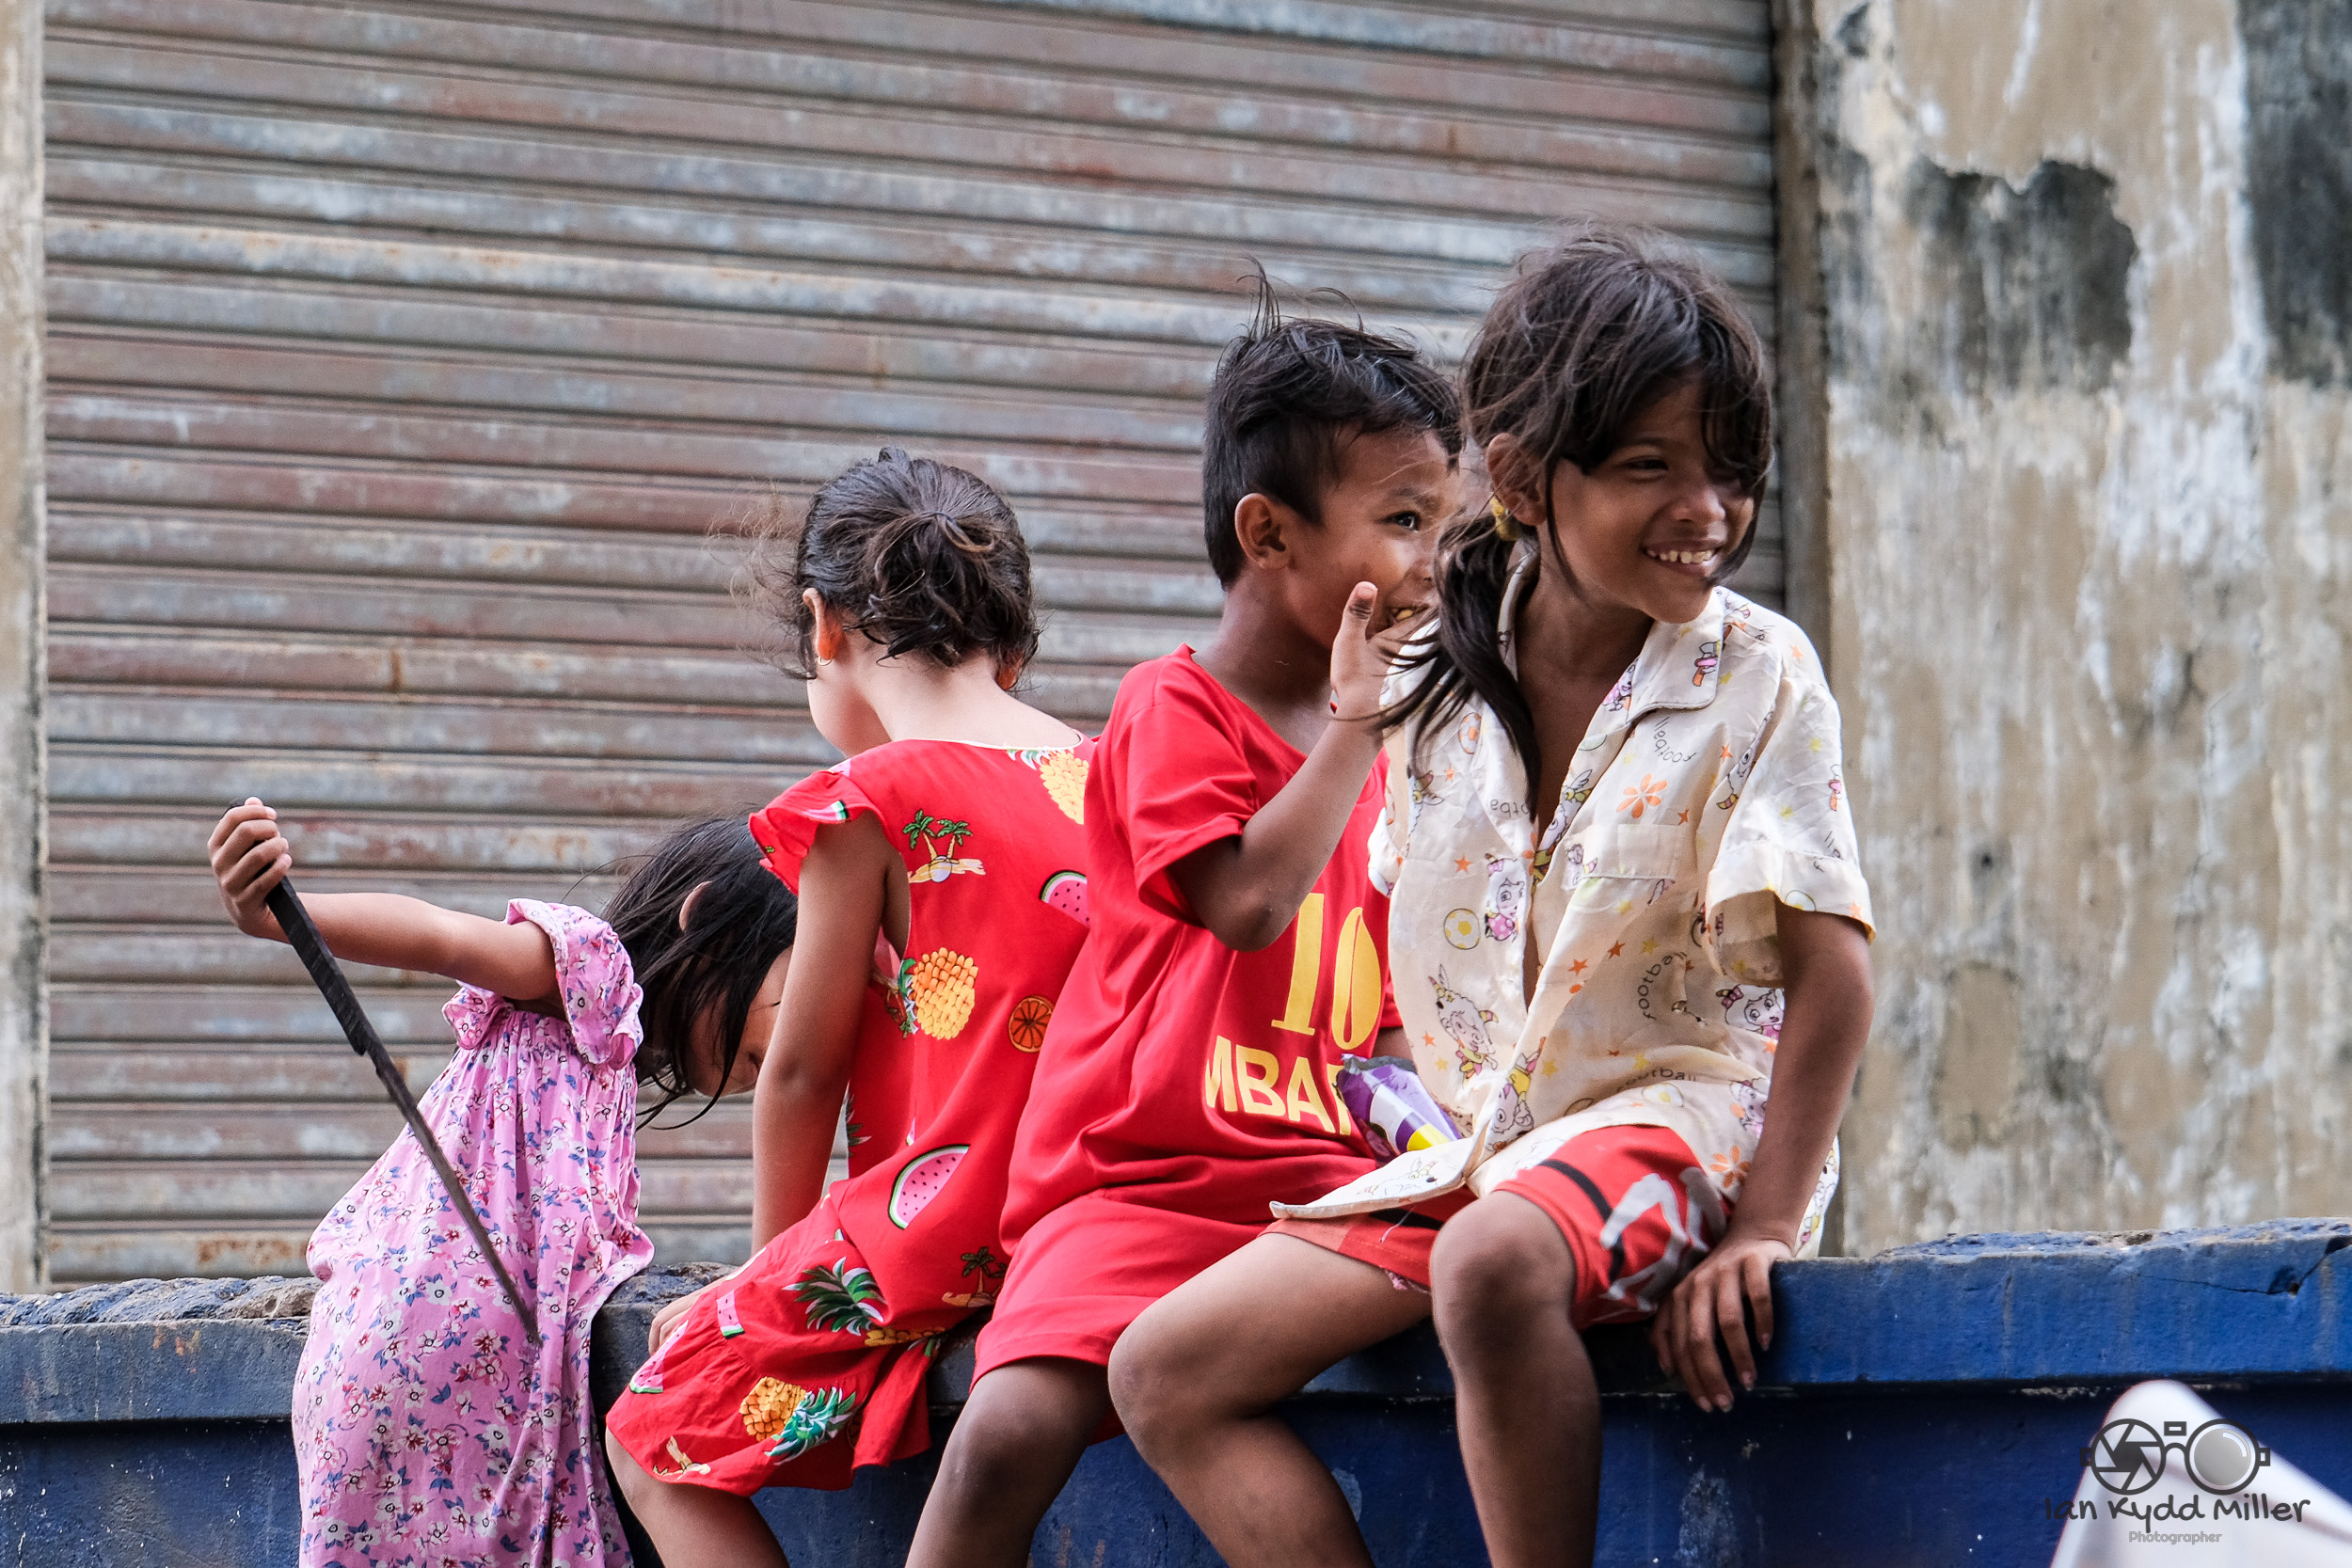
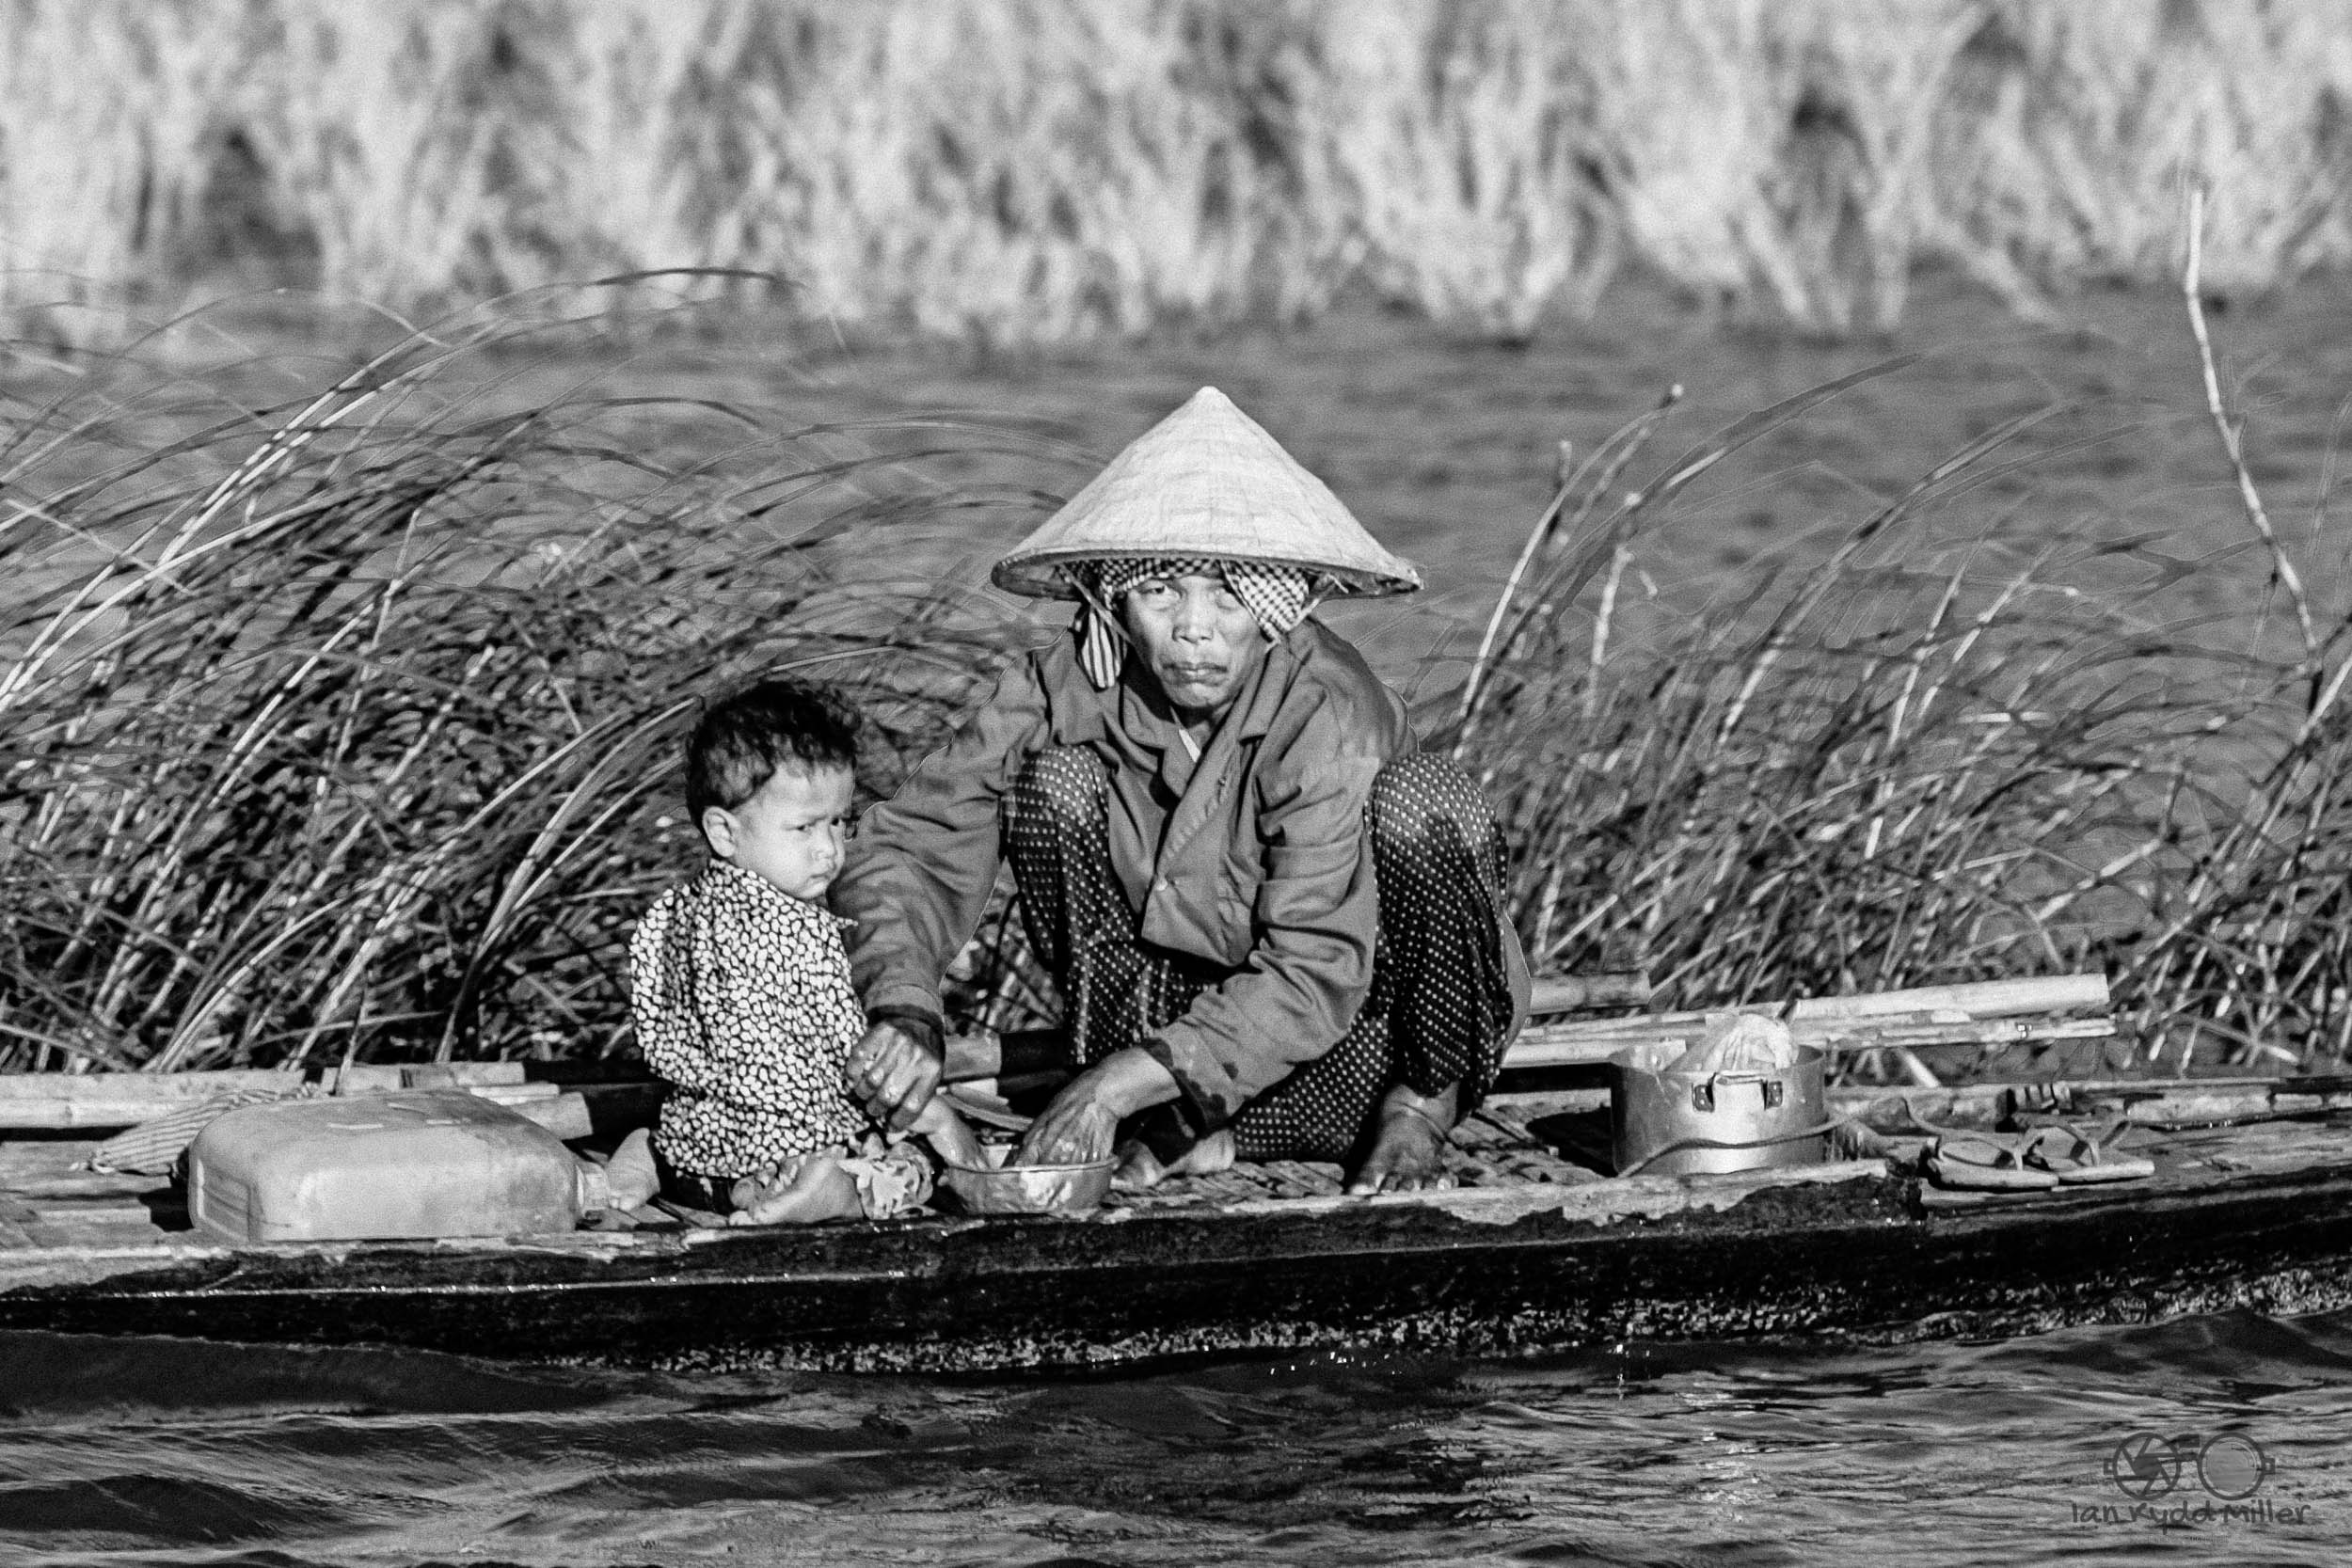
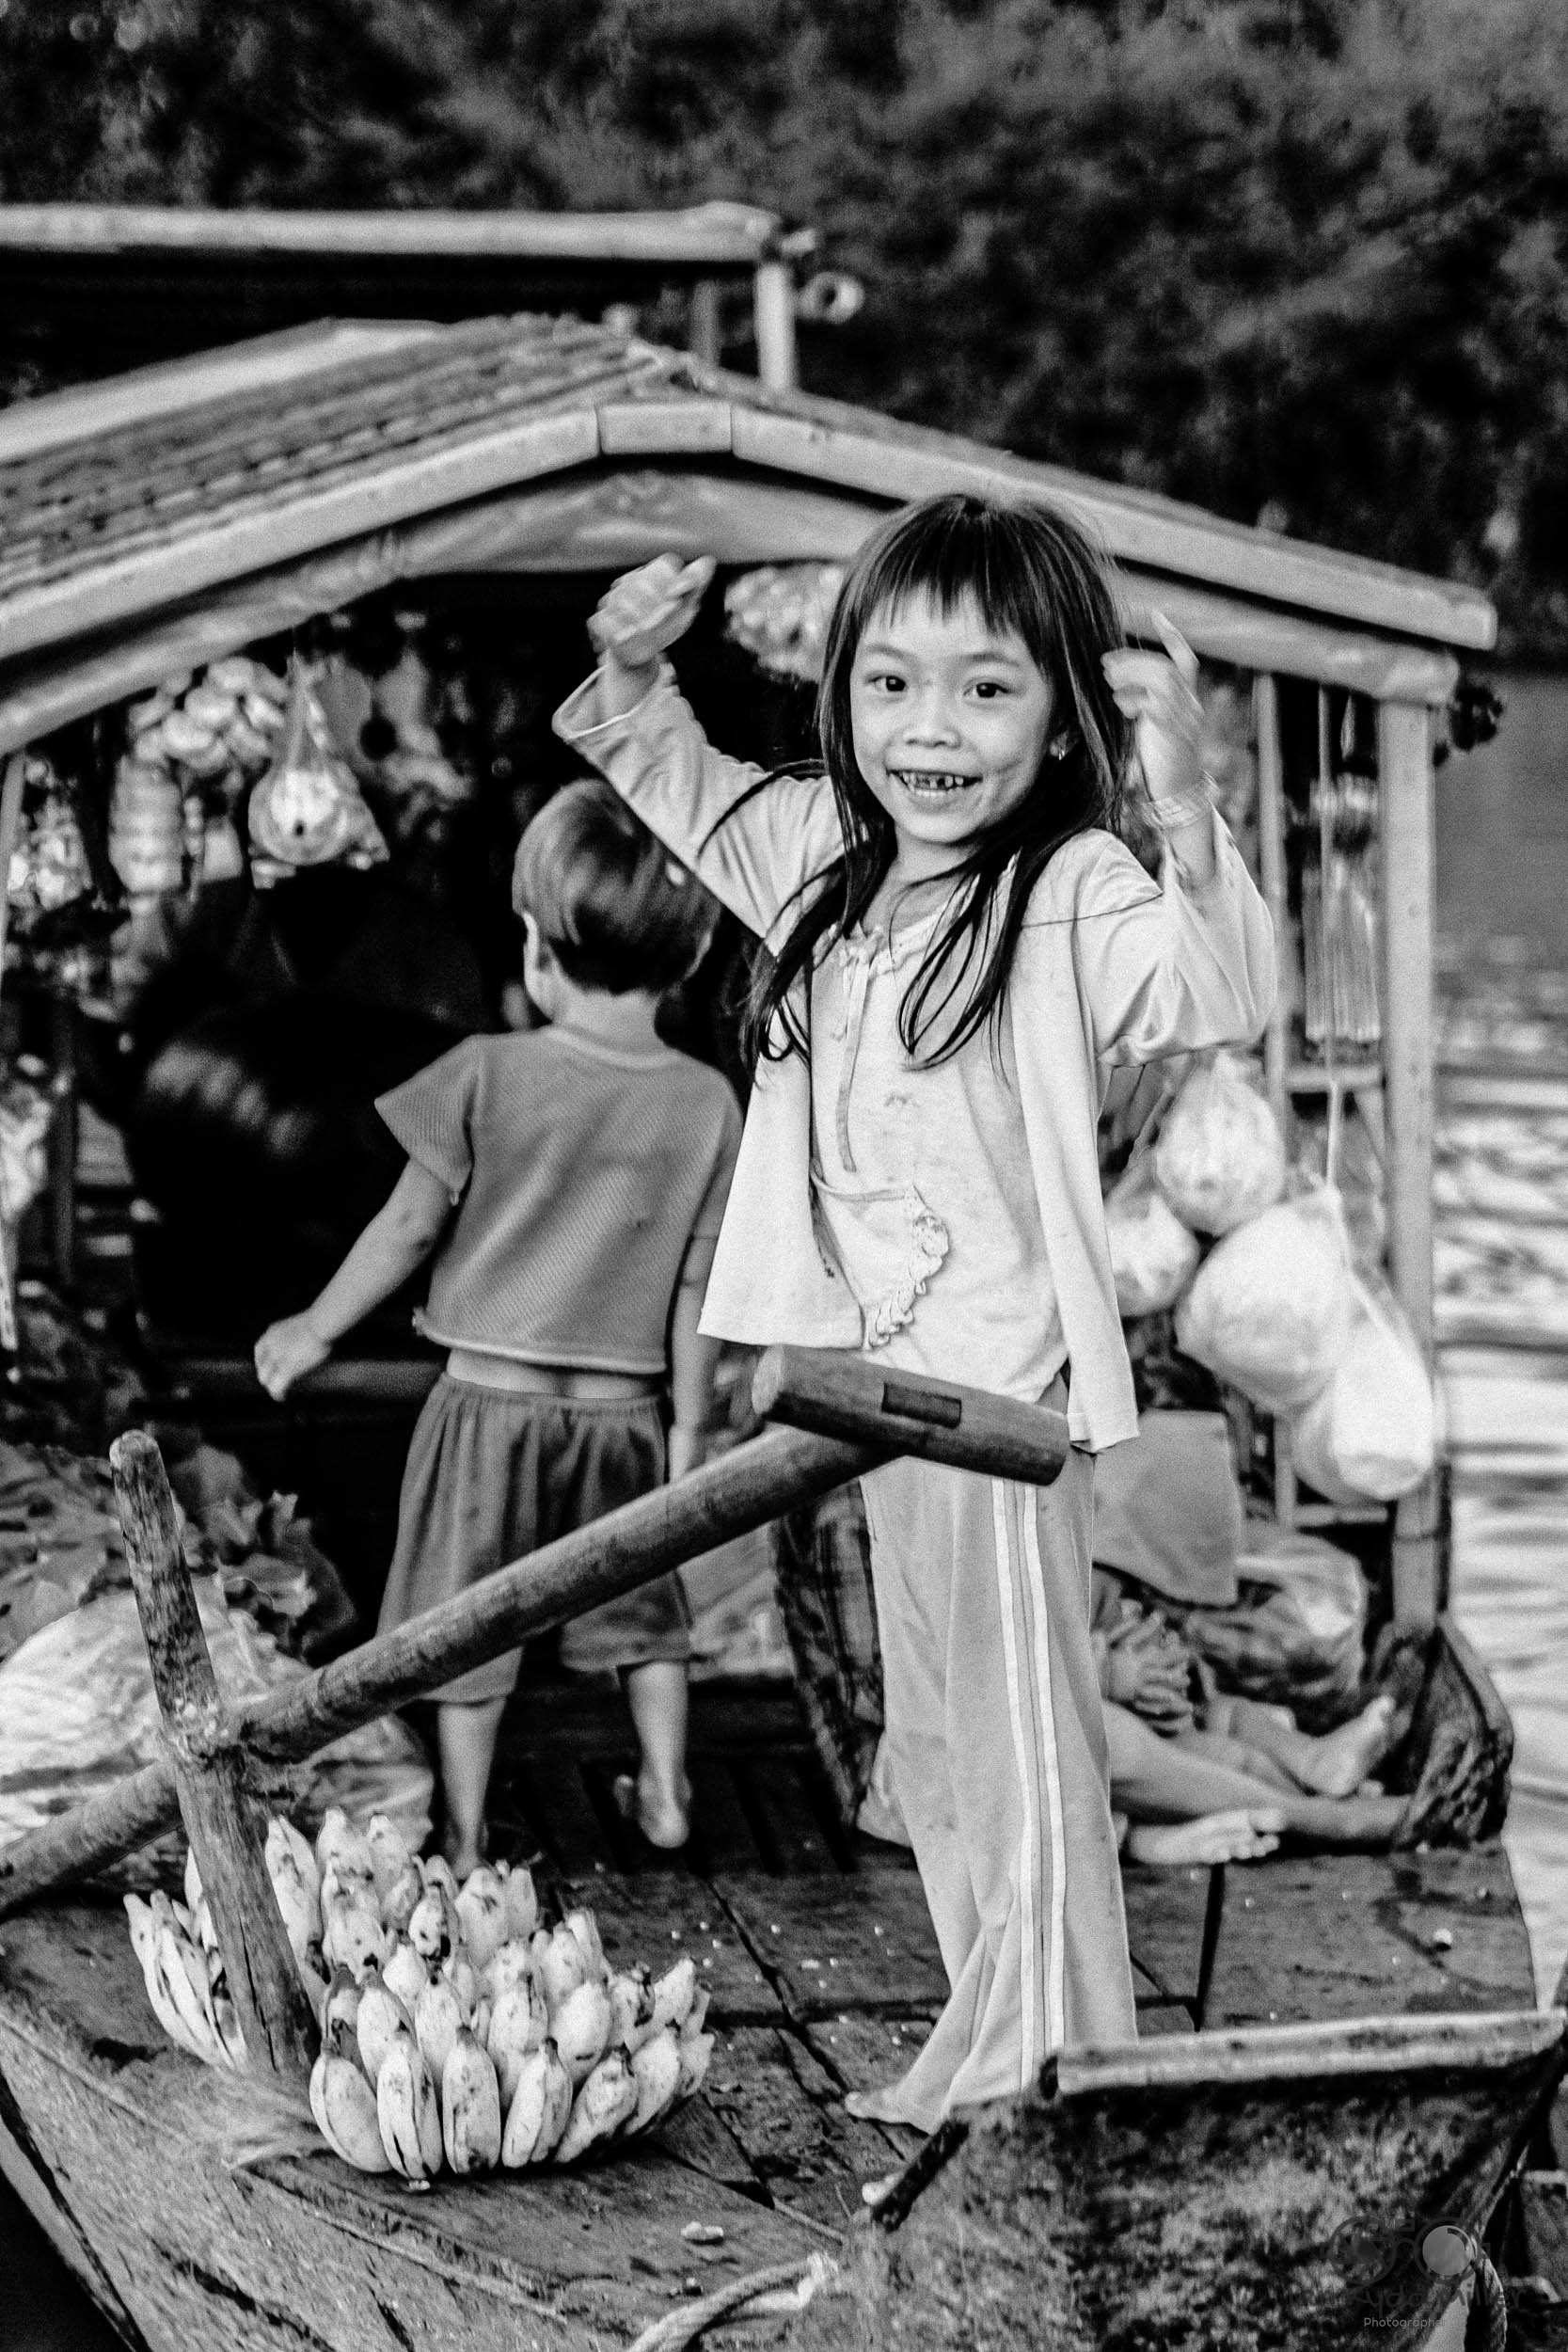
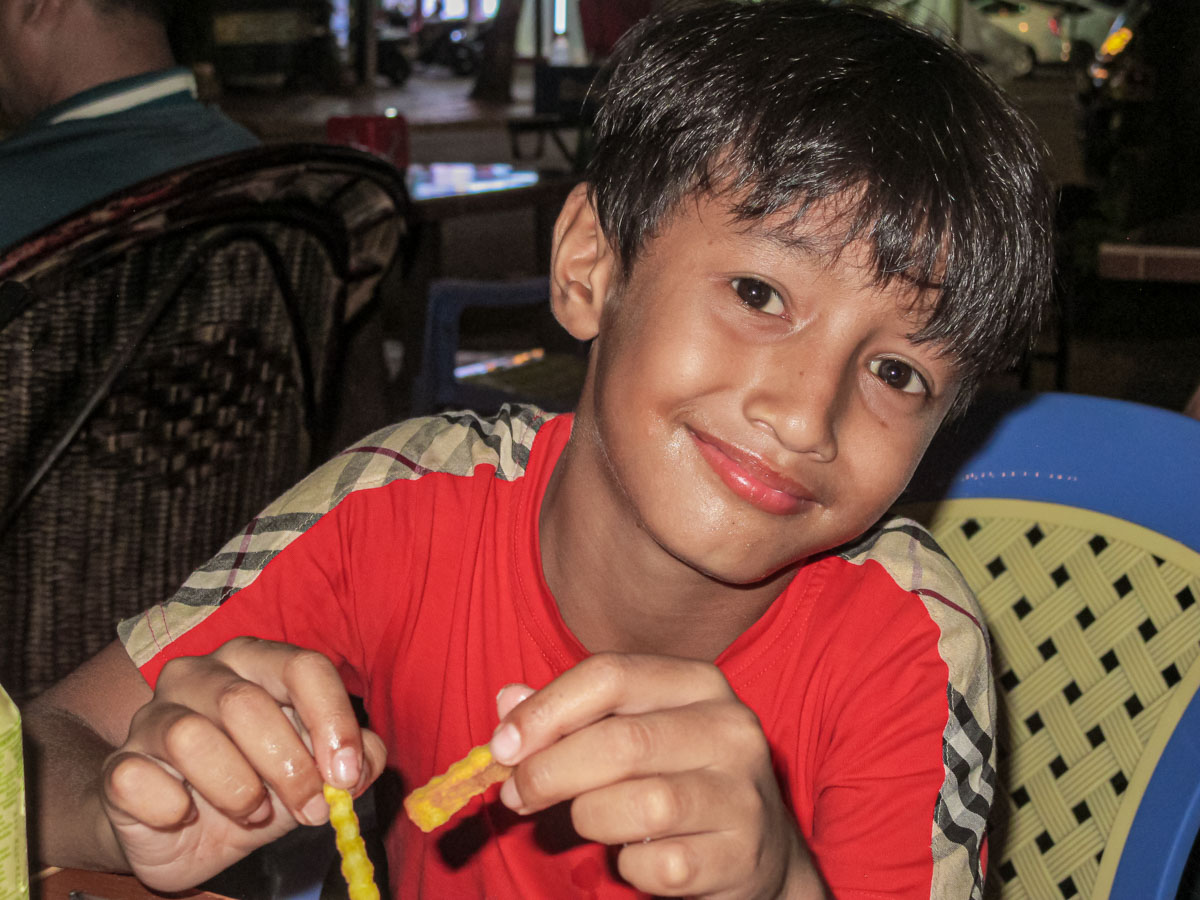
The Art of Street Photography in Asia: Capturing the Essence of Everyday Life
Street photography in Asia is an exhilarating and challenging endeavour that attracts photographers from all over the world. The continent’s diverse cultures, bustling metropolises, serene landscapes, and vibrant street life provide an endless array of subjects for photographers to capture. From the neon-lit streets of Tokyo to the historic alleys of Hanoi, every corner offers a new perspective, a unique story.
Understanding the Cultural Tapestry
Asia is a tapestry of traditions, religions, and languages. This diversity is reflected in the daily life of its people, which is a central subject of street photography. Photographers must approach their craft with respect and sensitivity towards local customs and norms. Capturing images in Thailand, for instance, is not just about aesthetics but also about understanding and respecting the rich culture and traditions.
The Evolution of Street Photography in Asia
Street photography in Asia has evolved significantly over the years. In Thailand, for example, it has grown alongside urbanization and social change, with Bangkok becoming a dynamic focal point for this photographic style. The advent of digital photography and social media has also transformed the scene, making it more accessible and allowing a new generation of photographers to define a unique visual style that reflects Asian culture, urban narratives, and political undercurrents.
Technical Mastery Meets Artistic Vision
Mastering street photography in Asia involves a combination of technical prowess and artistic vision. It’s about being in the right place at the right time and having the patience to wait for that decisive moment. It’s also about choosing the right gear and settings to capture the scene as authentically as possible. Whether it’s the hustle of the markets or the tranquillity of a temple, photographers must be ready to capture the essence of the moment.
The Impact of Renowned Photographers
Photographers like Maciej Dakowicz have spent years documenting the streets of Asia, offering profound insights into the lives and environments they capture. Dakowicz’s work, which spans two decades, showcases his ability to seize unfiltered moments and discover profound meaning in simplicity.
A Visual Journey Through Asia’s Streets
For those interested in exploring street photography in Asia, there are countless resources available, from online galleries to books that delve into the experiences of seasoned photographers. These collections not only display the beauty of everyday life but also serve as inspiration for aspiring photographers looking to embark on their own visual journeys across Asia’s diverse landscapes.
In Conclusion
Street photography in Asia is more than just a genre; it’s a way to connect with humanity and the world around us. It requires an open heart, a keen eye, and a deep appreciation for the fleeting moments that make up our lives. For anyone ready to take on the challenge, the streets of Asia await, ready to reveal their stories to those willing to look.
References: : Capturing Life: A Guide to Thai Street Photography – Better Living Asia : Where The Sun Rises: 20 Years of Street Photography in Asia by Maciej Dakowicz – Eyeshot
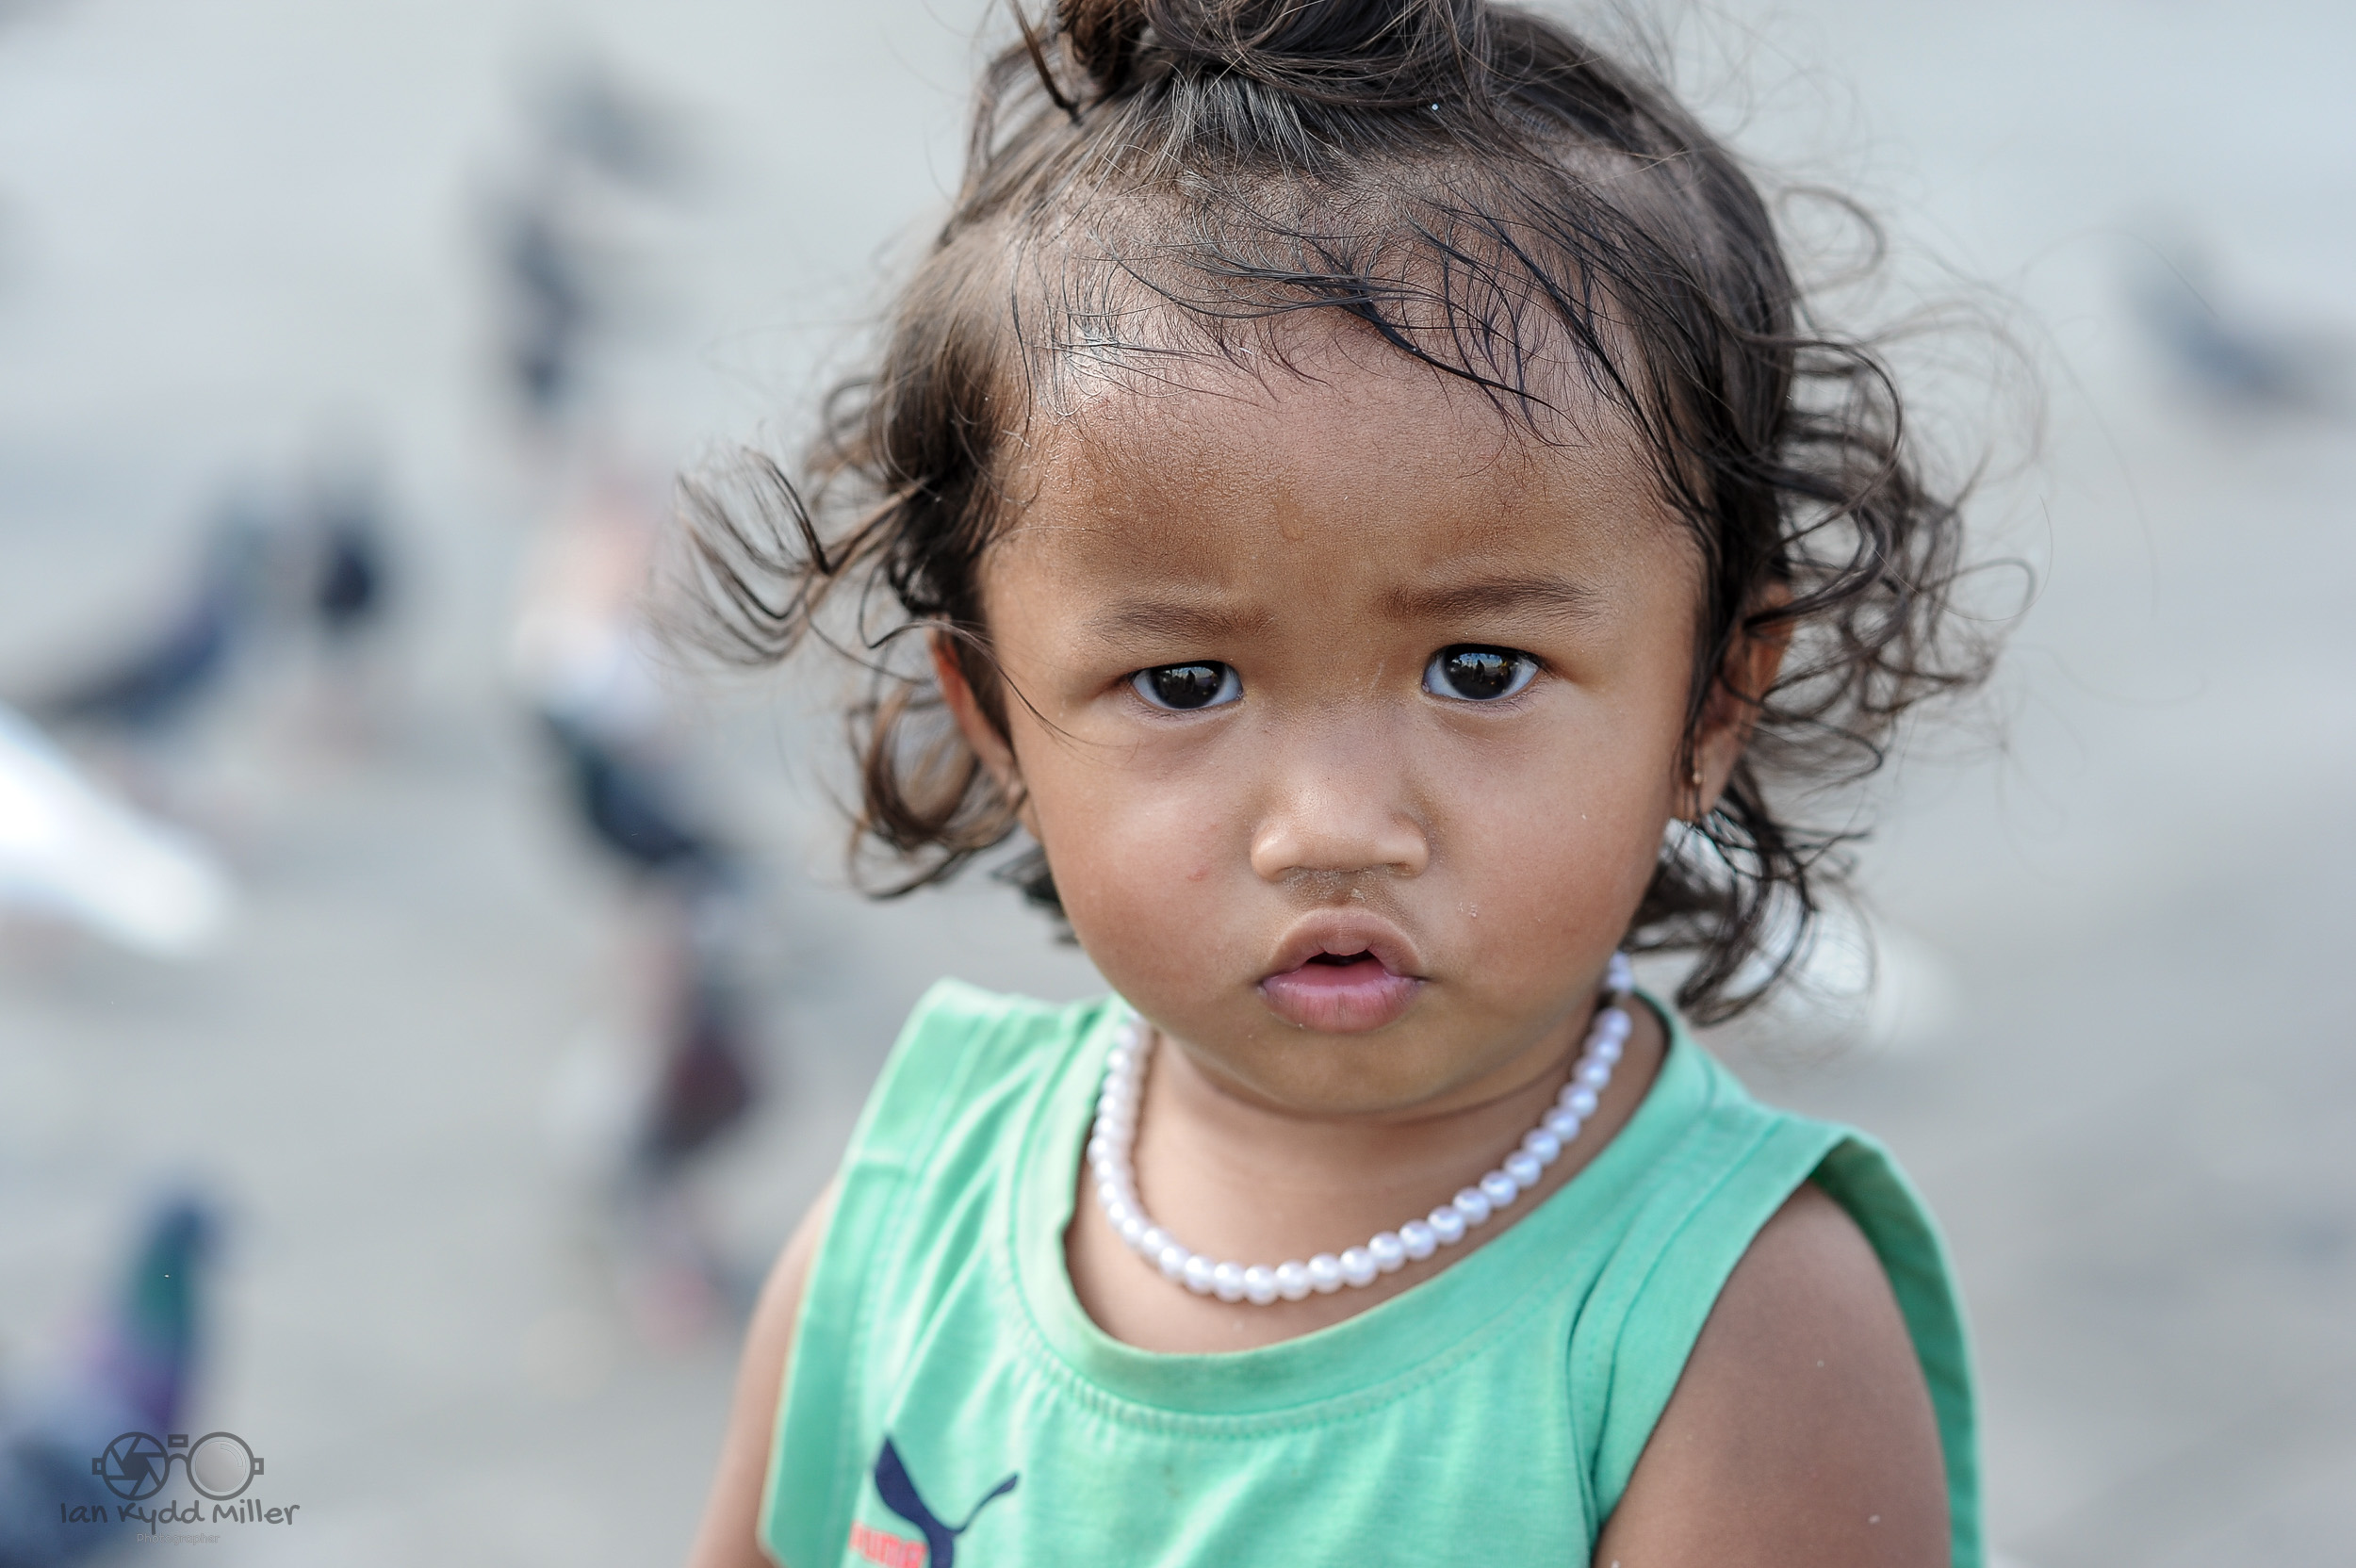
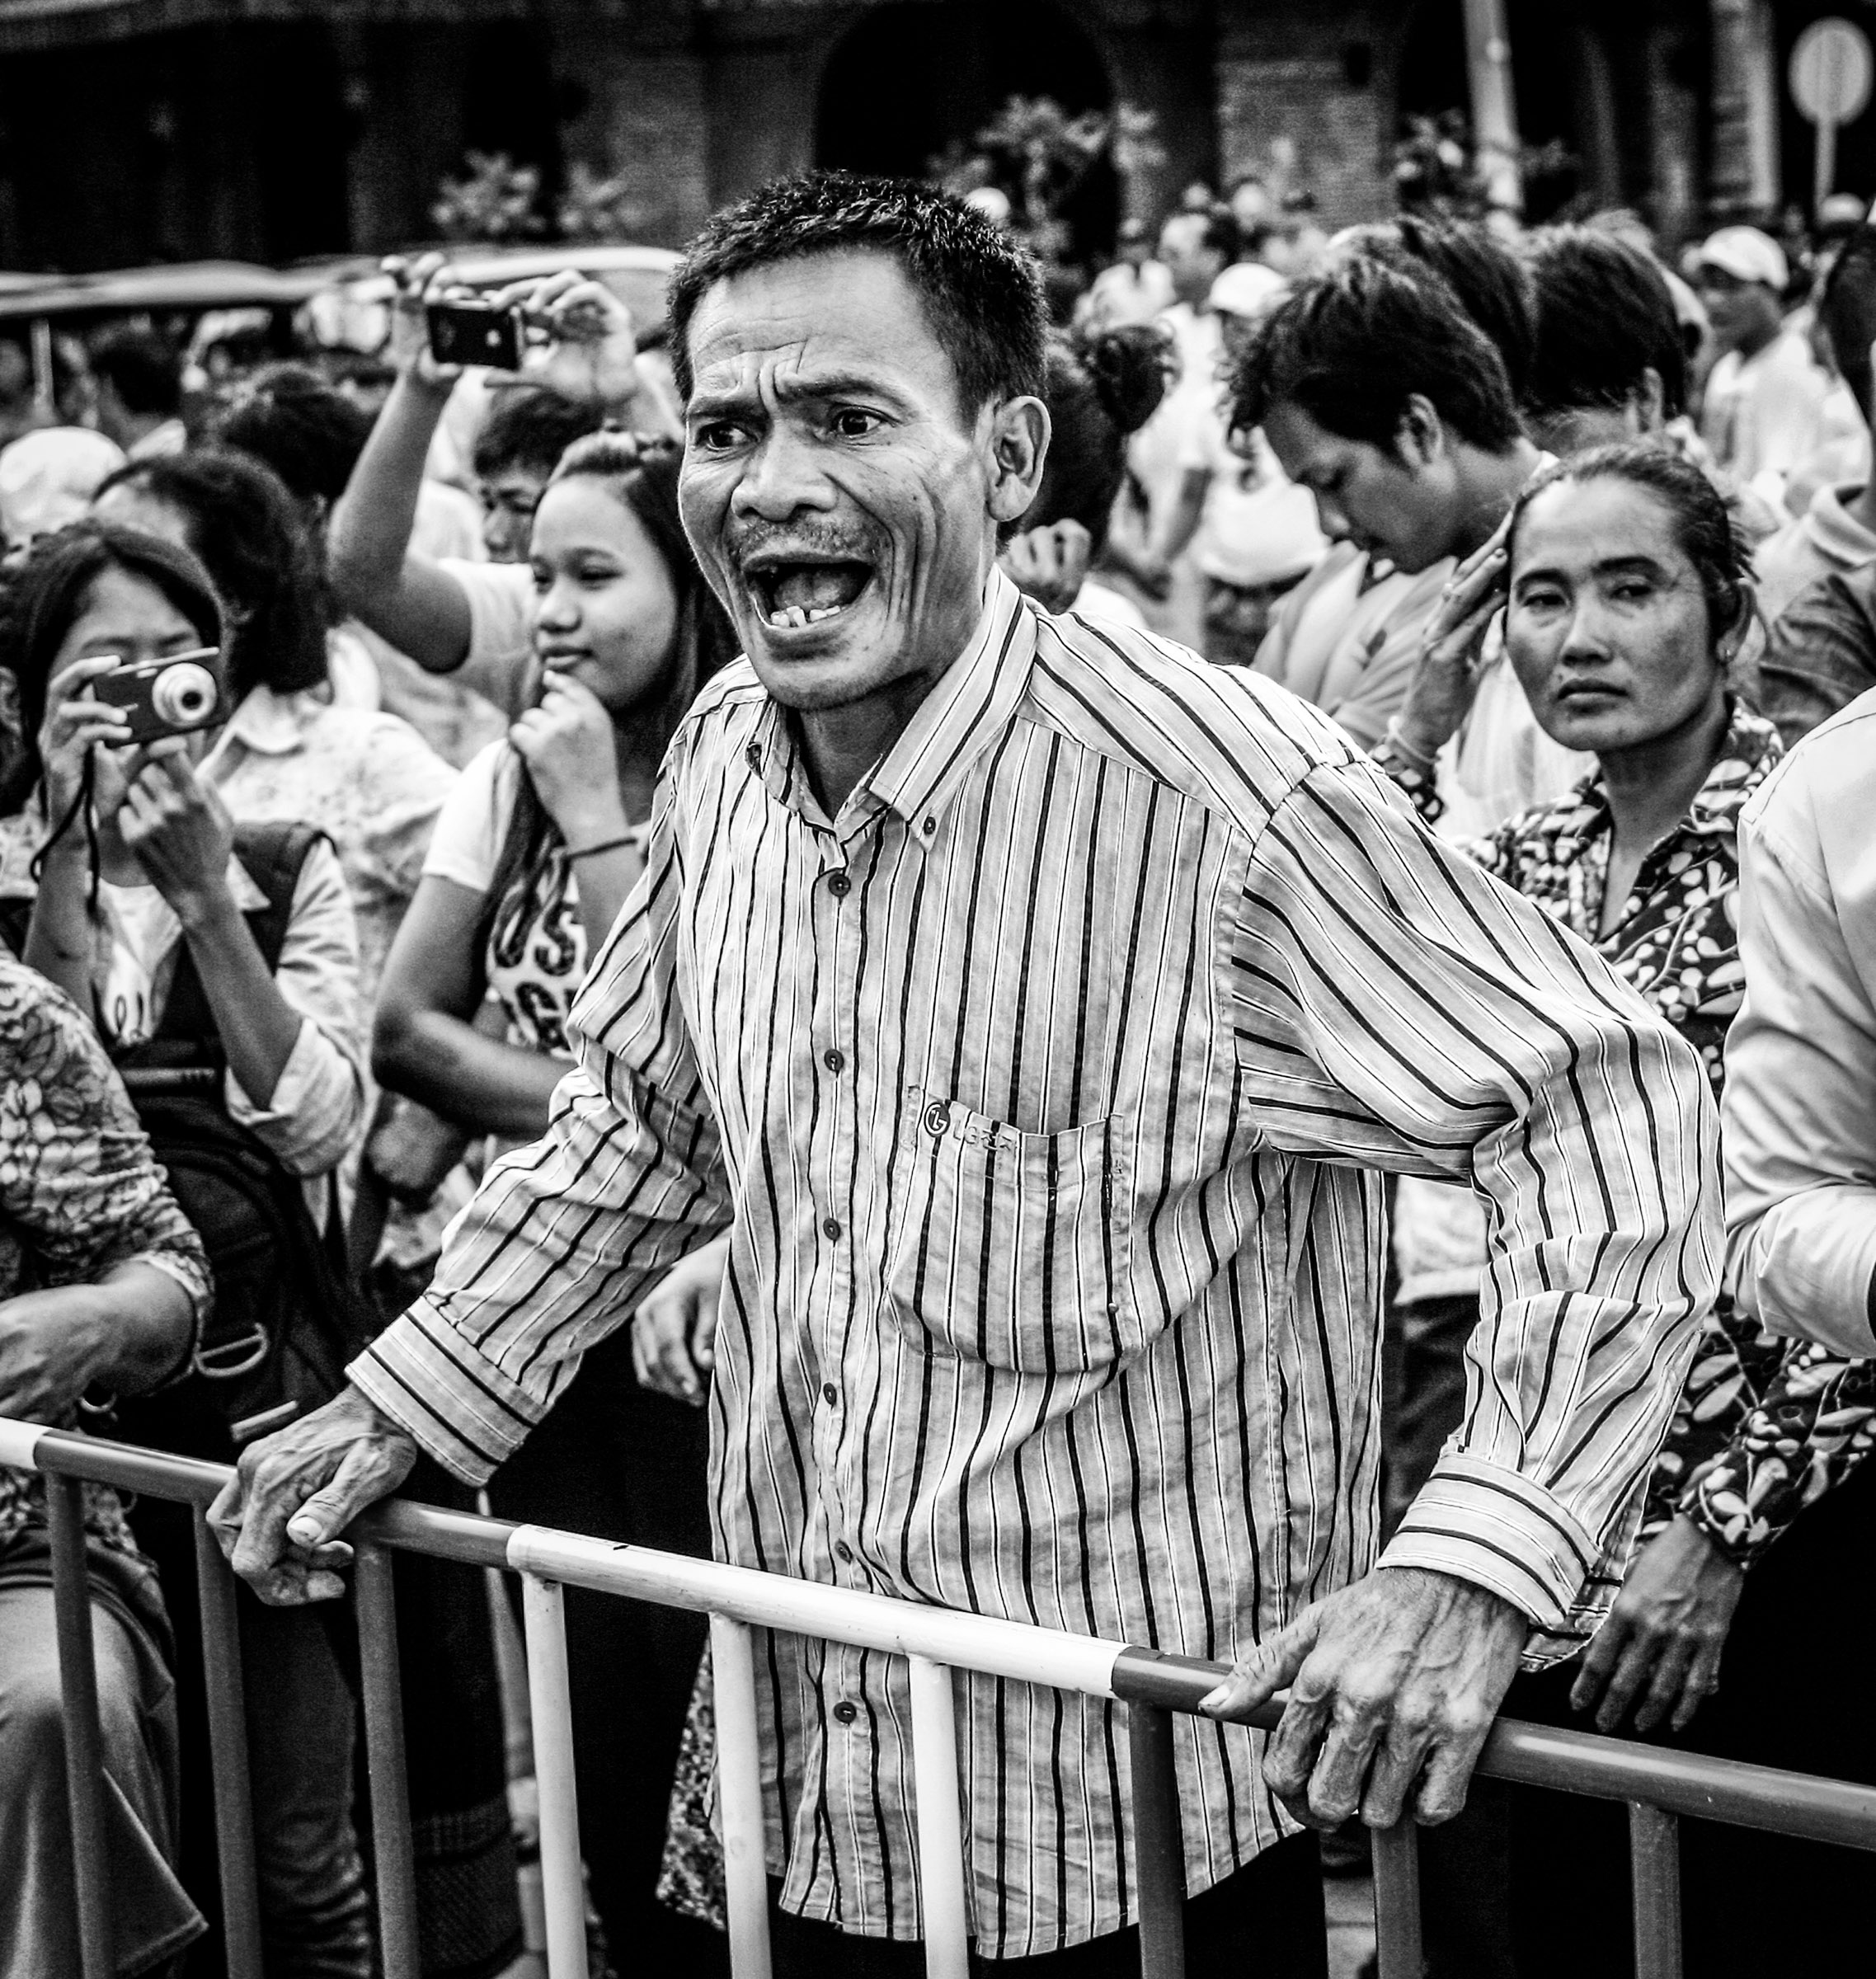
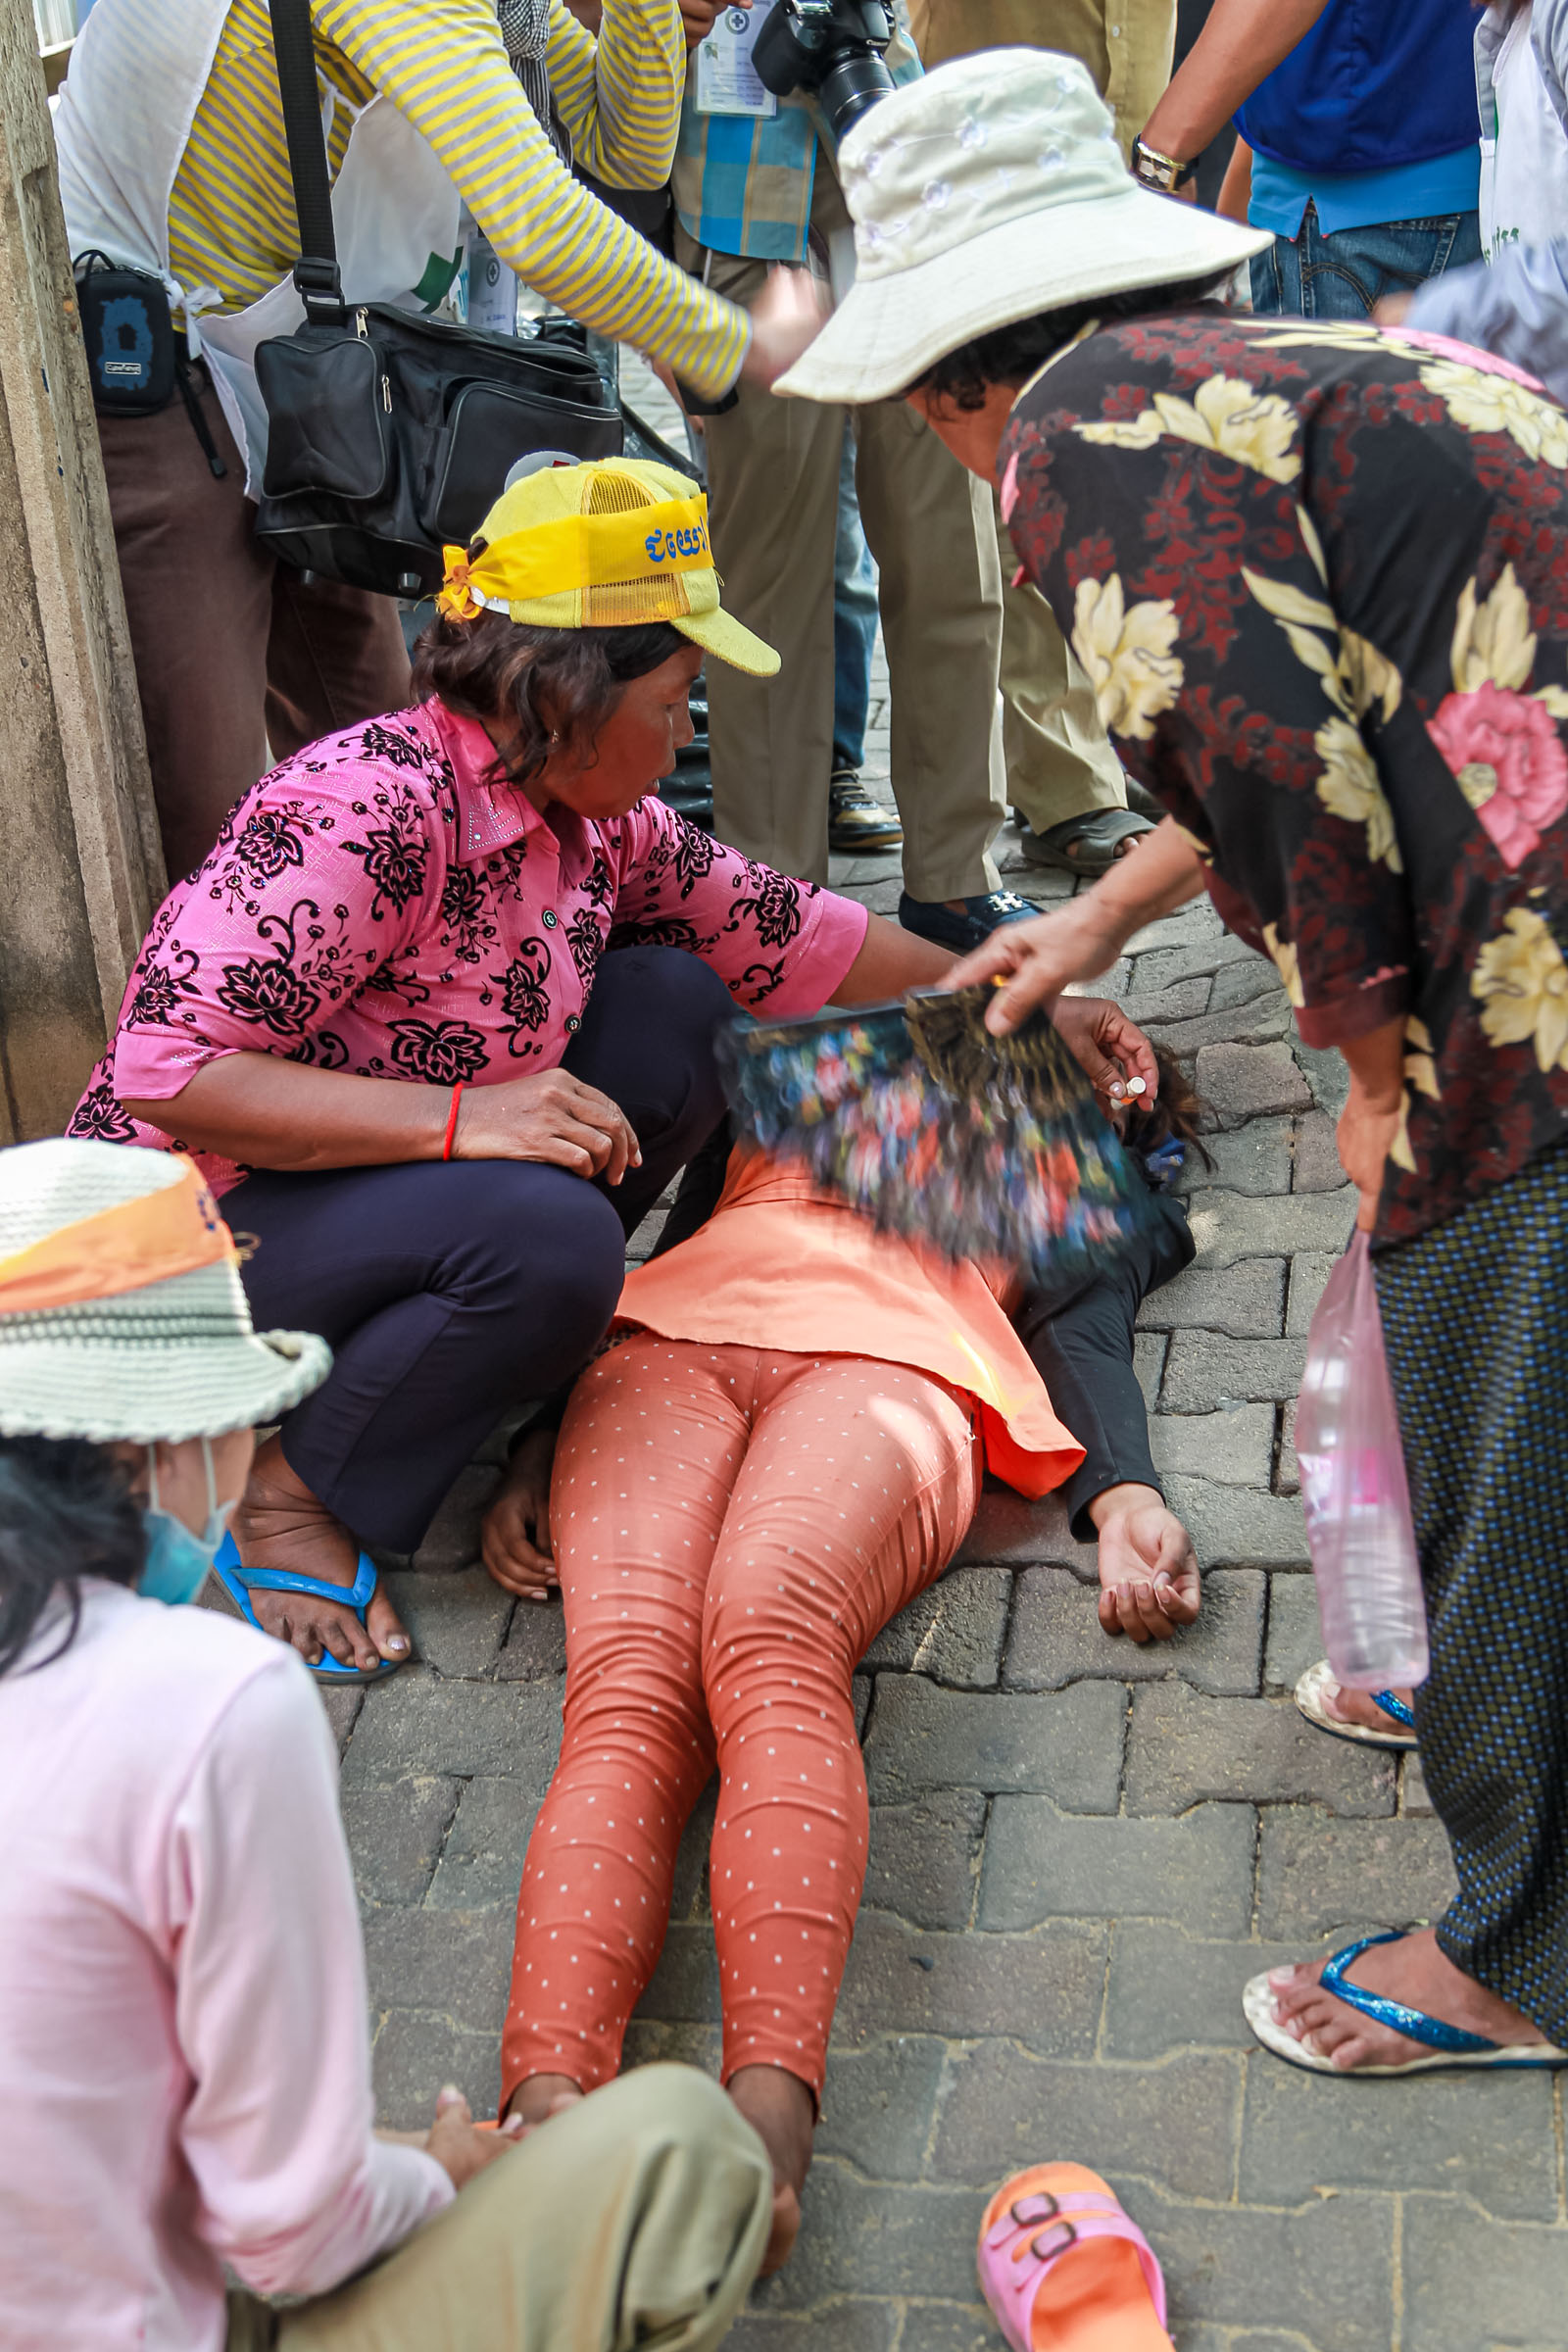
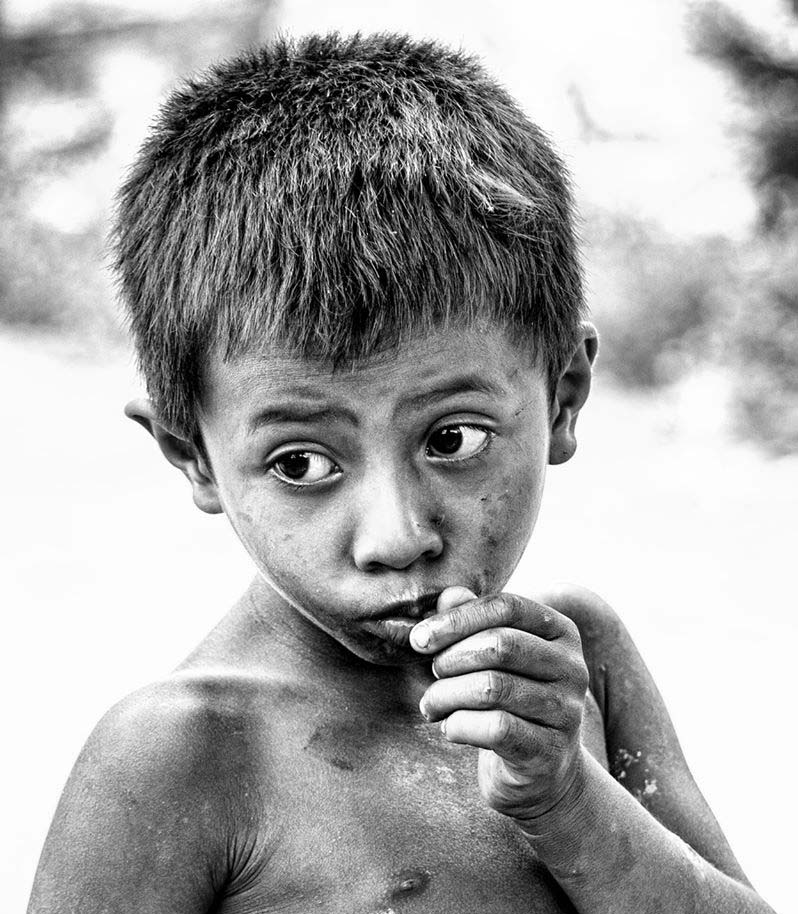
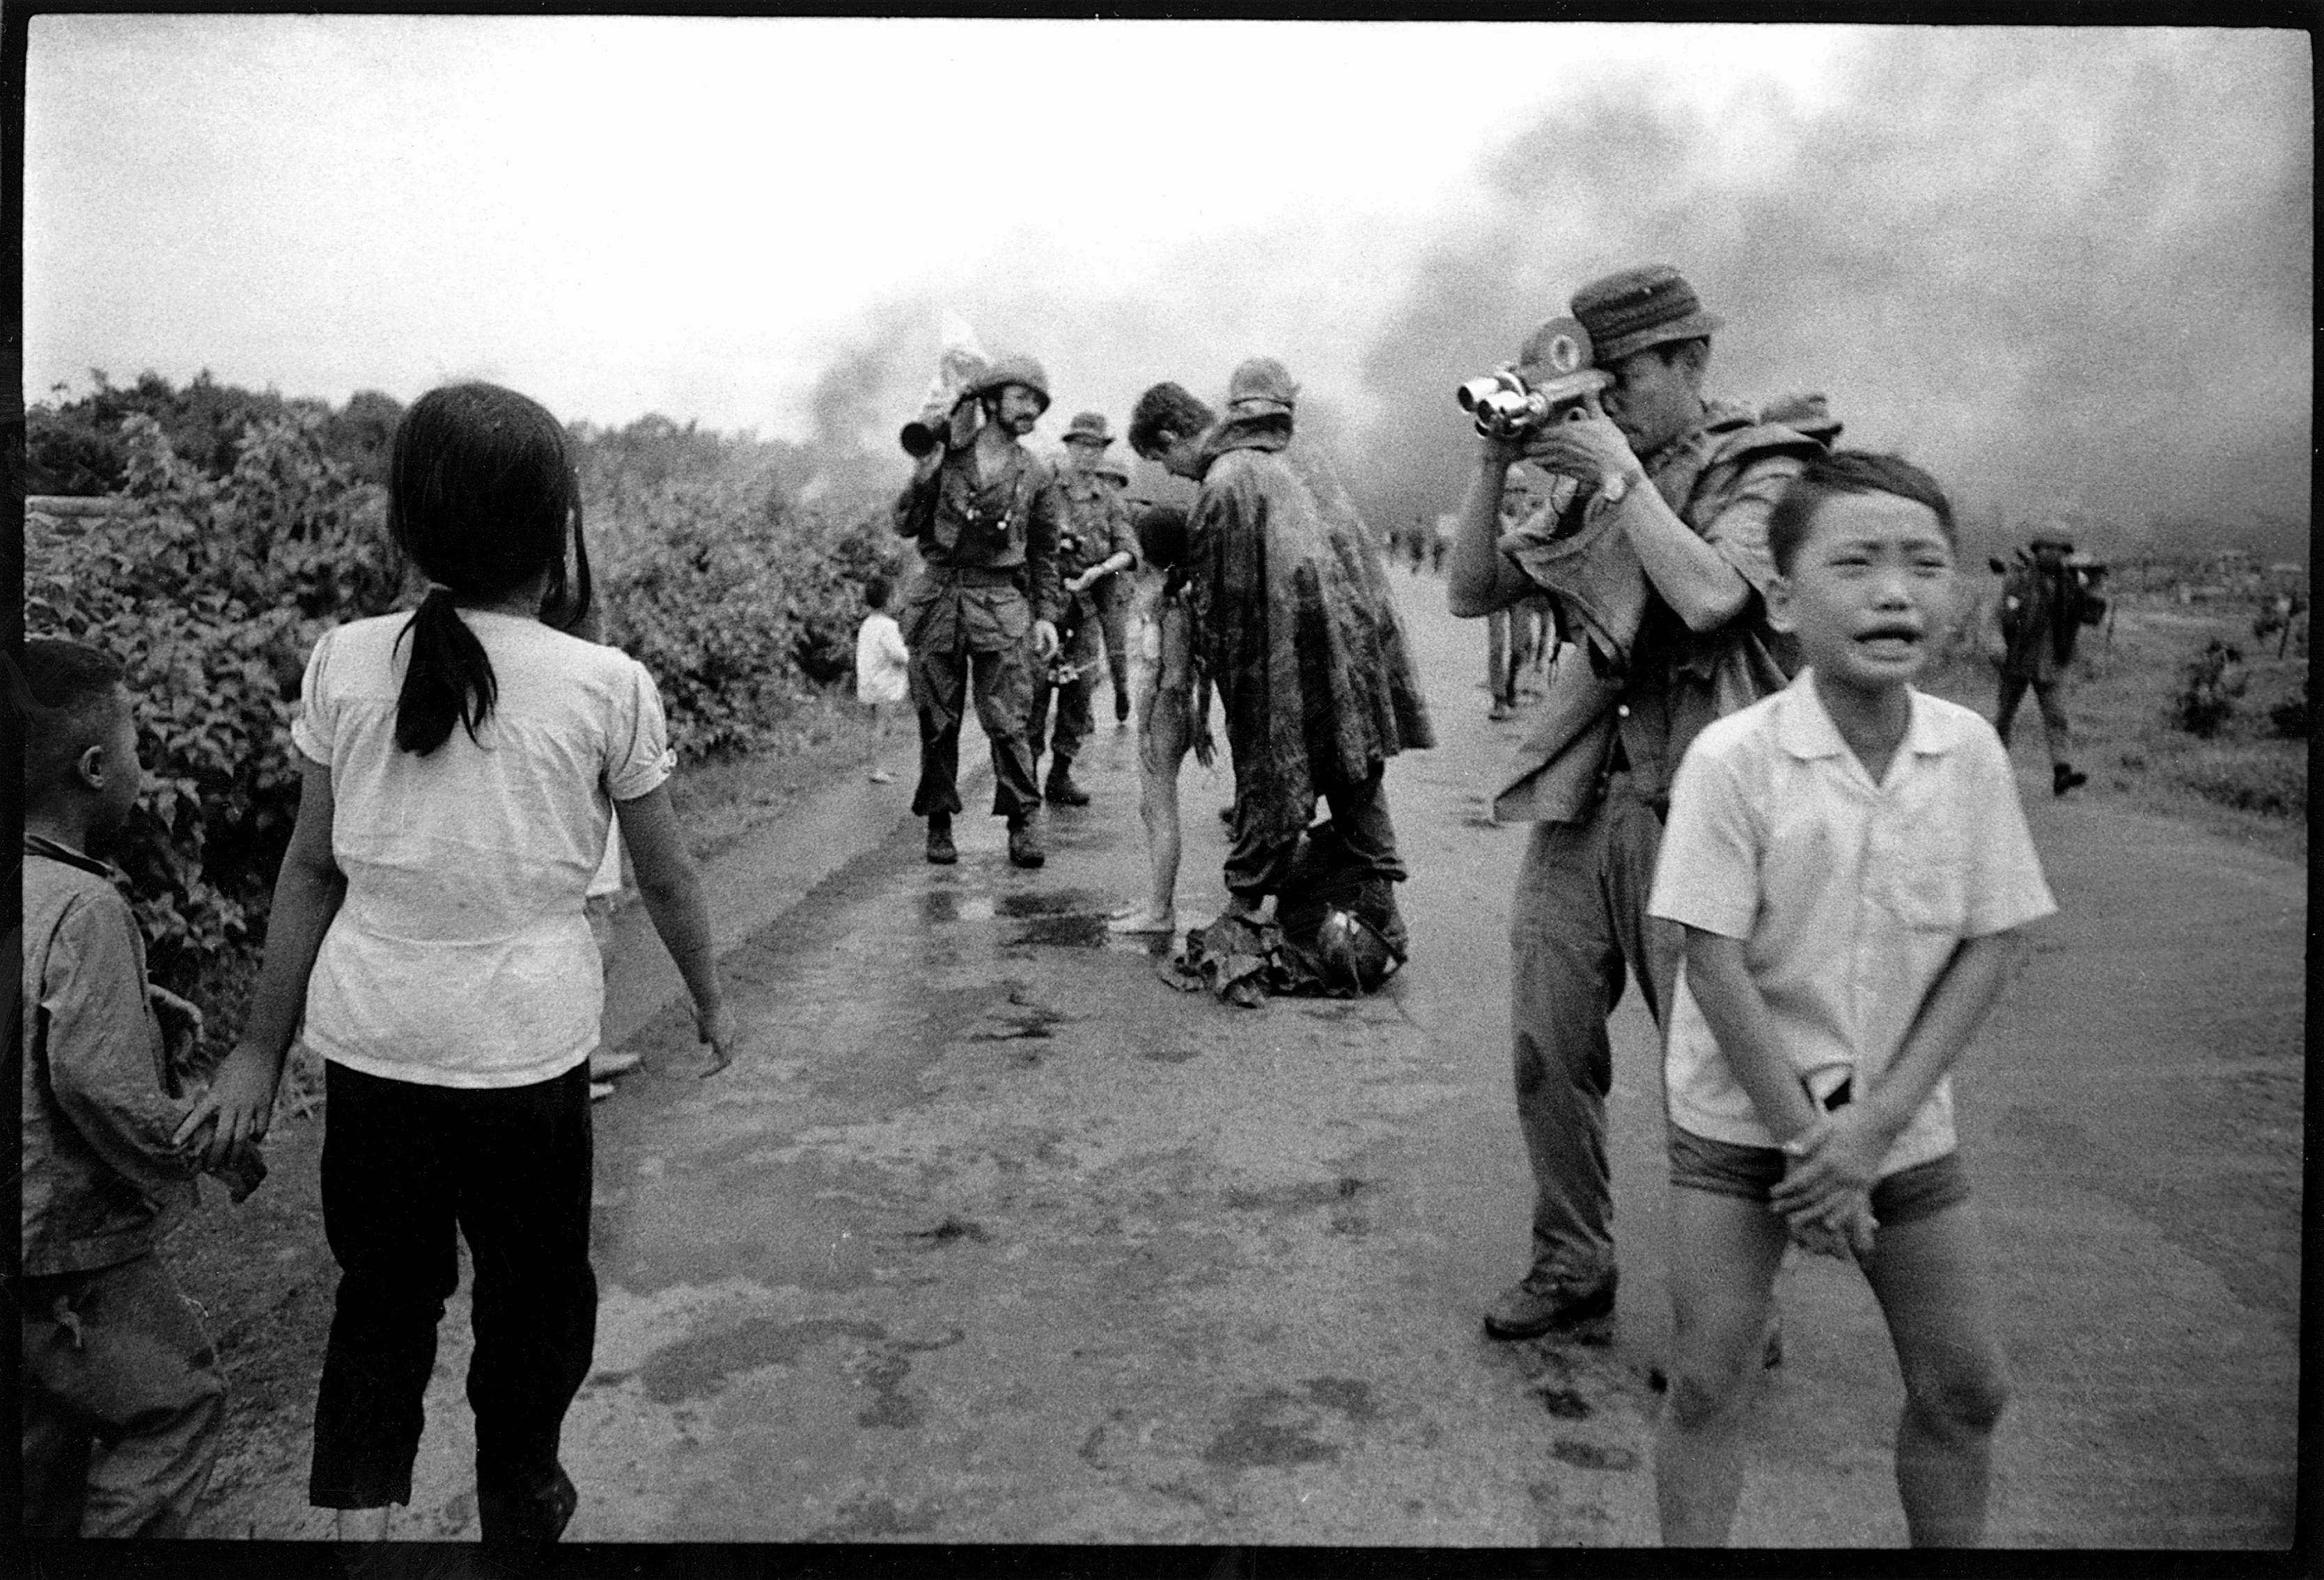
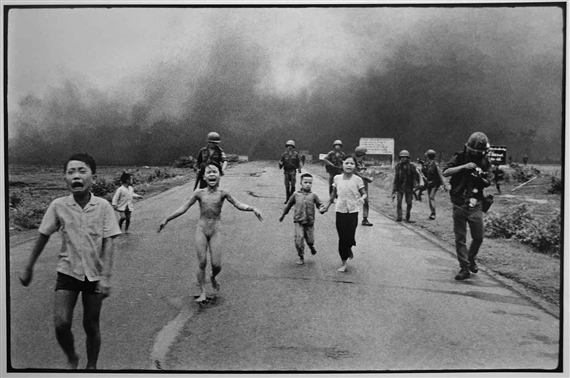
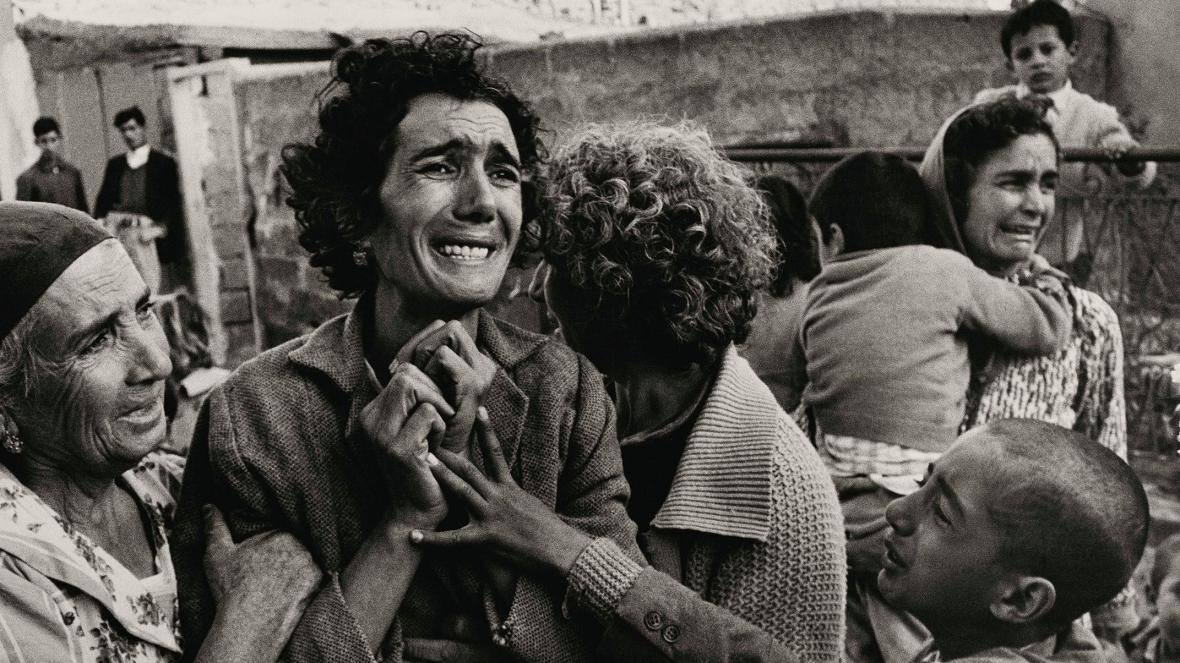
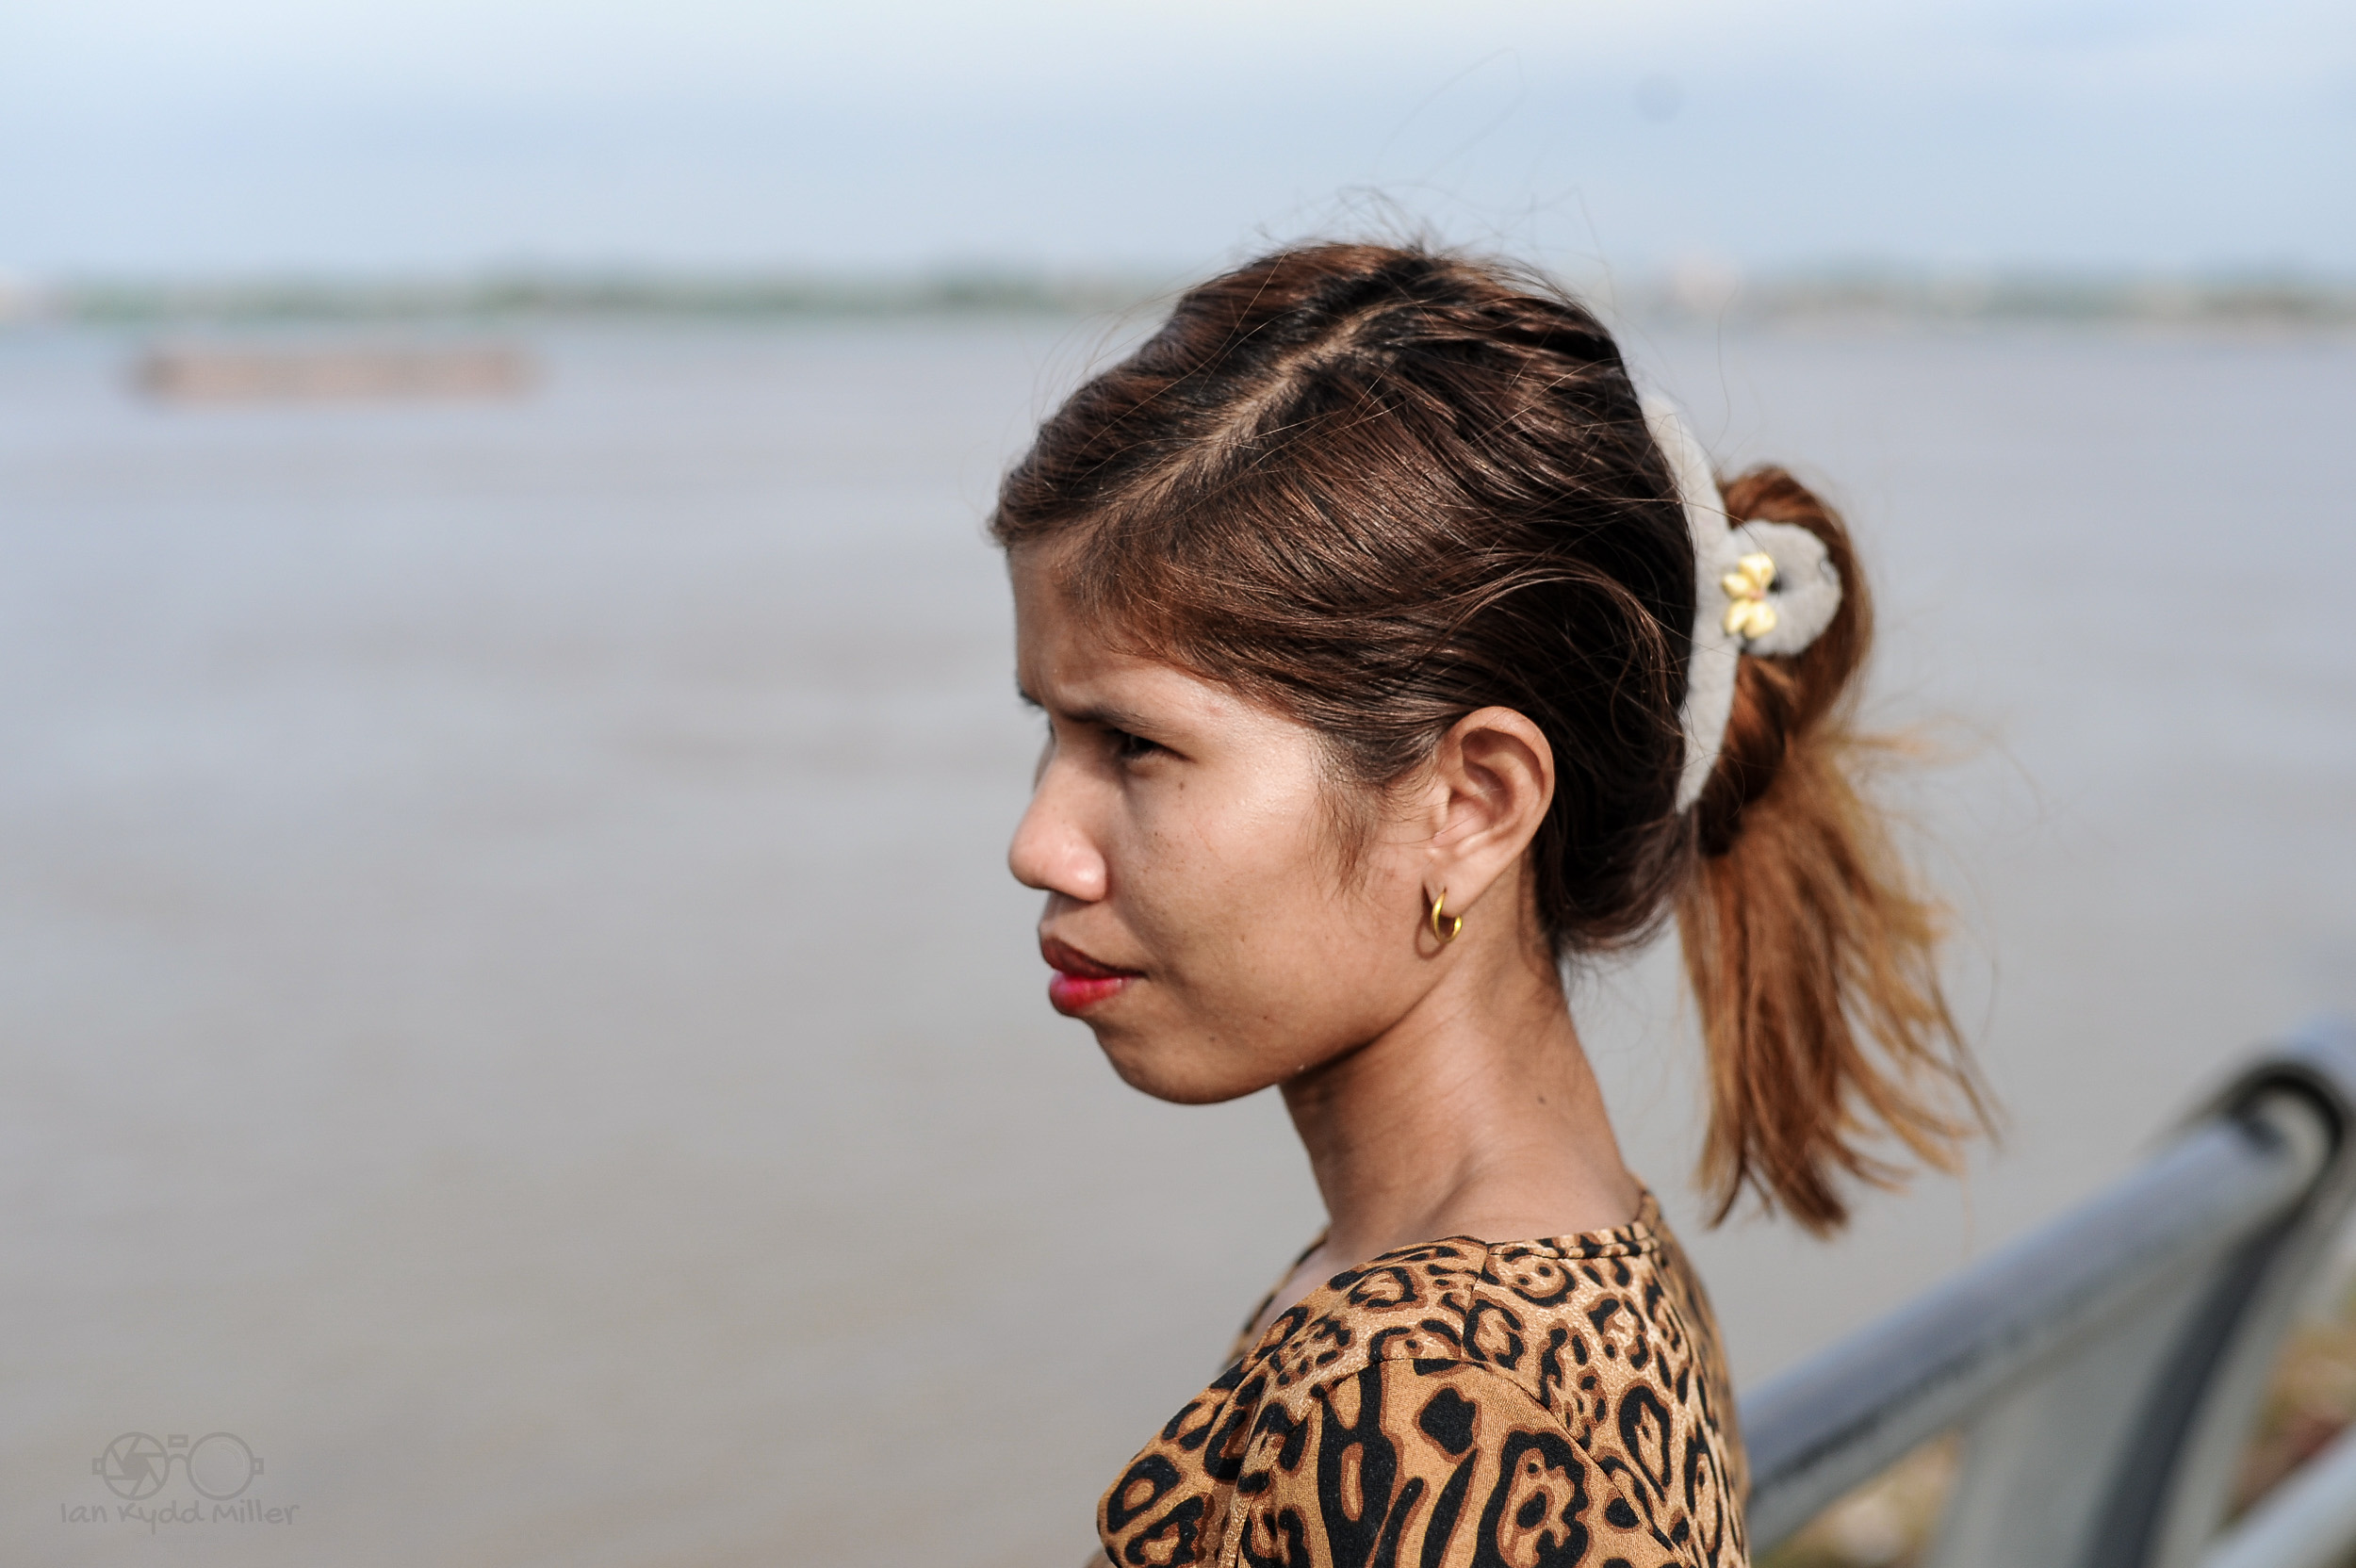
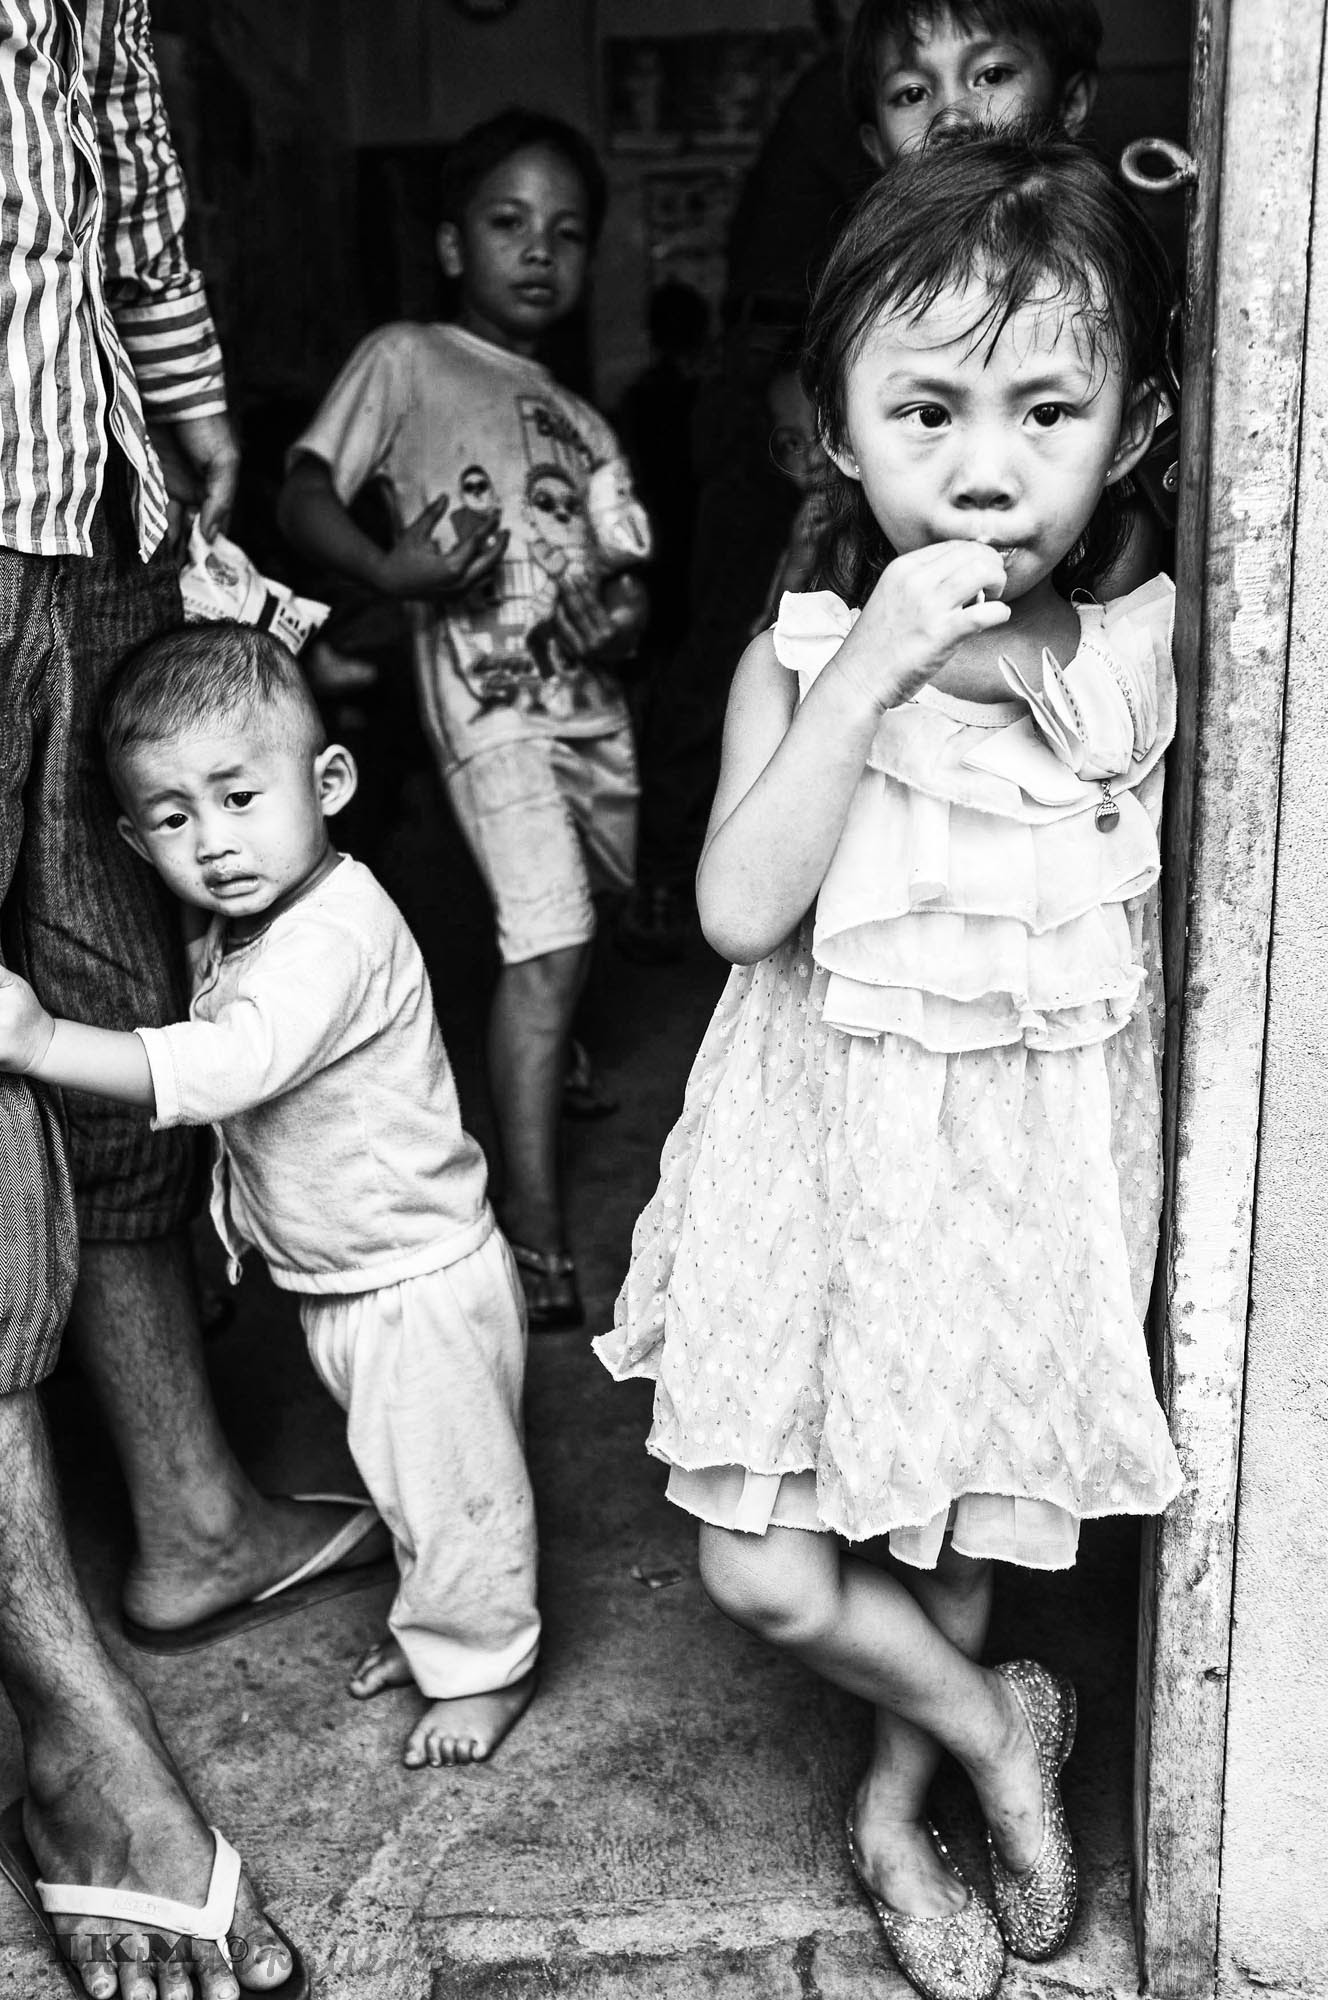
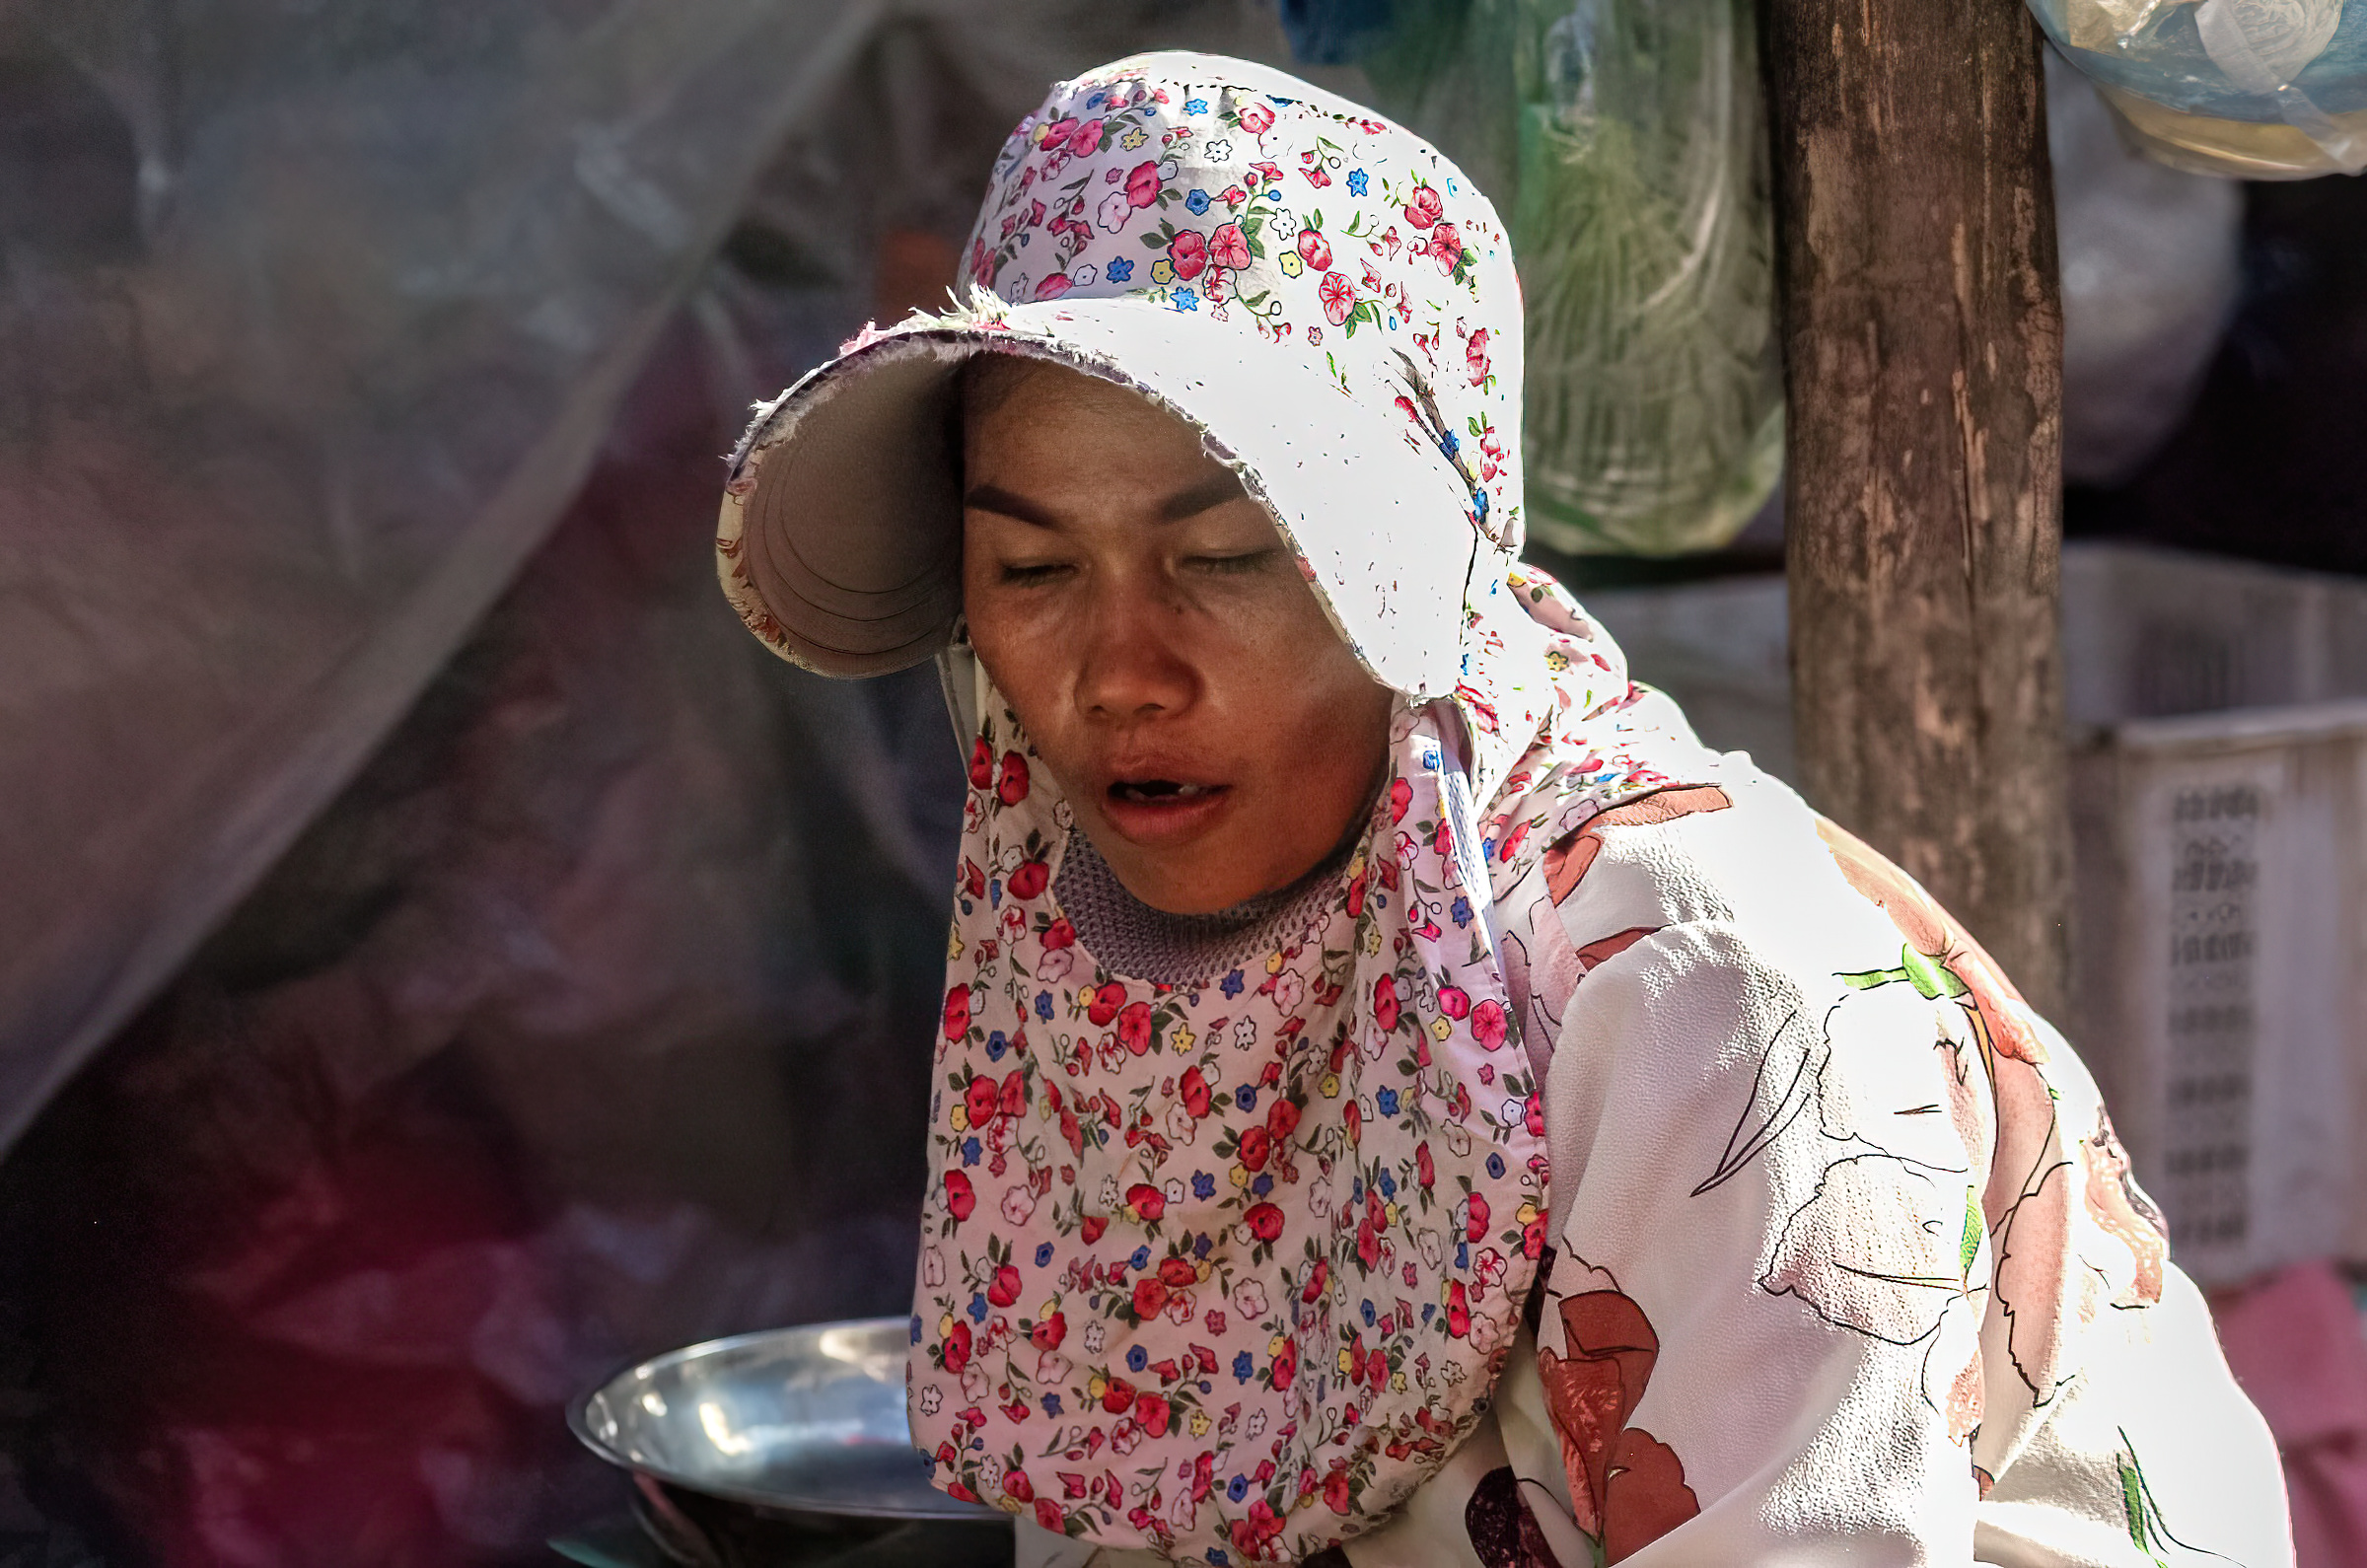
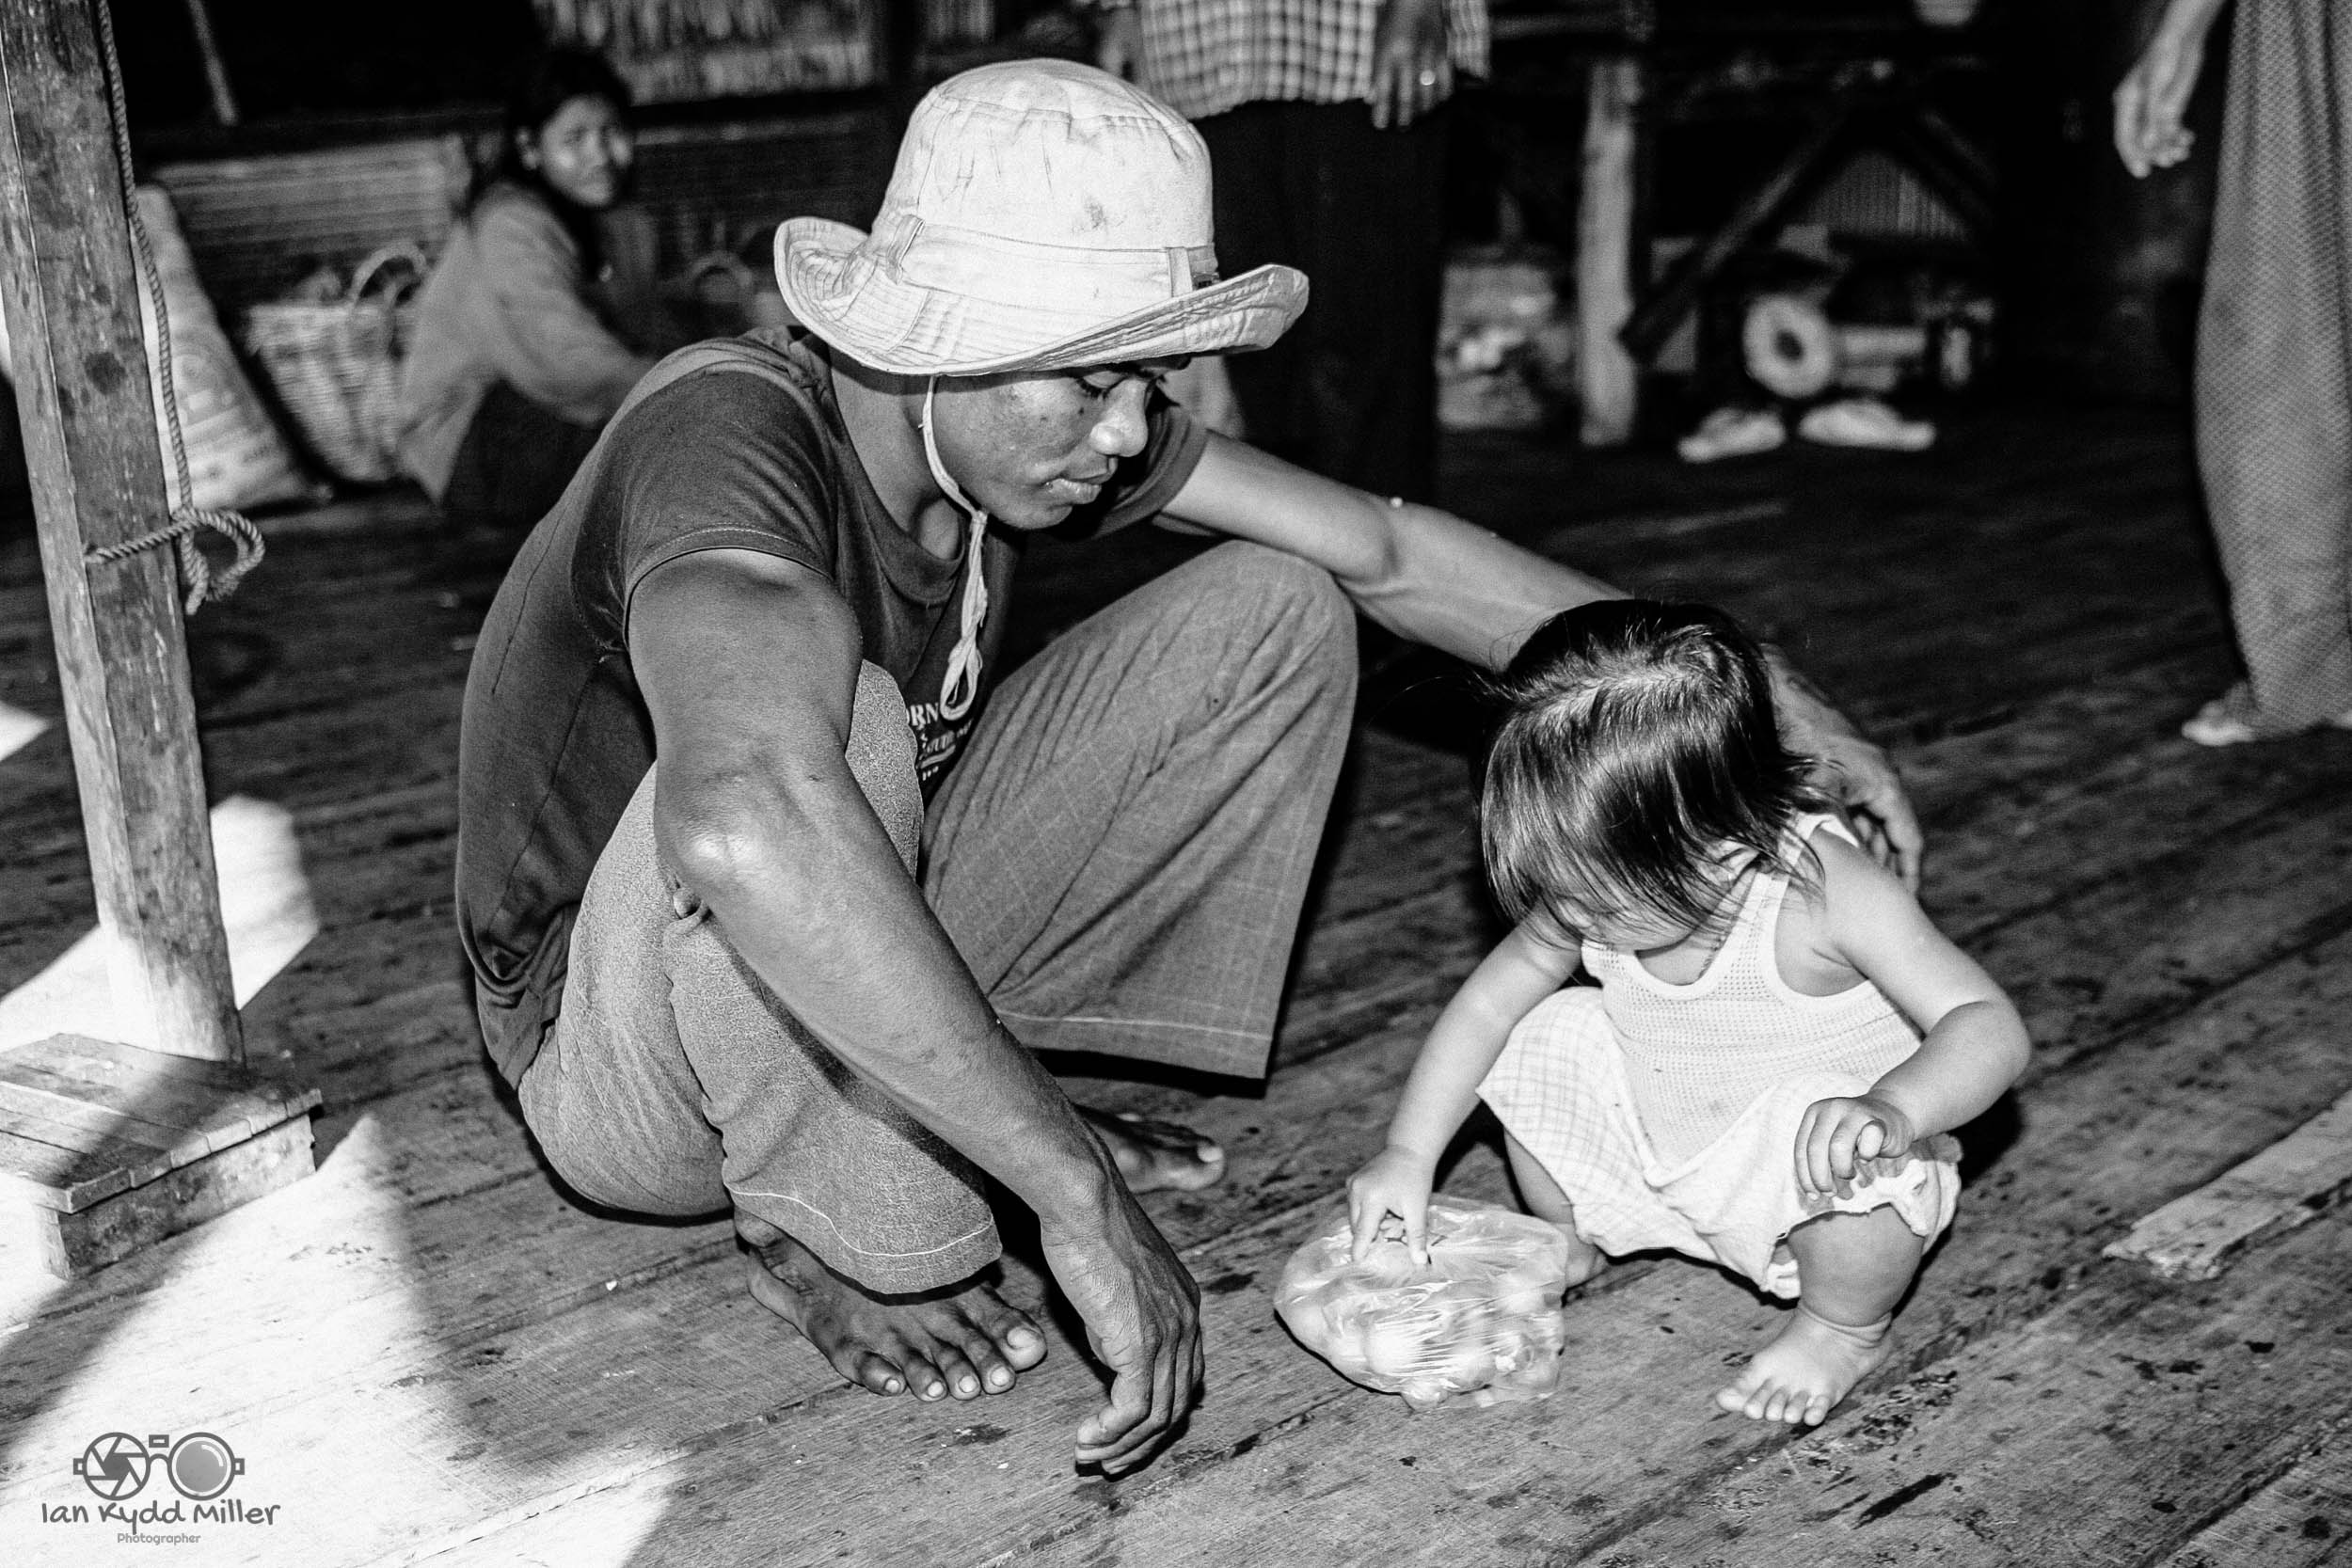
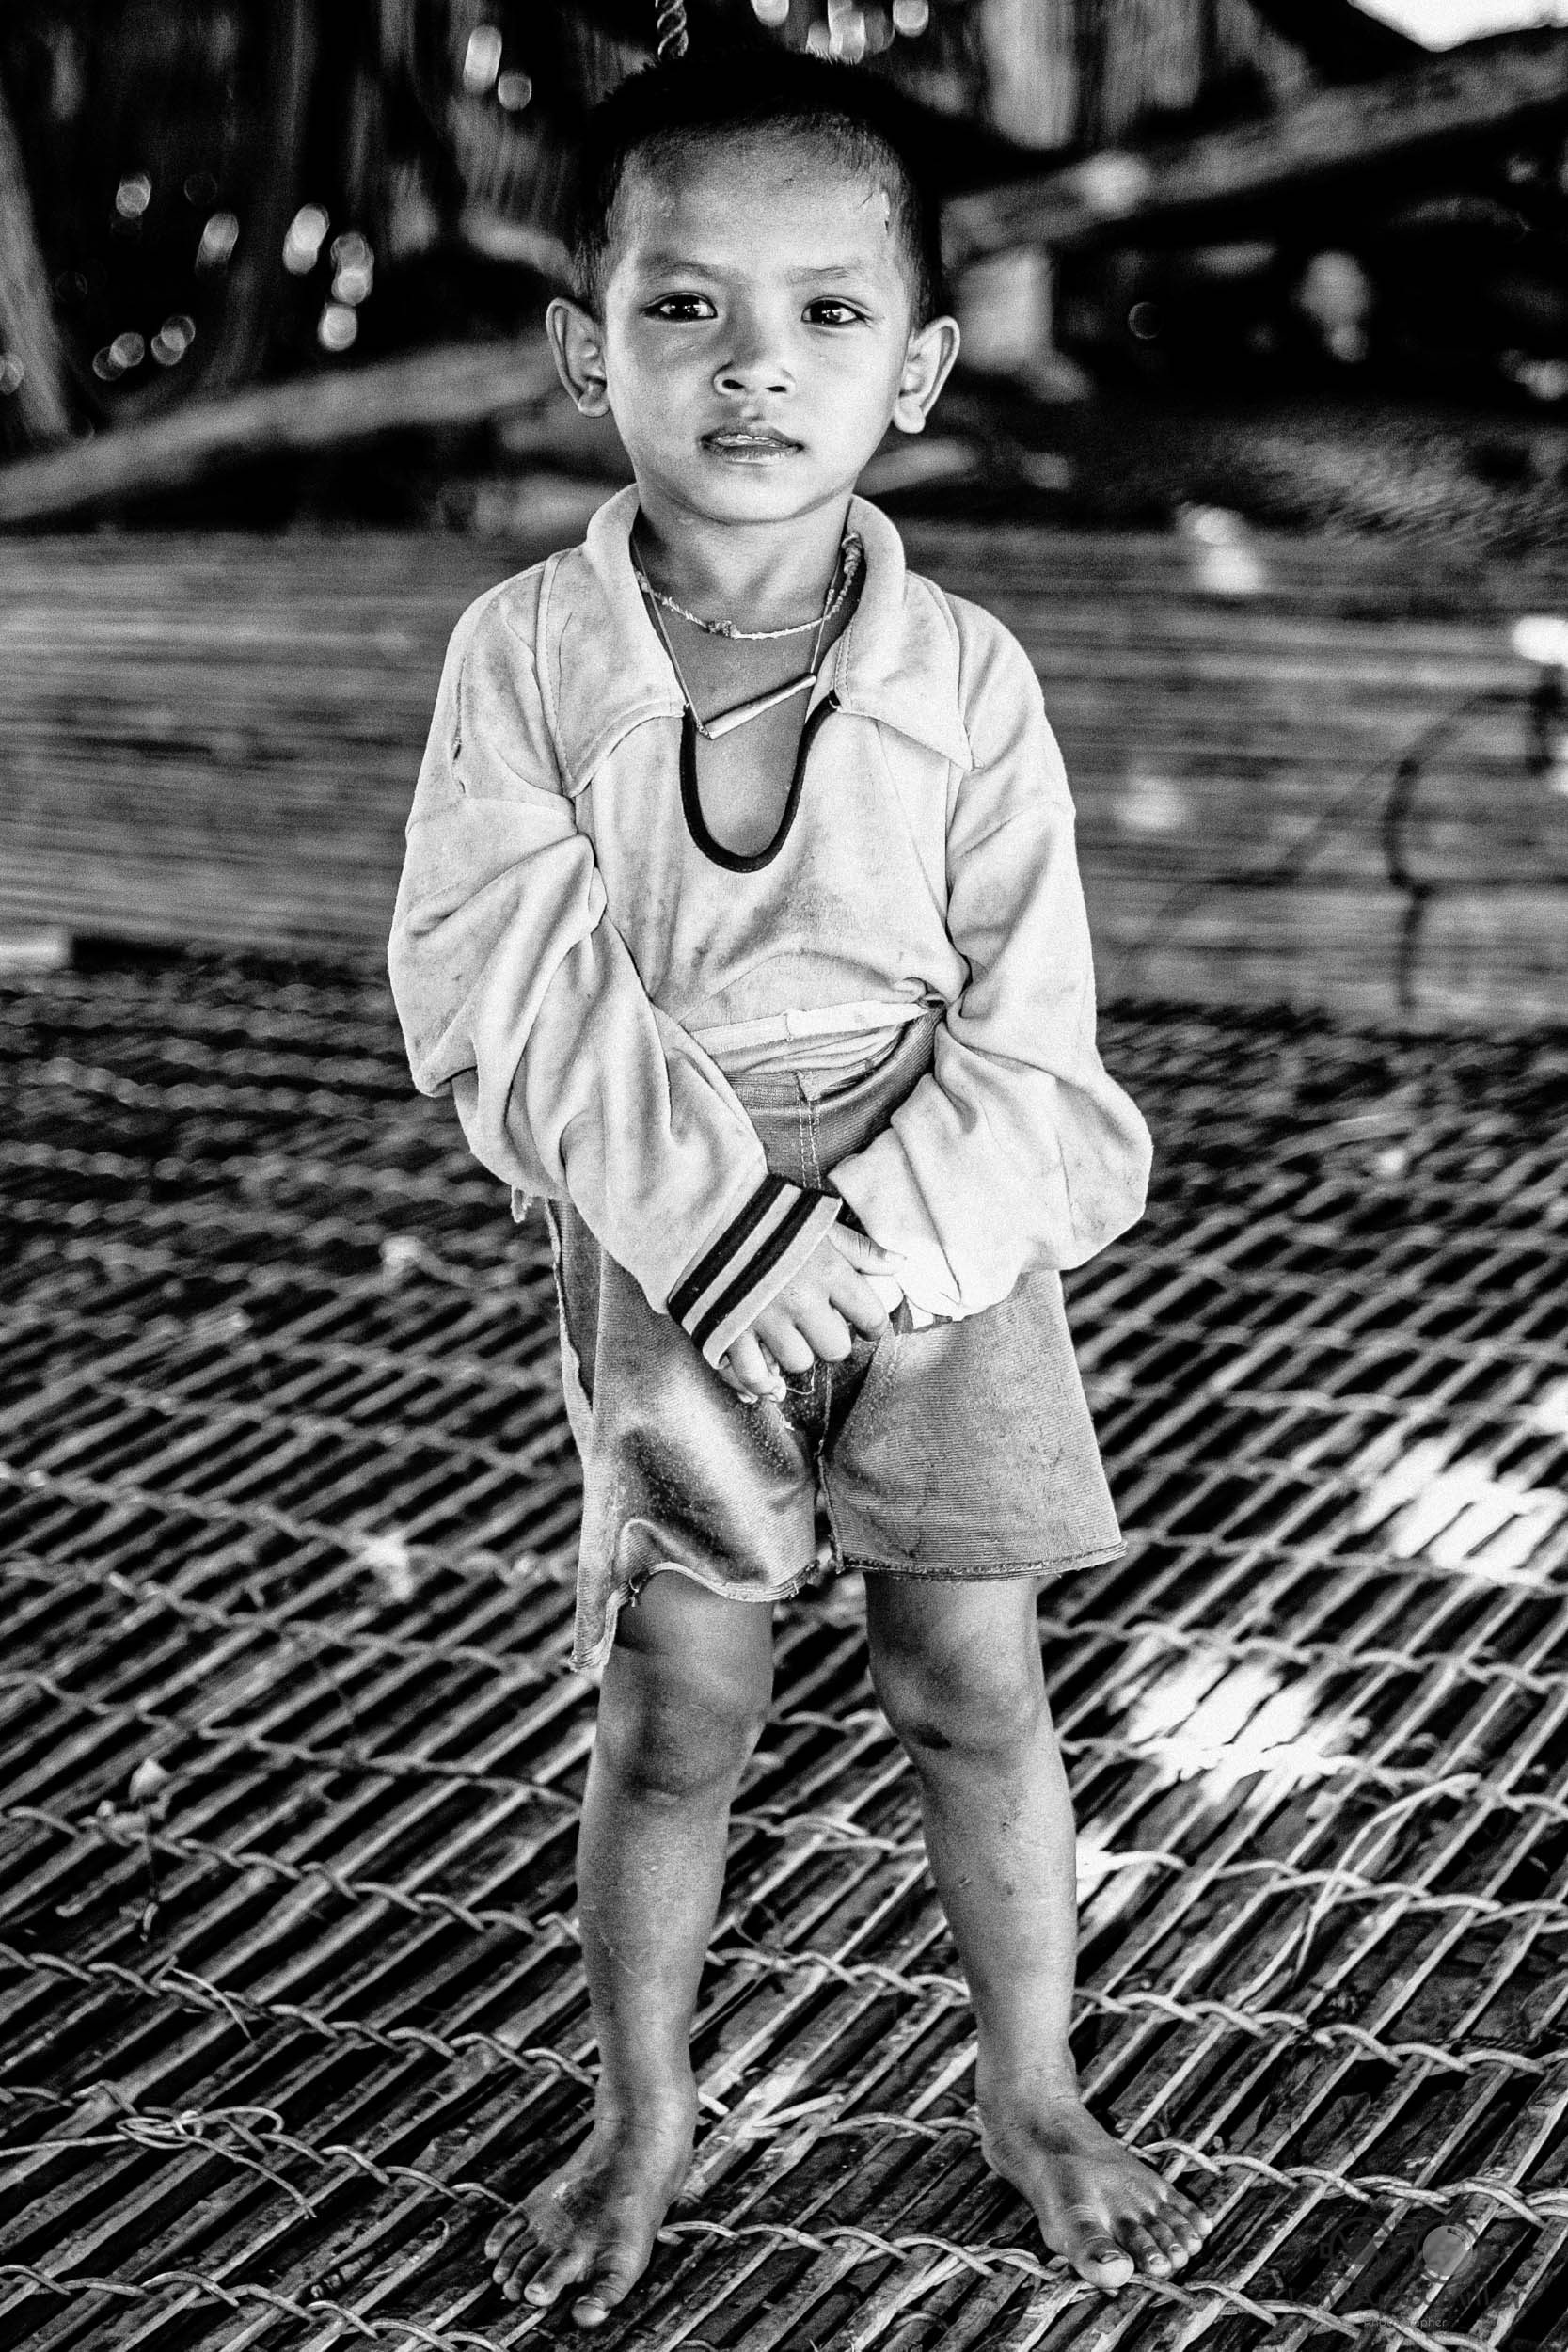
Photography, as an art form, has the profound ability to capture moments in time, but its true power lies in its capacity to evoke emotion and narrate the human experience. Humanism in photography is a movement that emphasizes this narrative, focusing on the dignity and beauty of everyday life and the common man’s struggles and joys.
The Roots of Humanist Photography
Humanist photography finds its origins in the early to mid-20th century, a period marked by significant social and political upheaval. It was during this time that photographers began to turn their lenses towards ordinary people, capturing the essence of daily life and the spirit of the community. This movement was particularly strong in Europe, with France being a notable epicentre.
The Philosophy Behind the Lens
At its core, humanist photography is about valuing the human experience and raising awareness of the shared emotions and conditions that bind us all. It’s a celebration of life in its most unvarnished form, portraying subjects with empathy and respect. The photographers of this school are not mere observers but storytellers who use their cameras to convey the intricacies of human existence.
Pioneers of Humanist Photography
One of the most influential figures in this movement was David Seymour, known as Chim, whose compassionate work reflected his deep-seated humanism and belief in photography’s power to awaken the public’s conscience. His images often depicted the aftermath of war and the resilience of the human spirit.
The Impact and Importance
Humanist photography serves as a visual chronicle of the human condition. It captures the happiest, saddest, and most triumphant moments of life. From peace and contemplation to war and leisure, it seizes the full spectrum of human emotions and experiences. This genre of photography helps us understand and connect with people from different walks of life, fostering a sense of empathy and unity.
The Legacy Continues
Today, humanist photography continues to inspire photographers around the world. It encourages them to look beyond the surface and capture images that tell stories about people striving to make the best of their lives. It remains a powerful tool for social commentary and a mirror reflecting the enduring human spirit.
In conclusion, humanist photography is more than just a style or technique; it is a philosophical approach to capturing life. It reminds us of the strength, beauty, and resilience inherent in the human spirit and the importance of preserving these moments for future generations. As we move forward, the principles of humanism in photography will undoubtedly continue to influence and guide photographers in their quest to document the profound narrative of humanity.
Photography is an art form that combines aesthetics with technical skill, where both details and technique play crucial roles in creating a compelling image. The essence of a good picture often lies in the photographer’s ability to effectively balance these elements to convey a vision or emotion.
Composition and the Rule of Thirds
Composition is the foundation of a good photograph. It’s about harmonising visual elements within the frame to guide the viewer’s eye towards the subject. The Rule of Thirds is a classic principle that suggests dividing the frame into nine equal segments by two equally spaced horizontal lines and two equally spaced vertical lines. Placing the subject along these lines or their intersections can create more tension, energy, and interest in the composition than simply centring the subject would.
Exposure: The Trifecta of Shutter Speed, Aperture, and ISO
Exposure is critical in photography, as it determines how light or dark an image will appear. The three pillars of exposure—shutter speed, aperture, and ISO—must be balanced to achieve the desired effect. Shutter speed affects motion blur, aperture influences the depth of field, and ISO impacts the image’s graininess or noise. Mastering exposure allows photographers to capture images that are visually striking and full of detail.
Focus: Sharpness Where It Counts
Focus is about directing attention to the most important part of the scene, the subject. A sharply focused subject against a softer background can make the subject stand out, drawing the viewer’s gaze to where the photographer intends. Different autofocus modes and manual focus adjustments give photographers control over this aspect.
Lighting: The Natural Paintbrush
Lighting is often considered the most important element in photography. It shapes and defines the subject, creates mood, and can dramatically alter the perception of a scene. Whether it’s the soft, diffused light of an overcast day or the golden hues of magic hour, understanding and utilizing natural light is a skill that significantly enhances the quality of a photograph.
Vision: The Photographer’s Intent
A good photograph starts with a clear vision. What is the photographer trying to convey? Is it the raw emotion of a candid moment or the serene beauty of a landscape? The photographer’s intent should guide all the technical choices made during the shooting process.
Technical Proficiency: Knowing Your Tools
Technical proficiency with camera settings and understanding the capabilities of one’s equipment are essential. Knowing when to use a tripod, which lens is best for the situation, or how to adjust settings quickly in changing conditions can make the difference between a good and great shot.
Post-Processing: The Final Touch
In the digital age, post-processing plays a significant role in the outcome of a photograph. Adjustments to colour balance, contrast, and sharpening can enhance details and correct any exposure issues. However, it’s important to maintain the integrity of the original image and not rely on editing to fix poor technique.
Conclusion
A good picture is not just about the details or the camera skills; it’s about how all these elements come together to create something greater than the sum of its parts. It’s about the photographer’s ability to see the world uniquely and to share that vision through the lens. Whether you’re a seasoned professional or an enthusiastic amateur, the journey to mastering photography is a continuous learning process, filled with moments of frustration and triumph. But it’s these moments that make photography such a rewarding art form.
Photography, a medium that has been entwined with the history of art since its inception in the 19th century, has sparked debates and discussions about its place in the art world. Is photography a true art form? This question has echoed through galleries, studios, and art schools alike, challenging the boundaries of artistic expression.
The essence of art lies in the conscious use of skill and creative imagination, especially in the production of aesthetic objects. By this definition, photography undoubtedly qualifies as an art form. It is a craft that requires an eye for detail, a sense of composition, and the ability to capture a moment that speaks volumes. The photographer, much like a painter or sculptor, uses their camera as a tool to convey emotions, tell stories, and bring attention to the overlooked nuances of daily life.
Historically, photography was not always embraced by the art community. In the 19th century, it was often regarded as a mere mechanical process, lacking the ‘refined feeling and sentiment’ that characterized ‘true art’. However, this perception has shifted dramatically over time. Today, photography is celebrated for its artistic merit, with numerous museums and galleries around the world dedicated to photographic works.
Photographers are artists who make myriad creative decisions, from choosing the subject and framing to selecting the right lighting and post-processing techniques. These choices are akin to a painter deciding on brushstrokes or a composer crafting a melody. The result is a piece that transcends mere replication of reality; it is an interpretation, a slice of life seen through the photographer’s unique perspective.
Moreover, photography has the power to challenge our perceptions and push the boundaries of reality. Surrealism, for example, is a domain where photography shines, creating images that defy logic and explore the depths of the human psyche. It is in these instances that photography indisputably asserts itself as an art form, capable of evoking a spectrum of feelings and thoughts in the viewer.
It captures the ephemeral, immortalizes the transient, and, most importantly, it allows us to see the world through another’s eyes. Photography is an art that speaks the universal language of humanity, connecting us across time and space with the power of a single image. So, let us celebrate photography not just as a true art form, but as a vital part of our cultural tapestry that continues to inspire and move us.