🎯 Why Sharp Focus Matters in Photography

Lenses, opinons, thoughts, photography, pictures, street, Travel

Clarity isn’t just technical—it’s emotional

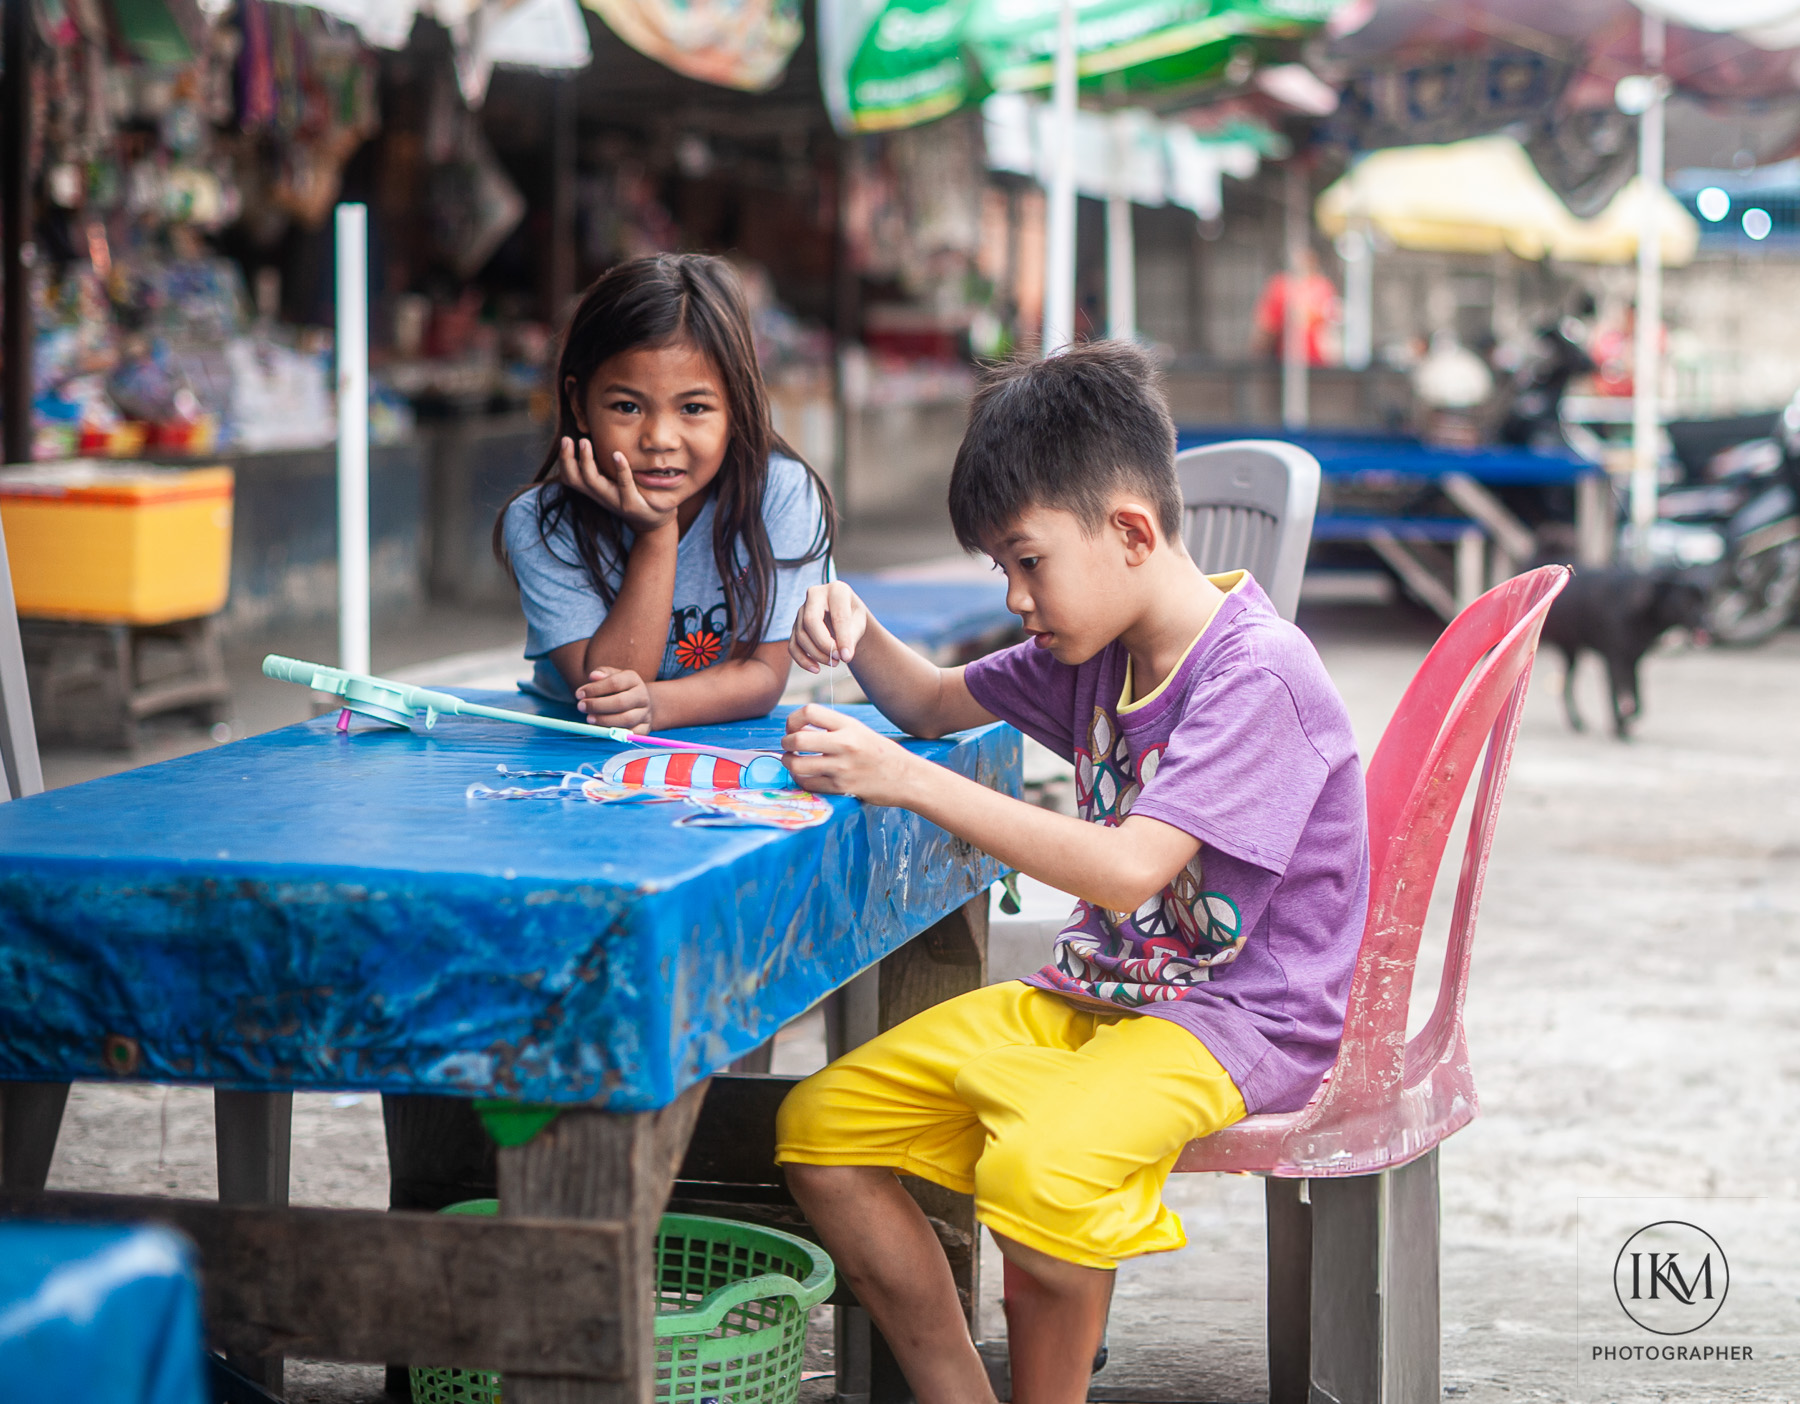
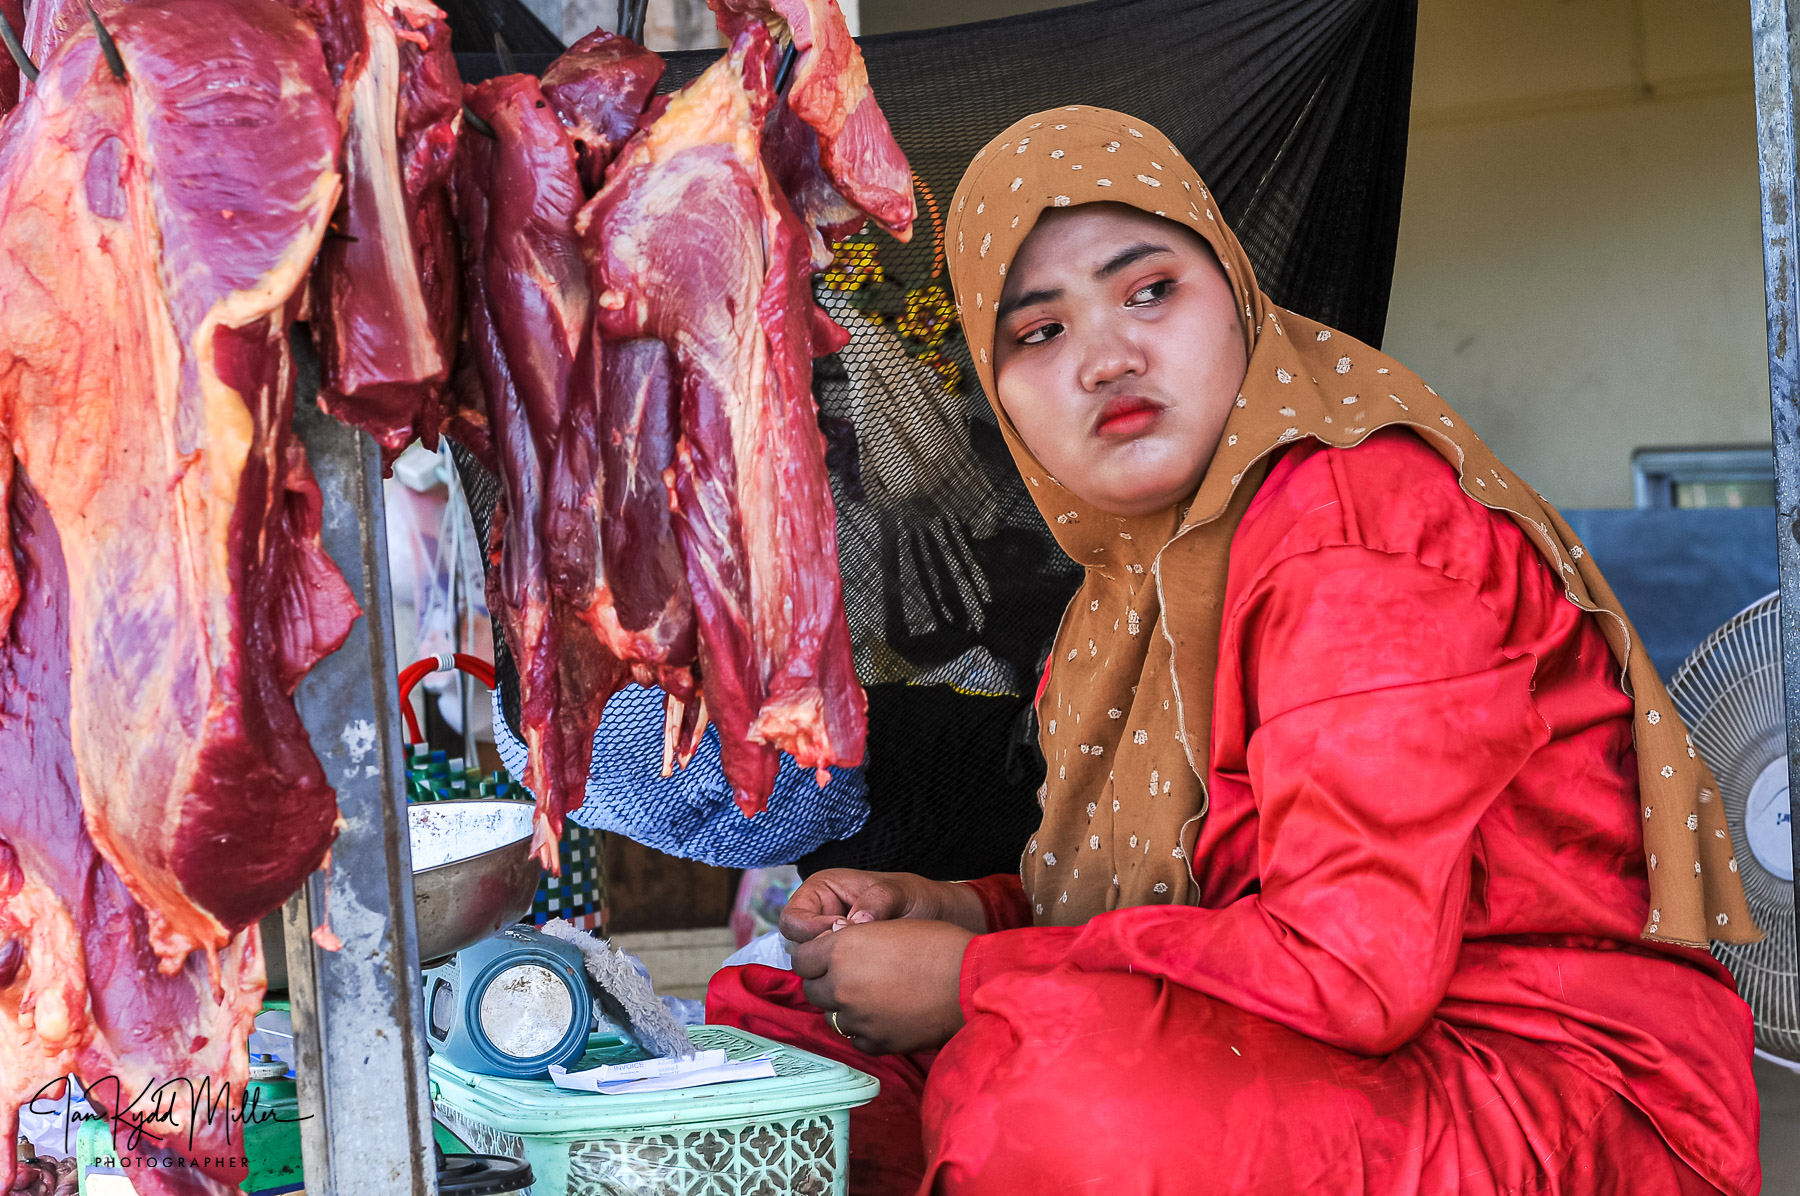
Focus is more than a technical checkbox. It’s a storytelling tool. A sharply focused image draws the viewer’s eye exactly where you want it—whether that’s a subject’s eyes, a product detail, or a fleeting moment in motion. Blurry or misfocused shots can feel accidental, distracting, or amateurish unless used deliberately for artistic effect.

🔍 What “Sharp Focus” Really Means

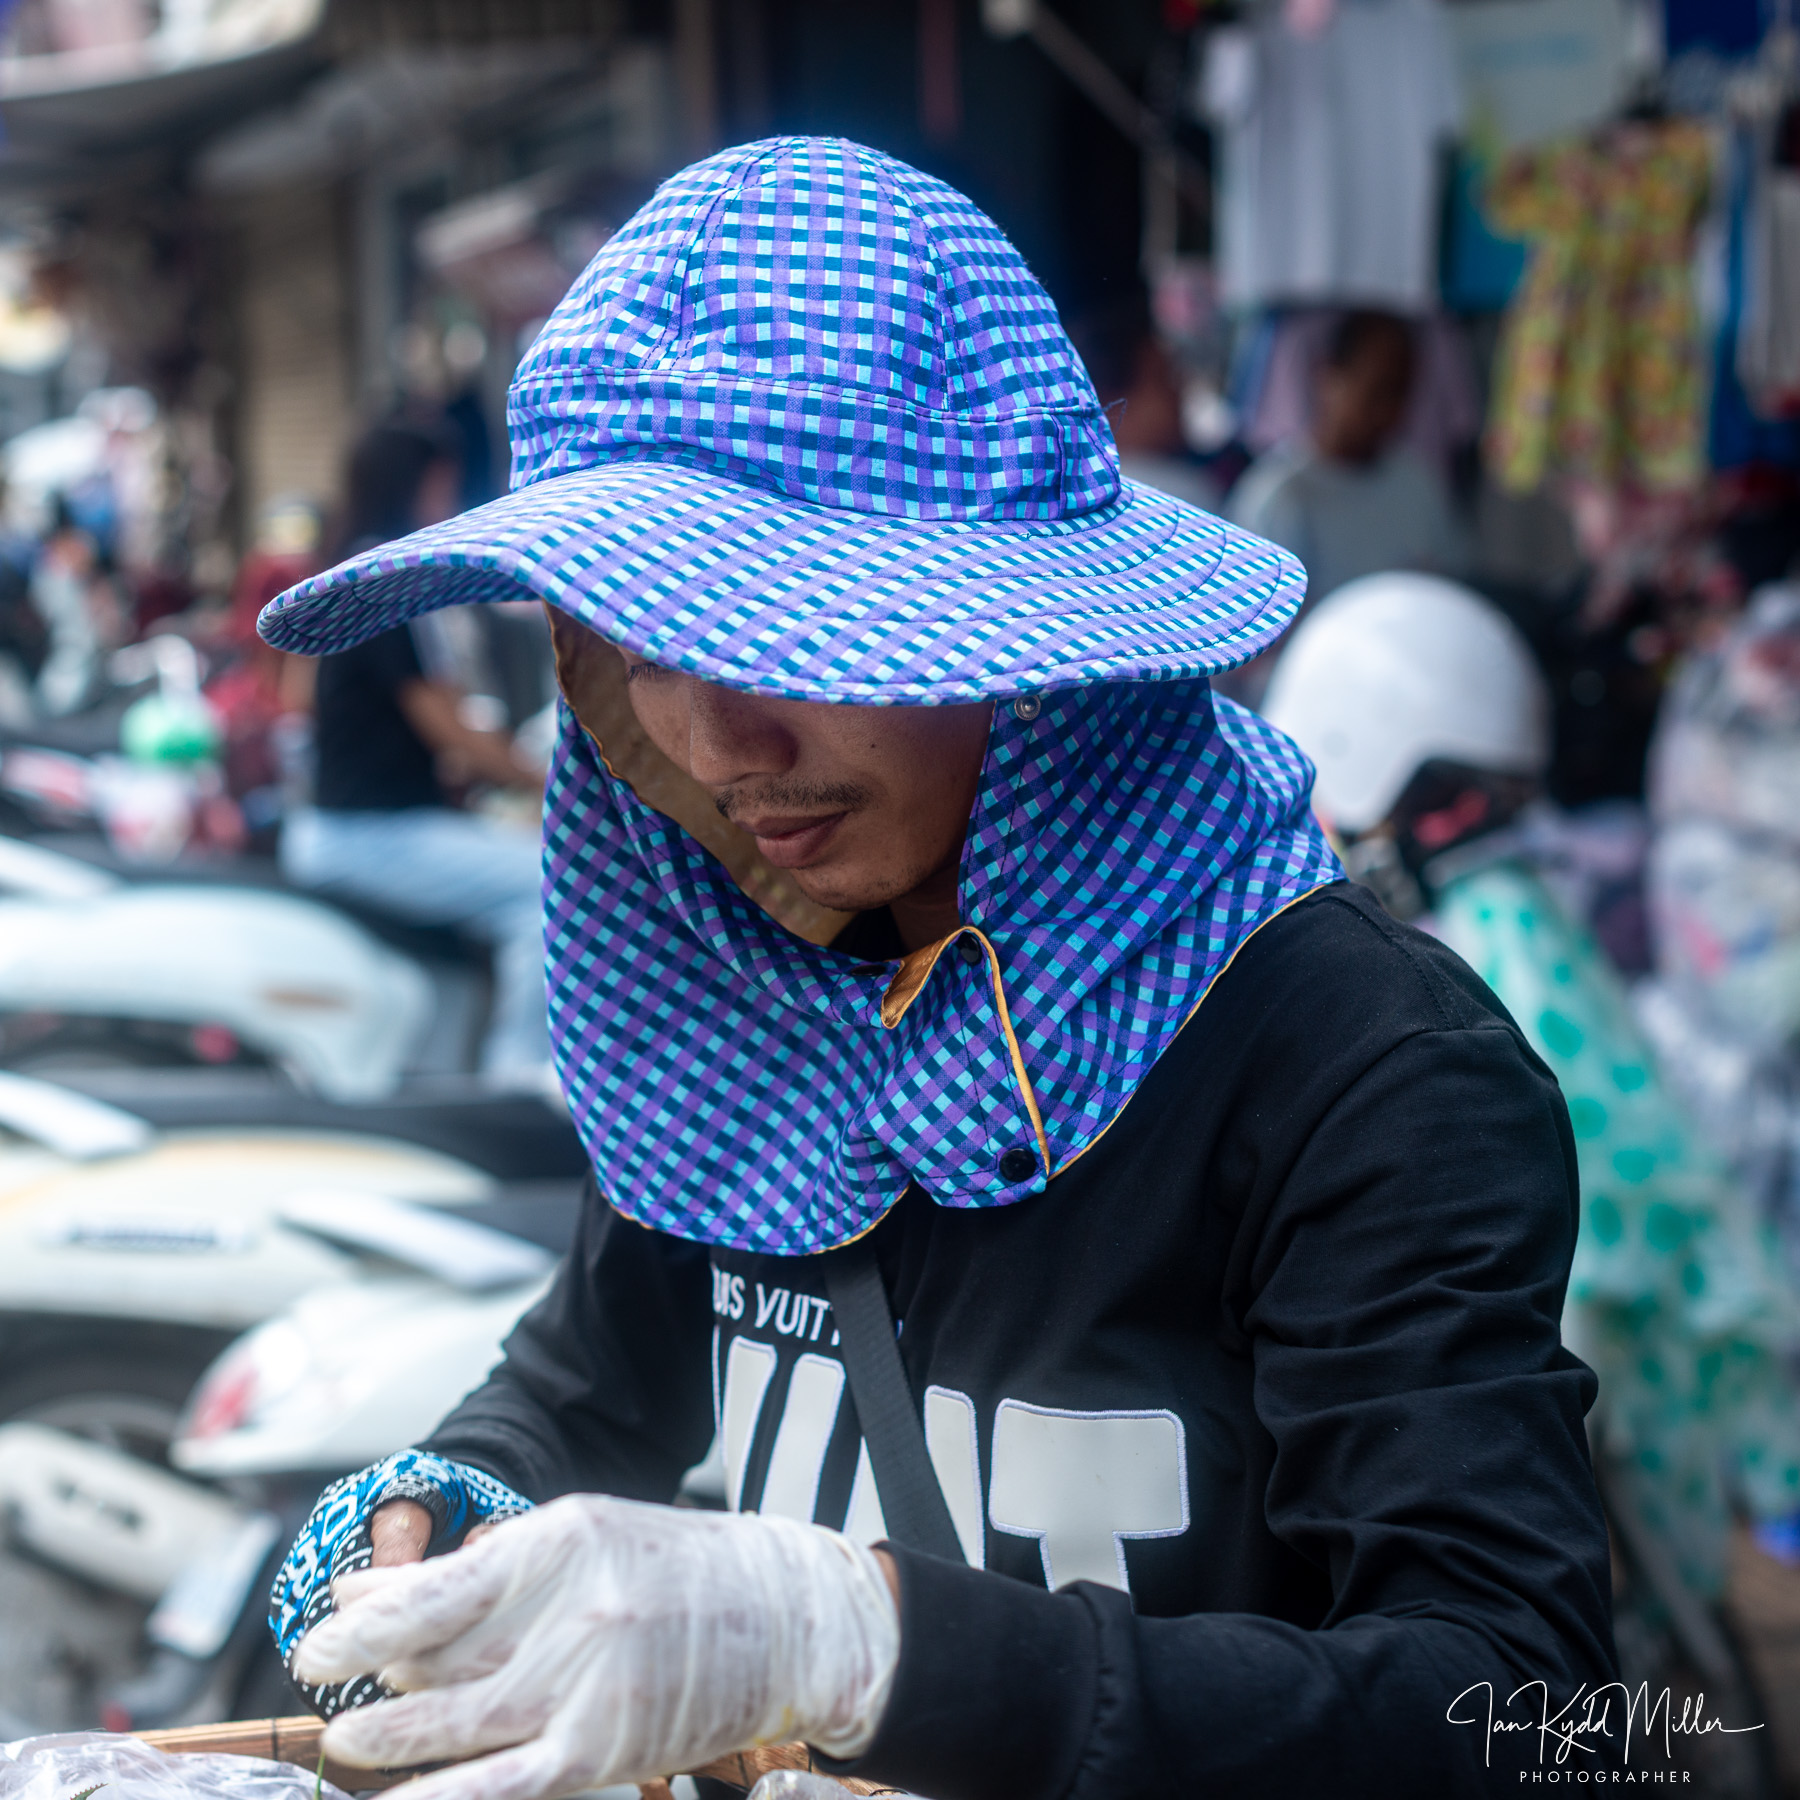
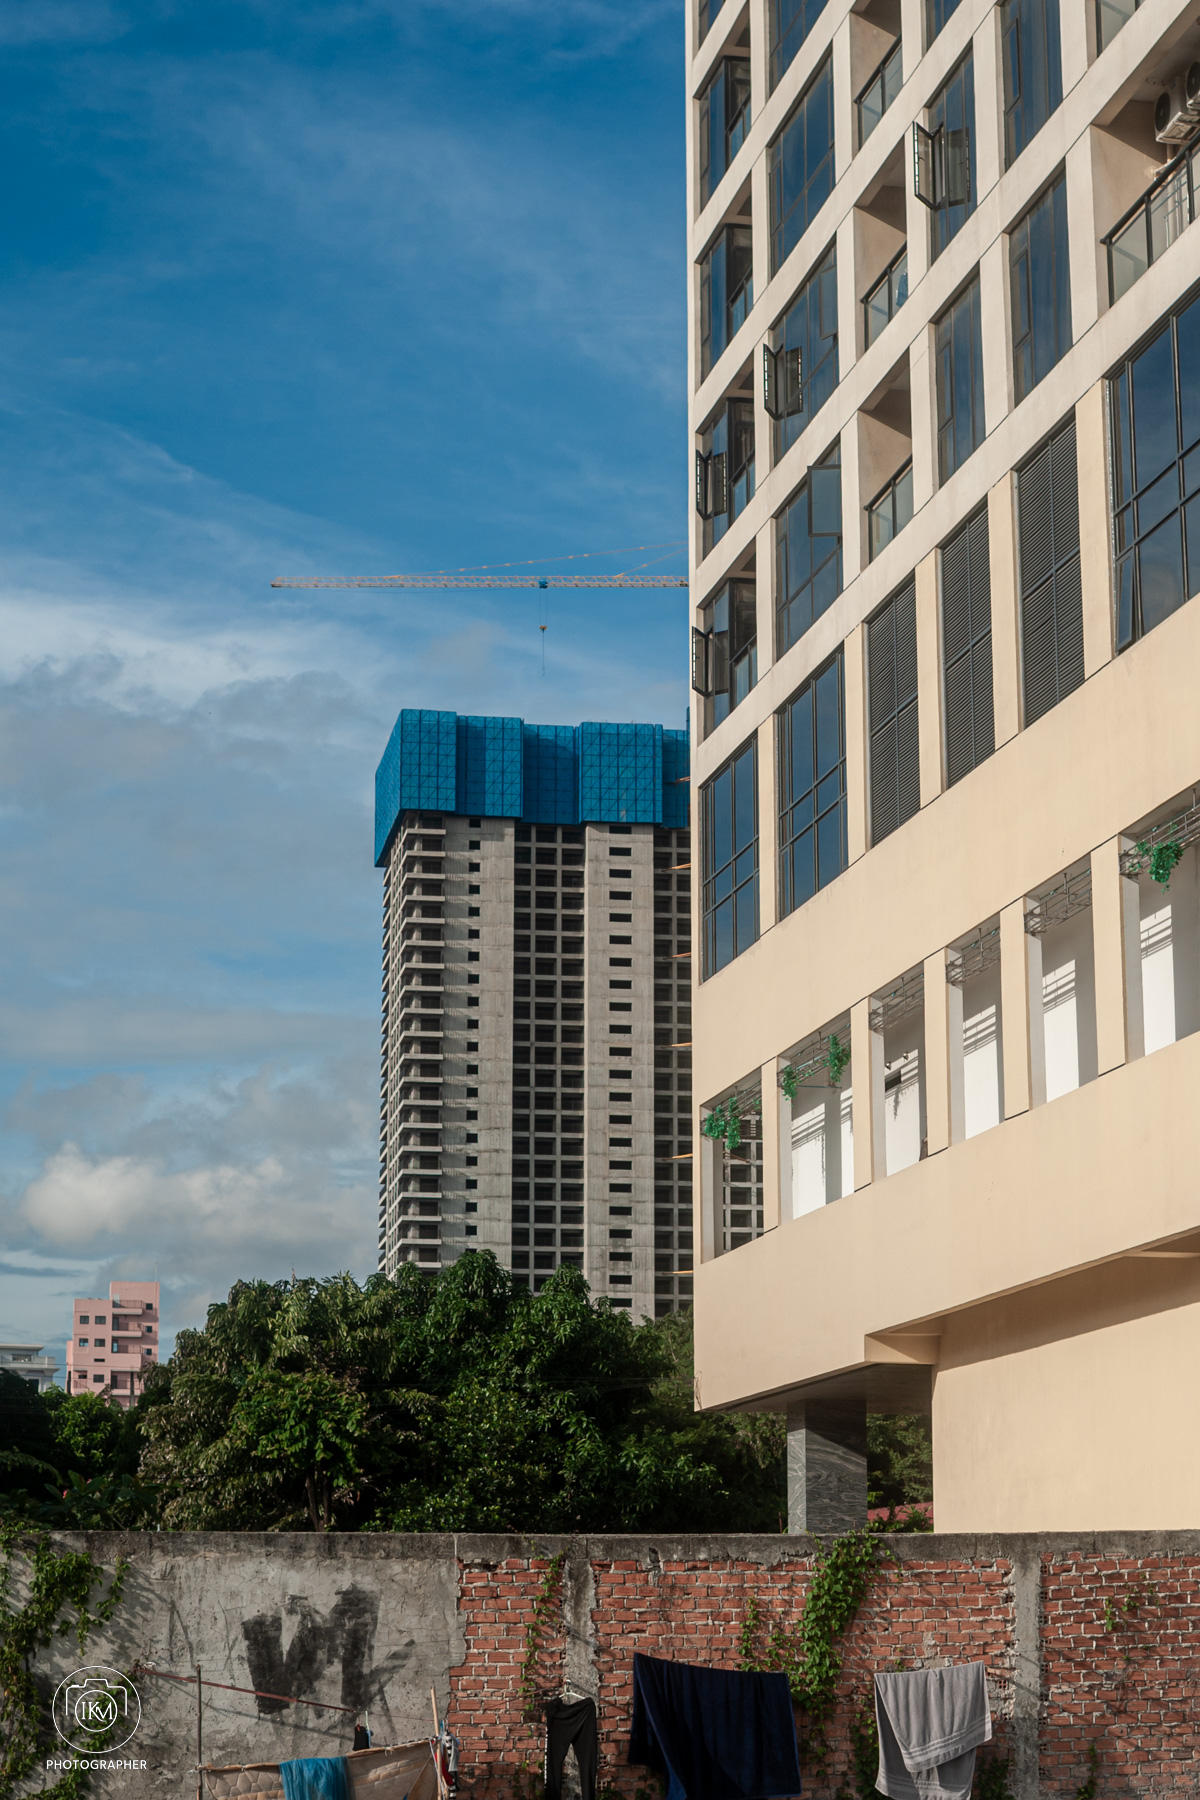
  • Plane of focus: The specific area in your frame that’s tack-sharp. Everything else falls into blur depending on depth of field.
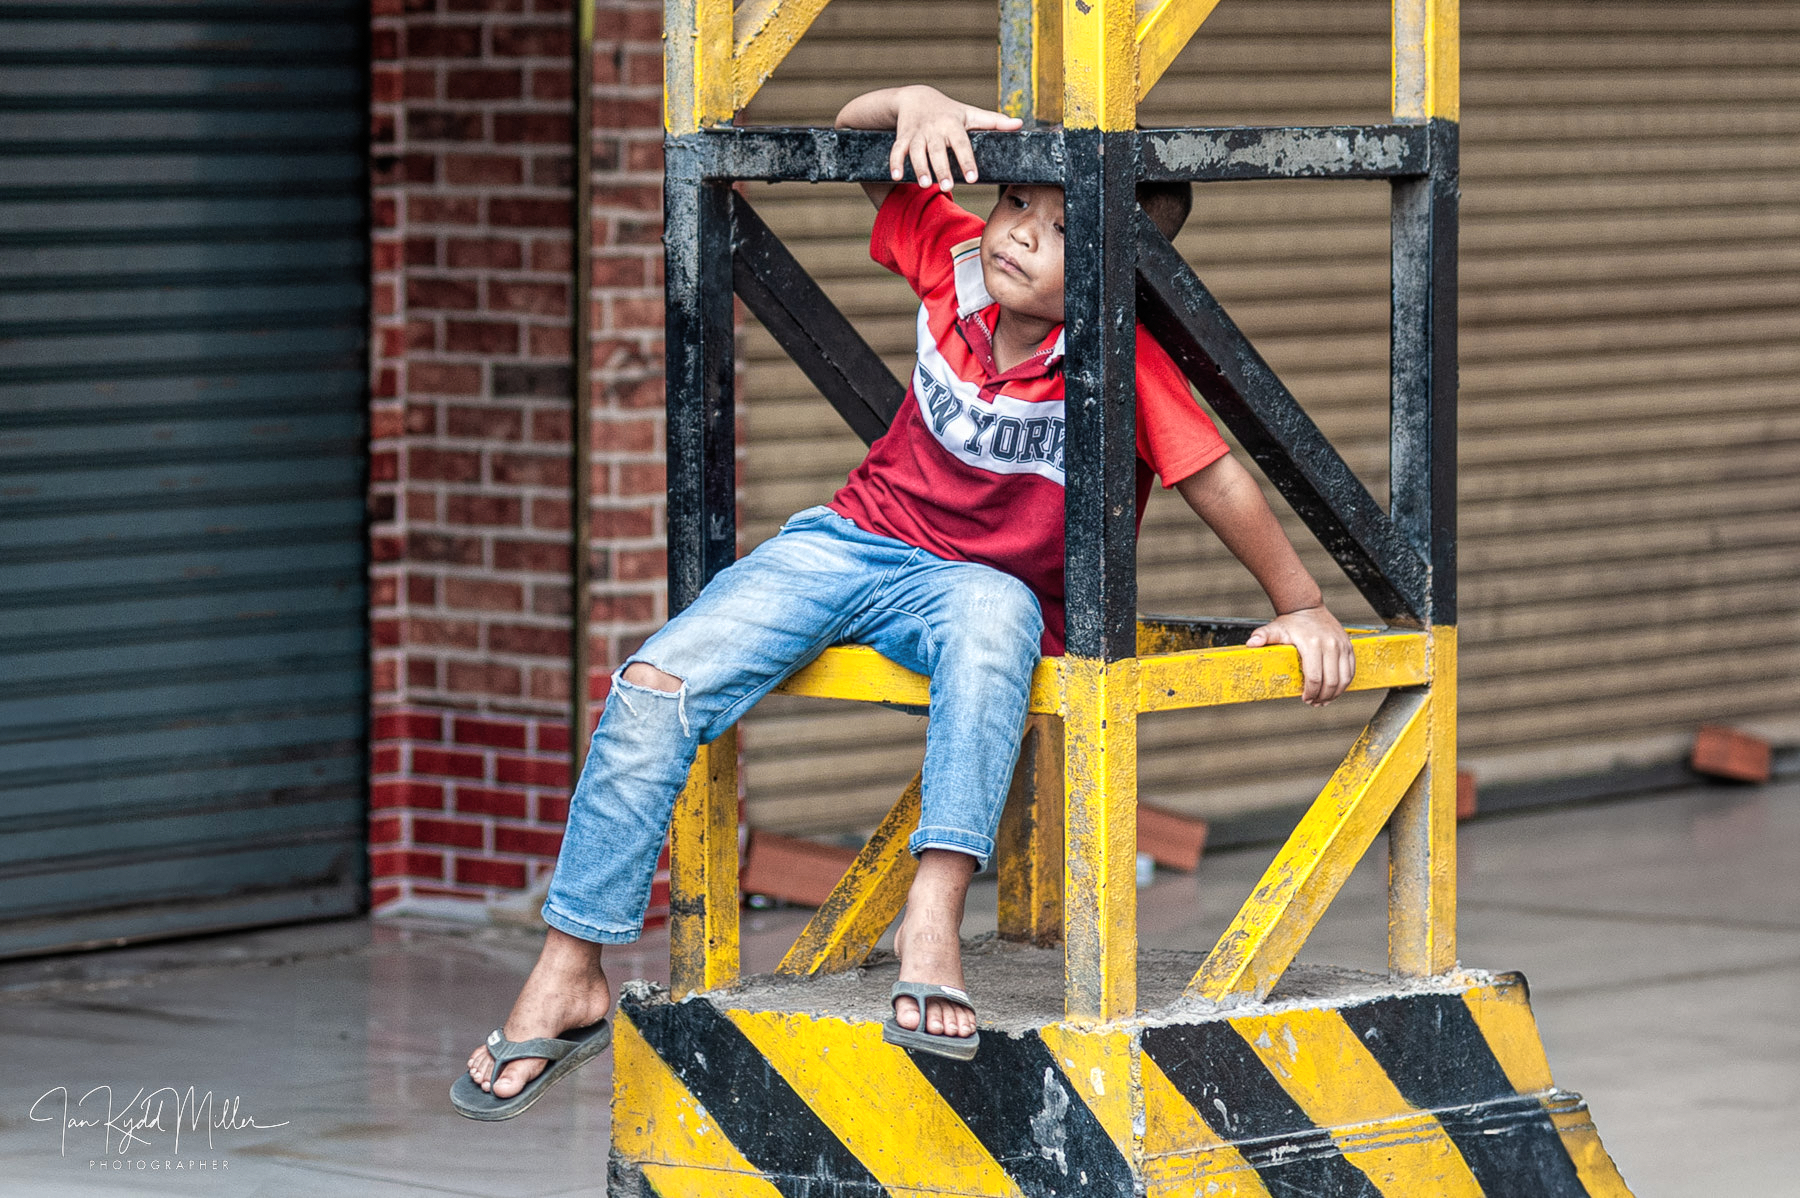
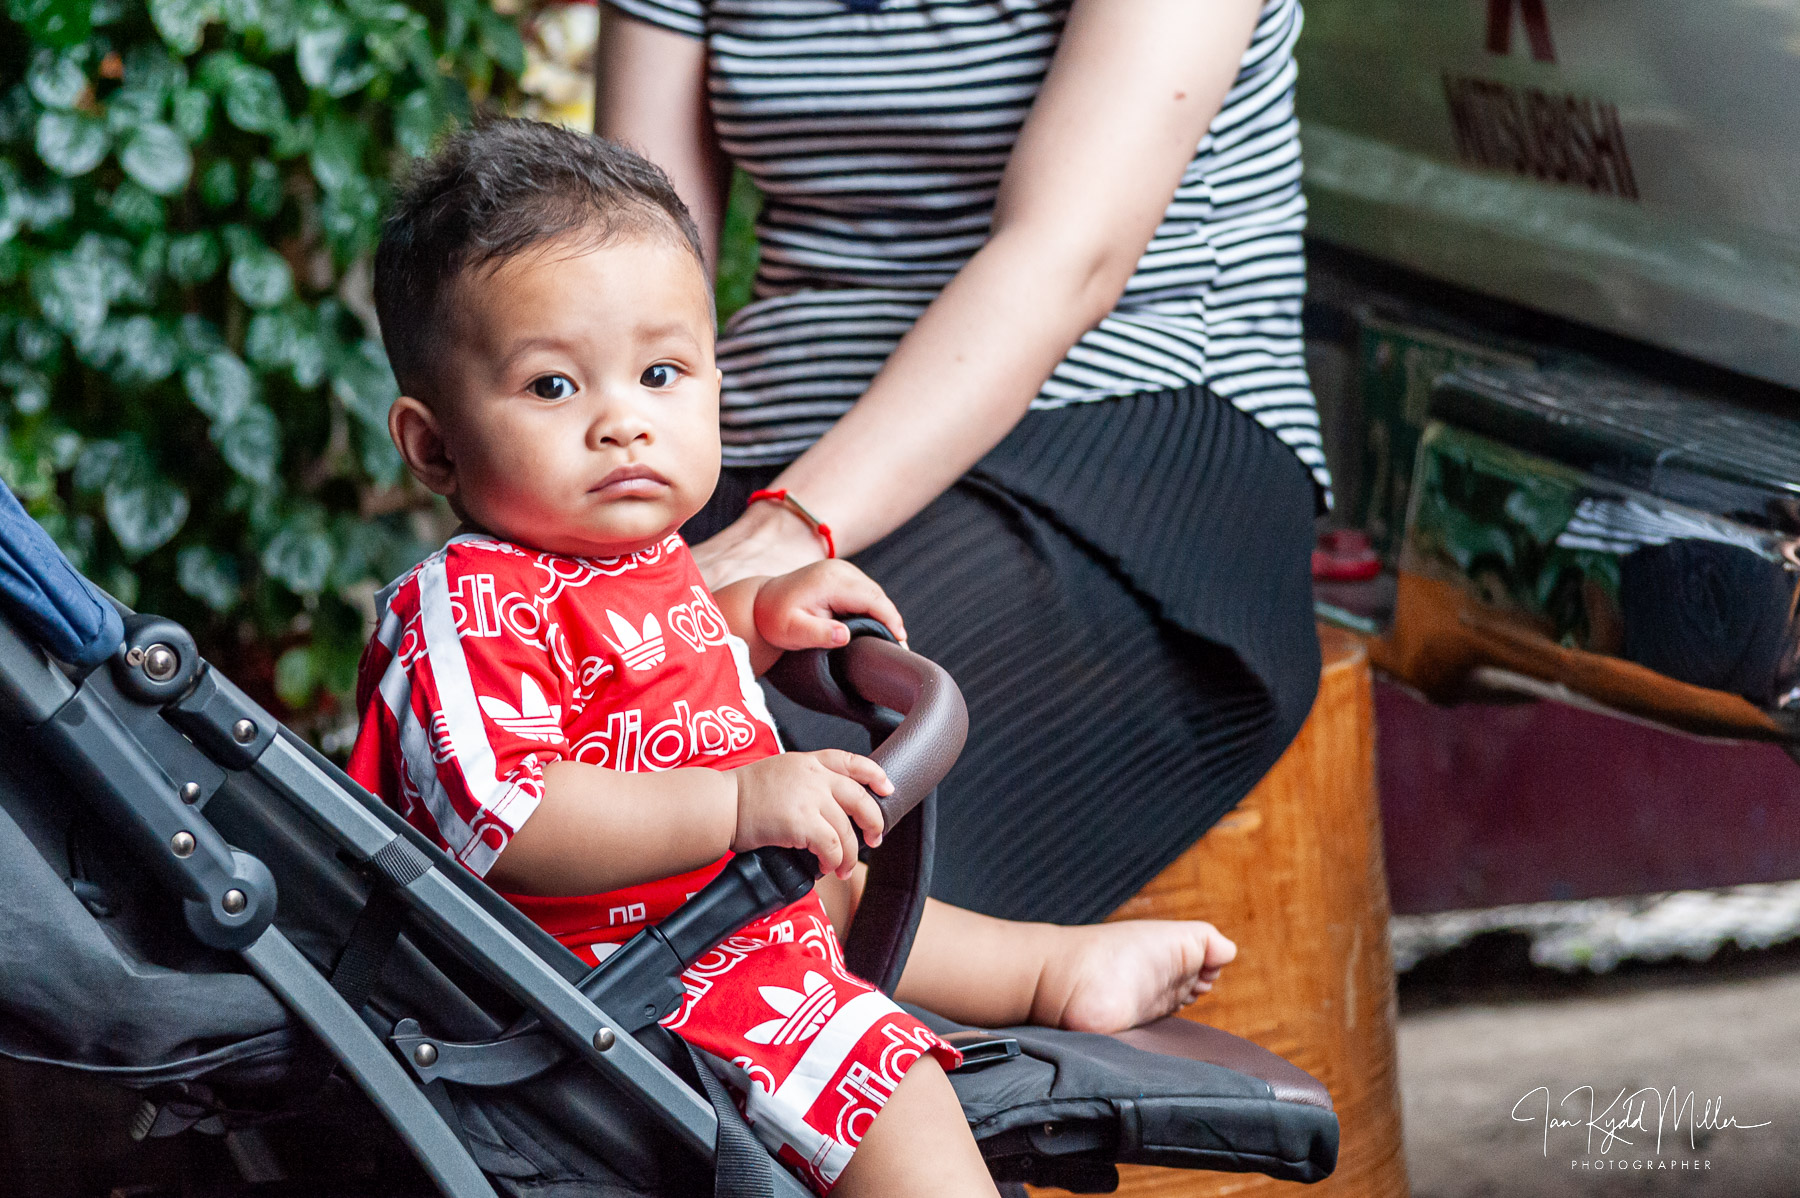
  • Subject isolation: Sharp focus helps separate your subject from the background, especially with wide apertures.
  • Viewer engagement: Crisp detail invites viewers to linger, explore textures, and emotionally connect with the subject.
  • Professionalism: Sharpness signals control and intent—essential in commercial, editorial, and portfolio work.

🧠 Common Focus Mistakes

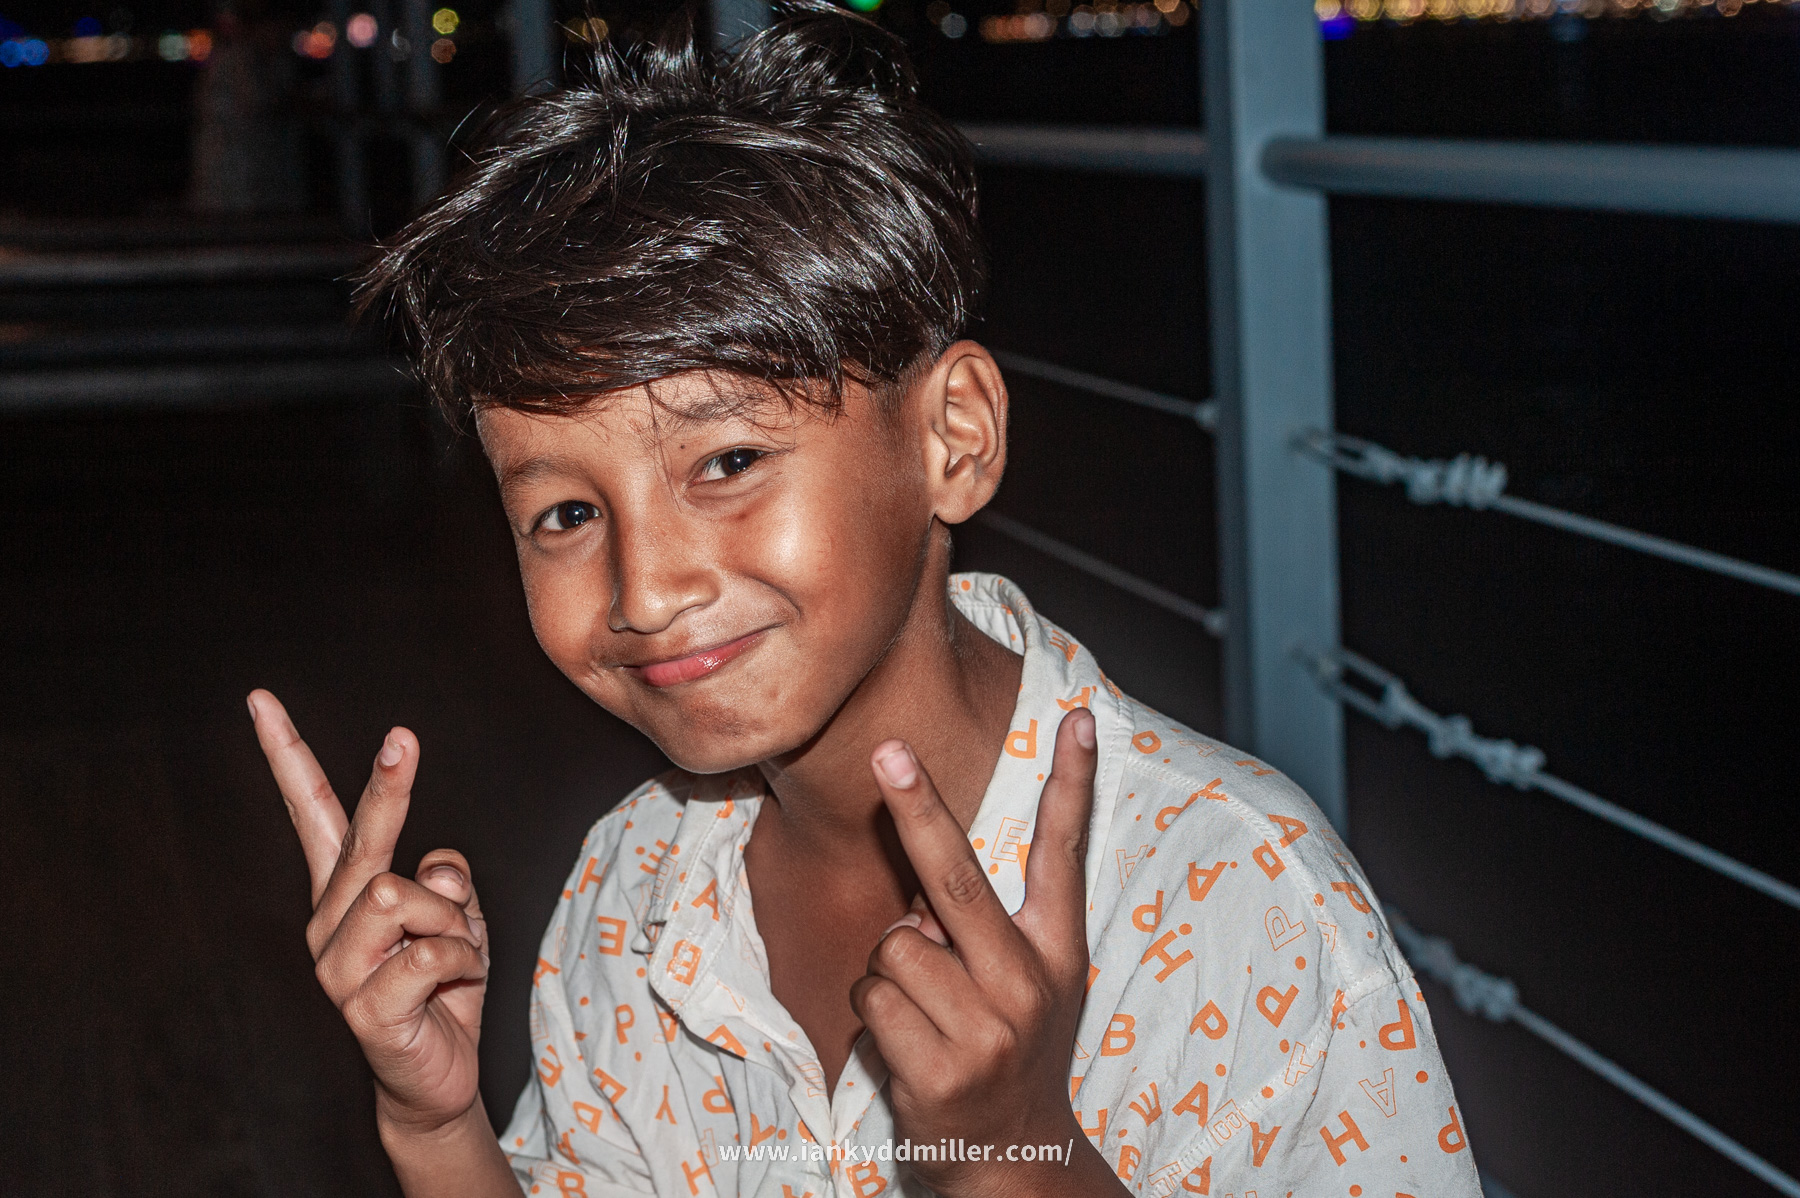
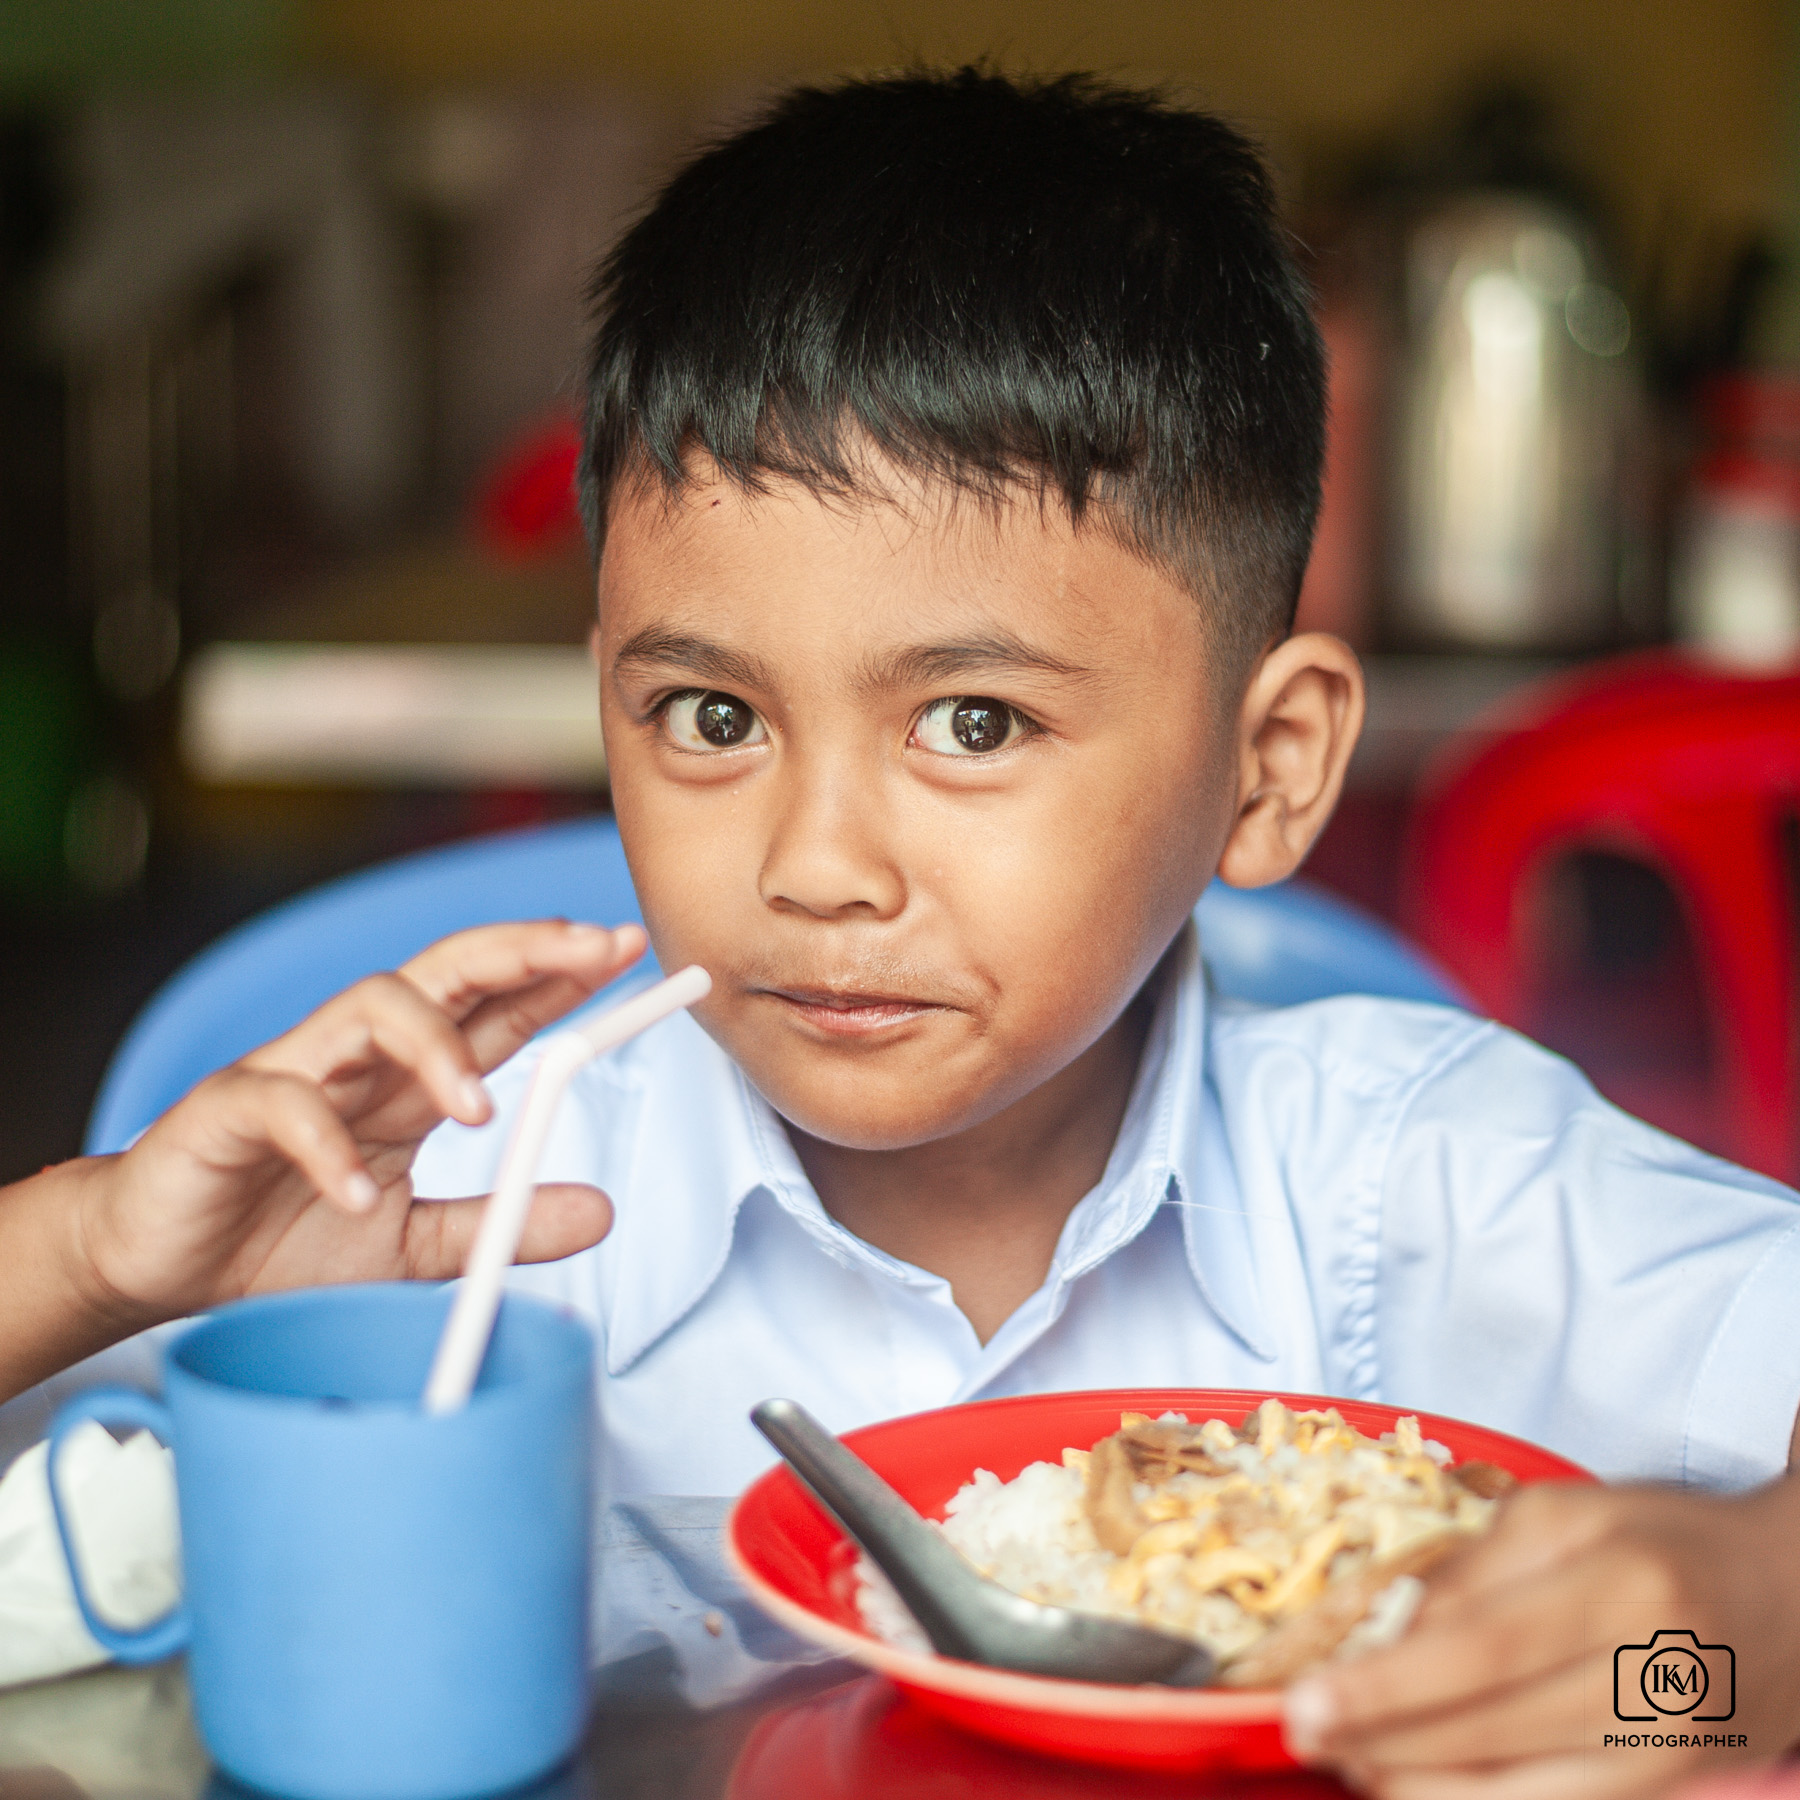
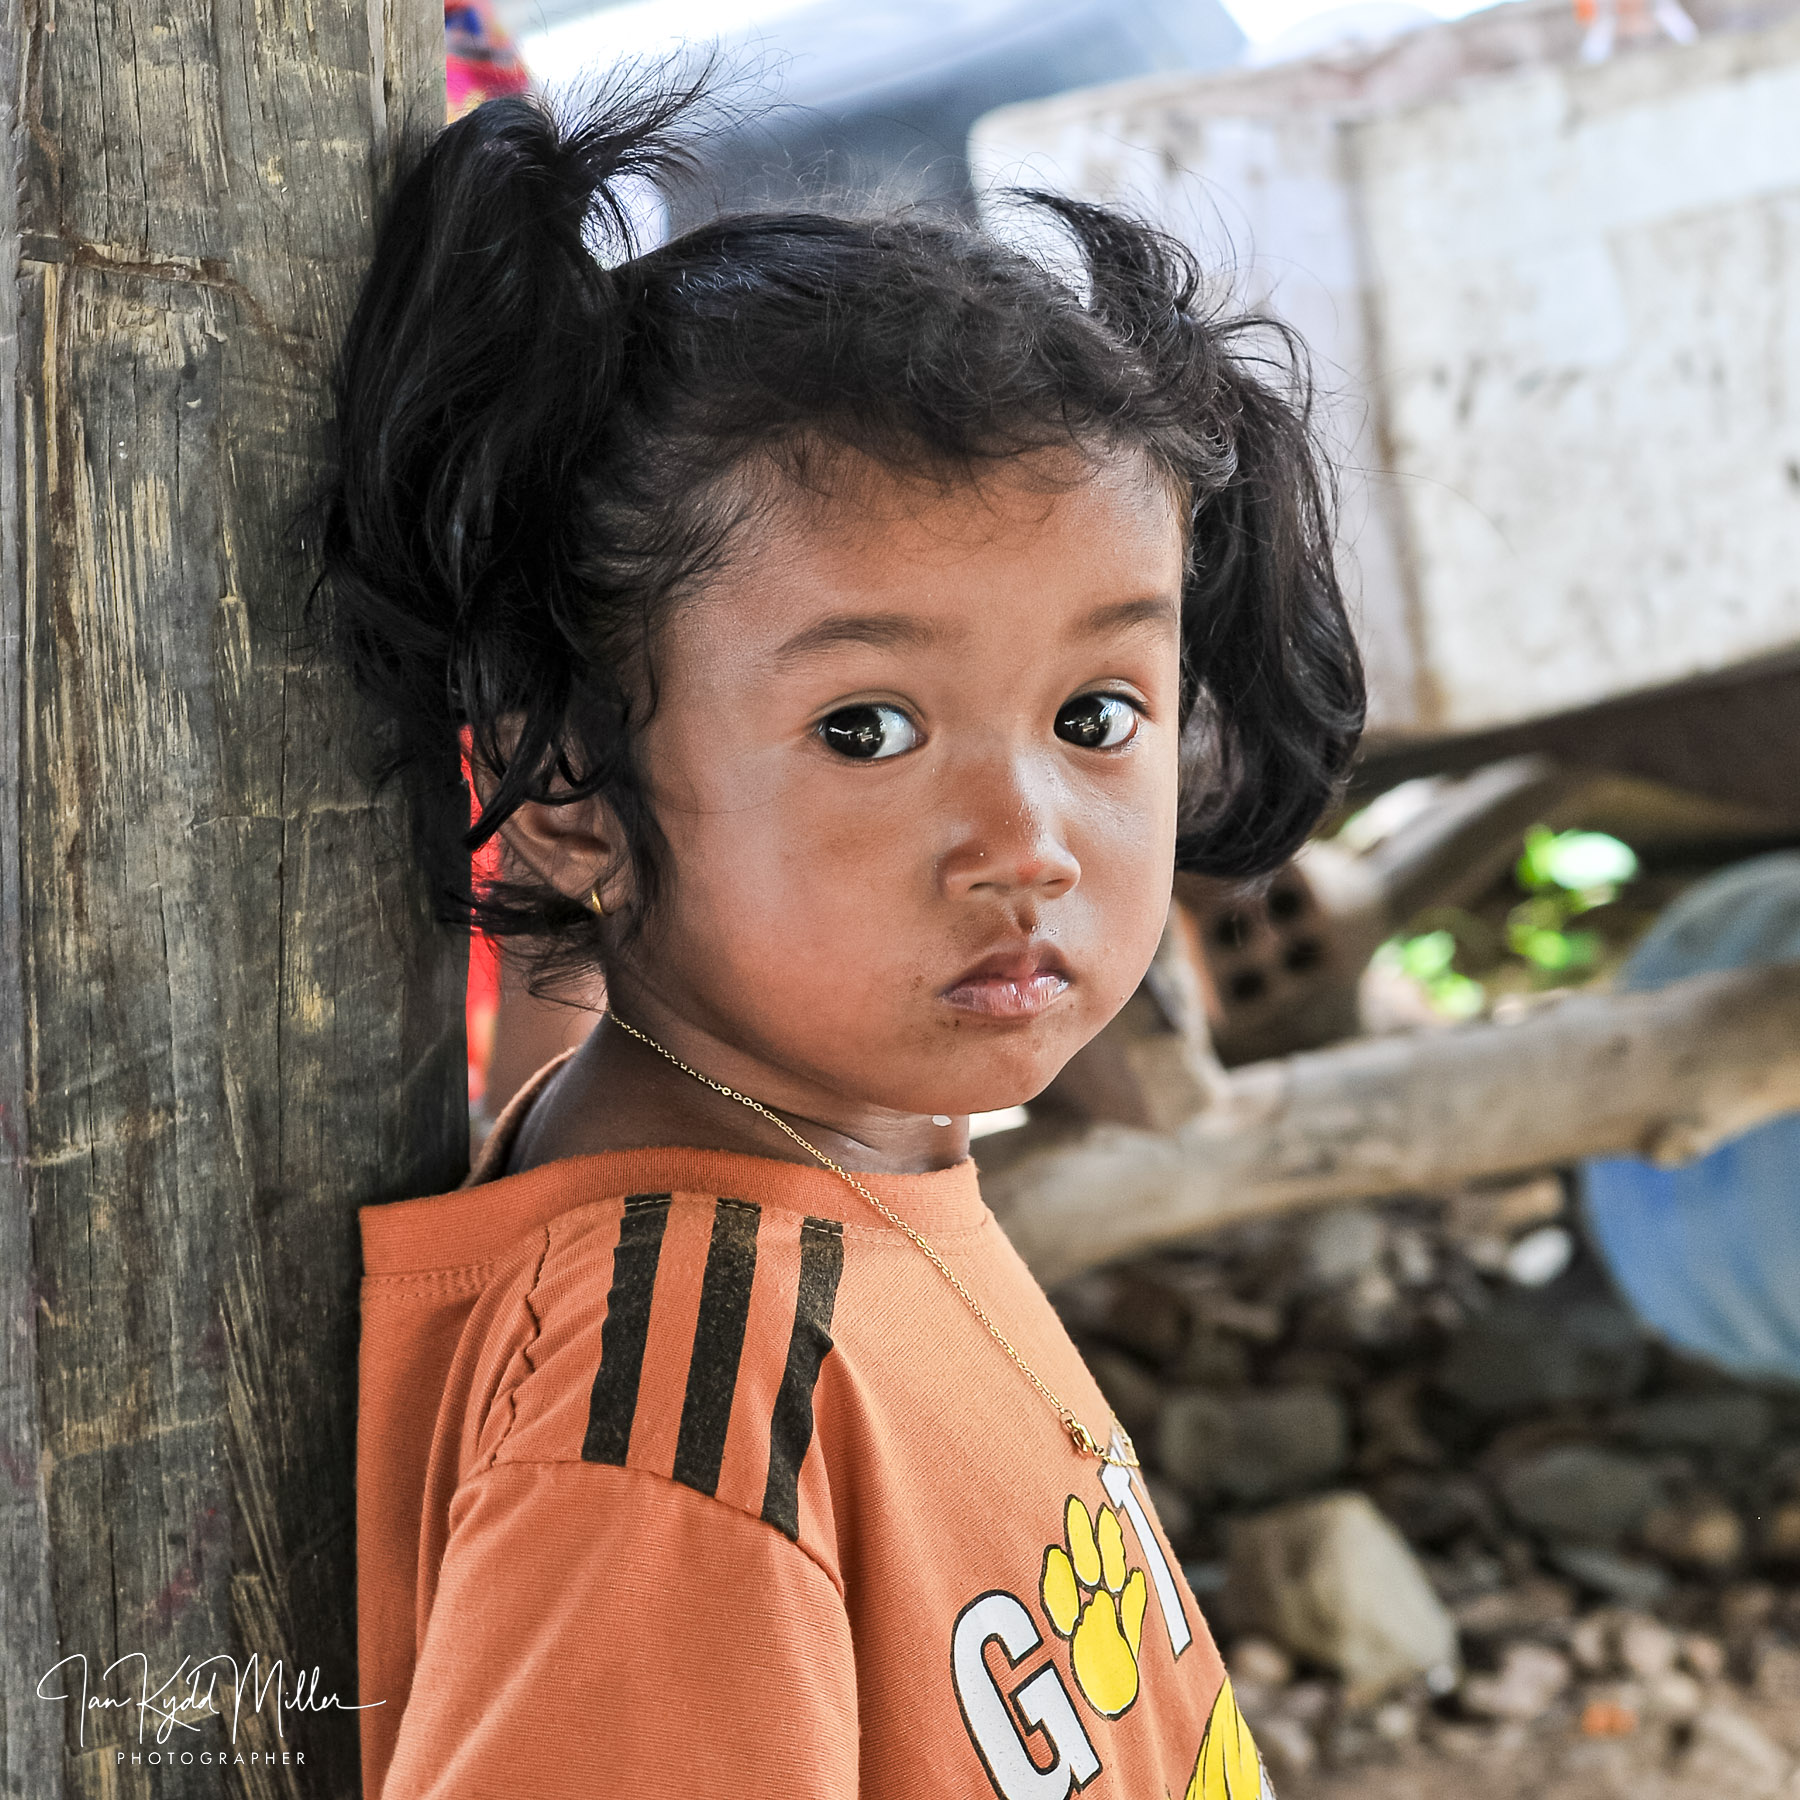
  • Back-focus or front-focus: The camera locks onto the wrong part of the scene—e.g., ears instead of eyes.
  • Focus-recompose errors: Reframing after focusing can shift the plane of focus, especially at wide apertures.
  • Motion blur mistaken for soft focus: Slow shutter speeds can cause blur even if focus is accurate.
  • Autofocus mode mismatch: Using single-point AF for moving subjects or wide-area AF for precise portraits can lead to missed shots.

⚙️ How to Nail Sharp Focus

  • Use single-point AF for precision: Especially for portraits—aim for the closest eye.
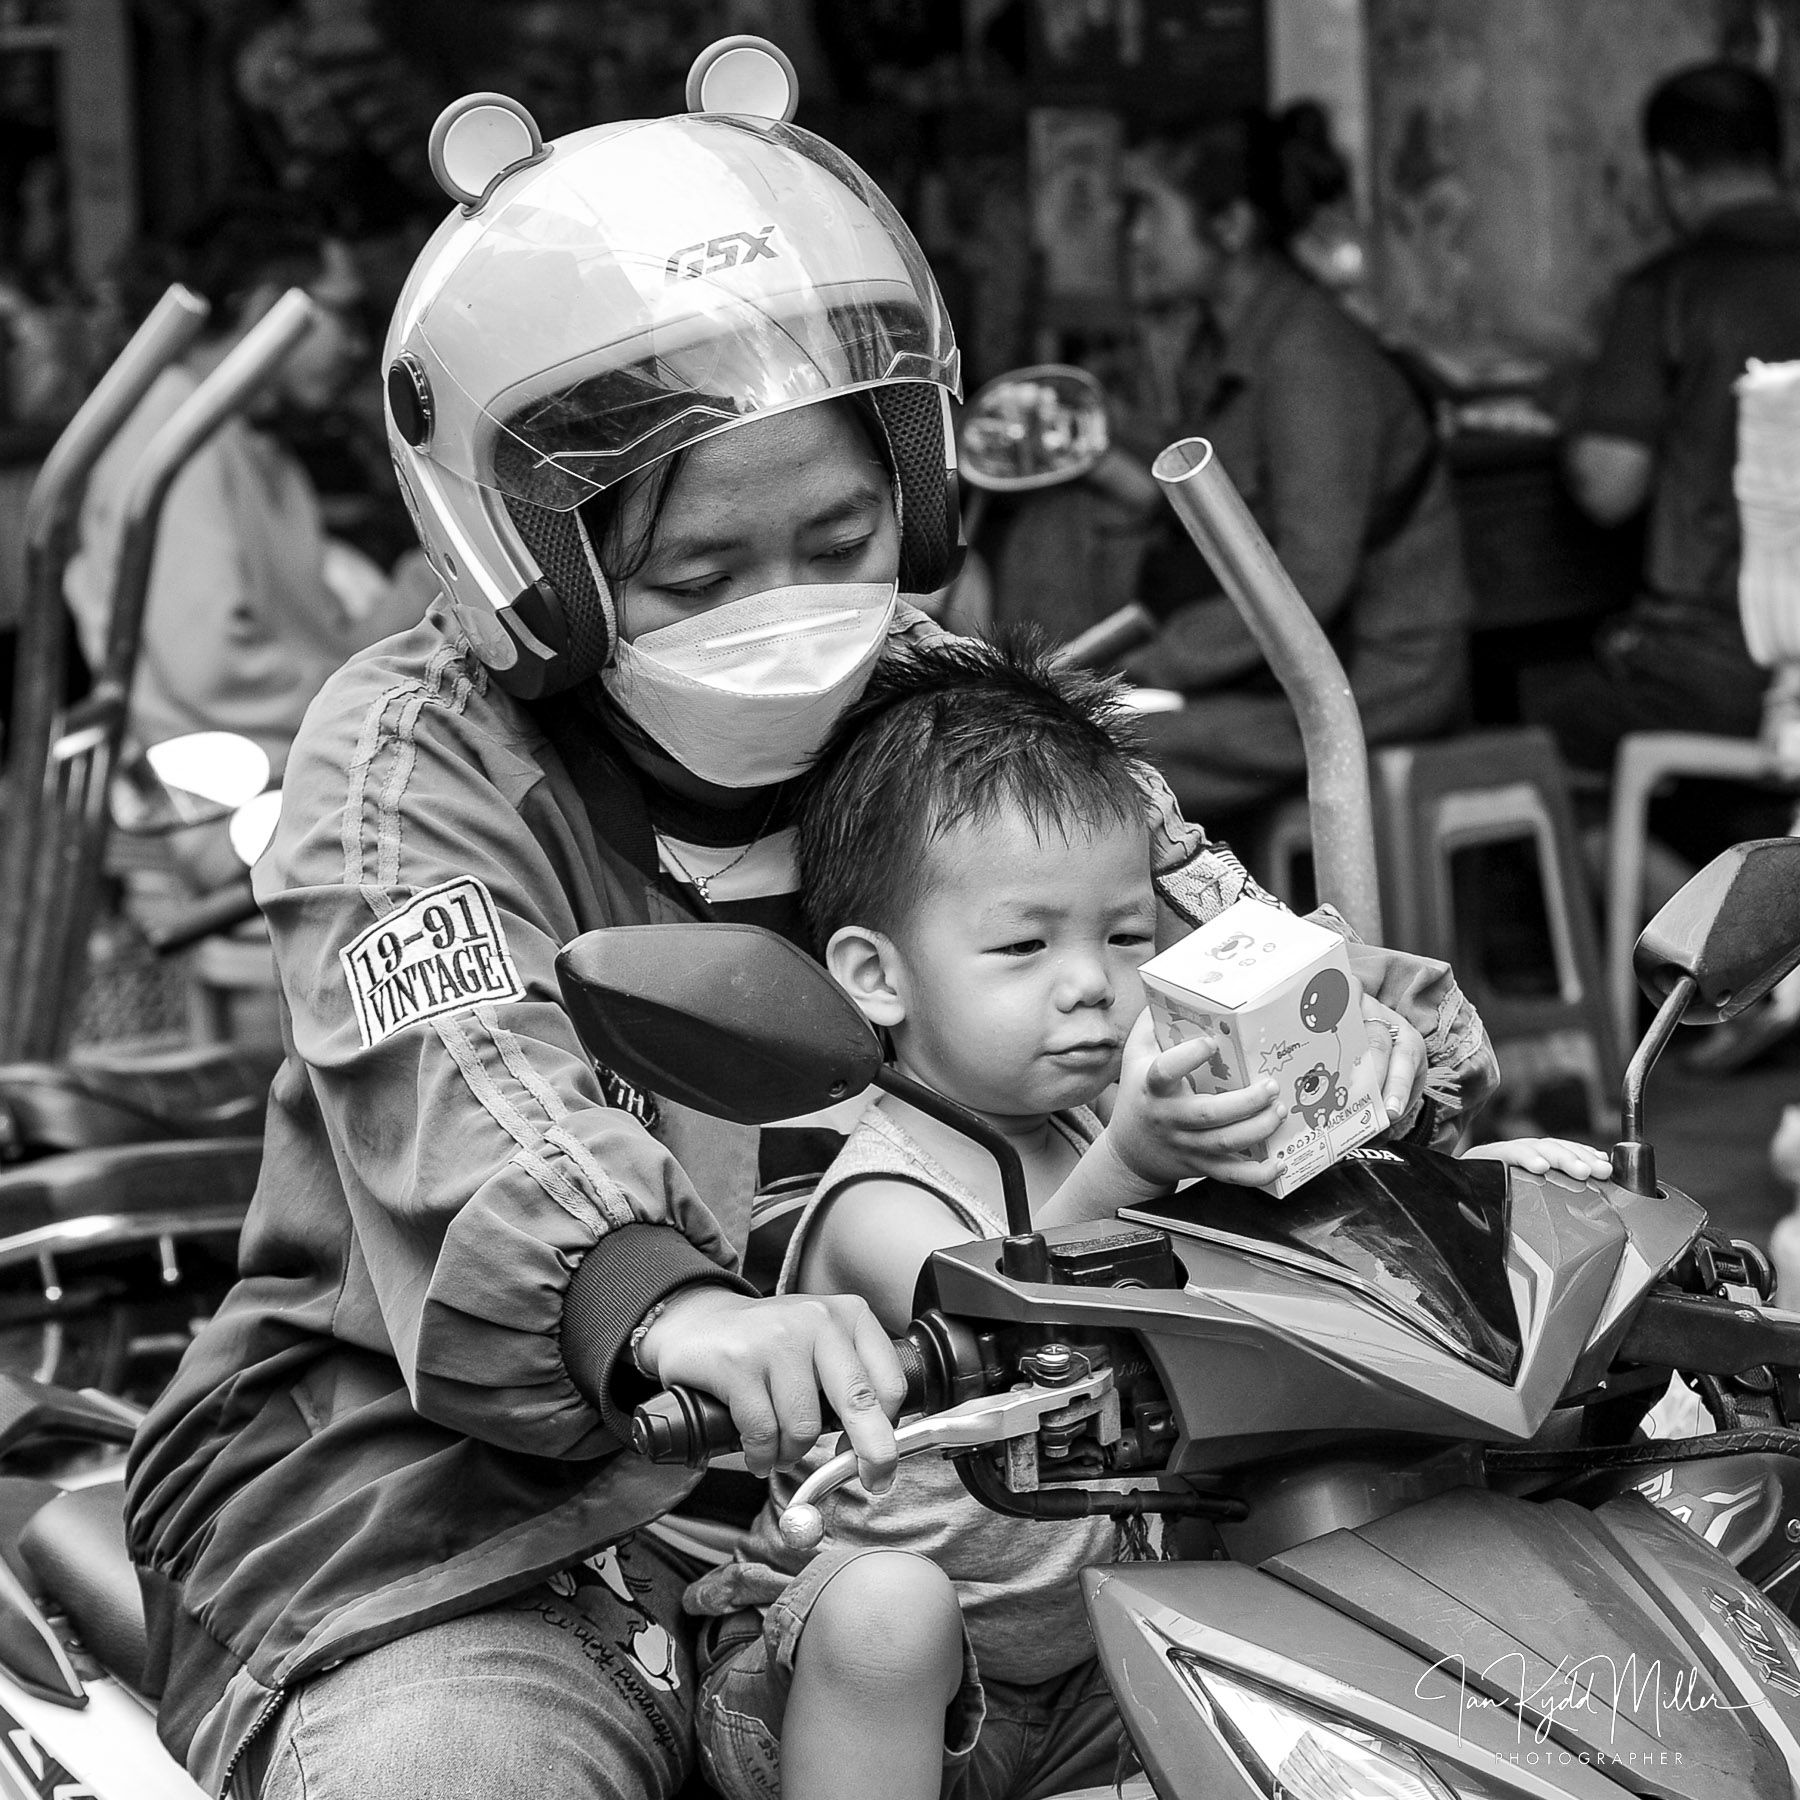
  • Switch to continuous AF for movement: Track subjects with AF-C or AI Servo modes.
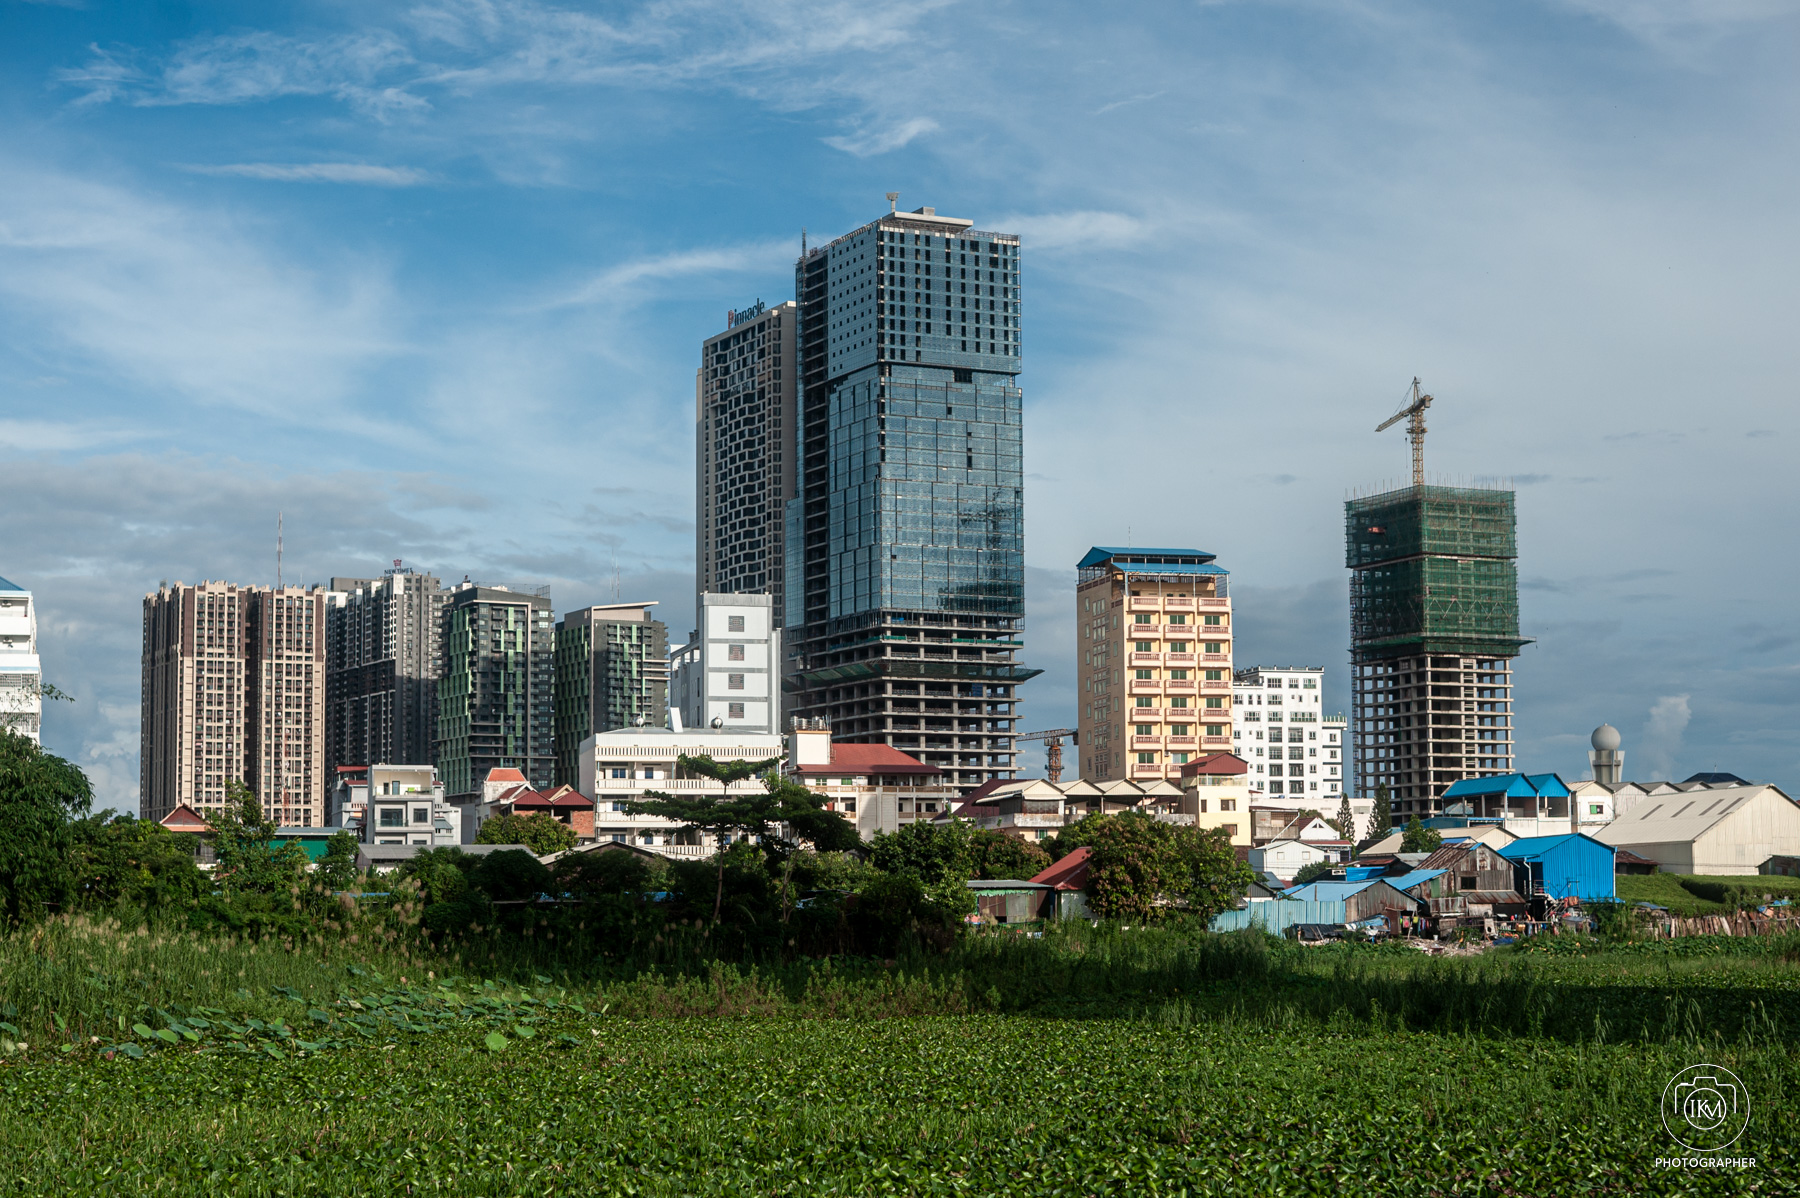
  • Check depth of field: Wide apertures (f/1.4–f/2.8) require pinpoint accuracy; stop down for more forgiving focus.
  • Stabilize your camera: Use tripods, monopods, or fast shutter speeds to avoid motion blur.
  • Review with magnification: Zoom in on your LCD or EVF to confirm critical sharpness.

🎨 When Soft Focus Works

  • Dreamy portraits: Slight softness can flatter skin and evoke nostalgia.
  • Motion blur storytelling: Intentional blur can convey speed, emotion, or chaos.
  • Atmospheric scenes: Fog, rain, or low light can benefit from selective softness.

But these effects only work when chosen, not when accidental.

📝 Final Thought

📸 The Exposure Triangle

opinons, thoughts, photography, pictures, street, Travel

Mastering the balance of light in photography

The Exposure Triangle is the foundation of photographic technique. It describes the relationship between three key settings—aperture, shutter speed, and ISO—that together determine how bright or dark your image will be. Understanding how these elements interact is essential for achieving correct exposure and creative control.

🔺 The Three Sides of the Triangle

  1. Aperture (f-stop)
    • Controls how much light enters through the lens.
    • Wide apertures (e.g., f/1.8) let in more light and create shallow depth of field (blurry backgrounds).
    • Narrow apertures (e.g., f/16) let in less light but increase depth of field (more of the scene in focus).
  2. Shutter Speed
    • Determines how long the sensor is exposed to light.
    • Fast speeds (e.g., 1/1000s) freeze motion.
    • Slow speeds (e.g., 1/30s or longer) allow motion blur or creative long exposures.
  3. ISO
    • Adjusts the sensor’s sensitivity to light.
    • Low ISO (100–200) produces clean, noise-free images.
    • High ISO (1600+) helps in low light but introduces grain/noise.

⚖️ How They Work Together

  • Changing one setting affects the others. For example:
    • If you open the aperture wider, you may need a faster shutter speed or lower ISO to avoid overexposure.
    • If you increase ISO in low light, you can use a faster shutter speed but risk more noise.
  • The triangle is about balance: each side compensates for the others to achieve the desired exposure.

🧠 Practical Tips

  • Use aperture priority mode when depth of field is your main concern (portraits, landscapes).
  • Use shutter priority mode when motion control is key (sports, long exposures).
  • Use manual mode to take full creative control and learn how the triangle works in practice.
  • Check your histogram to ensure highlights and shadows aren’t clipped.

🎨 Creative Control

Correct exposure isn’t always about technical perfection. Sometimes photographers intentionally underexpose for mood or overexpose for a dreamy effect. Mastering the triangle gives you the freedom to bend the rules deliberately.

📝 Final Thought

The Exposure Triangle is more than a technical concept—it’s a creative toolkit. By understanding how aperture, shutter speed, and ISO interact, you gain the ability to shape not just the brightness of your image, but its mood, sharpness, and emotional impact.

📸 Understanding Correct Exposure in Photography

Lenses, opinons, thoughts, photography, pictures, street, Travel

Why it matters and how to achieve it

Exposure refers to the amount of light that reaches your camera’s sensor. Too much light, and your photo is overexposed—washed out with lost highlight detail. Too little, and it’s underexposed—dark, noisy, and lacking shadow detail. Correct exposure is about balance: capturing detail in both highlights and shadows while preserving the atmosphere of the scene.

🔺 The Exposure Triangle

  1. Aperture (f-stop)
    • Controls how much light enters through the lens.
    • Wide apertures (f/1.4–f/2.8) let in more light and create shallow depth of field.
    • Narrow apertures (f/8–f/16) reduce light but increase depth of field, keeping more of the scene sharp.
  2. Shutter Speed
    • Determines how long the sensor is exposed to light.
    • Fast speeds (1/1000s) freeze motion.
    • Slow speeds (1/30s or longer) allow motion blur or creative long exposures.
  3. ISO
    • Adjusts sensor sensitivity to light.
    • Low ISO (100–200) produces clean images with minimal noise.
    • High ISO (1600+) helps in low light but introduces grain.

Together, these three settings form the exposure triangle, and adjusting one requires compensating with another to maintain balance.

🧠 Methods for Achieving Correct Exposure

  • Metering Modes: Cameras offer matrix, center-weighted, and spot metering to measure light differently. Choosing the right mode helps avoid over/underexposure in tricky lighting.
  • Histogram Check: Reviewing the histogram ensures highlights and shadows aren’t clipped. A balanced histogram indicates proper exposure.
  • Exposure Compensation: Adjusting +/– EV lets you fine-tune brightness without changing aperture or shutter speed.
  • Bracketing: Shooting multiple exposures (under, correct, over) ensures you capture the best version, especially in high-contrast scenes.
  • Manual Mode Practice: Learning to balance aperture, shutter, and ISO manually builds confidence and creative control.

🎨 Creative Considerations

Correct exposure isn’t always about technical perfection. Sometimes, intentional underexposure adds mood, or overexposure creates a dreamy effect. The key is knowing the rules well enough to break them deliberately.

📝 Final Thought

Exposure is the heartbeat of photography. By mastering aperture, shutter speed, and ISO—and using tools like histograms and metering—you gain control over both technical accuracy and creative expression. Correct exposure ensures your images are not just visible, but powerful.

🏙️ Why the Nikkor 20mm f/2.8D Is Still So Good

cameras, Lenses, opinons, thoughts, photography, pictures, street, Travel

A legacy wide-angle lens that punches above its weight.

The Nikon Nikkor 20mm f/2.8D is beloved for its compact size, sharp optics, and timeless rendering—making it a sleeper wide-angle gem for street, travel, and documentary photography. Despite its age, it holds its own against modern glass.

Released in the late 1980s and still available today, the Nikon AF Nikkor 20mm f/2.8D is one of those rare lenses that quietly earns a permanent spot in a photographer’s bag. It’s not flashy, not expensive, and not packed with modern tech—but it delivers where it counts: optical clarity, portability, and character.

🔍 Optical Performance

  • Sharpness: Impressively sharp in the center even wide open, with good edge performance by f/5.6. On full-frame bodies like the D800, it resolves fine detail without feeling clinical.
  • Distortion: Minimal for a 20mm prime—great for architecture and interiors. Barrel distortion is present but easily corrected.
  • Color and contrast: Natural rendering with strong microcontrast. It handles backlight well, thanks to Nikon’s internal coatings.
  • Flare resistance: Decent, though not perfect. Hood recommended for harsh light.
  • Bokeh: Not its strength—background blur is busy at f/2.8, but that’s expected from a wide-angle lens.

⚙️ Build and Handling

  • Size and weight: Just 260g and 69mm long—ridiculously compact for a full-frame wide-angle prime.
  • Autofocus: Screw-drive AF is fast and reliable on bodies with internal motors (D800, D3, etc.).
  • Manual focus: Smooth ring with good tactile feedback.
  • Minimum focus distance: 0.25m—great for dramatic foreground emphasis and layered compositions.

🧠 Why Photographers Love It

  • Street and travel: Discreet, lightweight, and fast enough for low-light scenes.
  • Documentary and editorial: Its rendering feels honest and immersive—ideal for environmental storytelling.
  • Landscape: Sharp enough for serious work, especially stopped down.
  • Vlogging and video: Wide field of view and compact form factor make it a solid choice for handheld shooting.

⚖️ Pros and Cons

Pros

  • Excellent sharpness and contrast
  • Compact and lightweight
  • Affordable on the used market (~$250–$350 USD)
  • Reliable autofocus and build quality

Cons

  • No weather sealing
  • No VR or AF-S motor
  • Bokeh and flare control are average
  • Edge sharpness lags behind modern ultra-wides

📝 Final Verdict

The Nikkor 20mm f/2.8D is a reminder that good design lasts. It’s not the sharpest or fastest wide-angle lens, but it’s one of the most practical and enjoyable to use. For photographers who value portability, honest rendering, and classic Nikon character, this lens is a keeper.

🧭 Legacy Glass That Still Delivers: Nikon AF Nikkor 300mm f/4 ED

Lenses, opinons, thoughts, photography, pictures, street

The Nikon AF Nikkor 300mm f/4 ED (Non-D) may be decades old, but it remains a sharp, reliable telephoto lens for budget-conscious photographers who value reach, contrast, and classic build quality. It’s a sleeper gem for wildlife, sports, and outdoor portraiture—especially when paired with a tripod or monopod.

Released in the late 1980s, the Nikon AF Nikkor 300mm f/4 ED was built for professionals who needed reach and speed without the bulk of the f/2.8 version. Though it lacks modern features like VR (Vibration Reduction) and silent wave motor autofocus, it continues to impress with its optical clarity, rugged construction, and affordability on the used market.

🔍 Optical Performance

  • Sharpness: This lens is surprisingly sharp wide open, with excellent center resolution and decent edge performance. Stopping down to f/5.6 improves corner sharpness, making it suitable for high-resolution bodies like the D800.
  • Color and contrast: Thanks to its ED (Extra-low Dispersion) glass elements, the lens delivers vibrant color and strong contrast, even in backlit conditions.
  • Chromatic aberration: Some longitudinal CA is visible in high-contrast scenes, but lateral CA is well-controlled. Easily correctable in post.
  • Bokeh: The 9-blade diaphragm produces pleasing background blur, though not as creamy as newer f/2.8 lenses.

⚙️ Build and Handling

  • Construction: All-metal barrel, integrated tripod collar, and a rear filter slot. It’s built like a tank, weighing around 1.3 kg (46.9 oz).
  • Autofocus: Screw-drive AF is adequate but not fast by modern standards. Works best with bodies like the D3 or D800 that have strong AF motors.
  • Ergonomics: Balanced for tripod or monopod use. Handheld shooting is possible but tiring over long sessions.

🧠 Use Cases

  • Wildlife: Excellent for birds and mammals in good light. Works well with 1.4x teleconverters for added reach.
  • Sports: Fast enough for field sports, especially when pre-focused or used with manual override.
  • Portraits: Great for outdoor headshots with strong subject isolation and flattering compression.
  • Travel and nature: Compact for a 300mm prime, making it a viable option for landscape detail and distant subjects.

⚖️ Pros and Cons

Pros

  • Excellent sharpness and contrast
  • Durable, professional-grade build
  • Affordable on the used market (~$250–$400 USD)
  • Compatible with FX and DX bodies

Cons

  • No VR or AF-S motor
  • Slower autofocus on entry-level bodies
  • Some CA and flare in extreme conditions
  • Heavy for handheld use

📝 Final Verdict

The Nikon AF Nikkor 300mm f/4 ED is a legacy lens that still earns its place in a modern kit. For photographers who don’t mind manual focus override or tripod work, it offers stunning image quality at a fraction of the cost of newer telephotos. It’s a reminder that great glass doesn’t expire—it just asks for a little patience and technique.

AF-S Nikkor 50mm f/1.4G with the D3 and D800

cambodia, Lenses, opinons, thoughts, photography, pictures, street, Travel

🧪 Optical Impressions

  • Wide-open performance (f/1.4): Delivers soft, dreamy bokeh with moderate sharpness in the center. On the D3, this creates a classic filmic look; on the D800, the high-resolution sensor reveals some softness and longitudinal chromatic aberration.
  • Stopped down (f/2.8–f/5.6): Sharpness improves significantly, especially across the frame. Ideal for street, editorial, and environmental portraiture.
  • Color and contrast: Neutral rendering with good microcontrast. Works well for natural light shooters and those who prefer minimal post-processing.
  • Bokeh: Smooth but can show slight nervousness in busy backgrounds. Better than the older AF-D version, but not as creamy as Nikon’s 58mm f/1.4G.

⚙️ Autofocus and Handling

  • AF speed: Quiet and accurate, but not lightning-fast. On the D3, it’s snappy enough for casual action; on the D800, it benefits from contrast-based fine-tuning.
  • Build quality: Solid plastic barrel with weather sealing at the mount. Lightweight and well-balanced on both bodies.
  • Manual focus: Smooth ring, but focus-by-wire feel lacks tactile feedback compared to older mechanical lenses.

🧠 D3 vs. D800 Pairing

  • Nikon D3: The lens complements the D3’s low-light prowess. Together, they excel in available light reportage, backstage photography, and moody portraiture.
  • Nikon D800: The D800’s 36MP sensor demands more from the lens. While the 50mm f/1.4G holds up well stopped down, wide-open shots may show softness and fringing that require post-processing.

✅ Use Cases

  • Low-light street photography
  • Environmental portraits
  • Travel and documentary work
  • Editorial and lifestyle shoots

🧾 Verdict

The AF-S 50mm f/1.4G is a versatile, reliable prime that pairs well with both the D3 and D800, especially for photographers who value character over clinical perfection. It’s not the sharpest wide-open, but its rendering is expressive and forgiving—ideal for storytelling, not pixel-peeping.

For sharper edge-to-edge performance, consider the Sigma 50mm f/1.4 Art or Nikon’s 50mm f/1.8G. But for a classic Nikon look with modern AF and solid build, the 50mm f/1.4G remains a worthy companion.

Shooting in RAW — A Practical Guide

cameras, film, opinons, thoughts, photography, street, Travel

Shooting in RAW means saving the sensor’s unprocessed data so you can shape the final image later. RAW files act like a digital negative: they keep maximum detail, tone, and color information that in-camera JPEG processing would otherwise compress or discard.

What RAW actually contains

  • RAW stores linear sensor data with higher bit depth than JPEG, preserving more tonal steps between shadows and highlights. This gives you extra headroom when correcting exposure, recovering highlights, or pulling detail from shadows.

Advantages of shooting RAW

  • Greater dynamic range and recovery — You can recover more detail from highlights and shadows because RAW keeps more tonal information.
  • Flexible white balance — White balance is not baked into the pixel data the way it is for JPEGs, so you can change it non-destructively in post.
  • Superior colour depth and grading — Higher bit depth means smoother gradients and more room for colour grading without banding.
  • Non‑destructive edits — RAW editing writes instructions instead of permanently changing pixels, so you can always revert to the original capture.
  • Better noise handling — RAW processors can apply more sophisticated noise reduction because they have access to the sensor’s full data.
  • More control for critical workflows — Commercial, landscape, and fine-art work benefits from the latitude RAW offers for exacting color and tone control.

Disadvantages of shooting RAW

  • Larger file sizes — RAW files are significantly bigger than JPEGs, which increases storage needs and backup complexity.
  • Slower workflow — RAW requires post-processing, which adds time to editing and delivery compared with straight-out-of-camera JPEGs.
  • Compatibility and portability — RAW formats vary by camera brand and model; some software or older devices may not read every RAW without updates or converters.
  • Longer write times and smaller burst buffers — On some cameras, RAW capture can slow burst rate or fill buffers faster than JPEGs, affecting action shooting.
  • Need for consistent color management — RAW gives flexibility but demands disciplined color pipelines (calibrated monitor, managed profiles) to get reliable outputs.

When to choose RAW vs JPEG

  • Shoot RAW when: you need maximum image quality, plan heavy editing, require reliable highlight/shadow recovery, or are producing work for clients or prints.
  • Shoot JPEG when: you need instant turnaround, extreme file economy (long events with limited cards), or when images are destined only for quick social sharing with minimal editing.

Practical workflow tips

  • Use RAW+JPEG if you sometimes need immediate, shareable files but still want RAW for archives and editing.
  • Cull JPEG previews to speed selection; reserve RAW for final edits.
  • Invest in fast, large-capacity memory cards and a reliable backup routine to handle RAW volumes.
  • Create camera-specific presets or base edits to speed RAW processing while keeping non‑destructive flexibility.
  • Keep your RAW converters updated and standardize on one or two tools (Lightroom, Capture One, or your camera maker’s software) to ensure consistent color and metadata handling.

Short checklist before you shoot

  • Do you need maximum dynamic range and color control? → RAW.
  • Do you need immediate delivery with no editing? → JPEG or RAW+JPEG.
  • Do you have storage and backup planned? → If yes, RAW is safe; if not, plan for it before shooting large volumes.

Shooting RAW is about trading convenience for control. If your work values tonal fidelity, color precision, and future-proof archives, RAW is usually worth the extra planning and processing time.

📸 Nikon D810: Detailed Assessment of Capabilities and Character

cameras, homelessness, Lenses, opinons, thoughts, photography, pictures, street, Travel

🏗️ Build and Ergonomics

  • Body: Magnesium alloy, fully weather-sealed, designed for professional use in demanding environments.
  • Handling: Classic Nikon DSLR ergonomics—deep grip, tactile dials, and intuitive button layout.
  • Weight: ~980g (body only), substantial but balanced with pro lenses.
  • Shutter: Redesigned for quieter operation and reduced vibration, enhancing sharpness in long exposures.

📷 Sensor and Image Quality

  • Resolution: 36.3MP FX-format CMOS sensor, no optical low-pass filter for maximum detail.
  • Dynamic Range: Among the best of its generation—excellent highlight recovery and shadow depth, ideal for landscapes and studio work.
  • ISO Performance: Native ISO 64–12,800 (expandable to 32–51,200). At ISO 64, it produces exceptionally clean, detailed files.
  • Color and Tonality: Natural, nuanced rendering with wide latitude for post-processing.

Character: The D810 is known for its “medium-format feel” in a DSLR body—files are rich, detailed, and flexible, rewarding careful technique.

⚡ Performance and Autofocus

  • AF System: 51-point Multi-CAM 3500FX, reliable and accurate, though not as advanced as later Nikon AF modules (e.g., D5/D850).
  • Continuous Shooting: 5 fps (7 fps in DX crop with grip)—adequate for portraits, weddings, and landscapes, but not a sports machine.
  • Buffer: Limited compared to modern bodies; RAW bursts can fill quickly.

Character: The D810 is deliberate rather than fast—best for photographers who value precision over speed.

🎥 Video Capabilities

  • Resolution: 1080p Full HD at up to 60 fps.
  • Features: Flat picture profile, uncompressed HDMI output, headphone/mic jacks.
  • Limitations: No 4K, and video AF is slow compared to mirrorless systems.

🔋 Battery and Storage

  • Battery Life: ~1,200 shots per charge (EN-EL15 battery).
  • Storage: Dual card slots (CF + SD), offering flexibility and redundancy.

✅ Strengths

  • Exceptional image quality with 36MP detail and wide dynamic range.
  • ISO 64 base sensitivity for ultra-clean files.
  • Rugged, professional build with weather sealing.
  • Quiet shutter and refined vibration control for long exposures.
  • Dual card slots for pro workflows.

❌ Weaknesses

  • Slower burst rate and buffer limit action/sports use.
  • AF system is reliable but dated compared to newer Nikon DSLRs and mirrorless.
  • No 4K video, making it less appealing for hybrid shooters.
  • Heavy files (36MP RAWs) demand strong storage and processing power.

🎯 Best Use Cases

  • Landscape photography: Dynamic range and ISO 64 base make it a landscape legend.
  • Studio and portrait work: High resolution and tonal depth excel in controlled lighting.
  • Weddings and events: Excellent image quality, though buffer and AF may limit fast action.
  • Fine art and commercial photography: Files rival medium format in flexibility and detail.

✨ Verdict

The Nikon D810 is a camera with soul and discipline. It rewards careful shooting with files of extraordinary richness and depth. While it lacks the speed and modern conveniences of newer bodies, its character lies in precision, tonal subtlety, and reliability. For photographers who value image quality above all else, the D810 remains one of Nikon’s most iconic DSLRs.

The Nikon D850 is the natural evolution of the D810—it keeps the D810’s legendary image quality ethos but adds higher resolution (45.7MP vs 36.3MP), faster burst rates, vastly improved autofocus, and 4K video. The D810 remains a superb stills camera with a more deliberate, slower character, while the D850 is the more versatile all‑rounder.

📊 Nikon D810 vs Nikon D850: Side‑by‑Side Breakdown

FeatureNikon D810 (2014)Nikon D850 (2017)
Sensor36.3MP FX CMOS, no OLPF45.7MP FX BSI CMOS, no OLPF
Base ISO64 (expandable 32–51,200)64 (expandable 32–102,400)
Dynamic RangeExcellent, especially at ISO 64Even better, with deeper shadow recovery
Autofocus51‑point Multi‑CAM 3500FX153‑point Multi‑CAM 20K (same as D5)
Continuous Shooting5 fps (7 fps with grip in DX mode)7 fps (9 fps with grip + EN‑EL18 battery)
BufferLimited for RAW burstsLarger buffer, better for action
Video1080p Full HD (60 fps)4K UHD (full sensor readout)
LCD3.2″ fixed, 1.23M dots3.2″ tilting touchscreen, 2.36M dots
Viewfinder100% coverage, 0.7x mag100% coverage, 0.75x mag
Battery Life~1,200 shots~1,840 shots
Weight980 g1,005 g
Release Price~$3,300~$3,300

🔎 Key Differences in Character

  • Resolution & Detail: The D850’s 45.7MP BSI sensor delivers more detail and better low‑light efficiency than the D810’s 36.3MP sensor. Both are superb, but the D850 files have more cropping flexibility.
  • Speed & AF: The D810 is deliberate—great for landscapes, portraits, and studio work. The D850 adds speed (7–9 fps) and a pro‑level AF system, making it viable for action and wildlife.
  • Video: The D810 is stills‑only focused, while the D850 is a true hybrid with 4K video.
  • Handling: Both share Nikon’s rugged build, but the D850’s tilting touchscreen and improved viewfinder make it more modern and versatile.
  • Battery Life: The D850 lasts longer per charge, despite its higher resolution.

✅ Verdict

  • Choose the D810 if you want a pure stills camera with extraordinary tonal depth, a slower, more contemplative shooting style, and you don’t need 4K or cutting‑edge AF. It’s also a bargain on the used market.
  • Choose the D850 if you want the ultimate all‑round DSLR—high resolution, speed, advanced AF, and 4K video. It’s the more versatile tool for professionals who need one body to do it all.

Nikon D700 detailed breakdown: The cult-classic FX workhorse

cameras, Lenses, opinons, thoughts, photography, pictures, street, Travel

The Nikon D700 (2008) bridged flagship performance from the D3 into a more compact, affordable body. Its 12MP FX sensor, robust build, and reliable AF earned a long-standing reputation for “film-like” files, clean high ISO, and professional handling that still holds up for many shooters today.

Core specs and what they mean

  • Sensor and processor: 12.1MP FX-format CMOS with EXPEED image processing for natural color, smooth tones, and strong high‑ISO performance. This resolution prioritizes dynamic range and cleaner files over sheer detail.
  • ISO range: Native ISO 200–6400, expandable to 100–25,600—remarkable for its era and still usable in many low‑light situations with thoughtful exposure and noise control.
  • Autofocus: 51‑point Multi‑CAM 3500FX system with reliable tracking and accuracy, inherited from Nikon’s pro lineage.
  • Speed: 5 fps natively, up to 8 fps with the MB‑D10 grip—enough for events and moderate action, though not a sports specialist by modern standards.
  • Build: Magnesium‑alloy, weather‑sealed body and a bright optical viewfinder (95% coverage, 0.72x). Classic pro ergonomics and durable controls encourage confident, all‑day use.
  • LCD and video: 3.0″ 920k‑dot screen; no video recording—the D700 is a pure stills camera.

Image quality and rendering

  • Low‑light performance: Clean, pleasing files up to ISO 3200–6400 with balanced noise character; the extended modes are situational but workable. The sensor’s tonal response and color make it feel “organic,” contributing to its cult status among photographers who value presence over pixel count.
  • Dynamic range and tonality: Mid‑ISO files have strong highlight roll‑off and natural skin tones. The 12MP resolution is limiting for heavy cropping, but it rewards careful framing and gives a classic, cohesive look.
  • Lenses and pairing: The D700 pairs beautifully with fast primes (e.g., 35/1.8G, 50/1.8G, 85/1.8G) and older AF‑D glass; its AF module handles dim interiors and mixed light well.

Autofocus, speed, and handling

  • AF reliability: The Multi‑CAM 3500FX is decisive for portraits, events, and general street, with dependable single‑point focus and robust 3D tracking for human subjects. It’s less sticky than modern flagship AF on erratic sports but more than adequate for most work.
  • Burst and buffer: 5 fps covers ceremonies, street, and reportage; adding the MB‑D10 grip unlocks 8 fps for action sequences. Buffer depth is modest by today’s standards, so RAW bursts should be paced.
  • Ergonomics: Nikon’s classic control layout, deep grip, and OVF clarity foster a connected shooting flow. The optical viewfinder and battery efficiency also mean fewer interruptions in long sessions.

The good

  • Image character: Files have a timeless, film‑like quality that many photographers prefer over ultra‑clinical modern sensors.
  • Low‑light competence: Usable high ISO and pleasing noise profile, especially for events and ambient street scenes.
  • Build quality: Rugged, weather‑sealed magnesium shell with professional ergonomics that still feel right in 2025.
  • AF system: Proven 51‑point module that’s fast and trustworthy for people and everyday action.
  • Value: On the used market, the D700 delivers pro‑grade handling and rendering at a fraction of modern body prices.

The bad

  • No video: Pure stills—if you need hybrid work, this is a hard stop.
  • Resolution limits: 12MP constrains heavy crops and large commercial prints; landscape and studio shooters may prefer higher‑res alternatives.
  • Age factors: Older LCD, 95% viewfinder coverage, and smaller buffer feel dated compared to later bodies; shutter counts on used copies can be high.
  • High‑ISO extremes: Expanded ISOs are situational; usable results depend on light quality and tolerance for grain.

Best use cases

  • Events and reportage: Reliable AF, strong high‑ISO, and classic color make it excellent for weddings, NGO work, and street/documentary.
  • Portraits: Natural skin tones and pleasing tonality; pair with fast primes for characterful rendering.
  • Travel and everyday: The OVF and long battery life create a frictionless experience—ideal for photographers who value presence over tech novelty.

Alternatives to consider

  • Nikon D3/D3S: Similar 12MP performance; D3S adds cleaner extreme ISO and deeper buffer in a tank‑like body—better for sustained action but larger and heavier.
  • Nikon D750/D780: Higher resolution, improved DR, and modern features (video, better live view AF) while keeping great low‑light performance.
  • Nikon D850: If resolution, DR, and 4K video matter, the 45.7MP D850 is the modern all‑rounder—but it changes the shooting feel entirely.

Verdict

If you want a DSLR that disappears in your hands and produces files with soul, the Nikon D700 still delivers. It’s not for spec chasers or hybrid shooters, but for photographers who value presence, dependable AF, strong low‑light performance, and the tactile confidence of a pro‑grade body, it remains a compelling buy. The weaknesses—no video, modest resolution, aging buffer—are clear, yet the D700’s strengths create a shooting experience many modern cameras can’t replicate.

📸 Fuji X-Pro2 + 18mm f/2: A Street Photography Combo That Honors Presence

cambodia, cameras, fujifilm, Lenses, opinons, thoughts, photography, pictures, street, Travel

Street photography thrives on intuition, timing, and connection. The gear you choose should disappear in your hands, allowing you to focus on the fleeting gestures and subtle interactions that define urban life. The Fujifilm X-Pro2, with its rangefinder-inspired design, and the XF 18mm f/2, Fuji’s compact wide-angle prime, form a partnership that embodies this philosophy.

🏙️ The X-Pro2: A Tool for Storytellers

  • Hybrid Viewfinder: The X-Pro2’s optical/electronic hybrid finder is its signature feature. It allows you to see beyond the frame lines, anticipating action before it enters your composition—a gift for street shooters.
  • Discreet Design: Its rangefinder styling is understated, drawing less attention than a DSLR. On the street, invisibility is power.
  • Image Quality: The 24MP X-Trans III sensor delivers rich tones, excellent dynamic range, and Fuji’s renowned film simulations (like Classic Chrome and Acros) that give images a timeless, documentary feel.
  • Customization: With tactile dials for shutter speed, ISO, and exposure compensation, the X-Pro2 encourages a hands-on, mindful shooting process.

🎯 The XF 18mm f/2: Compact and Characterful

  • Field of View: Equivalent to 27mm on full-frame, this lens strikes a balance between wide context and intimate framing—perfect for capturing both environment and subject.
  • Size and Weight: At just 116g, it’s a true “pancake” lens. Mounted on the X-Pro2, it creates a slim, unobtrusive package that slips easily into a jacket pocket.
  • Rendering: While not clinically sharp like Fuji’s newer primes, the 18mm f/2 has a characterful rendering—slightly imperfect, but soulful. Its gentle vignetting and contrast lend images a filmic quality.
  • Speed: The f/2 aperture is fast enough for low-light alleys and night markets, while still keeping the lens compact.

🌆 Why This Combo Works for Street Photography

  • Presence, Not Distance: The 18mm encourages you to get close, to step into the scene rather than observe from afar. This fosters images that feel immersive and authentic.
  • Quiet Confidence: The X-Pro2’s shutter is discreet, and the small lens doesn’t intimidate subjects—ideal for candid moments.
  • Fluid Workflow: Physical dials and compact ergonomics mean you can adjust settings without breaking eye contact with the street.
  • Timeless Aesthetic: Together, they produce images with a classic look—clean, contrasty, and cinematic.

✨ The Philosophy of Presence

Street photography isn’t about perfection; it’s about being there. The X-Pro2 + 18mm f/2 combo honours this by stripping away excess. It’s not the sharpest or fastest setup, but it’s one that encourages awareness, patience, and connection. With this kit, you’re not just photographing the street—you’re part of it.

Final Thought: If you value discretion, character, and the ability to move fluidly through the city, the Fuji X-Pro2 with the XF 18mm f/2 is more than just a camera and lens—it’s a philosophy of presence, a reminder that the best street photographs come not from technical perfection, but from being fully alive to the moment.