
📖 Lowepro Stealth Reporter 200 AW — Discussion & Evaluation for DSLR Use

cameras, Fujichrome, Lenses, Lowepro, nikon, opinons, thoughts, photography, street, Travel

The Lowepro Stealth Reporter 200 AW is a shoulder‑style camera bag originally designed for photojournalists and news photographers, with an emphasis on speed, durability, and weather protection. It remains a strong option for DSLR shooters who need fast access and rugged reliability.

🧱 Build Quality & Design

According to Lowepro’s own description, the Stealth Reporter series was “created for photojournalists and news photographers” and built to withstand harsh field conditions while remaining lightweight and durable.

Key design elements include:

  • Magnesium‑reinforced structure (internal frame)
  • Heavy‑duty materials and reinforced stitching
  • All Weather (AW) cover for rain, dust, and sand protection
  • Highly water‑resistant top zipper for fast access without opening the flap

This makes it particularly suitable for urban, documentary, and editorial DSLR work, where speed and protection matter more than hiking comfort.

📸 Capacity & DSLR Compatibility

The bag is sized for one DSLR body plus 3–4 lenses, a flash, and accessories. This aligns well with typical DSLR kits such as:

  • A DSLR body (D700, D300S, D810, etc.)
  • A trio of primes (e.g., 35/50/85)
  • Or a zoom kit (24–70 + 70–200)
  • Flashgun + batteries
  • Memory cards (dedicated wallet holds up to 12 cards)

User feedback confirms it “easily takes a DSLR camera + a couple of lenses” and is “well padded” and “sturdy”.

⚙️ Organization & Workflow

The Stealth Reporter 200 AW includes:

  • Removable cable management pouch
  • Memory card wallet (attaches to strap)
  • Multiple pockets for batteries, notebooks, filters, and personal items
  • Adjustable padded dividers for customizing DSLR layouts

This makes it ideal for fast-paced DSLR workflows, especially in news, street, and event environments.

🚀 Strengths for DSLR Use

1. Fast Access

The top zipper allows you to grab your DSLR without opening the flap, a major advantage for street and press shooters.

2. Weather Protection

The AW cover provides full rain and dust protection, essential for field work in unpredictable conditions.

3. Professional Layout

Designed for working photographers, the internal layout supports efficient DSLR operation and quick lens changes.

4. Discreet Appearance

The bag looks like a messenger bag rather than a camera bag, reducing unwanted attention — useful in sensitive environments.

5. Durability

User reviews highlight that it is “better made than newer models” and extremely sturdy.

⚠️ Limitations for DSLR Use

1. Shoulder Fatigue

As a shoulder bag, it places all weight on one side. With a DSLR + lenses, this can become tiring during long assignments.

2. Limited Dual‑Body Support

While it can fit one DSLR comfortably, dual‑body shooters may find it cramped.

3. Bulk When Loaded

The bag becomes heavy and boxy when filled with DSLR gear.

4. No Dedicated Laptop Sleeve

Some versions lack a padded laptop compartment, limiting its use for hybrid photo‑editing workflows.

⚖️ Summary Table

CategoryStrengthsWeaknesses
AccessFast top‑zip accessFull flap still slows deep access
WeatherAW cover, rugged buildAdds bulk when deployed
CapacityDSLR + 3–4 lensesNot ideal for dual‑body setups
ComfortPadded strapShoulder fatigue over time
DurabilityVery sturdy, pro‑gradeHeavier than modern bags
DiscretionLooks like a messenger bagStill bulky when full

✨ Verdict

The Lowepro Stealth Reporter 200 AW is an excellent DSLR bag for photojournalists, street photographers, and documentary shooters who prioritize:

  • Fast access
  • Weather protection
  • Professional organization
  • Durability

It is less ideal for long hikes, dual‑body setups, or photographers who need backpack‑level comfort.

Final assessment: One of the best classic shoulder bags for DSLR field work — rugged, fast, and intelligently designed, though heavy and less comfortable for all‑day carry.

📖 Lowepro Stealth Reporter 200 AW — Evaluation for Fujifilm XE2 & X‑Pro3 Kits

🎒 Why This Bag Works Even Better for Mirrorless

The Stealth Reporter 200 AW was originally designed for bulky DSLR bodies, so when you load it with smaller, lighter Fujifilm cameras, you get:

  • More space than you need (excellent for flexibility)
  • Better weight distribution
  • Faster access because the bodies don’t snag on dividers
  • Room for accessories like chargers, batteries, filters, and notebooks

In other words, the bag becomes over‑engineered for the Fuji kit — which is a good thing.

🧱 How Your Fuji Kit Fits Inside

📸 Your loadout:

  • Fujifilm XE2
  • Fujifilm X‑Pro3
  • Three lenses (likely primes or compact zooms)

Typical layout inside the 200 AW:

  • Centre compartment: X‑Pro3 with lens mounted
  • Side compartment 1: XE2 body
  • Side compartment 2: Two primes stacked or one zoom
  • Front pocket: Batteries, cards, cleaning cloth
  • Side pocket: Filters, small notebook
  • Rear pocket: Passport, phone, flat items
  • Top zip access: Grab the X‑Pro3 instantly without opening the flap

This is exactly the kind of workflow the bag was designed for — fast, quiet, efficient.

✅ Strengths for Fuji XE2 + X‑Pro3 Users

1. Perfect size for a two‑body mirrorless kit

You’re not fighting the bag’s dimensions. Everything fits with breathing room.

2. Fast access for street and documentary work

The top zipper is ideal for the X‑Pro3 — a camera built for decisive‑moment shooting.

3. Discreet appearance

The bag looks like a messenger bag, not a camera bag. This pairs beautifully with Fuji’s rangefinder‑style bodies, keeping you low‑profile.

4. Weather protection

The AW cover is a huge advantage in Phnom Penh’s sudden rainstorms or dusty dry season.

5. Quiet operation

The flap and zippers are relatively quiet — important for street and candid work.

6. Room for extras

Because Fuji gear is compact, you can carry:

  • A small LED light
  • A power bank
  • A mini tripod
  • A notebook
  • Snacks or water

Without overloading the bag.

❌ Weaknesses (Specific to Fuji Use)

1. Overkill for minimalists

If you ever go out with just one Fuji body and one lens, the bag feels too big.

2. Shoulder fatigue

Even with lighter mirrorless gear, a shoulder bag can strain over long days.

3. Not ideal for long hikes

Urban, editorial, and street? Perfect. Travel trekking? Less so.

4. Dividers designed for DSLR depth

Fuji bodies are slimmer, so you may need to reposition or double‑fold dividers to avoid empty space.

⚖️ Summary Table for Fuji Use

CategoryStrengthsLimitations
FitPerfect for 2 bodies + 3 lensesSlightly oversized for minimal kits
AccessTop‑zip is ideal for X‑Pro3Full flap slows deep access
ComfortLighter load than DSLRShoulder fatigue on long days
DiscretionLooks like a messenger bagStill bulky when full
WeatherAW cover excellent for SE AsiaAdds bulk when deployed

✨ Verdict

For a two‑body Fujifilm kit, the Lowepro Stealth Reporter 200 AW is almost the perfect shoulder bag:

Fast access, discreet design, weather protection, and enough space for a full working kit without feeling cramped.

It’s especially strong for:

  • Street photography
  • Documentary work
  • Editorial assignments
  • Urban travel
  • Fast‑moving environments

Its only real drawback is the inherent limitation of shoulder bags: long‑term comfort.

📖 Yongnuo 100mm f/2 on the Nikon D300S — Full Breakdown

cameras, Lenses, nikon, opinons, thoughts, photography, street, Travel

🧱 Build & Design

  • Lens type: Manual/AF telephoto prime, Nikon F mount
  • Focal length: 100mm (effective 150mm on D300S due to 1.5x crop)
  • Aperture: f/2–f/16, 9-blade diaphragm for smooth bokeh
  • Build quality: Lightweight plastic barrel, metal mount — feels budget but usable
  • Focus ring: Smooth but lacks tactile precision; not ideal for manual focus critical work

✅ Strengths

📸 On the D300S

  • Effective 150mm reach: Excellent for tight portraits, isolating subjects, and compressing backgrounds
  • Wide aperture: f/2 allows shallow depth of field and low-light shooting
  • Bokeh: Surprisingly smooth for the price — good subject-background separation
  • Color & contrast: Decent rendering, especially when stopped down to f/2.8–f/4
  • Compatibility: Fully mounts and functions on the D300S, including autofocus

💰 Value

  • Price point: Often under $150 — one of the cheapest telephoto primes available
  • Entry-level telephoto: Great for photographers exploring longer focal lengths without investing in Nikon’s 105mm or 135mm primes

❌ Limitations

⚠️ Autofocus

  • Inconsistent AF: Can hunt or miss focus, especially in low light or on older bodies like the D300S
  • Noisy motor: Audible whirring during focus — not ideal for video or quiet environments
  • No internal focusing: Front element rotates, complicating use with polarizers

🧠 Optical Performance

  • Wide open softness: f/2 is usable but not tack-sharp; improves at f/2.8 and beyond
  • Chromatic aberration: Visible in high-contrast edges, especially wide open
  • Flare resistance: Weak coatings — prone to ghosting and flare in backlit scenes

🕰️ D300S Constraints

  • 12MP resolution: Limits cropping flexibility — lens flaws are less visible but detail is capped
  • No live view AF: Manual focus is harder without magnified preview
  • DX crop factor: You lose the “classic 100mm” feel — becomes more compressed, like a 150mm

⚖️ Summary Table

FeatureYongnuo 100mm f/2 on D300S
Effective focal length150mm (DX crop)
AutofocusFunctional but unreliable
BokehSmooth, creamy at f/2
SharpnessSoft wide open, better at f/2.8–f/4
BuildLightweight, budget feel
ValueHigh — telephoto reach under $150
Best usePortraits, detail shots, compressed street scenes
LimitationsAF inconsistency, flare, chromatic aberration

Sources: Ian Kydd Miller’s review, DPReview forums

✨ Conclusion

The Yongnuo 100mm f/2 is a quirky but capable budget telephoto prime. On the Nikon D300S, it delivers creamy bokeh and tight framing ideal for portraits and compressed street scenes. Autofocus and optical quirks require patience, but for the price, it’s a compelling tool — especially if you embrace its limitations and shoot deliberately.

Verdict: A budget telephoto with character — imperfect but rewarding when paired with the D300S’s rugged charm. (Not a bad lens for the $50 I paid for it, needs to be used with a little care, AF can be a little haphazard).

📖 Nikon D300S — A Detailed Breakdown: Strengths, Weaknesses, and Legacy

cameras, Lenses, nikon, opinons, thoughts, photography, street, Travel

The Nikon D300S is a rugged, pro-grade APS-C DSLR from 2009 that still holds up for action, wildlife, and documentary work. It offers fast autofocus, dual card slots, and a tough build — but it’s limited by its 12MP resolution

🕰️ Overview

Released in 2009, the Nikon D300S was the flagship DX-format DSLR for serious enthusiasts and professionals. It built on the success of the D300 by adding HD video, dual card slots, and refined autofocus, making it a versatile tool for demanding field work.

✅ Strengths

🧱 Build & Handling

  • Magnesium alloy body with weather sealing — durable and field-ready.
  • Pro-style ergonomics — dedicated buttons, top LCD, and deep grip for confident handling.
  • Dual card slots (CF + SD) — useful for backup or overflow.

⚙️ Performance

  • 12.3MP DX sensor — modest by today’s standards, but clean files up to ISO 1600.
  • 7 fps burst shooting — excellent for action, wildlife, and sports.
  • 51-point Multi-CAM 3500DX AF system — fast, reliable autofocus with good tracking.

🎥 Video (for its time)

  • 720p HD video at 24fps — Nikon’s first serious attempt at video in a pro DSLR.
  • External mic input — rare in DSLRs of that era.

❌ Weaknesses

📸 Image Quality

  • 12MP resolution limits cropping and large print flexibility.
  • Not full-frame sensor — DX format means less depth of field control and lower dynamic range than FX bodies.
  • ISO performance falls behind modern sensors — noise creeps in above ISO 1600.

🧠 Features & Tech

  • No live view AF during video — manual focus only.
  • No Wi-Fi or GPS — lacks modern connectivity.
  • Fixed rear LCD — no tilt or touch functionality.

🕰️ Aging Factors

  • Outpaced by successors like the D500 (2016), which offers 20.9MP, 10 fps, 4K video, and better ISO performance.
  • Limited resale value — though still respected, it’s now a niche tool.

⚖️ Use Case Snapshot

Use CaseD300S StrengthsD300S Limitations
Wildlife & actionFast AF, 7 fps, rugged buildLower resolution, no 4K video
Documentary & field workDual cards, weather sealingNo Wi-Fi, limited ISO range
PortraitsGood color, reliable AFDX format limits bokeh control
VideoExternal mic, 24fps HDManual focus only, no full HD

✨ Conclusion

The Nikon D300S remains a respected workhorse for photographers who value tactile control, durability, and fast autofocus. While its 12MP sensor and lack of modern features limit its relevance today, it still delivers clean, characterful files and reliable performance in demanding conditions.

Verdict: A classic pro DX body — still capable, but best suited for those who value build and responsiveness over resolution and tech.

📖 Nikon D700 vs D810 — When 12MP Is Enough, and When 36MP Shines

cameras, Lenses, nikon, opinons, thoughts, photography, street, Travel, viltrox

🕰️ Two Generations, Two Philosophies

  • Nikon D700 (2008): A 12MP full‑frame DSLR known for its tonal depth, rugged build, and film‑like rendering. Beloved for its character and efficiency.
  • Nikon D810 (2014): A 36MP full‑frame powerhouse designed for detail, dynamic range, and professional workflows. Celebrated for precision and versatility.

📸 Street Photography

  • D700 (12MP):
    • Smaller files, faster workflow.
    • Atmospheric rendering — shadows and tones feel organic, almost cinematic.
    • Forces discipline: you must frame carefully, as cropping options are limited.
    • Discreet enough for candid shooting.
  • D810 (36MP):
    • Extreme detail, but heavier files slow down workflow.
    • Less discreet — bulkier presence on the street.
    • Cropping flexibility allows you to reframe after the fact.
    • Can feel clinical compared to the D700’s mood.

Verdict: D700 excels in character‑driven street work; D810 offers precision but less immediacy.

🎭 Portrait Photography

  • D700 (12MP):
    • Softer detail can flatter skin tones.
    • Files have a natural, film‑like quality.
    • Works beautifully with classic primes (e.g., 85mm f/1.8D).
  • D810 (36MP):
    • Extreme detail — every pore and texture is visible.
    • Ideal for commercial retouching and high‑end portraiture.
    • Demands sharp lenses; reveals flaws in older optics.

Verdict: D700 gives character and mood; D810 delivers precision and retouching flexibility.

📰 Editorial & Commercial Work

  • D700 (12MP):
    • Perfect for web, magazines, and prints up to A3.
    • Efficient workflow — smaller files mean faster editing and delivery.
    • Less suited for billboard or fine art reproduction.
  • D810 (36MP):
    • Designed for commercial output — large prints, cropping, and archival quality.
    • Demands more storage and computing power.
    • Provides future‑proof resolution for agencies and galleries.

Verdict: D700 is efficient for editorial; D810 is indispensable for commercial and fine art projects.

⚖️ Comparative Snapshot

ContextD700 (12MP)D810 (36MP)
StreetAtmospheric, discreet, efficientDetailed, flexible cropping, heavier workflow
PortraitFlattering softness, film‑likeExtreme detail, retouching power
EditorialFast turnaround, A3 printsLarge prints, archival detail
WorkflowLight files, quick editsHeavy files, demanding post‑production

✨ Conclusion

The Nikon D700 proves that 12MP is enough for most real‑world applications — especially street and editorial work where atmosphere and efficiency matter. The D810, with its 36MP sensor, shines when detail, cropping, and large‑scale output are essential.

Verdict: Choose the D700 for character and speed; choose the D810 for precision and scale.

📖 Why My 12MP Nikon D700 Still Delivers Stunning A3 Prints

cameras, fujifilm, Lenses, nikon, opinons, thoughts, photography, street, Travel, viltrox

🕰️ A Classic Camera with Character

Released in 2008, the Nikon D700 was Nikon’s first “affordable” full‑frame DSLR. With its 12.1MP FX sensor, it might look modest compared to today’s 36MP, 45MP, or even 60MP monsters. Yet, it remains beloved by many photographers for its tonal depth, rugged build, and film‑like rendering.

🎯 The Myth of Megapixels

  • Resolution vs. perception: 12MP translates to an image size of roughly 4256 × 2832 pixels. At 300 dpi (standard print resolution), that’s enough for prints up to A3 size (16.5 × 11.7 inches) without visible loss of detail.
  • Beyond numbers: Sharpness, dynamic range, and lens quality matter more than raw pixel count. A well‑exposed, well‑composed D700 file will outshine a sloppy 45MP shot.
  • Viewing distance: Large prints are rarely examined at nose‑length. At normal viewing distances, 12MP images look crisp and immersive.

📸 Why the D700 Excels

  • Full‑frame sensor: Larger pixels mean better light‑gathering ability, resulting in cleaner files and smoother tonal transitions.
  • Dynamic range: The D700 captures highlights and shadows with grace, giving prints depth and richness.
  • Color rendering: Its files have a distinctive “thickness” — less clinical than modern sensors, often described as film‑like.
  • Workflow: Smaller RAW files are faster to process and archive, making it practical for long projects.

⚖️ Lens Quality Matters

Pairing the D700 with high‑quality primes (like the Nikkor 85mm f/1.8G or classic D lenses) ensures that the sensor’s resolution is fully utilized. A sharp lens with good micro‑contrast can make a 12MP file look far more detailed than the megapixel count suggests.

📊 Comparative Snapshot

FactorD700 (12MP)Modern DSLR/Mirrorless (36–45MP)
Print sizeUp to A3 comfortablyUp to A1 or billboard
File size~12–14MB RAW40–60MB RAW
WorkflowFast, efficientDemands more storage & computing
RenderingFilm‑like, atmosphericClinical, ultra‑sharp
FlexibilityLimited croppingExtreme cropping possible

✨ Conclusion

The Nikon D700 proves that megapixels aren’t everything. With its 12MP sensor, it produces images rich in tone, character, and detail — easily printable up to A3. For many photographers, the D700’s files feel more alive than those from modern high‑resolution cameras.

Verdict: A well‑crafted 12MP image can be more powerful than a soulless 45MP file. The D700 reminds us that photography is about vision, not just resolution.

📖 Do Megapixels Really Matter?

cameras, fujifilm, Lenses, nikon, opinons, thoughts, photography, street, Travel

🎯 What Megapixels Do

  • Resolution: More megapixels = more detail captured, allowing larger prints and tighter crops.
  • Flexibility: High‑MP files give room to reframe or crop without sacrificing quality.
  • Professional needs: Commercial photographers (fashion, product, landscape) benefit from 36MP+ sensors for billboard‑sized prints or fine art reproduction.

⚠️ Limits of Megapixels

  • Lens quality matters more: A poor lens won’t resolve the detail that a high‑MP sensor can capture.
  • Noise & low‑light: Packing more pixels into a sensor can increase noise, especially on smaller sensors.
  • File size: Higher resolution means larger files, requiring more storage and processing power.
  • Diminishing returns: For everyday use (social media, prints up to A3), 20–24MP is more than enough.

⚖️ Comparative Snapshot

Use CaseIdeal MegapixelsWhy
Social media / web12–16MPMore than sufficient for screens
Standard prints (A4–A3)20–24MPSharp detail without huge files
Large prints / posters30–36MPAllows cropping and enlargement
Fine art / commercial45–60MPMaximum detail for billboard or gallery work

✨ Conclusion

Megapixels matter when resolution is critical — for large prints, heavy cropping, or commercial reproduction. But for most photographers, once you’re above ~20MP, other factors (lens quality, sensor performance, light, and composition) matter far more.

Verdict: Megapixels give you potential; skill and optics turn that potential into great photographs.

📖 Does Camera and Lens Quality Make You a Better Photographer?

cameras, fujifilm, Lenses, nikon, opinons, thoughts, photography, street, Travel, viltrox

🎯 The Case for Better Gear

  • Optical performance: High‑quality lenses deliver sharper images, better color rendition, and smoother bokeh. They can make even entry‑level camera bodies perform like professional tools.
  • Low‑light capability: Expensive cameras often have larger sensors and better ISO performance, allowing clean images in dim conditions.
  • Autofocus speed & accuracy: Modern lenses and cameras track subjects more reliably, especially in sports or wildlife photography.
  • Durability: Professional gear is often weather‑sealed and built to withstand heavy use.

⚠️ The Limits of Gear

  • Skill matters more: As John Mak notes, “better gear does help take better pictures, but the story your photo tells is more important than technical aspects”.
  • Composition & timing: Iconic photos throughout history were taken with modest equipment. Vision and timing outweigh megapixels.
  • Learning curve: Beginners may not benefit from advanced gear if they haven’t mastered fundamentals like exposure, framing, and light.
  • Risk of dependency: Believing gear equals progress can distract from developing creativity and storytelling.

⚖️ Balanced Perspective

AspectHigh‑Quality GearPhotographer’s Skill
Sharpness & resolutionImproves technical image qualityCan be compensated with technique (tripod, careful focus)
Low‑light shootingCleaner files, faster lensesCreative use of light sources, long exposures
AutofocusFaster, more reliableAnticipation, manual focus discipline
Bokeh & renderingCreamier blur, richer colorComposition and subject choice define impact
StorytellingNeutral — gear doesn’t add meaningVision, timing, and narrative make photos memorable

🌍 Expert Consensus

  • Lens quality often matters more than camera body quality — lenses are the “eyes” of the system.
  • Better gear expands possibilities but doesn’t replace skill — it’s a tool, not a shortcut.
  • True improvement comes from practice, study, and creative exploration.

✨ Conclusion

Gear quality enhances technical performance but does not define artistry. A better camera and lens can help you capture sharper, cleaner, and more versatile images, but becoming a better photographer requires vision, practice, and storytelling. The best path is to master fundamentals first, then upgrade gear when your skills demand it.

Verdict: Better gear improves possibilities; better skills make photographs. I tend to use the best gear I can afford, lenses and camera, but it does not make me a better photographer IMO.

📖 Nikkor 85mm f/1.8D vs f/1.8G — A Detailed Comparison

cameras, Lenses, nikon, opinons, thoughts, photography, pictures, street, Travel
  • NIKKOR AF-S 85mm f/1.8G vs NIKKOR AF 85mm f/1.8D (Скорость автофокуса ...
  • Nikon 85 mm F 1.8 D AF Nikkor review. Test Nikon AF Nikkor 85mm f / 1 ...
  • Nikon AF-S 85mm f/1.8G FX telefoto portretni objektiv Nikkor auto focus ...

🕰️ Historical Context

  • 85mm f/1.8D (1994): A workhorse portrait lens from the film era, designed for Nikon bodies with screw‑drive autofocus.
  • 85mm f/1.8G (2012): A modern redesign with AF‑S motor, optimised for digital sensors, offering improved sharpness and coatings.

⚙️ Technical Comparison

FeatureNikkor 85mm f/1.8DNikkor 85mm f/1.8G
Year introduced19942012
AutofocusScrew‑drive (needs motor in body)AF‑S Silent Wave Motor (works on all Nikon DSLRs)
Aperture blades7 straight9 rounded
BokehSlightly harsher, polygonal highlightsSmoother, creamier, round highlights
Optical design6 elements in 6 groups9 elements in 9 groups
CoatingsOlder NIC coatingsModern Super Integrated Coating
Minimum focus85 cm80 cm
Weight380 g350 g
Aperture ringYes (useful for film/manual bodies)No (G‑type, controlled electronically)
Price (used/new)Lower, often $250–300 usedHigher, ~$450–500 new

Sources: CameraDecision comparison, DPReview lens specs, CameraLabs group test.

📸 Rendering & Image Quality

  • Sharpness: The f/1.8G is sharper wide open, especially in the corners, while the f/1.8D improves when stopped down.
  • Bokeh: The f/1.8G’s rounded blades produce smoother background blur, making it more flattering for portraits.
  • Colour & contrast: The f/1.8G benefits from modern coatings, giving richer contrast and reduced flare compared to the f/1.8D.
  • Character: The f/1.8D has a slightly more “classic” rendering — some photographers appreciate its harsher bokeh and vintage feel.

⚖️ Practical Considerations

  • Compatibility: The f/1.8D won’t autofocus on entry‑level Nikon DSLRs (D3xxx, D5xxx series), while the f/1.8G works on all bodies.
  • Film shooters: The f/1.8D’s aperture ring makes it more versatile for older Nikon film cameras.
  • Digital shooters: The f/1.8G is better suited for modern DSLRs and mirrorless (via FTZ adapter).
  • Budget: The f/1.8D is cheaper on the used market, but the f/1.8G offers better overall performance for digital workflows.

✨ Conclusion

  • Choose the f/1.8D if you want a budget‑friendly lens with aperture ring compatibility and don’t mind screw‑drive autofocus.
  • Choose the f/1.8G if you want modern sharpness, smoother bokeh, and full compatibility with all Nikon DSLRs and mirrorless setups.

Verdict: The f/1.8D carries vintage character and affordability, while the f/1.8G delivers modern performance and versatility.

🌍 Slowing Down in a Fast World

cambodia, cameras, fujifilm, homelessness, Lenses, nikon, opinons, thoughts, photography, street, Travel

Introduction

We live in an age of acceleration. News cycles refresh by the minute, feeds scroll endlessly, and even creativity is pressured to produce faster, louder, more. Yet in the midst of this speed, there is value in slowing down — in reclaiming attention, rediscovering meaning, and reconnecting with the world around us.

The Case for Slowness

  • Depth over breadth: When everything is consumed quickly, little is truly absorbed. Slowness allows us to linger, to notice details.
  • Presence over distraction: Slowing down means being present — whether in conversation, in work, or in art.
  • Sustainability over burnout: Constant speed drains energy. Slowness restores balance, making creativity and living sustainable.

Rediscovery Through Attention

  • Objects: Everyday things reveal character when looked at closely — a weathered wall, a hand‑written note, a shadow at dusk.
  • People: Listening deeply, rather than rushing to respond, uncovers nuance in relationships.
  • Places: Streets, parks, and cities hold layers of history and atmosphere that only patience can reveal.
  • Returning again and again: Revisiting the same subject or place allows new layers to emerge. Each return reframes the familiar, showing how time and perspective reshape vision.

Reclaiming Vision

  • Against noise: Slowness cuts through distraction, sharpening what matters.
  • For clarity: It allows us to see not just what is in front of us, but what lies beneath.
  • As practice: Slowness is not passive — it is an active choice to resist speed and reclaim vision.

Using Technology When It’s Useful

  • Tool, not master: Technology should serve attention, not dictate it.

  • Selective use: Embrace tools that extend vision — editing software, digital archives, or cameras — but resist the pull of endless feeds.
  • Balance: The slow archive doesn’t reject technology; it uses it deliberately, when it amplifies meaning rather than dilutes it.

  • Agency: Choosing when and how to use technology is part of reclaiming vision in a fast world.

Harnessing Speed to Anticipate

  • Machine as ally: Cameras and devices can operate faster than human reflexes.
  • Anticipation: Using burst modes, predictive autofocus, or rapid shutter speeds allows the photographer to anticipate and catch fleeting gestures.
  • Integration: Slowness is about vision, but speed is about execution — together they form a rhythm of patience and precision.
  • Lesson: Technology’s speed is not about rushing; it is about being ready when the moment arrives.

Conclusion

Slowing down is not about rejecting progress. It is about reclaiming agency in how we see, feel, and create. Technology can be part of that process — but only when it is useful, intentional, and aligned with vision. Returning to a subject or place over and over again reminds us that meaning is not found in novelty alone, but in patience, repetition, and rediscovery. And when the decisive moment comes, the speed of a machine can help anticipate and capture it — ensuring vision and execution meet.
Verdict: Slow down, return often, use tools wisely, harness speed — and the world reveals itself anew.

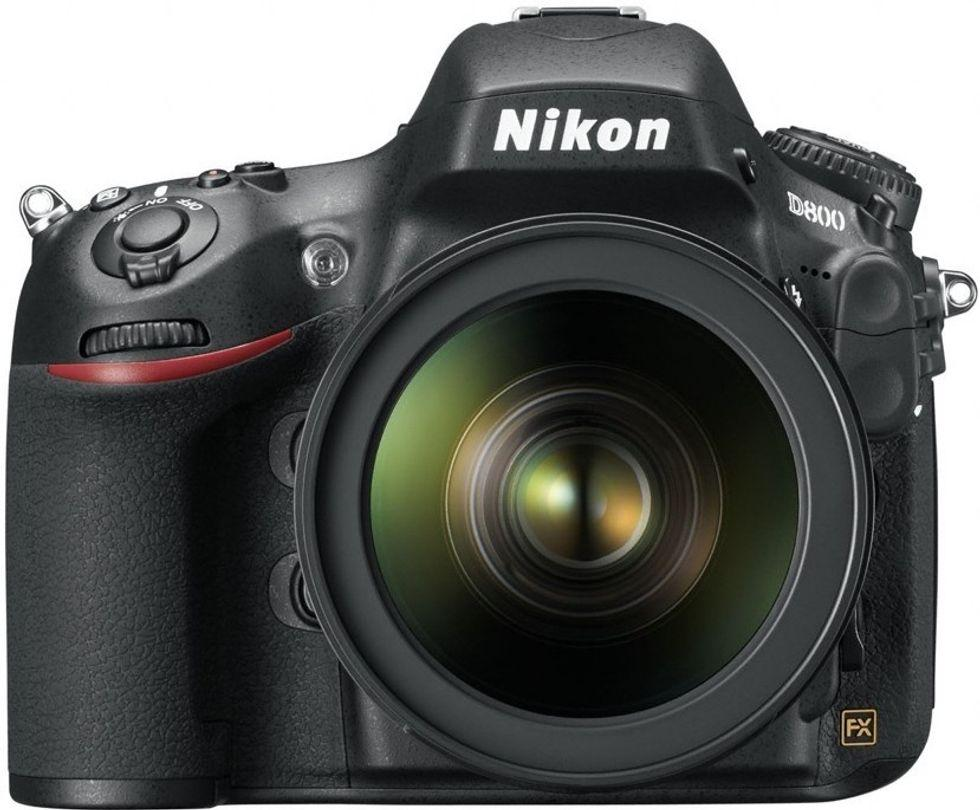
The Nikkor 50mm f/1.4D + Nikon D800

cameras, Lenses, nikon, opinons, thoughts, photography, street

The Nikkor 50mm f/1.4D is a very good match for the Nikon D800 when you value classic rendering and character; it autofocuses on the D800 (screw‑drive), gives pleasing bokeh and micro‑contrast, and performs best when stopped to f/2f/2f/4f/4for critical work.

Quick guide

  • Key considerations: Autofocus type (AF‑D screw‑drive), wide‑open rendering vs stopped‑down sharpness, chromatic aberration and vignetting on a high‑resolution sensor.
  • Clarifying questions to answer for yourself: Do you need silent/fast AF (AF‑S) or are you keeping the D‑series look? Will you prioritise center sharpness or the lens’s organic character?
  • Decision points: Keep the 50/1.4D for its look and price, or upgrade to an AF‑S 50/1.4G if you need faster/quieter AF.

Compatibility and performance

Autofocus compatibility: The 50mm f/1.4D is an AF‑D lens that uses the camera’s screw‑drive motor; the D800 supports this, so the lens will autofocus on your body. Optical character: on a high‑resolution body like the D800 the lens’s film‑era rendering becomes more apparent — softness and aberrations at f/1.4f/1.4 are common, but sharpness improves markedly by f/2f/2and is strong by f/2.8f/2.8, especially in the center. Real‑world user reports praise its look but note focus quirks and the need for careful technique on high‑MP bodies.

Practical tips and workflow

  • Focus technique: Use single‑point AF or back‑button AF and place the point on the subject’s eye; at f/1.4f/1.4 depth of field is very thin, so precise focus is essential.
  • Aperture strategy: Use f/1.4–f/2 for subject isolation and low light; f/2.8–f/4 for portraits and editorial crops where edge performance matters.
  • AF fine‑tune: Run an AF fine‑tune calibration on the D800 if you notice consistent front/back focus; many D800 users report improved results after calibration.
  • RAW workflow: Shoot RAW, apply targeted chromatic aberration correction and mild sharpening; accept or embrace some vignetting as part of the lens’s character.
  • Support and technique: For critical high‑resolution output, use a steady hand, higher shutter speeds, or a tripod to match the D800’s resolving power.

Risks trade‑offs and actionable steps

  • Trade‑offs: You trade AF speed and silence for character and cost; the AF‑D’s screw‑drive is noisier/slower than AF‑S alternatives. The D800 magnifies lens flaws (CA, corner softness, vignetting).
  • Actionable steps:
    1. Calibrate AF on the D800 and test at multiple apertures to find the sweet spot.
    2. Stop down to f/2.8f/2.8f/4f/4 for edge‑to‑edge sharpness when needed.
    3. Shoot RAW and apply selective CA correction and denoise in post.
    4. Consider AF‑S 50/1.4G only if you need faster, quieter AF and slightly improved optical control.

Closing

If you value classic rendering, micro‑contrast, and cost‑to‑performance, the Nikkor 50mm f/1.4D is an excellent, characterful lens on the D800 — provided you use careful focus technique, stop down when necessary, and apply a disciplined RAW workflow. For lab tests and long‑term user impressions, see community discussions and reviews that document both the lens’s charm and its practical limits.